1. Wprowadzenie
Thank you for choosing the Hama 95236 8-inch LCD Digital Photo Frame. This manual provides important information regarding the safe operation, setup, and maintenance of your device. Please read it thoroughly before using the product and keep it for future reference.
2. Instrukcje bezpieczeństwa
- Do not open the device. Incorrect assembly or repair can lead to electric shock.
- Nie używaj produktu, jeśli jest wyraźnie uszkodzony.
- Protect the product from dirt, moisture, and overheating. Use it only in dry environments.
- Nie upuszczaj produktu ani nie narażaj go na silne wibracje.
- Używaj produktu wyłącznie zgodnie z jego przeznaczeniem.
- Ten produkt, podobnie jak wszystkie produkty elektryczne, należy przechowywać w miejscu niedostępnym dla dzieci.
- Materiały opakowaniowe należy natychmiast zutylizować zgodnie z obowiązującymi lokalnie przepisami.
3. Zawartość opakowania
Please check that the package contains the following items:
- Hama 95236 8-inch LCD Digital Photo Frame
- Zasilacz
- Instrukcja obsługi (ten dokument)
4. Koniec produktuview
Familiarize yourself with the components and controls of your digital photo frame.
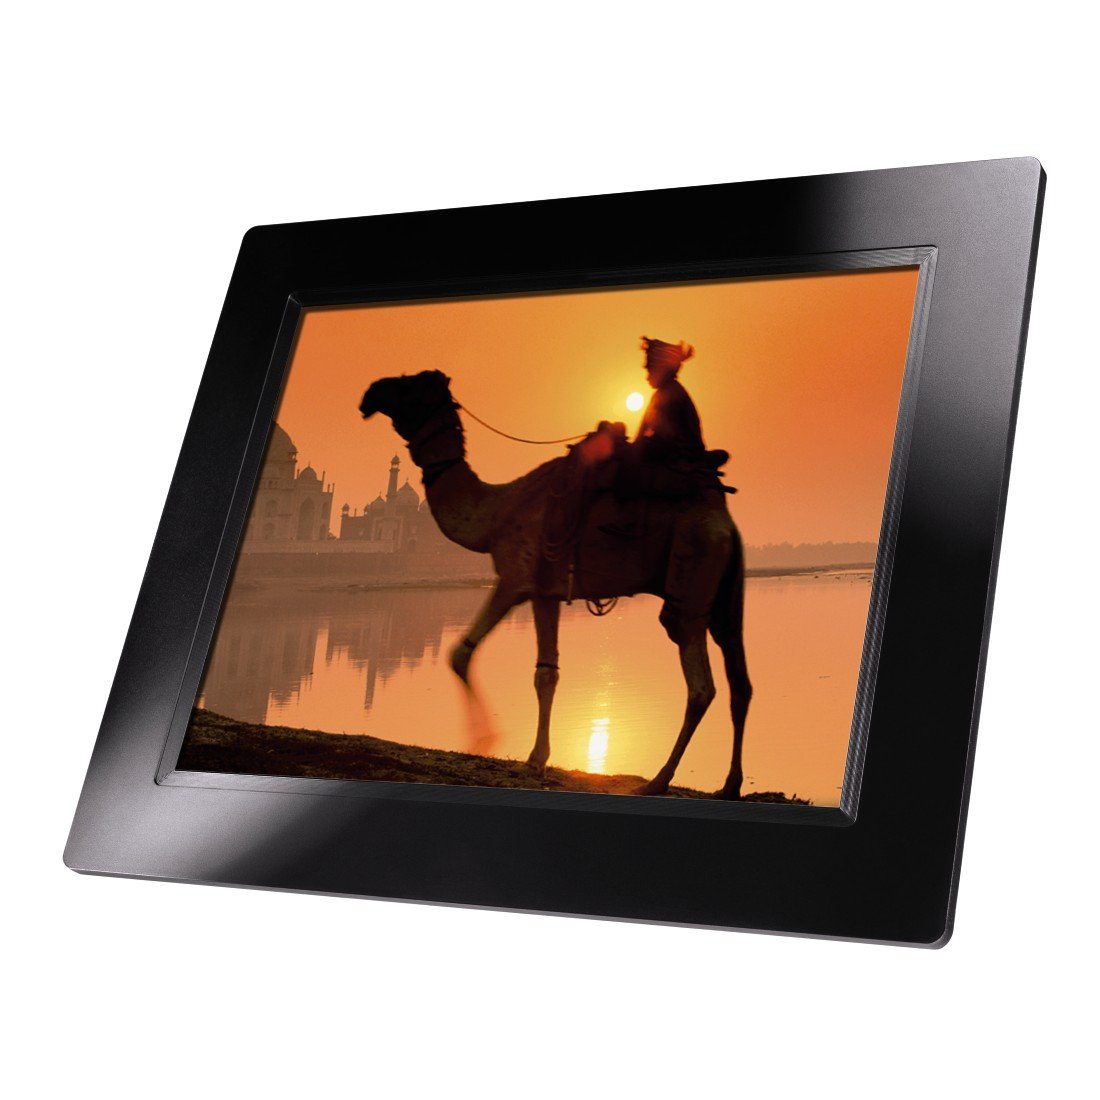
Rysunek 4.1: Przód view of the Hama 95236 Digital Photo Frame, showing the 8-inch LCD screen.

Rysunek 4.2: Strona view of the digital photo frame, highlighting the various input ports including the SD/MMC/MS card slot, USB port, and DC IN power port.

Rysunek 4.3: Tył view of the digital photo frame, showing the stand attachment point, ventilation grilles, and the control panel with power, navigation, and menu buttons.
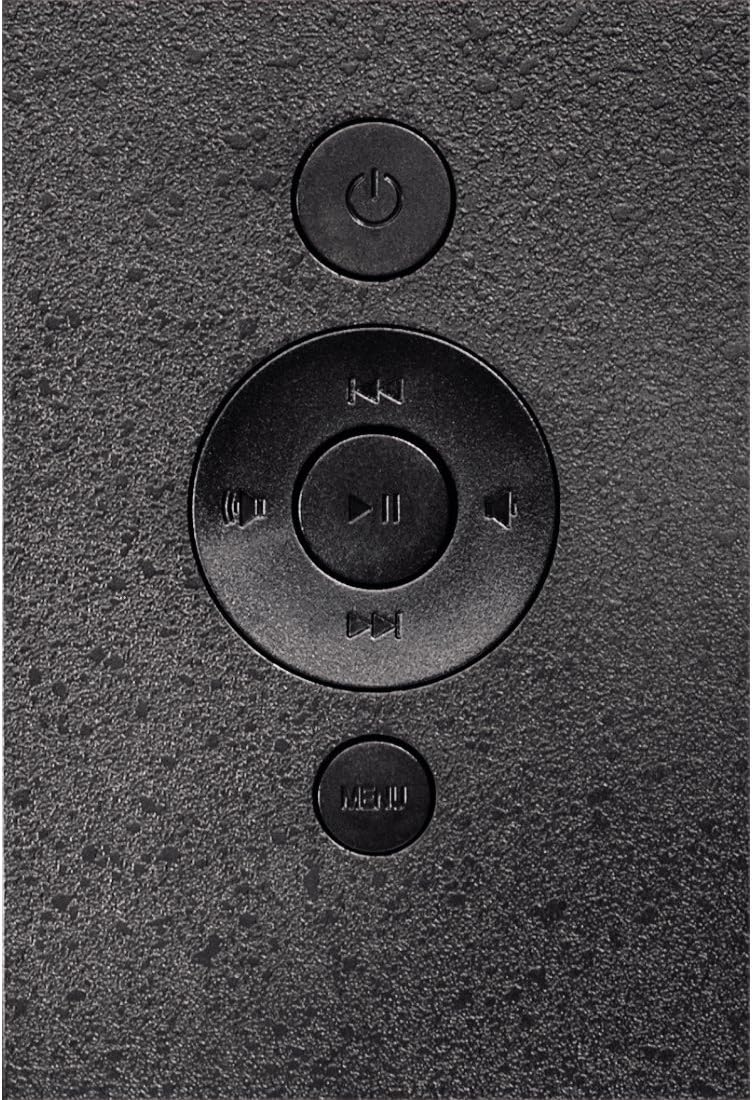
Rysunek 4.4: Close-up of the control buttons located on the back of the frame. These include the power button, directional navigation buttons (up, down, left, right), play/pause/enter button, and the menu button.
4.1. Porty i elementy sterujące
- SD/MMC/MS Card Slot: For inserting memory cards to display photos and videos.
- Port USB: For connecting USB flash drives or other compatible USB storage devices.
- DC IN: Power input for connecting the provided power adapter.
- Przycisk zasilania: Włącza lub wyłącza urządzenie.
- Przyciski nawigacyjne (góra/dół/lewo/prawo): Służy do poruszania się po menu i wybierania opcji.
- Play/Pause/Enter Button: Confirms selections or controls media playback.
- Przycisk menu: Dostęp do menu głównego w celu uzyskania dostępu do ustawień i opcji.
5. Konfiguracja
5.1. Mocowanie stojaka
Insert the metal stand into the designated slot on the back of the digital photo frame. Ensure it is securely fastened to provide stable support for the frame.
5.2. Podłączenie zasilania
- Podłącz zasilacz do portu DC IN z tyłu ramki na zdjęcia.
- Podłącz zasilacz do odpowiedniego gniazdka elektrycznego.
- Ramka zazwyczaj włącza się automatycznie lub można ją włączyć za pomocą przycisku zasilania.
5.3. Inserting a Memory Card or USB Drive
The Hama 95236 supports SD/MMC/MS memory cards and USB flash drives.
- Locate the SD/MMC/MS card slot or the USB port on the side of the frame (refer to Figure 4.2).
- Carefully insert your memory card or USB drive into the corresponding slot/port. Ensure it is inserted correctly to avoid damage.
- The frame should automatically detect the storage device and prompt you to view its contents or start a slideshow.
6. Instrukcja obsługi
6.1. Podstawowa nawigacja
Use the navigation buttons on the back of the frame to move through menus and options. The Play/Pause/Enter button confirms your selection.
6.2. Menu główne
Naciśnij MENU button to access the main menu. From here, you can select different modes and settings:
- Zdjęcie: View photos in a slideshow or individually.
- Muzyka: Odtwórz dźwięk files.
- Wideo: Odtwórz wideo files.
- Kalendarz/Zegar: Display the calendar and time.
- Ustawienia: Adjust various device parameters.
6.3. Odtwarzanie zdjęć
- Z menu głównego wybierz Zdjęcie.
- Navigate to your desired folder or select all photos.
- Naciśnij Odtwórz/Pauza/Enter button to start the slideshow.
- During a slideshow, you can use the navigation buttons to skip photos or pause playback.
6.4. Ustawienia systemowe
Uzyskaj dostęp do Ustawienia menu to customize your photo frame:
- Ustawienia wyświetlania: Adjust brightness, contrast, and display mode.
- Ustawienia pokazu slajdów: Configure transition effects, display time per photo, and repeat mode.
- Data i godzina: Ustaw aktualną datę i godzinę. Note: Some users have reported that date and time settings may reset after power loss.
- Język: Wybierz preferowany język interfejsu menu.
- Informacje o przechowywaniu: View details about connected storage devices.
7. Konserwacja
7.1. Czyszczenie urządzenia
- Przed czyszczeniem zawsze odłączaj urządzenie od prądu.
- Wyczyść ekran i powierzchnie zewnętrzne miękką, suchą i niepozostawiającą włókien ściereczką.
- Do not use aggressive cleaning agents, solvents, or abrasive materials.
7.2. Przechowywanie
Jeśli przechowujesz urządzenie przez dłuższy czas, odłącz je od zasilania i przechowuj w chłodnym, suchym miejscu, z dala od bezpośredniego światła słonecznego i ekstremalnych temperatur.
8. Rozwiązywanie Problemów
| Problem | Możliwa przyczyna | Rozwiązanie |
|---|---|---|
| Urządzenie się nie włącza. | Zasilacz nie jest podłączony lub jest uszkodzony. | Ensure the power adapter is securely connected to both the frame and the power outlet. Test the outlet with another device. |
| Brak wyświetlonych obrazów. | No memory card/USB drive inserted or filenie jest obsługiwane. | Insert a compatible memory card or USB drive with supported image formats (e.g., JPEG). Check if the storage device is properly inserted. |
| Date and time reset after power off. | No internal battery backup for clock. | This model may not retain date/time settings without continuous power. Re-enter settings if necessary after power interruption. |
| Video playback is choppy or distorted. | Unsupported video format or high bitrate. | Zapewnij wideo files are in a supported format and resolution. Convert videos to a lower resolution or bitrate if issues persist. |
| Przyciski nie reagują. | Tymczasowy błąd oprogramowania. | Disconnect the power adapter, wait a few seconds, then reconnect it to restart the device. |
9. Specyfikacje
| Funkcja | Szczegół |
|---|---|
| Numer modelu | 00095236 |
| Rozmiar ekranu | 8 cali |
| Rozdzielczość wyświetlacza | 800 x 600 pikseli |
| Proporcje obrazu | 4:3 |
| Pamięć wewnętrzna | 2 GB (2048 MB) |
| Łączność | USB, SD/MMC/MS Card Slot |
| Wymiary (dł. x szer. x wys.) | Wymiary 2.6 x 22.2 x 17.8 cm |
| Waga | 550 gramów |
| Producent | Hama |
10. Informacje o gwarancji
Hama GmbH & Co KG provides a manufacturer's warranty for this product. The specific terms and conditions of the warranty period and coverage are subject to the purchase date and the region of purchase. Please retain your proof of purchase (receipt) for any warranty claims.
For detailed warranty information, please refer to the official Hama webodwiedź witrynę lub skontaktuj się bezpośrednio z działem obsługi klienta.
11. Obsługa klienta
Should you have any questions regarding this product, please contact Hama Customer Support:
- Webstrona: Visit the official Hama website for FAQs, drivers, and further product information. www.hama.pl
- Kontakt: Refer to the contact section on the Hama webZnajdź numery telefonów i adresy e-mail pomocy technicznej w Twoim regionie.
Kontaktując się z pomocą techniczną, przygotuj numer modelu (00095236) i dowód zakupu.