1. Wprowadzenie
This manual provides detailed instructions for the installation, operation, and maintenance of your Gewiss GW10701 Programmable Thermostat. This device is designed to control heating and air conditioning systems, allowing you to manage room temperature efficiently and comfortably. Please read this manual thoroughly before installation and use to ensure proper functionality and safety.
2. Informacje dotyczące bezpieczeństwa
Aby zapobiec obrażeniom ciała lub uszkodzeniu urządzenia, należy zawsze przestrzegać następujących środków ostrożności:
- Instalację powinien wykonywać wyłącznie wykwalifikowany personel, zgodnie z lokalnymi przepisami i regulacjami dotyczącymi instalacji elektrycznych.
- Disconnect power to the heating/cooling system at the main circuit breaker before installing or servicing the thermostat.
- Nie wystawiaj termostatu na działanie wody i nadmiernej wilgoci.
- Należy używać wyłącznie określonego typu baterii i zwrócić uwagę na prawidłową biegunowość podczas instalacji.
- Keep batteries out of reach of children. Do not dispose of batteries in fire.
- Do not attempt to open or repair the thermostat yourself. Contact qualified service personnel.
3. Koniec produktuview
The Gewiss GW10701 is a wall-mounted programmable thermostat featuring an LCD display and intuitive controls for temperature management.
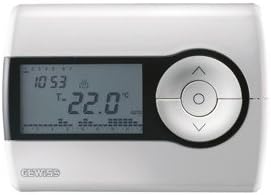
Rysunek 1: Przód view of the Gewiss GW10701 Thermostat. It features a clear LCD screen displaying time and temperature, alongside a circular control panel with directional buttons and a central confirmation button for easy navigation and setting adjustments.
3.1. składniki
- Wyświetlacz LCD: Shows current time, temperature, operating mode, and programming settings.
- Przyciski sterujące: Typically include UP/DOWN arrows for temperature adjustment, MODE button for selecting operating modes (e.g., Heat, Cool, Auto, Off), and a SET/PROG button for accessing programming menus. (Note: Specific button functions may vary slightly; refer to on-screen prompts.)
- Komora baterii: Located on the rear or side, houses the power supply batteries.
- Płyta montażowa: Do bezpiecznego montażu na ścianie.
4. Instalacja
4.1. Wybór lokalizacji
Select a central location on an interior wall, approximately 1.5 meters (5 feet) above the floor. Avoid locations near heat sources (lamps, direct sunlight, fireplaces), drafts (windows, doors), or areas with poor air circulation.
4.2. Montaż termostatu
- Odłącz zasilanie: Wyłącz zasilanie systemu ogrzewania/chłodzenia za pomocą głównego wyłącznika.
- Separate Base Plate: Carefully detach the front cover of the thermostat from its base plate.
- Zaznacz i wywierć: Hold the base plate against the wall at your chosen location. Mark the drilling points. Drill holes and insert wall anchors if necessary.
- Bezpieczna płyta bazowa: Fasten the base plate to the wall using the provided screws.
- Okablowanie (jeśli dotyczy): Connect the system wires to the appropriate terminals on the base plate. Refer to the wiring diagram provided with your heating/cooling system or consult a qualified electrician. Note: While the thermostat is battery-powered, it controls a 230V system. Ensure correct wiring.
- Zainstaluj baterie: Insert the required batteries into the battery compartment, observing correct polarity (+/-).
- Podłącz termostat: Carefully reattach the thermostat front cover to the base plate, ensuring it clicks securely into place.
- Przywróć zasilanie: Turn on the power to your heating/cooling system at the main circuit breaker.
5. Działanie
5.1. Konfiguracja początkowa
Upon first power-up or after battery replacement, you may need to set the current time and date. Follow the on-screen prompts or refer to the programming section.
5.2. Ustawianie temperatury
Użyj UP I W DÓŁ arrow buttons to adjust the desired temperature. The display will show the set temperature temporarily, then revert to the current room temperature.
5.3. Tryby pracy
Naciśnij TRYB button (or similar) to cycle through available operating modes:
- CIEPŁO: Termostat uruchomi system ogrzewania, gdy temperatura w pomieszczeniu spadnie poniżej ustawionej temperatury.
- FAJNE: The thermostat will activate the air conditioning system when the room temperature rises above the set temperature.
- AUTOMATYCZNY: Termostat automatycznie przełącza się między ogrzewaniem i chłodzeniem, aby utrzymać ustawiony zakres temperatur.
- OFF: Systemy ogrzewania i chłodzenia są wyłączone.
6. Programowanie
The Gewiss GW10701 allows you to create custom heating/cooling schedules for different times of the day and days of the week. This feature helps optimize energy consumption and comfort.
6.1. Ustawianie czasu i daty
- Naciśnij USTAWIĆ or ŻARCIE aby wejść do menu ustawień.
- Navigate using the arrow buttons to find "Time" or "Date" settings.
- Use the arrow buttons to adjust the values (hour, minute, day, month, year).
- Potwierdź każde ustawienie za pomocą USTAWIĆ or central button.
6.2. Creating a Program Schedule
The thermostat typically offers daily or weekly programming options. You can set different temperatures for various periods (e.g., Wake, Day, Evening, Sleep).
- Naciśnij ŻARCIE przycisk, aby wejść w tryb programowania.
- Select the day or group of days you wish to program (e.g., Mon-Fri, Sat-Sun, or individual days).
- For each period (e.g., "Wake"), set the desired start time and temperature using the arrow buttons.
- Advance to the next period and repeat the process.
- Save your program and exit programming mode.
Consult the on-screen menu and specific button labels on your device for precise programming steps, as interfaces can vary.
7. Konserwacja
7.1. Wymiana baterii
The thermostat is powered by batteries. When the battery indicator appears on the display, replace the batteries promptly to ensure continuous operation. Typically, 2x AA or AAA alkaline batteries are required.
- Ostrożnie zdejmij przednią pokrywę termostatu.
- Wyjmij stare baterie i zutylizuj je w odpowiedzialny sposób.
- Włóż nowe baterie, zwracając uwagę na prawidłową polaryzację.
- Załóż przednią pokrywę.
7.2. Czyszczenie
Clean the thermostat's exterior with a soft, dry cloth. Do not use abrasive cleaners, solvents, or spray cleaners directly onto the device, as this can damage the display or internal components.
8. Rozwiązywanie Problemów
| Problem | Możliwa przyczyna | Rozwiązanie |
|---|---|---|
| Wyświetlacz jest pusty lub przyciemniony. | Niski poziom naładowania baterii lub jej rozładowanie. | Wymień baterie na nowe. |
| Układ ogrzewania/chłodzenia nie odpowiada. |
|
|
| Odczyty temperatury wydają się niedokładne. | Na lokalizację termostatu mogą mieć wpływ przeciągi i źródła ciepła. | Upewnij się, że termostat nie jest wystawiony na bezpośrednie działanie promieni słonecznych, przeciągów ani urządzeń emitujących ciepło. |
9. Specyfikacje
- Producent: Gewiss
- Numer modelu: GW10701 (Chorus)
- Wymiary (dł. x szer. x wys.): Wymiary 13 x 2.3 x 9.2 cm
- Waga: 9.07 gramów
- Kolor: Biały
- Tworzywo: Plastikowy
- Zasilanie: Zasilany bateryjnie
- Przełączanie objętościtage: 230 Volt (for controlled system)
- Typ wyświetlacza: LCD lub LED
- Typ montażu: Naścienny
- Funkcje sterowania: Programmable, Button control
- Stosowanie: Heating systems, Air conditioning systems
10. Gwarancja i wsparcie
For warranty information, technical support, or service inquiries regarding your Gewiss GW10701 Thermostat, please refer to the warranty card included with your product or visit the official Gewiss website. You may also contact your local Gewiss distributor or retailer for assistance.
Gewiss Official Webstrona: www.gewiss.com


