Wstęp
This manual provides detailed instructions for the safe and proper installation, operation, and maintenance of your Progress Lighting Inspire Collection 9-Light Off-White Linen Shade Traditional Chandelier in Brushed Nickel. Please read all instructions carefully before beginning installation and retain this manual for future reference.
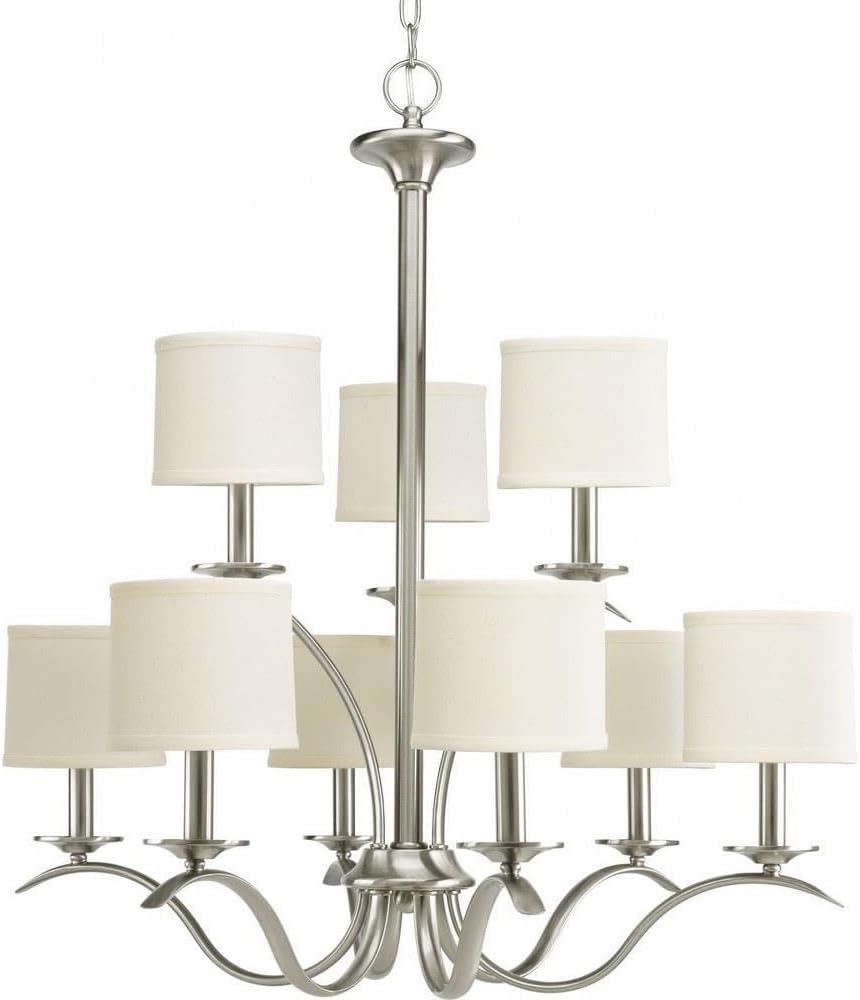
Image: The Inspire Collection 9-Light Chandelier featuring a brushed nickel finish and off-white linen shades.
Informacje dotyczące bezpieczeństwa
OSTRZEŻENIE: To reduce the risk of fire, electric shock, or personal injury, always turn off the main power supply at the circuit breaker before installation, removal, or servicing. This product requires professional installation. Always consult a qualified electrician if you are unsure about the installation process.
Ostrzeżenie dotyczące propozycji 65: Ten produkt może zawierać substancje chemiczne, o których stan Kalifornia wie, że powodują raka i wady wrodzone lub inne szkody reprodukcyjne. Umyj ręce po kontakcie.
- Ensure all electrical connections are in accordance with local codes and ordinances.
- Stosuj wyłącznie żarówki o podanym typie i mocy.tage aby uniknąć przegrzania.
- Do not hang anything from the fixture.
Zawartość opakowania
Przed rozpoczęciem instalacji sprawdź, czy wszystkie komponenty są obecne:
- Chandelier fixture assembly
- 9 Off-white linen shades
- Ceiling chain (6 feet of 9 gauge chain supplied)
- Instalacja elektryczna
- Mounting hardware (may require additional screws not included)
- Arkusz instalacyjny
Konfiguracja i instalacja
Professional installation is recommended for this chandelier. Follow these general steps, referring to the included installation sheet for specific details.
1. Przygotuj się do instalacji
- Wyłącz zasilanie na wyłączniku obwodu.
- Carefully unpack the fixture and components.
- Determine the desired hanging height. For an 8-foot ceiling, the bottom of the chandelier should be 30-36 inches above a dining table. For higher ceilings, divide the vertical space into thirds and position the chandelier two-thirds of the distance from the floor, ensuring at least 7 feet of clearance from the floor in areas where people walk underneath.
2. Mount the Fixture
- Attach the mounting bracket to the junction box in the ceiling.
- Adjust the chain length as needed. The supplied chain is 6 feet long.
- Przeciągnij przewody elektryczne przez łańcuch i baldachim.
3. Połączenia elektryczne
- Connect the fixture's ground wire to the ground wire from the junction box.
- Connect the fixture's 'white or identified' wire (often with ridges) to the white (neutral) wire from the junction box.
- Connect the fixture's 'plain or black' wire to the black (hot) wire from the junction box.
- Zabezpiecz wszystkie połączenia za pomocą nakrętek zaciskowych i taśmy izolacyjnej.
4. Montaż końcowy
- Przymocuj baldachim do sufitu.
- Install 9 candelabra-shaped bulbs (E26 base, maximum 60 watts each). Note: Only candelabra-shaped bulbs can be used with the shades.
- Attach the off-white linen shades to each light socket.
- Przywróć zasilanie za pomocą wyłącznika obwodu.
Wizualny przewodnik instalacji
Wideo: Kompleksowy przeglądview of chandelier installation by Progress Lighting, demonstrating key steps and considerations for proper setup.
Wymiary produktu

Image: Dimensional drawing of the chandelier, indicating a width of 29.38 inches and a height of 31 inches.
Instrukcja obsługi
Once properly installed, your chandelier can be operated using a standard wall switch. If your electrical setup includes a dimmer switch, ensure it is compatible with incandescent bulbs for optimal performance.
The fixture's switch type is listed as 'Pull Chain' in some specifications, however, the primary control is typically via a wall switch for chandeliers of this design. Please refer to your specific home wiring and switch setup.
Konserwacja
Czyszczenie
- Zawsze wyłączaj zasilanie przed czyszczeniem.
- Wytrzyj urządzenie miękką, suchą ściereczką.
- Nie należy używać środków czyszczących o właściwościach ściernych ani rozpuszczalników, gdyż mogą one uszkodzić powłokę.
- The linen shades can be gently dusted or spot cleaned with a damp jeśli to konieczne, szmatkę.
Wymiana żarówki
- Ensure power is off and bulbs have cooled before replacing.
- Unscrew old bulbs and screw in new E26 candelabra-shaped bulbs.
- Nie przekraczać maksymalnej mocytage 60 watów na żarówkę.
Rozwiązywanie problemów
If your chandelier is not functioning correctly, refer to the following common issues:
- Brak światła: Check the circuit breaker, ensure bulbs are securely screwed in, and verify all electrical connections are tight.
- Migające światła: Ensure bulbs are fully tightened. If using a dimmer, confirm it is compatible with the bulb type and that the bulbs are dimmable.
- Luźne mocowanie: Re-check mounting hardware and ensure it is securely fastened to the ceiling junction box.
Jeżeli problem nadal występuje, należy skonsultować się z wykwalifikowanym elektrykiem.
Specyfikacje
| Marka | Oświetlenie Progress |
| Nazwa modelu | Inspirować |
| Numer części | P4638-09 |
| Kolor | Nikiel szczotkowany |
| Tworzywo | Stal stopowa |
| Materiał zacieniający | Bielizna |
| Styl | Przejściowy |
| Formularz oprawy oświetleniowej | Żyrandol |
| Wymiary produktu | 29.38" dł. x 29.38" szer. x 31" wys. |
| Waga przedmiotu | 15 funtów |
| Liczba źródeł światła | 9 |
| Podstawa żarówki | E26 |
| Cotage | 60 watów (na żarówkę) |
| Tomtage | 120 wolty |
| Zastosowanie wewnątrz/na zewnątrz | Wnętrz |
| Funkcja specjalna | Posiada certyfikat UL |
Informacje o gwarancji
This Progress Lighting product is covered by a 1-letnia ograniczona gwarancja. This warranty guarantees your complete satisfaction with your purchase and includes professional after-sales customer service support. Please retain your proof of purchase for warranty claims.
Obsługa klienta
For further assistance, technical support, or warranty inquiries, please visit the official Progress Lighting website or contact their customer service department. Refer to the packaging or the Progress Lighting webAktualne dane kontaktowe znajdują się na stronie.


