Wstęp
This manual provides essential information for the safe and effective use of your RadioShack 45-Watt Desoldering Iron. Please read this manual thoroughly before operation and retain it for future reference.
The RadioShack 45-Watt Desoldering Iron is designed for removing solder from electronic components and circuit boards. Its integrated suction bulb allows for efficient and clean desoldering.
Informacje dotyczące bezpieczeństwa
WARNING: Risk of Burns and Fire. Always exercise extreme caution when using this tool.
- Always wear appropriate personal protective equipment, including safety glasses, to protect against molten solder splashes.
- Ensure adequate ventilation in your workspace to avoid inhaling solder fumes. Use a fume extractor if possible.
- Do not touch the hot tip or metal parts of the desoldering iron. Temperatures can reach several hundred degrees Celsius.
- Place the desoldering iron on its included stand when not in use to prevent accidental contact or damage to surfaces.
- Keep flammable materials away from the desoldering iron.
- Unplug the iron from the power outlet when not in use or before cleaning and maintenance.
- Do not use the desoldering iron if the cord or plug is damaged.
- Przechowywać w miejscu niedostępnym dla dzieci.
Produkt ponadview
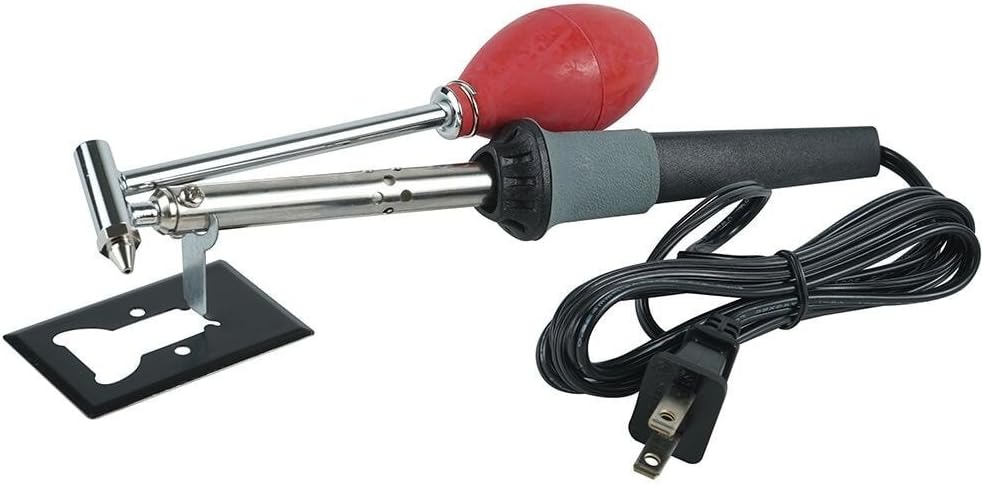
Figure 1: RadioShack 45-Watt Desoldering Iron with its integrated suction bulb and included stand.
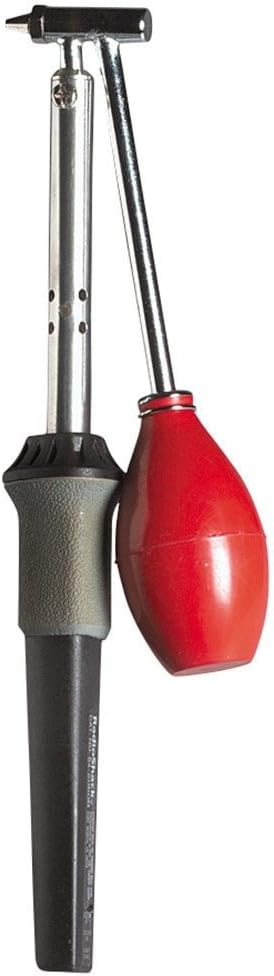
Rysunek 2: Strona view illustrating the desoldering iron's pencil-style handle and the attached suction bulb mechanism.
The desoldering iron features a heated tip for melting solder and an integrated suction bulb to remove the molten solder from component leads and pads.
Organizować coś
- Przygotowanie miejsca pracy: Set up your workspace in a well-ventilated area. Ensure you have a stable, heat-resistant surface.
- Umiejscowienie stojaka: Place the included desoldering iron stand on your work surface. This stand is crucial for safely resting the hot iron when not actively desoldering.
- Podłączenie zasilania: Plug the desoldering iron into a standard electrical outlet (120V AC). The iron will begin to heat up immediately.
- Czas nagrzewania: Allow approximately 3-5 minutes for the iron to reach its operating temperature.
Instrukcja obsługi
Follow these steps for effective desoldering:
- Prepare the Tip: Before first use or after extended periods, tin the tip by melting a small amount of solder onto it. This helps with heat transfer and prevents oxidation.
- Pozycjonowanie: Place the tip of the desoldering iron directly onto the solder joint you wish to remove. Ensure the tip makes good contact with both the component lead and the PCB pad.
- Melt the Solder: Allow the iron to heat the solder until it becomes molten and shiny. This usually takes a few seconds.
- Aktywuj ssanie: While the solder is still molten, quickly depress the red rubber bulb to create a vacuum, then release it. The molten solder will be drawn into the iron's hollow tip.
- Remove Iron: Immediately remove the desoldering iron from the joint once the solder has been removed.
- W razie konieczności powtórz: For larger solder joints or stubborn connections, you may need to repeat the process. Sometimes adding a small amount of fresh solder to an old joint can help it melt more easily for removal.
- Czysta wskazówka: Periodically clean the tip on a damp gąbka lub wełna mosiężna do usuwania nadmiaru lutu i utleniania.
Konserwacja
- Czyszczenie końcówek: Regularly clean the desoldering tip using a damp sponge or brass wool. A clean tip ensures efficient heat transfer and prolongs tip life.
- Cynowanie końcówek: Always tin the tip with a thin layer of solder after cleaning and before storing the iron. This prevents oxidation.
- Clearing the Nozzle: Over time, solder may accumulate inside the desoldering iron's nozzle. To clear it, ensure the iron is unplugged and cool. Unscrew the tip assembly and carefully remove any solidified solder using a small wire or the included cleaning rod (if applicable).
- Składowanie: Store the desoldering iron in a dry, safe place when not in use.
Rozwiązywanie problemów
| Problem | Możliwa przyczyna | Rozwiązanie |
|---|---|---|
| Żelazko się nie nagrzewa. | No power, faulty outlet, damaged cord/iron. | Check power connection and outlet. Inspect cord for damage. If damaged, discontinue use and replace. |
| Solder not melting or melting slowly. | Insufficient heat, oxidized tip, poor contact. | Allow more heat-up time. Clean and tin the tip. Ensure full contact with solder joint. |
| Solder not being sucked up. | Nozzle clogged, poor seal, solder not fully molten. | Clear the nozzle (see Maintenance). Ensure the tip is fully seated. Ensure solder is completely molten before activating suction. |
| Tip becomes discolored or corroded quickly. | Lack of tinning, improper cleaning, high temperature. | Always tin the tip. Use a damp sponge or brass wool for cleaning, not abrasive materials. |
Specyfikacje
| Funkcja | Szczegół |
|---|---|
| Marka | RadioShack |
| Numer modelu | 1501548 |
| Cotage | 45 watów |
| Źródło zasilania | Elektryczny przewodowy |
| Konkretne zastosowania | Zastosowanie przemysłowe |
| Styl | Ołówek |
| Styl głowy | Ołówek |
| Typ palnika | Ceramiczny |
| Waga przedmiotu | 8.1 uncji |
| Tworzywo | Metal |
| UPC | 040293142162 |
Gwarancja i wsparcie
For specific warranty information regarding your RadioShack 45-Watt Desoldering Iron, please refer to the documentation included with your purchase or contact RadioShack customer support directly. Warranty terms and conditions may vary.
For technical assistance or inquiries, please visit the official RadioShack webstronie lub skontaktuj się z działem obsługi klienta.


