1. Wprowadzenie
The Optex CX-702 is a high-performance Multi-Focus Passive Infrared (PIR) motion detector designed for reliable security applications. It utilizes advanced multi-focus optics to provide precise detection capabilities, minimizing false alarms while ensuring accurate intruder detection. This manual provides essential information for the proper installation, operation, and maintenance of your CX-702 detector.
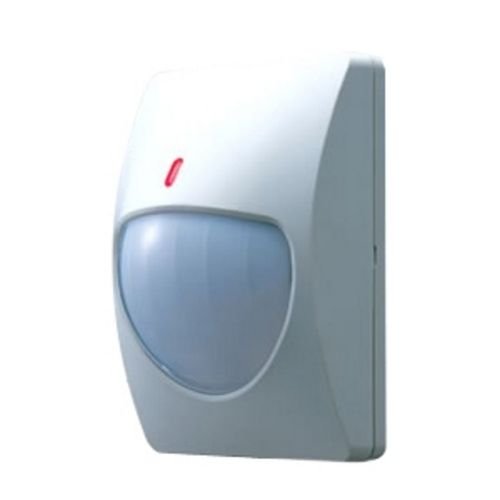
Figure 1: Optex CX-702 Multi-Focus PIR Motion Detector. This image shows the compact, white casing of the motion detector, typically mounted on a wall.
2. Informacje dotyczące bezpieczeństwa
Please read and understand all safety instructions before installing or operating the CX-702 detector. Failure to follow these instructions may result in injury, damage to the device, or improper operation.
- Bezpieczeństwo elektryczne: Ensure all power is disconnected before performing any wiring or maintenance. Installation should be performed by qualified personnel in accordance with local electrical codes.
- Montowanie: Mount the detector securely to a stable surface to prevent it from falling.
- Warunki środowiskowe: Do not expose the detector to extreme temperatures, high humidity, or direct water spray.
- Ingerencja: Avoid installing the detector near sources of strong electromagnetic interference, heating/cooling vents, or direct sunlight, which can cause false alarms.
3. Zawartość opakowania
Przed przystąpieniem do instalacji sprawdź, czy w opakowaniu znajdują się wszystkie elementy:
- Optex CX-702 Multi-Focus PIR Motion Detector unit
- Mounting bracket (if applicable)
- Śruby montażowe i kotwy
- Instrukcja obsługi (ten dokument)
4. Konfiguracja i instalacja
Proper installation is crucial for optimal performance of the CX-702 detector.
4.1 Miejsce montażu
- The CX-702 is designed for Montaż ścienny instalacja.
- Wybierz miejsce, w którym detektor będzie miał swobodny dostęp view obszaru podlegającego ochronie.
- Avoid aiming the detector directly at windows, heat sources, or areas with significant air currents.
- Recommended mounting height is typically between 2.1 to 2.7 meters (7 to 9 feet) for optimal coverage.
4.2 Okablowanie
The CX-702 operates on Elektryczny przewodowy power. Refer to the wiring diagram inside the detector casing for specific terminal connections. Typically, connections include:
- Pobór mocy: Connect to a stable DC power source (e.g., 9-16V DC). Observe polarity.
- Wyjście alarmowe: Connect to the alarm control panel's zone input. This is usually a normally closed (NC) relay output.
- TampWyjście: (If available) Connect to a tamper zone on the control panel. This activates if the detector cover is removed.
4.3 Regulacja czułości
The detector may feature internal jumpers or potentiometers for adjusting sensitivity. Consult the internal diagram for specific settings. Adjust sensitivity to suit the environment, balancing detection reliability with false alarm immunity.
5. Instrukcja obsługi
Once installed and powered, the Optex CX-702 detector will begin its warm-up period, typically lasting a few minutes. During this time, the detector may not be fully operational.
5.1 Zasada wykrywania
The CX-702 uses Passive Infrared (PIR) technology to detect changes in infrared energy (heat) within its detection pattern. When a person moves through the detection zones, the detector senses the change in infrared energy and triggers an alarm.
5.2 Zasięg detekcji
The detector offers a Maksymalny zasięg do 70 stóp (approximately 21 meters). The actual coverage area depends on mounting height, sensitivity settings, and environmental factors.
5.3 wskaźnik LED
Most PIR detectors include an LED indicator. This LED typically illuminates when motion is detected. During normal operation, the LED may be disabled to prevent drawing attention to the detector. Refer to the internal settings for LED control.
6. Konserwacja
Regular maintenance ensures the long-term reliability and performance of your CX-702 detector.
- Czyszczenie: Periodically clean the detector lens with a soft, dry, lint-free cloth. Do not use abrasive cleaners or solvents, as these can damage the lens and affect detection.
- Kontrola przeszkód: Ensure that no objects are obstructing the detector's field of view.
- Test funkcjonalności: Test the detector's functionality regularly (e.g., monthly) by walking through its detection pattern to confirm it triggers an alarm.
7. Rozwiązywanie Problemów
If you experience issues with your CX-702 detector, refer to the following common problems and solutions:
- Detector not triggering:
- Sprawdź połączenia zasilania.
- Verify wiring to the alarm panel.
- Upewnij się, że w obszarze wykrywania nie ma żadnych przeszkód.
- Increase sensitivity settings if necessary.
- Fałszywe alarmy:
- Check for heat sources (heaters, direct sunlight) or air currents (vents) in the detection area.
- Ensure the detector is not aimed at windows where temperature changes or moving objects outside could cause detection.
- Zmniejsz ustawienia czułości.
- Clean the detector lens.
- Tampo alarm:
- Ensure the detector cover is securely closed.
- Sprawdź tamppołączenie przełącznika er.
8. Specyfikacje
| Funkcja | Specyfikacja |
|---|---|
| Marka | Optex |
| Numer modelu | AL-OPT-CX702 (CX-702) |
| Źródło zasilania | Elektryczny przewodowy |
| Waga przedmiotu | 0.22 kilograma (7.7 uncji) |
| Maksymalny zasięg | 70 stóp |
| Typ montażu | Montaż ścienny |
| ASIN | B007HKI93G |
| Data pierwszej dostępności | 4 września 2010 r. |
9. Informacje o gwarancji
Optex products are manufactured to high-quality standards. For specific warranty terms and conditions, please refer to the warranty card included with your product or visit the official Optex webZachowaj dowód zakupu na wypadek roszczeń gwarancyjnych.
10. Wsparcie techniczne
If you require further assistance with installation, operation, or troubleshooting that is not covered in this manual, please contact Optex customer support or your authorized dealer. Contact information can typically be found on the official Optex webstrona: www.optexamerica.com


