1. Wprowadzenie
Thank you for choosing the Progress Lighting Gather Collection Five-Light Chandelier. This elegant fixture, featuring etched glass shades and a brushed nickel finish, is designed to enhance your home's ambiance. This manual provides essential information for safe installation, operation, and maintenance of your new chandelier.
2. Ważne informacje dotyczące bezpieczeństwa
OSTRZEŻENIE: Ten produkt może narazić Cię na działanie substancji chemicznych, w tym ołowiu, który jest znany w stanie Kalifornia jako czynnik powodujący raka i wady wrodzone lub inne szkody reprodukcyjne. Aby uzyskać więcej informacji, przejdź do www.P65Warnings.ca.gov.
Always turn off the main power supply at the circuit breaker before beginning any electrical installation. Consult a qualified electrician if you are unsure about any part of the installation process. Ensure all wiring connections are secure and comply with local electrical codes. Do not exceed the maximum wattage określone dla żarówek.
3. Zawartość opakowania
Przed rozpoczęciem instalacji sprawdź, czy wszystkie komponenty są obecne:
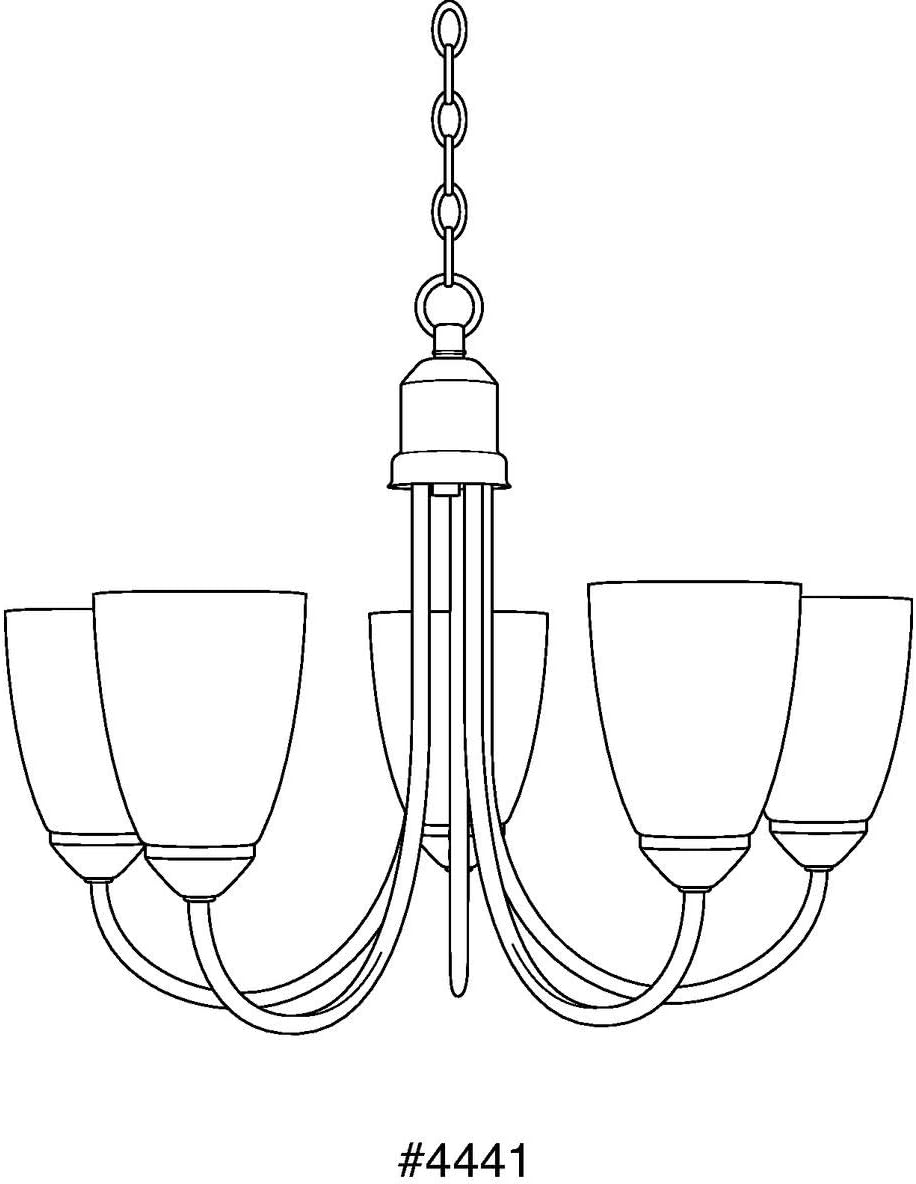
- Chandelier Fixture (Brushed Nickel)
- Etched Glass Shades (5)
- Zestaw elementów montażowych
- Chain and Canopy Assembly
- Arkusz instalacyjny
4. Specyfikacje produktu
| Funkcja | Specyfikacja |
|---|---|
| Numer modelu | P4441-09 |
| Marka | Oświetlenie Progress |
| Kolor | Nikiel szczotkowany |
| Tworzywo | Alloy Steel (Fixture), Glass (Shades) |
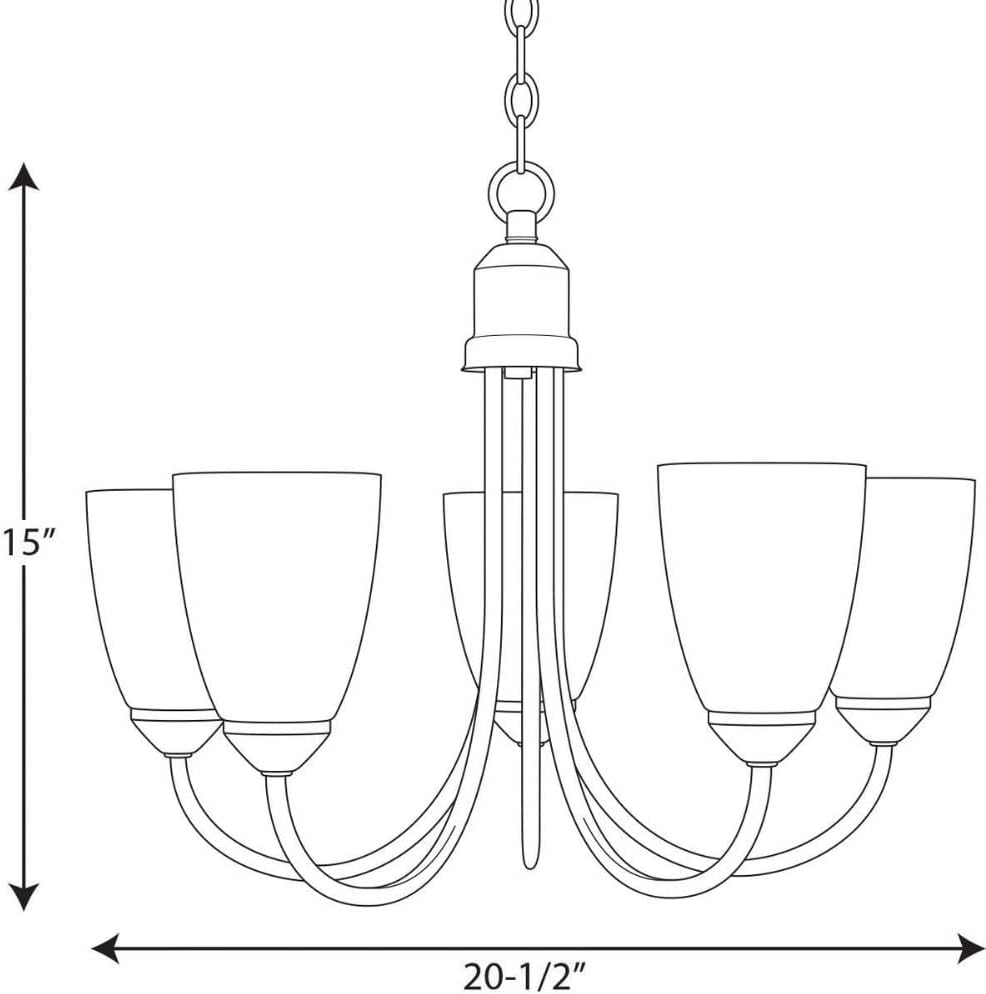
| Wymiary (dł. x szer. x wys.) | 20.2" x 20.63" x 15" |
| Waga przedmiotu | 5 funtów |
| Liczba źródeł światła | 5 |
| Maksymalna moctage na żarówkę | 100 watów |
| Tomtage | 120 wolty |
| Typ instalacji | Stały |
| Typ źródła światła | Żarowe (kompatybilne z diodami LED, świetlówkami kompaktowymi, halogenami) |
| Typ pokoju | Dining Room, Great Room, Bathroom |
5. Konfiguracja i instalacja
Installation of this chandelier typically requires two people for safety and ease of handling. Follow the detailed instructions provided in the included installation sheet. Below are general steps and helpful visual aids.
5.1. Wstępna instalacja
- Wyłącz zasilanie: Locate the circuit breaker controlling the light fixture and turn off the power.
- Rozpakować: Ostrożnie wyjmij wszystkie elementy z opakowania i sprawdź, czy nie są uszkodzone.
- Potrzebne narzędzia: Gather necessary tools such as a screwdriver, wire strippers, pliers, and a ladder.
5.2. Montaż i instalacja
Assemble the main body of the chandelier according to the diagrams in your installation sheet. This may involve unfolding the arms and attaching the chain. Adjust the chain length to achieve the desired hanging height. For dining room tables, the bottom of the chandelier should typically hang 30-36 inches above the table surface for an 8-foot ceiling. For higher ceilings, consider the guidelines in the video below.


5.3. Chandelier Hanging Height Guidelines
For optimal lighting and aesthetic appeal, consider the following guidelines for hanging your chandelier. This video provides a comprehensive overview of recommended hanging heights for various room types.
5.4. Okablowanie
Connect the fixture wires to the house wires according to the provided wiring diagram. Ensure all connections are secure with wire nuts. Proper grounding is crucial for safety; do not skip this step.
5.5. Montaż końcowy
Once wired, secure the canopy to the ceiling junction box. Install the light bulbs (not included) into the sockets. The chandelier uses five medium base bulbs (100W max per bulb). Finally, attach the etched glass shades to each light base.
6. Operating Your Chandelier
After installation, restore power at the circuit breaker. Your chandelier is now ready for use. This fixture is fully dimmable when used with dimmable bulbs and a compatible dimmer switch (sold separately), allowing you to adjust the light intensity to suit your needs.
7. Pielęgnacja i konserwacja
7.1. Czyszczenie
To maintain the finish of your chandelier, wipe it with a soft, dry cloth. Avoid using abrasive cleaners or solvents, as these can damage the finish. For glass shades, use a mild glass cleaner and a soft cloth.
7.2. Wymiana żarówki
Always turn off the power to the fixture at the circuit breaker before replacing bulbs. Allow bulbs to cool completely before handling. Replace bulbs with the same type and wattage (medium base, 100W max) to ensure proper operation and prevent damage.
8. Rozwiązywanie Problemów
If your chandelier is not functioning correctly, refer to the following common issues and solutions:
- Światła się nie włączają:
- Sprawdź czy wyłącznik jest włączony.
- Ensure bulbs are securely screwed in and not burnt out.
- Sprawdź, czy wszystkie połączenia okablowania są bezpieczne.
- Lights flickering or dimming improperly:
- Ensure you are using dimmable bulbs with a compatible dimmer switch.
- Sprawdź, czy połączenia przewodów nie są luźne.
- Osprzęt jest luźny:
- Ensure the mounting hardware is securely fastened to the ceiling junction box.
If problems persist, contact Progress Lighting customer support or a qualified electrician.
9. Gwarancja i wsparcie
This Progress Lighting product comes with a 1-roczna ograniczona gwarancja, guaranteeing your complete satisfaction and including professional after-sales customer service support. For warranty claims, technical assistance, or replacement parts, please contact Progress Lighting customer service directly.
Informacje kontaktowe: Refer to the contact details provided on the original product packaging or the official Progress Lighting webstrona.


