1. Wprowadzenie
This manual provides instructions for the proper installation, operation, and maintenance of the Pentair Kreepy Krauly K01200 Hose Kit. This kit is designed as a complete replacement hose assembly for Pentair Kreepy Krauly automatic pool cleaners, specifically model 2000. Each hose section measures 40 inches in length and the kit includes 11 standard sections plus 1 leader hose section, totaling 12 sections.
Proper use and care of these hoses will ensure optimal performance of your automatic pool cleaner and extend the lifespan of the product.
2. Informacje dotyczące bezpieczeństwa
Podczas instalacji i użytkowania tego produktu należy zawsze przestrzegać podstawowych zasad bezpieczeństwa. Nieprzestrzeganie tych instrukcji może spowodować obrażenia ciała lub uszkodzenie mienia.
- Ensure the pool pump is turned off and disconnected from power before performing any installation or maintenance on the pool cleaner or its hoses.
- Keep children and pets away from the pool area during installation and maintenance.
- Do not operate the pool cleaner with damaged hoses. Inspect hoses regularly for cracks, punctures, or excessive wear.
- Aby zapewnić kompatybilność i bezpieczeństwo, należy używać wyłącznie oryginalnych części zamiennych Pentair.
3. Zawartość opakowania
Przed przystąpieniem do instalacji sprawdź, czy wszystkie komponenty są obecne i nieuszkodzone.
- 11 x Standard 40-inch Hose Sections
- 1 x Leader 40-inch Hose Section (typically connects to the cleaner head)
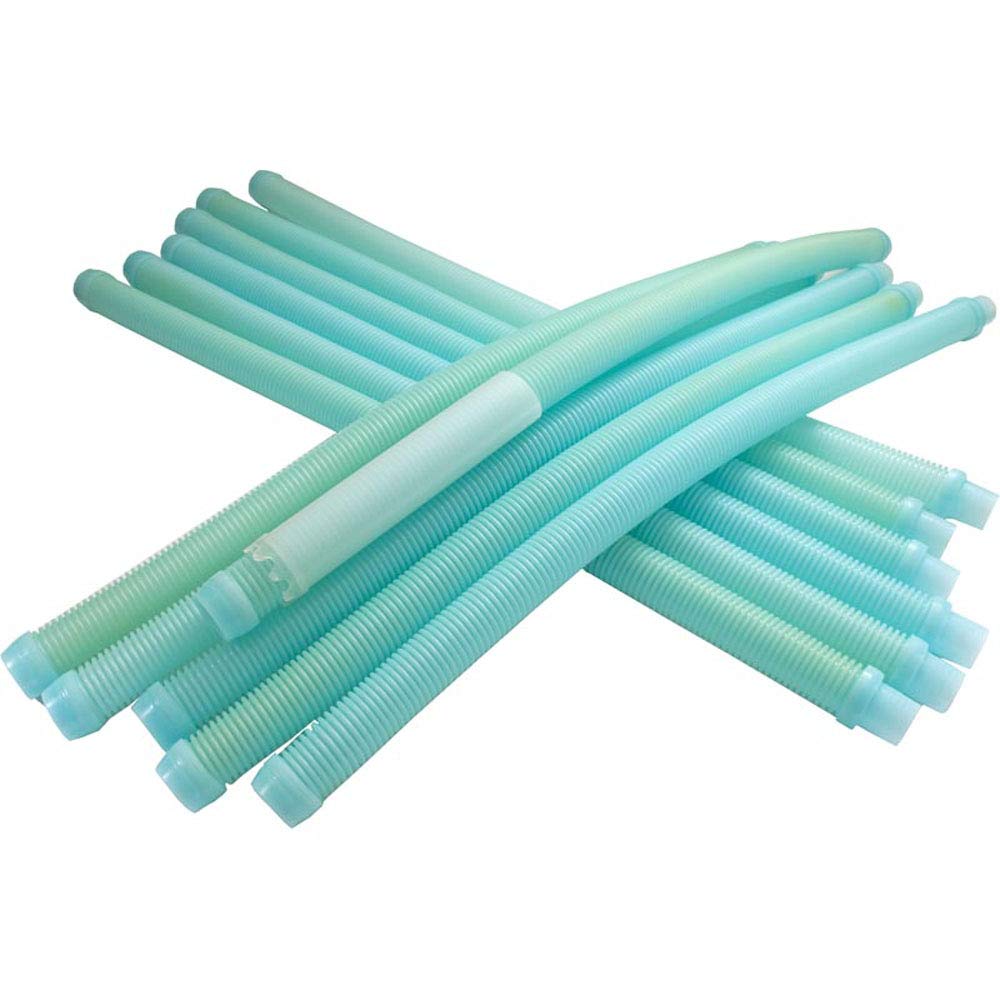
Rysunek 1: The Pentair Kreepy Krauly K01200 Hose Kit. This image displays several blue hose sections, which are designed for connecting to an automatic pool cleaner. The hoses feature ribbed exteriors and male/female connectors at each end for secure attachment.
4. Konfiguracja i instalacja
Follow these steps to properly assemble and connect the hose kit to your Pentair Kreepy Krauly automatic pool cleaner.
- Prepare the Pool Cleaner: Ensure your automatic pool cleaner is clean and free of debris. Disconnect any old hoses.
- Connect Leader Hose: Attach the leader hose section (often slightly different in design or color, or simply the first section) to the intake port of your Kreepy Krauly cleaner head. Ensure a snug and secure fit.
- Assemble Hose Sections: Connect the remaining standard 40-inch hose sections end-to-end. Each section has a male and female end. Push the male end firmly into the female end until it clicks or feels secure.
- Wskazówka: If connections are difficult, briefly immerse the female end of the hose in warm (not boiling) water for 10-15 seconds to soften the plastic slightly, then connect. Ensure the connection is fully seated once cooled.
- Notatka: Verify that you have the correct type of connectors for your specific Kreepy Krauly model. Some setups may require a specific adapter (e.g., a female-to-female connector) not included in this standard kit.
- Determine Hose Length: The total length of the hose assembly should be sufficient to reach all areas of your pool, plus an additional section or two to allow the cleaner to move freely without pulling taut. Typically, the hose should extend from the skimmer or dedicated suction line to the furthest point of the pool, plus approximately 2-3 feet.
- Connect to Suction Source: Attach the final hose section to your pool's skimmer or dedicated suction line. Ensure this connection is also secure to prevent air leaks.
- Remove Air from Hoses: Before turning on the pump, submerge the entire hose assembly in the pool water to fill it with water and remove any trapped air. This helps prevent air from entering the pump system.
- Uruchom pompę: Once the hoses are filled with water and all connections are secure, turn on your pool pump. Observe the cleaner's operation to ensure proper suction and movement.
5. Działanie
Once installed, the Pentair Kreepy Krauly K01200 hose kit facilitates the movement and suction of your automatic pool cleaner. No specific operational steps are required for the hoses themselves beyond ensuring they are correctly connected and free of obstructions.
- Monitor Cleaner Movement: Periodically observe your pool cleaner to ensure it is covering the entire pool surface and not getting tangled or stuck.
- Sprawdź ssanie: Verify that the cleaner maintains adequate suction. A loss of suction can indicate an air leak in the hose connections or a blockage.
6. Konserwacja
Regular maintenance of your hose kit will prolong its life and ensure efficient pool cleaning.
- Sprawdź węże: Regularly inspect all hose sections for signs of wear, cracks, punctures, or kinks. Replace any damaged sections promptly.
- Sprawdź połączenia: Periodically check all hose connections to ensure they remain tight and secure. Loose connections can lead to air leaks and reduced suction.
- Clean Hoses: If hoses become dirty or accumulate algae, they can be cleaned with a soft brush and mild pool-safe cleaner. Rinse thoroughly.
- Składowanie: During off-season or extended periods of non-use, disconnect the hoses, drain them completely, and store them in a cool, dry place away from direct sunlight and extreme temperatures. Coiling them loosely can prevent kinks.
- Unikaj ostrych krawędzi: Ensure hoses do not rub against sharp pool edges or equipment, which can cause premature wear.
7. Rozwiązywanie Problemów
This section addresses common issues related to the hose kit.
| Problem | Możliwa przyczyna | Rozwiązanie |
|---|---|---|
| Loss of suction or poor cleaner performance. | Air leak in hose connections; damaged hose section; incorrect hose length. |
|
| Hoses disconnect during operation. | Loose connections; worn hose ends; improper connection technique. |
|
| Hoses are stiff or difficult to connect. | Cold temperatures; new hoses. |
|
8. Specyfikacje
- Numer modelu: K01200
- Typ produktu: Automatic Pool Cleaner Hose Kit
- Zgodność: Pentair Kreepy Krauly Automatic Pool Cleaner (Model 2000)
- Hose Section Length: 40 cali (ok. 101.6 cm)
- Ilość: 11 Standard Sections + 1 Leader Section (Total 12 sections)
- Kolor: Niebieski
- Wymiary produktu (w opakowaniu): 41 x 8.5 x 6.25 cala (ok. 104.1 x 21.6 x 15.9 cm)
- Waga przedmiotu (w opakowaniu): 8.9 funta (ok. 4.04 kg)
- Producent: Pentair
9. Gwarancja i wsparcie
Pentair products are manufactured to high-quality standards. For specific warranty information regarding your K01200 Hose Kit, please refer to the warranty documentation included with your original pool cleaner or visit the official Pentair webstrona.
For technical assistance, troubleshooting beyond this manual, or to inquire about replacement parts, please contact Pentair Customer Support. Contact information can typically be found on the Pentair webstronie internetowej lub na opakowaniu produktu.
Oficjalny Pentair Webstrona: www.pentair.com


