1. Wprowadzenie
This manual provides essential instructions for the safe assembly, operation, and maintenance of your Sealey IHS1 stand. This stand is designed to convert the Sealey IWMH1809R wall-mounted infrared heater into a freestanding IFSH1809R unit. Please read these instructions thoroughly before use and retain them for future reference.

Figure 1: The Sealey IHS1 stand with a compatible infrared heater installed, showcasinze względu na swoją wolnostojącą konstrukcję.
2. Instrukcje bezpieczeństwa
Always observe the following safety precautions to prevent personal injury or damage to the product.
- Ensure the stand is assembled on a flat, stable, and level surface.
- Do not exceed the maximum weight capacity of the stand. This stand is specifically designed for Sealey IWMH1809R/IFSH1809R heaters.
- Regularnie sprawdzaj wszystkie elementy mocujące i połączenia, aby mieć pewność, że są bezpieczne.
- Keep children and pets away from the stand and attached heater during operation.
- Nie należy podejmować prób modyfikacji stojaka w żaden sposób.
- When moving the stand with the heater attached, ensure the heater is switched off and cooled, and move with care to prevent tipping.
3. Zawartość opakowania
Przed rozpoczęciem montażu należy sprawdzić, czy wszystkie elementy są obecne:
- 1 x Sealey IHS1 Stand Assembly (includes base, pole sections, and mounting bracket)
- Required Fasteners and Tools (if applicable, refer to heater manual for heater-specific fasteners)
4. Instalacja i montaż
Follow these steps to assemble the IHS1 stand and attach your compatible heater.
- Złóż podstawę: Place the stand base on a flat, stable surface. Ensure the base is fully seated and stable.

Figure 2: The robust circular base of the Sealey IHS1 stand, designed for stability.
- Zamontuj sekcje słupów: Securely connect the pole sections to the base and to each other, following the instructions provided with the stand's packaging. Ensure all connections are tightened.
- Montaż grzejnika: Attach your Sealey IWMH1809R heater to the top mounting bracket of the IHS1 stand. Refer to your heater's instruction manual for specific mounting hardware and procedures. Ensure the heater is securely fastened and balanced on the stand.
- Zarządzanie kablami: Route the heater's power cable along the stand pole using the provided cable clips to prevent tripping hazards and maintain a tidy appearance.

Rysunek 3: Zbliżenie view of the cable management clip on the stand's pole, used to secure the power cord.
5. Instrukcja obsługi
The IHS1 stand provides a stable platform for your heater. Its primary operational feature is height adjustment.
- Regulacja wysokości: To adjust the height of the heater, loosen the height adjustment collar on the stand pole. Carefully raise or lower the upper pole section to the desired height (between 1340mm and 1700mm). Once the desired height is achieved, securely tighten the adjustment collar to lock the pole in place.

Figure 4: The height adjustment collar on the stand's pole, allowing for variable height settings.
- Pozycjonowanie: Place the stand with the attached heater in a location where it can provide optimal heating without obstruction. Ensure there is adequate clearance around the heater as specified in the heater's manual.
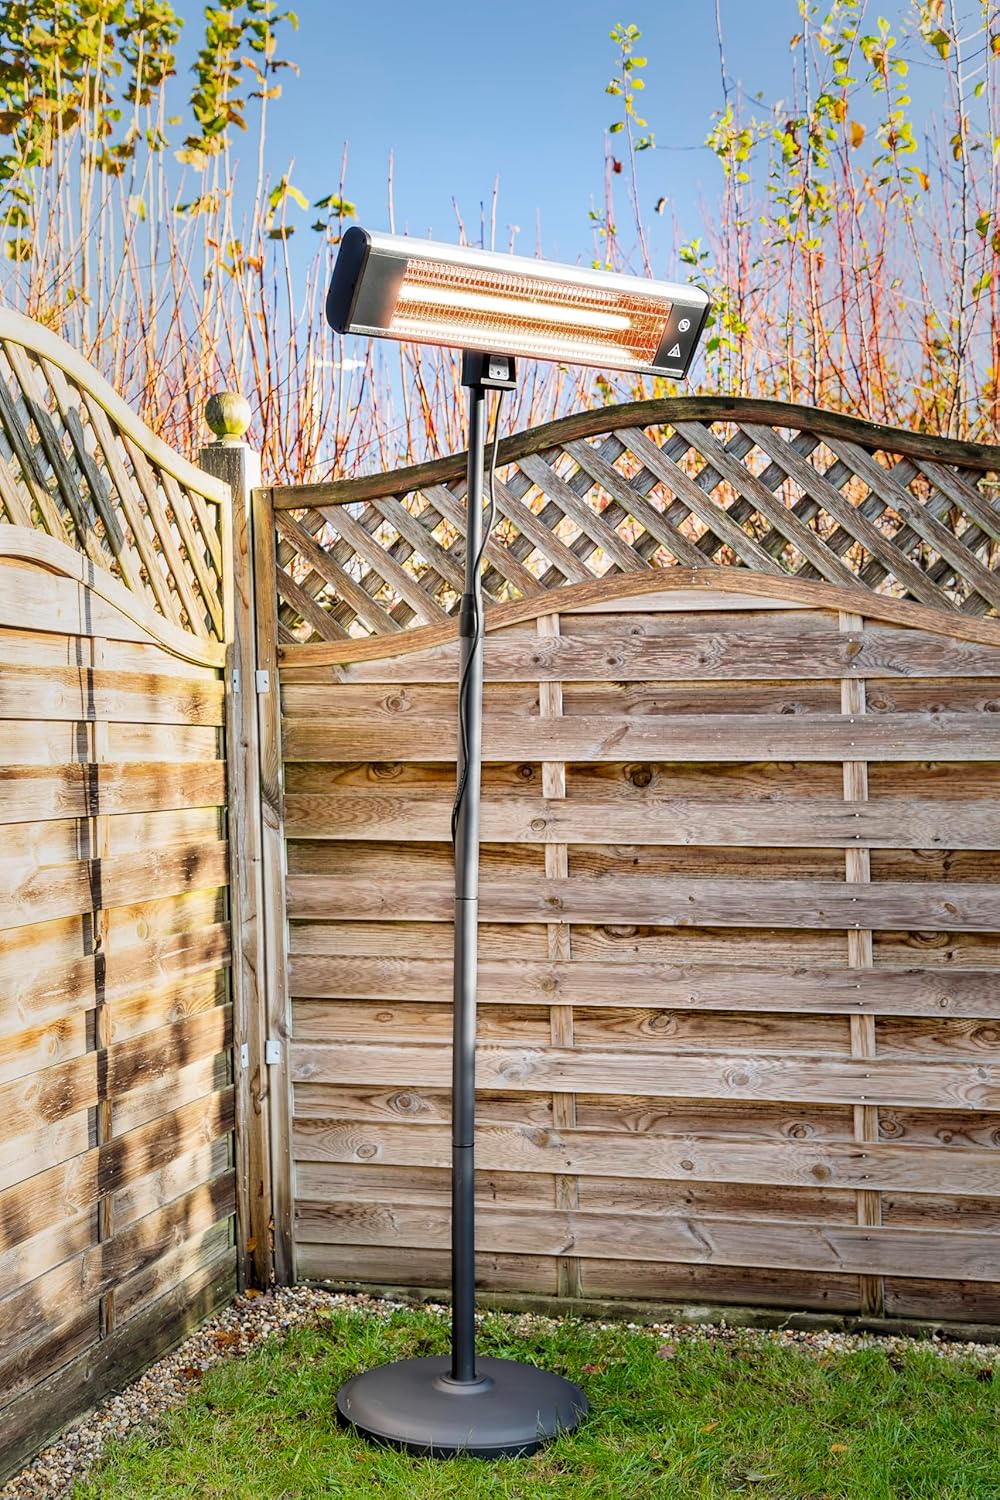
Figure 5: The Sealey IHS1 stand with an infrared heater positioned outdoors, demonstrating its freestanding utility.
Note: For specific operating instructions regarding the heater's power, heat settings, and sensor functions, please refer to the instruction manual provided with your Sealey IWMH1809R/IFSH1809R heater. An example of a heater control panel is shown below for reference.

Rysunek 6: Example of a control panel found on compatible Sealey heaters, featuring ON, OFF, and SENSOR buttons.
6. Konserwacja
To ensure the longevity and safe operation of your IHS1 stand:
- Czyszczenie: Przetrzyj stojak miękką szmatką.amp ściereczka. Nie należy używać środków czyszczących o właściwościach ściernych ani rozpuszczalników.
- Kontrola: Periodically check all bolts, screws, and connections for tightness. Retighten if necessary.
- Składowanie: If storing the stand for an extended period, disassemble it if desired and store in a dry, protected area.
7. Rozwiązywanie Problemów
If you encounter issues with your IHS1 stand, consider the following:
- Niestabilność stanowiska:
- Upewnij się, że stojak jest ustawiony na całkowicie płaskiej i równej powierzchni.
- Verify all pole sections and the base are securely tightened.
- Confirm the heater is properly centered and balanced on the mounting bracket.
- Trudności w regulacji wysokości:
- Ensure the height adjustment collar is fully loosened before attempting to adjust.
- Sprawdź, czy w sekcjach słupa nie ma żadnych przeszkód lub zanieczyszczeń.
For issues related to the heater's functionality, refer to the heater's specific instruction manual.
8. Specyfikacje
| Funkcja | Szczegół |
|---|---|
| Numer modelu | IHS1 |
| Kompatybilne grzejniki | Sealey IWMH1809R, IFSH1809R |
| Minimalna wysokość | 1340mm |
| Maksymalna wysokość | 1700mm |
| Wymiary produktu (w opakowaniu) | Około 0.62 x 3.23 x 0.62 cala |
| Waga przedmiotu | 22.2 funta (ok. 10.07 kg) |
| Kolor | Czarny |
9. Gwarancja i wsparcie
This Sealey IHS1 stand comes with a 1-letnia gwarancja. For full terms and conditions, please refer to the official Sealey website or contact Sealey customer support.

Figure 7: Sealey's 1 Year Guarantee emblem, indicating product assurance.
W celu uzyskania pomocy technicznej, części zamiennych lub reklamacji gwarancyjnych skontaktuj się z autoryzowanym dealerem Sealey lub odwiedź oficjalną stronę internetową Sealey webwitryna z informacjami pomocniczymi.
Please note: "Terms and conditions apply" as indicated by the manufacturer.


