1. Wprowadzenie
The Continental 62463 Molded Radiator Hose is engineered for efficient transfer of glycol-based coolants within a vehicle's cooling system. Its design ensures optimal flow through tight bends and reduces stress on radiator connections. This product is manufactured to meet or exceed industry standards, providing reliable performance in automotive applications.
2. Koniec produktuview
The Continental 62463 is a molded radiator hose featuring an EPDM tube and cover with synthetic knit reinforcement. It is compatible with various coolants, including ethylene glycol- and propylene glycol-based coolants, as well as organic acid modified, long-life coolants. It is not intended for use in fuel or oil transfer applications.
Główne cechy:
- Designed for full flow through tight bends.
- Zmniejsza naprężenia w połączeniach grzejnikowych.
- EPDM construction with synthetic knit reinforcement.
- Odporne na degradację elektrochemiczną (ECR).
- Spełnia lub przewyższa specyfikację SAE 20R4EC klasy D1.
Zawartość opakowania:
- One Continental 62463 Molded Radiator Hose.
3. Konfiguracja i instalacja
Proper installation is crucial for the longevity and performance of your radiator hose. It is recommended that installation be performed by a qualified technician.
Środki ostrożności:
- Przed rozpoczęciem jakichkolwiek prac przy układzie chłodzenia należy upewnić się, że silnik jest zimny.
- Należy nosić odpowiedni sprzęt ochrony osobistej, obejmujący rękawice i okulary ochronne.
- Be aware that coolant can be hot and under pressure.
- Zużyty płyn chłodniczy należy utylizować zgodnie z lokalnymi przepisami.
Kroki instalacji:
- Spuszczanie płynu chłodzącego: Place a suitable drain pan under the radiator and open the drain cock to drain the cooling system.
- Usuń stary wąż: Rozluźnij clamps securing the old radiator hose to the radiator and engine. Carefully remove the old hose.
- Sprawdź połączenia: Clean the connection points on both the radiator and engine to ensure they are free of debris, corrosion, or old hose residue.
- Zainstaluj nowy wąż: Position the Continental 62463 Molded Radiator Hose onto the radiator and engine connections. Ensure the hose is fully seated and aligned correctly.
- Bezpieczne Clamps: Install new hose clamps (not included) and tighten them securely. Avoid over-tightening, which can damage the hose.
- Uzupełnij płyn chłodzący: Close the radiator drain cock and refill the cooling system with the appropriate coolant mixture as specified by your vehicle manufacturer.
- Odpowietrzanie: Start the engine and allow it to reach operating temperature with the heater on high. Monitor the coolant level and add more as needed to remove any trapped air from the system.
- Sprawdź, czy nie ma wycieków: Po ostygnięciu silnika należy ponownie sprawdzić poziom płynu chłodzącego i sprawdzić, czy na połączeniach nie ma śladów wycieków.

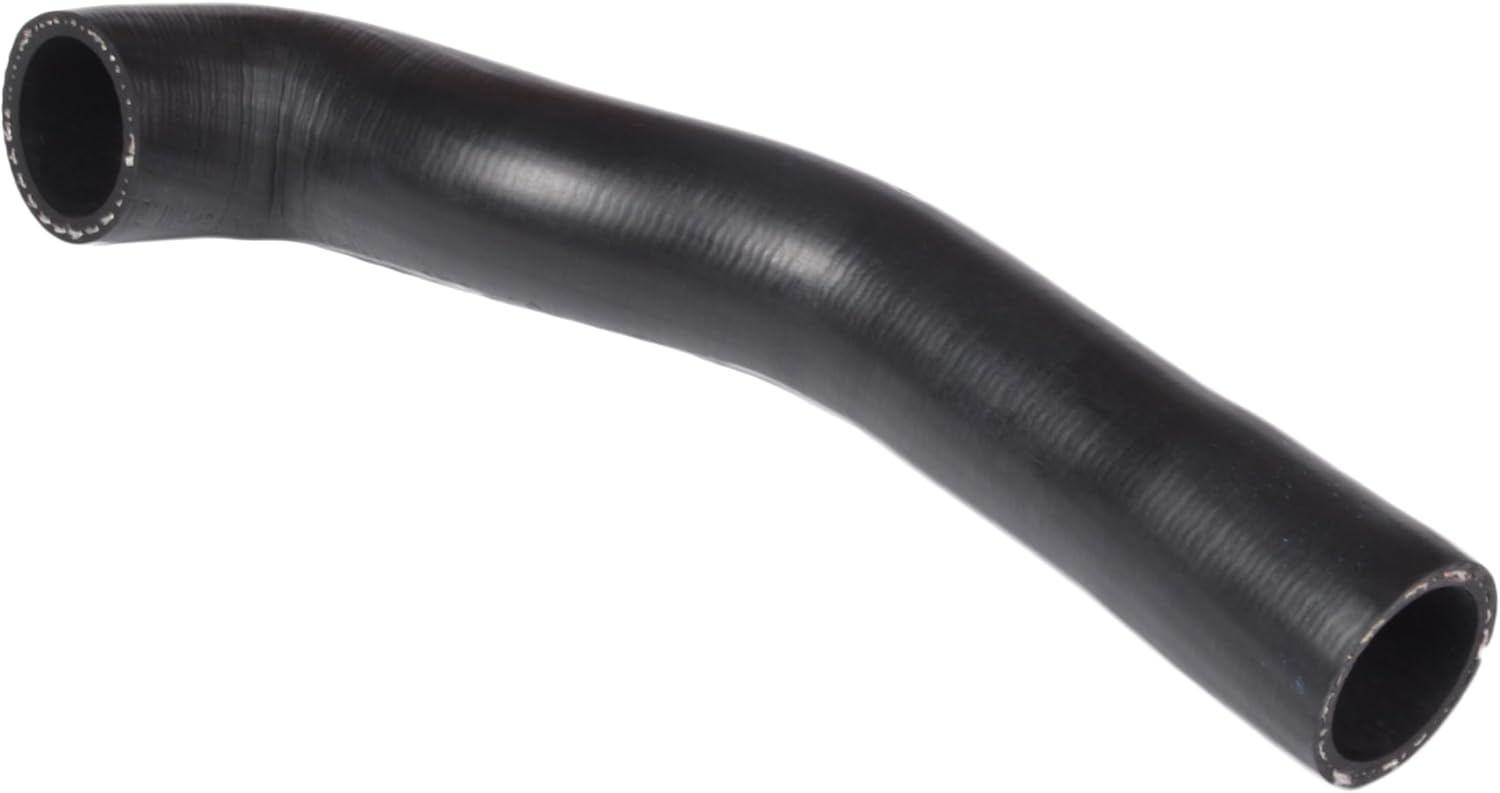
Figure 1: The Continental 62463 Molded Radiator Hose, illustrating its specific molded shape for proper fitment.

Rysunek 2: Profesjonalizm bocznyfile of the radiator hose, demonstrating its uniform construction.
Rysunek 3: Koniec view of the radiator hose, illustrating the internal diameter and material composition.
4. Zagadnienia operacyjne
Once installed, the radiator hose operates as an integral part of the vehicle's cooling system. No specific user operation is required beyond ensuring the cooling system is properly maintained.
Normalna praca:
- The hose will convey coolant between the engine and radiator, maintaining optimal engine temperature.
- It is designed to withstand typical engine compartment temperatures and pressures.
5. Konserwacja
Regular inspection of your radiator hose is essential for preventing cooling system failures.
Harmonogram inspekcji:
- Inspect the hose at every oil change or at least twice a year.
- Check for signs of wear, cracks, bulges, or leaks.
- Feel the hose for softness or hardness; a healthy hose should be firm but pliable.
- Upewnij się, że wąż klampsą bezpieczne i odporne na korozję.
Czyszczenie:
- Keep the exterior of the hose clean from oil, grease, and other contaminants that can degrade the rubber.
Wymiana:
- Replace the hose immediately if any signs of damage or degradation are observed.
- Follow vehicle manufacturer recommendations for cooling system flush and hose replacement intervals.
6. Rozwiązywanie Problemów
This section addresses common issues related to radiator hoses.
Typowe problemy i rozwiązania:
| Problem | Możliwa przyczyna | Rozwiązanie |
|---|---|---|
| Wyciek chłodziwa | luźne clamps, damaged hose, cracked radiator/engine connection. | Dokręć lub wymień clamps. Inspect and replace hose if damaged. Check radiator/engine connections. |
| Pęcznienie/wybrzuszenie węża | Internal damage, excessive pressure, coolant contamination. | Replace hose immediately. Check cooling system for proper pressure and coolant quality. |
| Utwardzanie/pękanie węży | Age, heat exposure, chemical degradation. | Replace hose. This is a sign of normal wear and tear or Electrochemical Degradation (ECR). |
If you encounter issues not listed here or require further assistance, consult a professional automotive technician.
7. Specyfikacje
| Funkcja | Szczegół |
|---|---|
| Numer modelu | 62463 |
| Marka | Kontynentalny |
| Tworzywo | EPDM (monomer etylenowo-propylenowo-dienowy) |
| Inner Diameter (ID) Range | 1 inch to 3 inches |
| Zakres temperatur | -40°F do 275°F (-40°C do 135°C) |
| Zgodność | Spełnia lub przekracza specyfikacje SAE 20R4EC klasy D1 |
| Opór | Degradacja elektrochemiczna (ECR) |
| Wymiary produktu | Około 16.5 x 12 x 4 cali (wymiary opakowania) |
| Waga przedmiotu | Około 10.4 uncji |
Uwaga: Specyfikacje mogą ulec zmianie bez powiadomienia.
8. Gwarancja i wsparcie
For information regarding product warranty, please refer to the official Continental website or contact their customer support directly. Continental products are designed for durability and function in real-world conditions.
Informacje kontaktowe:
For technical assistance or warranty claims, please visit the Sklep Continental na Amazonie or the official Continental webstrona.
When contacting support, please have your product model number (62463) and purchase details available.


