1. Wprowadzenie
This manual provides instructions for the installation, operation, and maintenance of the Rain Bird SRKCP/CPF Replacement Solenoid. This solenoid is designed to restore functionality to compatible Rain Bird irrigation valves, ensuring efficient and reliable water flow control.
The SRKCP/CPF solenoid is an energy-efficient, low-power encapsulated unit featuring a captured plunger for enhanced durability and long-term performance. It is engineered for straightforward removal and installation, often requiring no specialized tools.
2. Zgodność
The Rain Bird SRKCP/CPF Replacement Solenoid is compatible with the following Rain Bird valve series:
- APAS Series Valves
- ASVF Series Valves
- ECV Series Valves
- CP Series Valves
- CPF Series Valves
- DV Series Valves
- DAS Series Valves
- JTV Series Valves
Ważna uwaga:
This replacement solenoid is designed exclusively for newer Rain Bird valves featuring a hexagon-shaped solenoid. To jest niekompatybilny with older Rain Bird valves that utilize round solenoids with ridges.
3. Główne cechy
- Direct replacement for specified Rain Bird valve models.
- Energy-efficient, low-power encapsulated design.
- Features a captured plunger for extended life and reliability.
- Designed for quick and easy installation without the need for special tools.
- Helps in efficient troubleshooting and repair of irrigation systems.
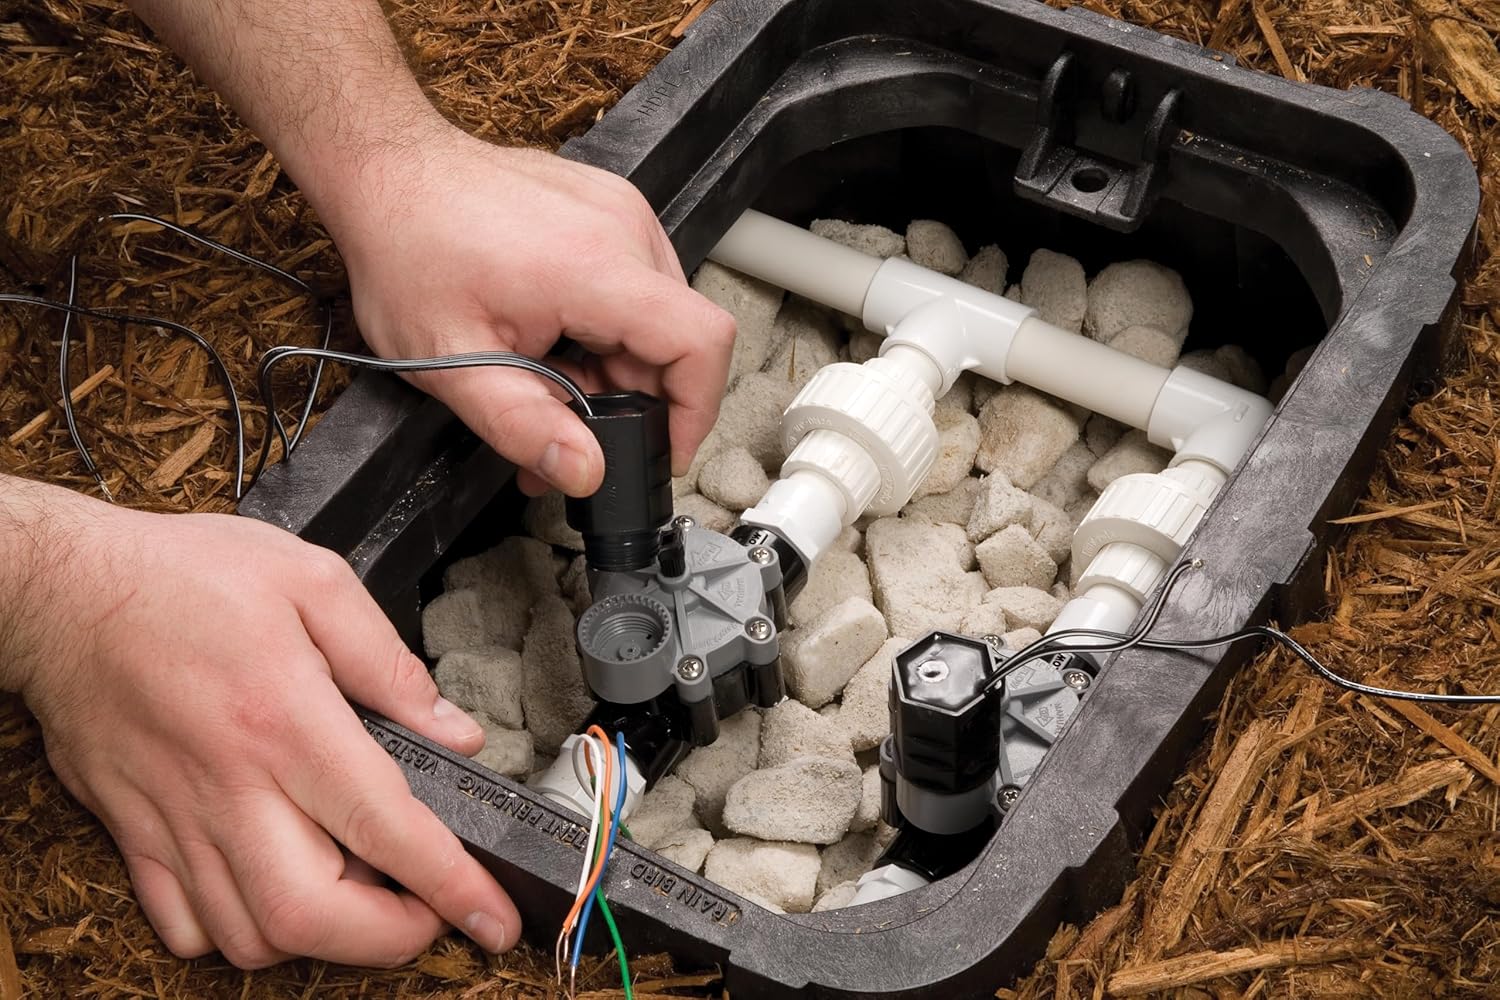
4. Instalacja
Follow these steps to replace the solenoid on your compatible Rain Bird valve:
- Wyłącz dopływ wody: Before beginning, ensure the main water supply to the irrigation system is completely shut off to prevent water leakage.
- Zlokalizuj zawór: Identify the valve requiring solenoid replacement. It is typically located within a valve box in your landscape.
- Odłącz okablowanie: Carefully disconnect the two wires connected to the existing solenoid. Note which wire connects to which terminal if applicable, though for a solenoid, polarity is generally not an issue.
- Wyjmij stary elektromagnes: Unscrew the old solenoid from the valve body by turning it counter-clockwise. This can usually be done by hand or with minimal force.
- Sprawdź zawór: Briefly inspect the valve port for any debris or damage before installing the new solenoid.
- Montaż nowego elektromagnesu: Screw the new Rain Bird SRKCP/CPF solenoid into the valve body by turning it clockwise until it is hand-tight. Do not overtighten.
- Podłącz okablowanie: Reconnect the two wires to the new solenoid. Ensure a secure connection. Wire nuts are commonly used for this purpose.
- Przywrócenie dostaw wody: Slowly turn the main water supply back on. Check for any leaks around the newly installed solenoid.
- Operacja testowa: Test the valve operation using your irrigation controller to ensure it opens and closes correctly.


5. Działanie
The SRKCP/CPF solenoid primarily operates electronically via your irrigation controller. However, it also features a manual override option:
- Działanie automatyczne: When connected to an irrigation controller, the solenoid will open and close the valve based on the programmed schedule.
- Obsługa ręczna: The solenoid body includes markings for "ON" and "OFF" with an arrow indicating "MANUAL 1/4 TURN". To manually open the valve, turn the solenoid 1/4 turn counter-clockwise towards the "ON" position. To close the valve manually, turn it 1/4 turn clockwise towards the "OFF" position. This feature is useful for testing or temporary watering without the controller.
6. Konserwacja
The Rain Bird SRKCP/CPF Replacement Solenoid is designed for minimal maintenance. As a replacement part, its primary function is to restore valve operation. Regular maintenance involves:
- Kontrola nieszczelności: Periodically check the valve area for any signs of water leakage, which could indicate a faulty seal or an issue with the solenoid or valve body.
- Usuwanie zanieczyszczeń: Ensure the valve box remains clear of excessive dirt or debris that could interfere with valve or solenoid function.
- Integralność okablowania: Occasionally inspect the wiring connections for corrosion or damage, ensuring they remain secure.
7. Rozwiązywanie Problemów
If your irrigation valve is not functioning correctly after solenoid replacement, consider the following:
- Zawór się nie otwiera:
- Verify the water supply is fully open.
- Check electrical connections to the solenoid for looseness or corrosion.
- Ensure the irrigation controller is sending power to the correct zone.
- Manually turn the solenoid 1/4 turn to the "ON" position. If the valve opens, the electrical signal or solenoid itself may be faulty.
- Valve Not Closing:
- Manually turn the solenoid 1/4 turn to the "OFF" position. If the valve closes, the electrical signal from the controller might be stuck "ON".
- Inspect the valve diaphragm for debris or damage that prevents it from seating properly.
- Ensure the solenoid is fully tightened and not cross-threaded.
- Incorrect Solenoid Type: Double-check that the installed solenoid is the correct hexagon-shaped replacement for your valve model. Older round solenoids are not compatible.
8. Specyfikacje
| Atrybut | Szczegół |
|---|---|
| Numer modelu | SRKCP/CPF |
| Tworzywo | Metal |
| Pozycja Wymiary (dł. x szer. x wys.) | 1.5 x 1.3 x 2.25 cala |
| Wykończenie zewnętrzne | Black Coated |
| Liczba portów | 2 |
| Waga przedmiotu | 0.375 uncji |
| Źródło zasilania | Water (controlled electrically) |
| Zawarte komponenty | Solenoid |
| UPC | 077985999308 |
9. Gwarancja i wsparcie
The Rain Bird SRKCP/CPF Replacement Solenoid comes with a manufacturer's warranty. For specific warranty details, including coverage period and terms, please refer to the packaging or contact Rain Bird customer support directly.
For technical assistance, troubleshooting beyond this manual, or to inquire about warranty claims, please visit the official Rain Bird website or contact their customer service department. Contact information can typically be found on the product packaging or the Rain Bird webstrona.


