1. Wprowadzenie
This manual provides detailed instructions for the installation, operation, and maintenance of your Samsung SyncMaster 740N 17-inch LCD Monitor. Please read this manual thoroughly before using your monitor to ensure proper functionality and to prevent damage. Keep this manual for future reference.
2. Informacje dotyczące bezpieczeństwa
Observe the following safety precautions to ensure the safe and efficient operation of your monitor:
- Nie umieszczaj monitora w niestabilnym miejscu.
- Unikaj wystawiania monitora na bezpośrednie działanie promieni słonecznych, źródeł ciepła i ekstremalnych temperatur.
- Chroń monitor przed wodą i nadmierną wilgocią.
- Zapewnij odpowiednią wentylację, nie blokuj otworów wentylacyjnych.
- Należy używać wyłącznie przewodu zasilającego i zasilacza dostarczonych wraz z monitorem.
- Nie próbuj samodzielnie naprawiać monitora. Wszelkie prace serwisowe zleć wykwalifikowanemu personelowi.
- Odłączaj monitor od gniazdka elektrycznego podczas burzy z piorunami lub jeśli nie używasz go przez dłuższy czas.
3. Zawartość opakowania
Sprawdź, czy w opakowaniu produktu znajdują się wszystkie elementy:
- Samsung SyncMaster 740N LCD Monitor
- Przewód zasilający
- VGA Cable (D-Sub)
- Instrukcja obsługi (ten dokument)
- Installation CD (may include drivers and software like MagicTune)
4. Konfiguracja
4.1 Rozpakowywanie i umieszczanie
Carefully remove the monitor and all accessories from the packaging. Place the monitor on a stable, flat surface, ensuring adequate space for ventilation around the unit.
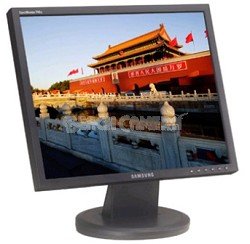
Rysunek 1: The Samsung SyncMaster 740N 17-inch LCD Monitor. This image shows the front view of the monitor with its stand, illustrating its compact design suitable for various desktop environments.
4.2 Podłączanie monitora
- Podłączenie zasilania: Podłącz przewód zasilający do portu zasilania monitora, a następnie podłącz drugi koniec do uziemionego gniazdka elektrycznego.
- Połączenie wideo (VGA): Connect the VGA cable (D-Sub) to the VGA port on the back of the monitor and to the VGA output port on your computer's graphics card. Tighten the screws on the VGA connector to secure the connection.
- Włączanie: Press the power button on the front of the monitor. Then, power on your computer. The monitor should automatically detect the input signal.
5. Obsługa monitora
5.1 Podstawowe sterowanie
The control buttons are typically located on the front or bottom bezel of the monitor. These buttons allow you to access the On-Screen Display (OSD) menu to adjust various settings.
- Przycisk zasilania: Włącza lub wyłącza monitor.
- Przycisk menu: Otwiera menu ekranowe.
- Up/Down or Left/Right Buttons: Navigate through OSD menu options and adjust values.
- Enter/Source Button: Confirms selections or switches input sources.
5.2 Nawigacja w menu OSD
Naciśnij Menu button to open the OSD. Use the navigation buttons to select categories like Zdjęcie, Kolor, OSD, I Organizować coś. Naciskać Wchodzić to access sub-menus or confirm changes. Press Menu ponownie, aby wyjść z OSD.
5.3 Funkcje specjalne
- MagicBright II™: This feature provides various preset brightness modes (e.g., Text, Internet, Game, Sport, Movie, Custom) to optimize the display for different content types. Access it via the OSD menu.
- MagicColor™: Enhances color saturation and brightness, making images appear more vivid. This can be toggled on/off in the OSD.
- MagicTune™: A software utility that allows you to control monitor settings directly from your computer using a mouse and keyboard, providing a more convenient way to adjust brightness, contrast, and other parameters. Install from the provided CD or Samsung's webstrona.
5.4 Optimal Resolution
For the best display quality, set your computer's display resolution to the monitor's native resolution of 1280x1024. This can be adjusted through your operating system's display settings.
6. Konserwacja
6.1 Czyszczenie monitora
- Zawsze odłączaj monitor od zasilania przed czyszczeniem.
- Użyj miękkiej, niestrzępiącej się ściereczki, lekko wyczyśćampspłukać wodą lub specjalnym środkiem do czyszczenia ekranów.
- Do not use abrasive cleaners, waxes, or solvents as they can damage the screen or casing.
- Spray cleaner onto the cloth, not directly onto the screen.
6.2 Ogólna opieka
- Unikaj dotykania ekranu ostrymi przedmiotami.
- Nie należy umieszczać ciężkich przedmiotów na monitorze i jego kablach.
- If moving the monitor, ensure it is powered off and disconnected from all cables.
7. Rozwiązywanie Problemów
Jeśli masz problemy z monitorem, zapoznaj się z poniższymi typowymi problemami i ich rozwiązaniami:
| Problem | Możliwe rozwiązanie |
|---|---|
| Brak zasilania |
|
| No Signal / "Check Signal Cable" Message |
|
| Obraz jest niewyraźny lub zniekształcony |
|
| Colors are incorrect or faded |
|
| Martwe piksele | A small number of defective pixels is inherent in LCD technology. If the number of dead pixels exceeds manufacturer specifications, contact Samsung support. |
8. Specyfikacje
Key technical specifications for the Samsung SyncMaster 740N monitor:
| Funkcja | Szczegół |
|---|---|
| Nazwa modelu | SyncMaster 740N |
| Rozmiar ekranu | 17 cali |
| Typ wyświetlacza | TFT-LCD |
| Rozdzielczość natywna | 1280x1024 |
| Proporcje obrazu | 5:4 |
| Jasność (typowa) | 300 cd/m² |
| Współczynnik kontrastu (typowy) | 600:1 |
| ViewKąt nachylenia (H/V) | 160°/160° |
| Czas reakcji | 8 ms |
| Wejście | Analog (VGA D-Sub) |
| Pobór mocy | (Specific value not provided, typical for 17" LCDs of this era) |
| Wymiary (dł. x szer. x wys.) | 17.4 x 17.1 x 5 cala |
| Waga | 9.8 funta |
9. Gwarancja i wsparcie
Aby uzyskać informacje dotyczące gwarancji, pomocy technicznej lub zapytań serwisowych, zapoznaj się z kartą gwarancyjną dołączoną do produktu lub odwiedź oficjalną stronę pomocy technicznej firmy Samsung website. You may also find updated drivers and software, including MagicTune, on their support pages.
Oficjalne wsparcie firmy Samsung: https://www.samsung.com/us/support/