1. Wprowadzenie
This manual provides essential information for the proper setup, operation, and maintenance of your Coby DVD-527 5.1 Channel Progressive Scan DVD Player. Please read this manual thoroughly before using the device to ensure optimal performance and safety. The Coby DVD-527 features a super-slim design, 5.1 channel audio output, and progressive scan video output for enhanced picture quality on compatible televisions.
2. Informacje dotyczące bezpieczeństwa
- Źródło zasilania: Upewnij się, że zasilanie jest zgodne z objtagwymagania określone dla jednostki.
- Wentylacja: Nie zasłaniaj otworów wentylacyjnych. Zachowaj odpowiednią ilość miejsca wokół urządzenia, aby zapewnić prawidłowy przepływ powietrza i zapobiec przegrzaniu.
- Wilgoć: Nie wystawiaj urządzenia na działanie deszczu, wilgoci ani nadmiernej wilgotności.
- Czyszczenie: Unplug the unit from the power outlet before cleaning. Use a soft, dry cloth.
- Serwisowanie: Nie próbuj samodzielnie naprawiać tego produktu. Wszelkie czynności serwisowe należy powierzyć wykwalifikowanemu personelowi serwisowemu.
3. Zawartość opakowania
Sprawdź, czy w opakowaniu znajdują się wszystkie elementy:
- Odtwarzacz DVD Coby DVD-527
- W pełni funkcjonalny pilot zdalnego sterowania
- Kabel AV
- Instrukcja obsługi (ten dokument)
- Informacje o gwarancji
4. Koniec produktuview
The Coby DVD-527 DVD Player and its accompanying remote control are designed for ease of use and integration into your home entertainment system.
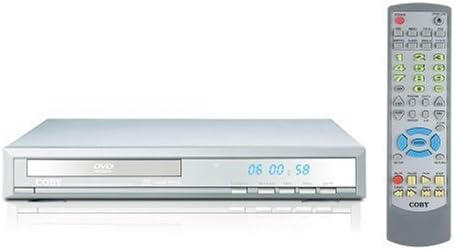
Rysunek 1: Coby DVD-527 DVD Player (left) and its full-function remote control (right). The DVD player features a slim profile with a disc tray, display screen, and control buttons on the front panel. The remote control includes various buttons for playback, navigation, and special features.
Elementy sterujące na panelu przednim
The front panel typically includes the disc tray, power button, play/pause, stop, and eject buttons, along with a digital display showing playback time or status.
Połączenia na tylnym panelu
The rear panel houses various audio and video output ports for connecting to your television and audio system.
Zdalne sterowanie
The included remote control provides full functionality for operating the DVD player from a distance, including power, playback controls, menu navigation, volume, and special features.
5. Konfiguracja
5.1 Podłączanie do telewizora
Choose one of the following video connection methods:
- Component Video Output (Progressive Scan): For the highest quality picture on HD-capable televisions, connect the Y, Pb, and Pr component video outputs from the DVD player to the corresponding inputs on your TV using component video cables.
- Wyjście wideo RCA: Connect the yellow RCA video output from the DVD player to the video input on your TV using an RCA video cable.
- Wyjście S-Video: Connect the S-Video output from the DVD player to the S-Video input on your TV using an S-Video cable.
5.2 Podłączanie do systemu audio
Wybierz jedną z następujących metod połączenia audio:
- 5.1 Dolby Digital Output: For surround sound, connect the 5.1 channel audio outputs (Front Left, Front Right, Center, Surround Left, Surround Right, Subwoofer) from the DVD player to the corresponding inputs on your 5.1 channel receiver or ampliyfikator.
- Wyjście cyfrowe audio koncentryczne: Connect the coaxial digital audio output from the DVD player to the coaxial digital audio input on your receiver or amplifier using a coaxial digital audio cable.
- Optyczne cyfrowe wyjście audio: Connect the optical digital audio output from the DVD player to the optical digital audio input on your receiver or amplifier using an optical digital audio cable.
- Analogowe wyjście audio: Connect the red and white RCA analog audio outputs from the DVD player to the corresponding audio inputs on your TV or stereo system using an RCA audio cable.
5.3 Połączenie zasilania
After all audio and video connections are made, plug the DVD player's power cord into a standard AC power outlet.
6. Instrukcja obsługi
6.1 Podstawowe odtwarzanie płyt
- Włącz telewizor i wybierz odpowiednie źródło sygnału dla odtwarzacza DVD.
- Press the Power button on the DVD player or remote control to turn on the unit.
- Press the Eject button (▲) on the front panel or remote to open the disc tray.
- Place a compatible disc (DVD, CD, CD-R/RW, MP3) gently into the disc tray with the label side facing up.
- Press the Eject button (▲) again to close the disc tray. The player will begin reading the disc.
- Playback should start automatically. If a disc menu appears, use the navigation buttons on the remote to select your desired option and press Enter.
- Use the Play (▶), Pause (▐▐), Stop (■), Fast Forward (►►), and Rewind (◄◄) buttons on the remote for playback control.
6.2 Funkcje specjalne
- Wyświetlacz ekranowy: Press the OSD button on the remote to view playback information on your screen.
- Operacja powiększenia: Use the Zoom button to magnify a portion of the picture.
- Wiele ViewKąty: For discs that support it, press the Angle button to switch between different camera angles.
- Napisy na filmie obcojęzycznym: Press the Subtitle button to select available subtitle languages.
- Parental Lock Control: Access the setup menu to configure parental control settings, restricting playback of certain content based on rating.
6.3 Ustawienia systemowe
Press the Setup button on the remote to access the system menu. Here you can adjust video settings (e.g., aspect ratio, progressive scan mode), audio settings, language preferences, and parental control options. Refer to the on-screen menu for detailed navigation.
7. Konserwacja
7.1 Czyszczenie urządzenia
Wipe the exterior of the DVD player with a soft, dry cloth. Do not use liquid cleaners or aerosol sprays, as they may damage the finish or internal components.
7.2 Pielęgnacja dysków
Handle discs by their edges. Keep discs clean and free of scratches. Store discs in their cases when not in use to prevent dust and damage.
8. Rozwiązywanie Problemów
Jeśli masz problemy z odtwarzaczem DVD, zapoznaj się z poniższymi typowymi problemami i ich rozwiązaniami:
- Brak zasilania:
• Ensure the power cord is securely plugged into both the DVD player and a working electrical outlet.
• Check if the power outlet is functional by plugging in another device. - Brak obrazka:
• Verify that the video cables are correctly connected between the DVD player and the TV.
• Ensure your TV is set to the correct input source (e.g., AV1, Component, HDMI).
• Check the TV's picture settings. - Brak dźwięku:
• Confirm that audio cables are properly connected to your TV or audio system.
• Check the volume level on both the DVD player and your TV/audio system.
• Ensure your TV/audio system is set to the correct audio input.
• If using digital audio, verify the audio settings in the DVD player's setup menu. - Disc Not Playing / Disc Error:
• Ensure the disc is clean and free of scratches or smudges.
• Make sure the disc is inserted correctly with the label side facing up.
• Verify that the disc format is compatible with the player (DVD, CD, CD-R/RW, MP3). - Pilot nie działa:
• Check and replace the batteries in the remote control.
• Ensure there are no obstructions between the remote and the DVD player's sensor.
• Point the remote directly at the DVD player.
9. Specyfikacje
| Model | Płyta DVD-527 |
| Marka | Koby |
| Wymiary (szer. x gł. x wys.) | 11 x 10 x 2 cala (w przybliżeniu) |
| Waga | 7 funta (w przybliżeniu) |
| Media Type Compatibility | DVD, CD, CD-R/RW, MP3 |
| Wyjście wideo | Component Video (Y, Pb, Pr), RCA Video, S-Video |
| Wyjście audio | 5.1 Channel Dolby Digital, Coaxial Digital, Optical Digital, Analog RCA (L/R) |
| Cechy specjalne | Progressive Scan, Multiple Subtitles, Multiple Viewing Angles, On-Screen Display, Zoom Operation, Parental Lock Control |
| Zgodność wideo | Systemu NTSC/PAL |
10. Gwarancja i wsparcie
This product is covered by a limited manufacturer's warranty. Please refer to the warranty information card included in your package for specific terms and conditions, including the warranty period and coverage details. Keep your purchase receipt as proof of purchase.
For technical assistance or customer support, please refer to the contact information provided in your warranty documentation or visit the official Coby website for the most current support resources.


