
1. Koniec produktuview
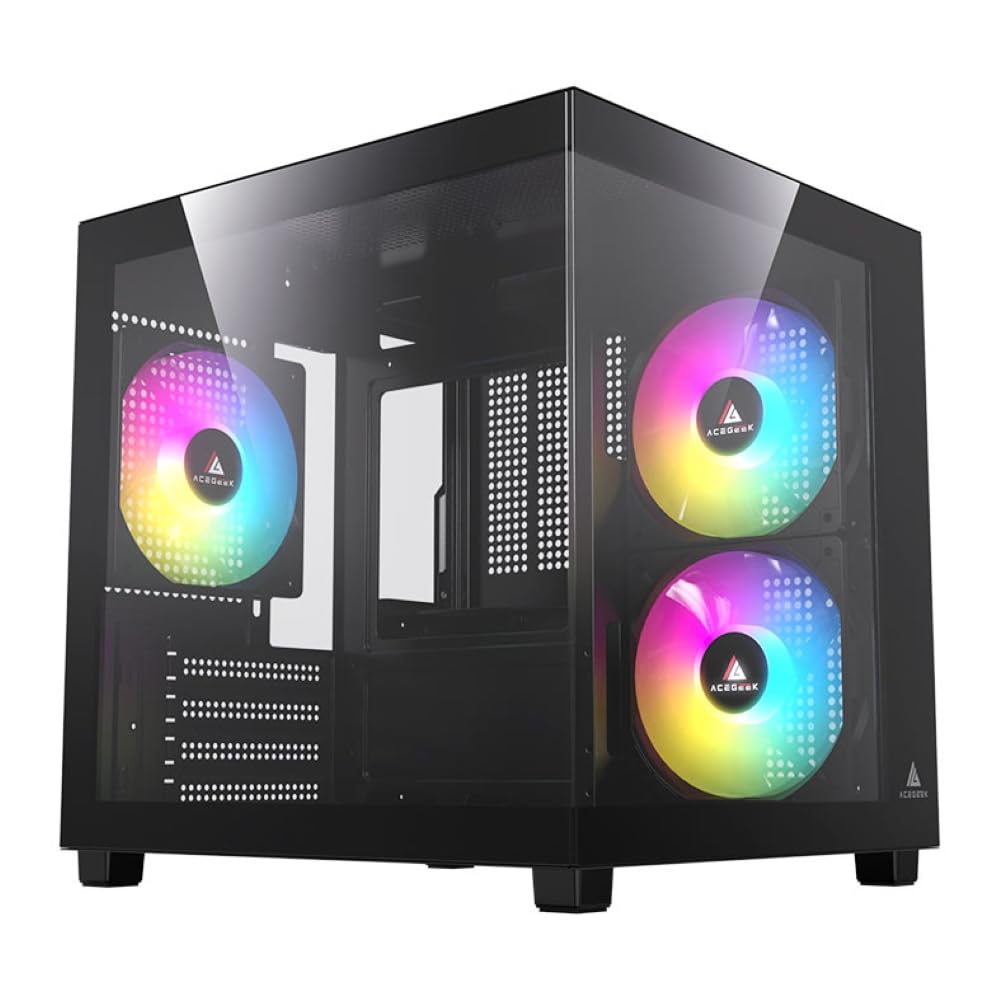
The Acegeek Ori Rainbow Gaming Case (Model: AG-ORI-BK-3F) is a Mid-Tower chassis designed for compact and stylish PC builds. It features a tempered glass side panel to showcase internal components and comes with three pre-installed Rainbow fans for enhanced aesthetics and airflow. The case is engineered for optimized space utilization and efficient heat dissipation, ensuring stable performance during extended use.
Główne cechy:
- Compact Mid-Tower design with a tempered glass side panel.
- Includes 3 pre-installed Rainbow fans for improved airflow and visual appeal.
- Optimized internal layout for easy component installation and cable management.
- Obsługuje płyty główne Micro-ATX i Mini-ITX.
- Ventilated side panel for enhanced internal airflow and thermal control.
- Convenient top-mounted I/O panel for easy access to ports and controls.
2. Konfiguracja i instalacja
This section provides general guidelines for installing components into your Acegeek Ori Rainbow Gaming Case. Always refer to the specific manuals for your motherboard, power supply, and other components for detailed installation instructions.
2.1 Przygotowanie sprawy
- Rozpakuj obudowę: Ostrożnie wyjmij obudowę z opakowania. Sprawdź, czy nie ma uszkodzeń powstałych podczas transportu.
- Zdejmij panele boczne: Locate and remove the screws securing the tempered glass side panel and the opposite metal side panel. Carefully set them aside in a safe place to prevent scratches or damage.
- Zidentyfikuj komponenty: Familiarize yourself with the internal layout, including motherboard standoffs, drive bays, and fan mounting points.

Rysunek 2.1: Wewnętrzne view of the Acegeek Ori Rainbow Gaming Case, showing the pre-installed RGB fan and internal layout.
2.2 Instalacja płyty głównej
- Zainstaluj osłonę I/O: If your motherboard came with a separate I/O shield, install it into the rear opening of the case.
- Pozycja płyty głównej: Align your Micro-ATX or Mini-ITX motherboard with the standoffs inside the case. Ensure all screw holes on the motherboard align with the standoffs.
- Bezpieczna płyta główna: Use the provided screws to secure the motherboard to the standoffs. Do not overtighten.
Rysunek 2.2: Wewnętrzne view of the case, highlighting the motherboard mounting area and rear fan position.
2.3 Instalacja zasilania
- Locate PSU Bay: The power supply unit (PSU) bay is located at the bottom rear of the case.
- Insert PSU: Slide your PSU into the bay, ensuring the fan faces the correct direction (usually downwards for cases with a bottom vent, or upwards if no bottom vent).
- Bezpieczny zasilacz: Przymocuj zasilacz do obudowy za pomocą śrub od tyłu.
2.4 Instalacja dysku pamięci masowej (HDD/SSD)
The case supports 1 x HDD and 2 x SSDs.
- Locate Drive Bays: Identify the designated mounting points for 3.5" HDDs and 2.5" SSDs.
- Zainstaluj dyski: Secure your HDD(s) and SSD(s) using the provided screws or tool-less mechanisms, if available.
2.5 Karta graficzna i karty rozszerzeń
- Zdejmij osłony gniazd: Zdejmij niezbędne zaślepki gniazd rozszerzeń z tyłu obudowy.
- Włóż kartę: Carefully insert your graphics card or other expansion cards into the appropriate PCIe slots on your motherboard.
- Karta bezpieczna: Secure the card with screws.
2.6 Zarządzanie kablami
Utilize the 20mm cable management space behind the motherboard tray to route and tie down cables. This improves airflow and aesthetics.
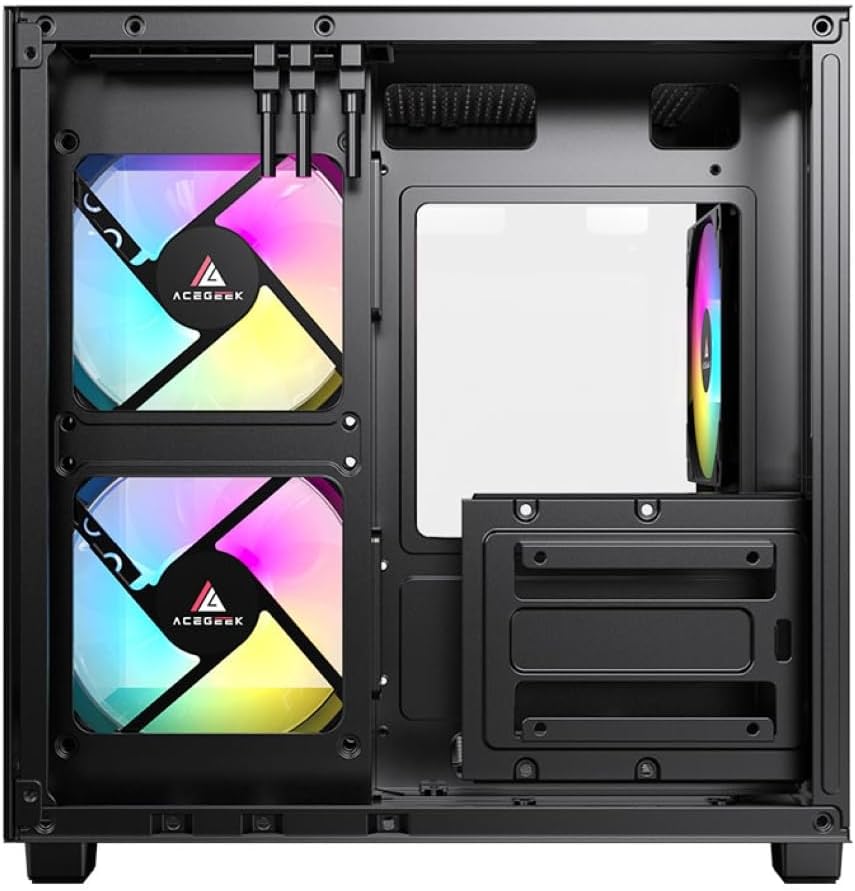
Rysunek 2.3: Tylna część wewnętrzna view of the case, illustrating the cable management area behind the motherboard tray.
2.7 Reinstall Side Panels
Once all components are installed and cables are managed, carefully reattach the metal and tempered glass side panels. Secure them with their respective screws.
3. Działanie
The Acegeek Ori Rainbow Gaming Case is designed to house your PC components. Its operation is primarily controlled by the installed components (motherboard, power supply, etc.).
3.1 Włączanie
After connecting all necessary external cables (power, monitor, peripherals), press the power button located on the top I/O panel of the case to start your computer.

Rysunek 3.1: Widok z góry z przodu view of the case, showing the location of the I/O panel with power button and ports.
3.2 Fan Operation and RGB Lighting
The three pre-installed Rainbow fans will illuminate and spin upon system startup, providing airflow and aesthetic lighting. Fan speed and RGB lighting effects are typically controlled via your motherboard's BIOS/UEFI settings or dedicated software, depending on how the fans are connected.

Rysunek 3.2: Kątowy view of the case, showcasing the illuminated Rainbow fans through the tempered glass panel.
4. Konserwacja
Regularna konserwacja pomaga zapewnić optymalną wydajność i długowieczność podzespołów komputera.
4.1 Czyszczenie z kurzu
- Częstotliwość: Clean your case every 3-6 months, or more frequently if in a dusty environment.
- Procedura:
- Wyłącz komputer i odłącz go od gniazdka ściennego.
- Zdejmij panele boczne.
- Use compressed air to blow dust out of the case, especially from fans, heatsinks, and dust filters. Hold fans gently to prevent over-spinning.
- Przetrzyj powierzchnie zewnętrzne miękką,amp cloth. For the tempered glass panel, use a glass cleaner and a microfiber cloth.
- Reattach side panels.

Rysunek 4.1: Tył view of the case, showing the ventilation grilles and expansion slots, areas where dust can accumulate.
4.2 Fan Inspection
Periodically check the fans for any obstructions or unusual noises. Ensure they are spinning freely.
5. Rozwiązywanie Problemów
This section addresses common issues you might encounter with your PC case. Note that many issues related to PC operation are component-specific and not directly related to the case itself.
5.1 System się nie włącza
- Sprawdź połączenia zasilania: Ensure the power supply is properly connected to the wall outlet and the motherboard (24-pin and CPU power).
- Złącza na panelu przednim: Verify that the front panel power switch connector is correctly attached to the motherboard's front panel header. Refer to your motherboard manual.
- Przełącznik zasilania: Ensure the switch on the back of the power supply is in the "ON" position.
5.2 Wentylatory nie obracają się lub RGB się nie świeci
- Podłączenia wentylatora: Check that the fan power cables and RGB cables are securely connected to the motherboard or a fan controller.
- Ustawienia płyty głównej: Consult your motherboard manual for fan control and RGB lighting settings in the BIOS/UEFI or through dedicated software.
- Zasilanie: Ensure the power supply is providing adequate power to all components.
5.3 Problemy z przegrzewaniem
- Airflow Obstructions: Ensure no cables or components are blocking airflow paths.
- Nagromadzenie kurzu: Clean dust from fans, radiators, and filters as described in the Maintenance section.
- Orientacja wentylatora: Verify that fans are installed with the correct intake/exhaust orientation for optimal airflow.
6. Specyfikacje
| Marka | Acegeek |
| Nazwa modelu | Oryginał |
| Numer modelu | AG-ORI-BK-3F |
| Typ sprawy | Średnia wieża |
| Kolor | Czarny |
| Tworzywo | ABS (Acrylonitrile Butadiene Styrene), Steel Alloy, Tempered Glass |
| Zgodność płyty głównej | Micro-ATX, Mini-ITX |
| Wymiary (gł. x szer. x wys.) | Wymiary: 30 cm x 27.5 cm x 29.8 cm |
| Zatoki napędowe | 1 x HDD, 2 x SSD |
| Gniazda rozszerzeń | 5 |
| W zestawie wentylatory | 3 x Rainbow Fans |
| Supported Fans (Max) |
|
| Wsparcie chłodnicy wodnej | Góra: do 240 mm |
| Maksymalna wysokość chłodnicy procesora | 150 mm |
| Maksymalna długość GPU | 290 mm |
| Przestrzeń do zarządzania kablami | 20 mm |
| Maksymalna długość zasilacza | 190 mm |
7. Informacje o gwarancji
The Acegeek Ori Rainbow Gaming Case comes with a 12-miesięczna gwarancja from the date of purchase. This warranty covers manufacturing defects and material faults under normal use. It does not cover damage caused by misuse, accidents, unauthorized modifications, or improper installation.
Proszę zachować dowód zakupu na potrzeby roszczeń gwarancyjnych.
8. Obsługa klienta
For technical assistance, troubleshooting, or warranty inquiries, please contact Acegeek customer support through their official webwitrynę lub sprzedawcę, u którego dokonałeś zakupu produktu.
When contacting support, please have your product model number (AG-ORI-BK-3F) and proof of purchase readily available.