
1. Wprowadzenie
Thank you for choosing the Contixo F15 Astro Mini Drone. This compact and lightweight drone is designed for beginners and experienced pilots alike, featuring a 720P HD camera, live video display, optical flow hover, and easy-to-use controls. Please read this manual thoroughly before operating the drone to ensure safe and optimal performance.
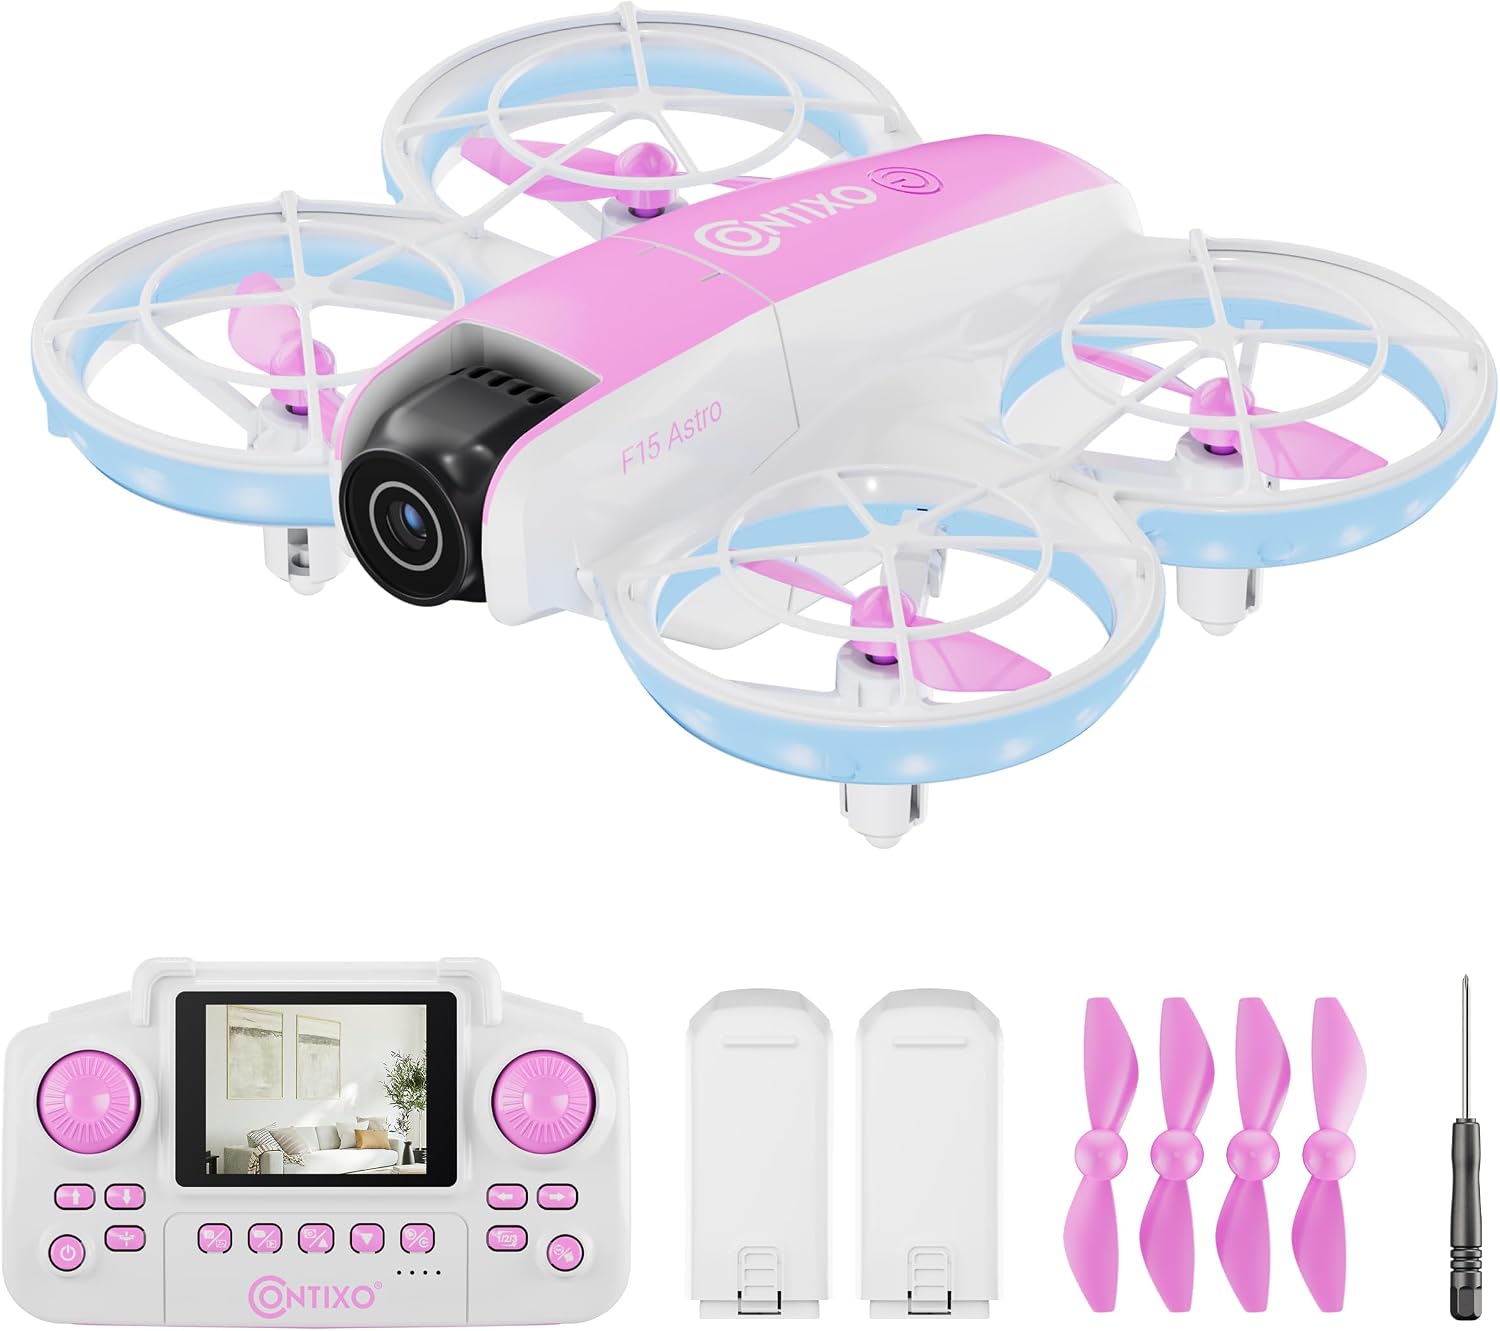
Image: The Contixo F15 Astro Mini Drone, showcasindzięki kompaktowej konstrukcji i oświetleniu LED.
2. Wytyczne bezpieczeństwa
- Zawsze używaj drona na otwartej, czystej przestrzeni, z dala od ludzi, zwierząt i przeszkód.
- Do not fly near airports, restricted airspace, or power lines.
- Ensure the drone's battery and remote control batteries are fully charged before each flight.
- Nadzoruj dzieci podczas obsługi drona.
- Unikaj latania przy silnym wietrze lub niekorzystnych warunkach pogodowych.
- Do not touch the propellers while they are spinning.
3. Zawartość opakowania
Sprawdź, czy w przesyłce znajdują się wszystkie elementy:
- 1x F15 Astro Mini Drone
- 1x Remote Controller with 2.4" Screen
- 2x Drone Batteries
- 4x zapasowe śmigła
- 1x Śrubokręt
- Kabel ładowania USB 1x

Image: All components included in the Contixo F15 Astro Mini Drone package.
4. Komponenty dronaview
4.1 Dron
- Osłony śmigieł: Provide protection for propellers and enhance safety.
- Śmigła: Generowanie siły nośnej dla lotu.
- Kamera 720P HD: Captures photos and videos, with adjustable tilt.
- Światła LED: Indicate drone status and provide visibility.
- Komora baterii: Zawiera akumulator drona.

Image: The Contixo F15 Astro Mini Drone highlighting its protected propeller design.
4.2 Pilot zdalnego sterowania
- Ekran 2.4": Displays live video feed from the drone's camera.
- Lewy joystick: Kontroluje wysokość (w górę/w dół) i obrót (w lewo/w prawo).
- Prawy joystick: Kontroluje ruch do przodu/do tyłu oraz w lewo/w prawo.
- Przycisk startu/lądowania jednym klawiszem: Inicjuje automatyczny start lub lądowanie.
- Przycisk obrotu 360°: Activates aerial stunt mode.
- Photo/Video Buttons: Capture images or start/stop video recording.

Image: The Contixo F15 Astro remote control with its integrated 2.4-inch screen for live video display.
5. Konfiguracja
5.1 Ładowanie akumulatora drona
- Wyjmij baterię drona z drona.
- Connect the USB charging cable to the battery and a USB power source (e.g., computer, USB wall adapter).
- The indicator light on the charging cable will show charging status (refer to cable instructions for specific light patterns).
- Charging typically takes approximately 60-90 minutes.

Image: The Contixo F15 Astro Mini Drone and its two included rechargeable batteries.
5.2 Montaż akumulatora drona
- Upewnij się, że dron jest wyłączony.
- Carefully insert the fully charged battery into the battery compartment on the drone's underside.
- Zabezpiecz pokrywę baterii.
5.3 Instalowanie baterii w pilocie zdalnego sterowania
- Otwórz komorę baterii znajdującą się z tyłu pilota.
- Włóż 3 baterie AAA (nie ma ich w zestawie) zgodnie z oznaczeniami biegunów.
- Dokładnie zamknij komorę baterii.
5.4 Pairing Drone and Remote
- Umieść drona na płaskiej, poziomej powierzchni.
- Power on the drone. The drone's LED lights will flash.
- Włącz pilota.
- Push the left joystick up to its maximum position, then pull it down to its minimum position. The drone's LED lights will stop flashing and remain solid, indicating successful pairing.
5.5 Kalibracja żyroskopu
- After pairing, ensure the drone is still on a flat, level surface.
- Simultaneously push both joysticks down and to the bottom-right corner.
- The drone's LED lights will flash rapidly and then become solid, indicating successful calibration.
Video: A detailed guide on how to use the Contixo F15 Astro Drone, covering setup and basic operations.
6. Obsługa drona
6.1 Start i lądowanie jednym klawiszem
- Startować: After pairing and calibration, press the One-Key Takeoff/Landing button. The drone will automatically ascend and hover at a stable altitude.
- Lądowanie: During flight, press the One-Key Takeoff/Landing button again. The drone will slowly descend and land automatically.

Image: Visual representation of the one-touch takeoff and landing feature of the F15 Astro drone.
6.2 Podstawowe sterowanie lotem
- Lewy joystick (przepustnica/odchylenie):
- Wciśnij w górę/w dół: Zwiększ/zmniejsz wysokość.
- Push left/right: Rotate drone left/right.
- Right Joystick (Forward/Backward/Sideways):
- Push up/down: Fly forward/backward.
- Push left/right: Fly left/right (strafe).
6.3 Optical Flow Hover
The F15 Astro drone features Optical Flow Hover technology, which uses a downward-facing camera to detect patterns on the ground and maintain a stable position. This feature helps the drone hover steadily, making it easier to control, especially for beginners.
6.4 360° Stunts
To perform a 360° flip:
- Ensure the drone is flying at a sufficient height (at least 2-3 meters).
- Press the 360° Flip button on the remote control.
- Aby wykonać salto, natychmiast naciśnij prawy joystick w wybranym kierunku (do przodu, do tyłu, w lewo lub w prawo).

Image: The Contixo F15 Astro Mini Drone performing a 360-degree flip.
6.5 Camera Operation (720P HD)
The drone is equipped with a 720P HD camera that can capture photos and videos. The camera angle can be manually adjusted before flight.
- Wideo na żywo: The 2.4" screen on the remote control provides a real-time live video feed from the drone's camera.
- Robienie zdjęć: Press the Photo button on the remote control to capture a still image.
- Nagrywanie wideo: Press the Video button once to start recording, and press it again to stop recording.

Image: The 720P HD camera of the F15 Astro drone, featuring an adjustable angle.
Video: A demonstration of the Contixo F15 Astro Drone's features and flight capabilities.
7. Konserwacja
7.1 Czyszczenie
- Do czyszczenia drona i pilota używaj miękkiej, suchej ściereczki.
- Nie należy używać wody ani środków czyszczących, gdyż mogą one uszkodzić urządzenia elektroniczne.
7.2 Wymiana śmigła
If a propeller is damaged, replace it with a spare propeller from the package. Use the included screwdriver to carefully remove the screw holding the damaged propeller and install the new one, ensuring it is securely fastened.
7.3 Pielęgnacja baterii
- Przechowuj baterie w chłodnym, suchym miejscu.
- Nie należy przeładowywać ani nadmiernie rozładowywać akumulatorów.
- If the drone will not be used for an extended period, remove the batteries from both the drone and the remote control.
8. Rozwiązywanie Problemów
| Problem | Możliwa przyczyna | Rozwiązanie |
|---|---|---|
| Dron nie reaguje na pilota. | Brak sparowania lub słaba bateria. | Ensure drone and remote are powered on and paired correctly. Check battery levels. |
| Dron dryfuje w czasie lotu. | Żyroskop nie jest skalibrowany. | Kalibrację żyroskopu należy przeprowadzać na płaskiej powierzchni. |
| Poor video quality or no live feed. | Weak signal or camera issue. | Ensure drone is within range. Check for obstructions. Restart drone and remote. |
| Śmigła się nie kręcą. | Przeszkoda lub uszkodzenie. | Check for hair or debris around propellers. Replace damaged propellers. |
9. Specyfikacje
- Marka: Contixo
- Nazwa modelu: F15 Astro
- Kamera: 720P HD, Adjustable Angle
- Remote Screen: 2.4 cali
- Pojemność baterii: 580 mAh (litowo-polimerowy)
- Wymiary produktu: 10" dł. x 7" szer. x 2" wys.
- Cechy lotu: Optical Flow Hover, One-Key Takeoff/Landing, 360° Stunts
10. Gwarancja i wsparcie
For warranty information, technical support, or any questions regarding your Contixo F15 Astro Mini Drone, please refer to the contact information provided on the product packaging or visit the official Contixo webstrona. Zachowaj dowód zakupu na potrzeby roszczeń gwarancyjnych.
Wideo: Wprowadzenieview of the Contixo F15 Astro Drone, highlighting its key features.


