
1. Wprowadzenie
The AOPUTTRIVER AP-5000Y is a versatile hot wire anemometer designed for accurate measurement of wind speed, airflow (CFM/CMM), and temperature. Its retractable, 360° revolving probe allows for precise measurements in various environments, including tight spaces like HVAC ducts. This manual provides essential information for the proper setup, operation, maintenance, and troubleshooting of your device.
2. Co znajduje się w pudełku
- AP-5000Y Hot Wire Anemometer Unit
- Torba płócienna
- Instrukcja obsługi
- Kabel danych (typ C)

Image: Contents of the AP-5000Y package, showing the anemometer, canvas bag, instruction manual, and Type-C data cable.
3. Konfiguracja
Before initial use, it is crucial to connect the internal battery and fully charge the device.
- Podłącz akumulator:
Locate the battery compartment on the back of the device. Use a small screwdriver to remove the battery cover. Connect the battery line interface to the corresponding port inside the compartment. Ensure a secure connection.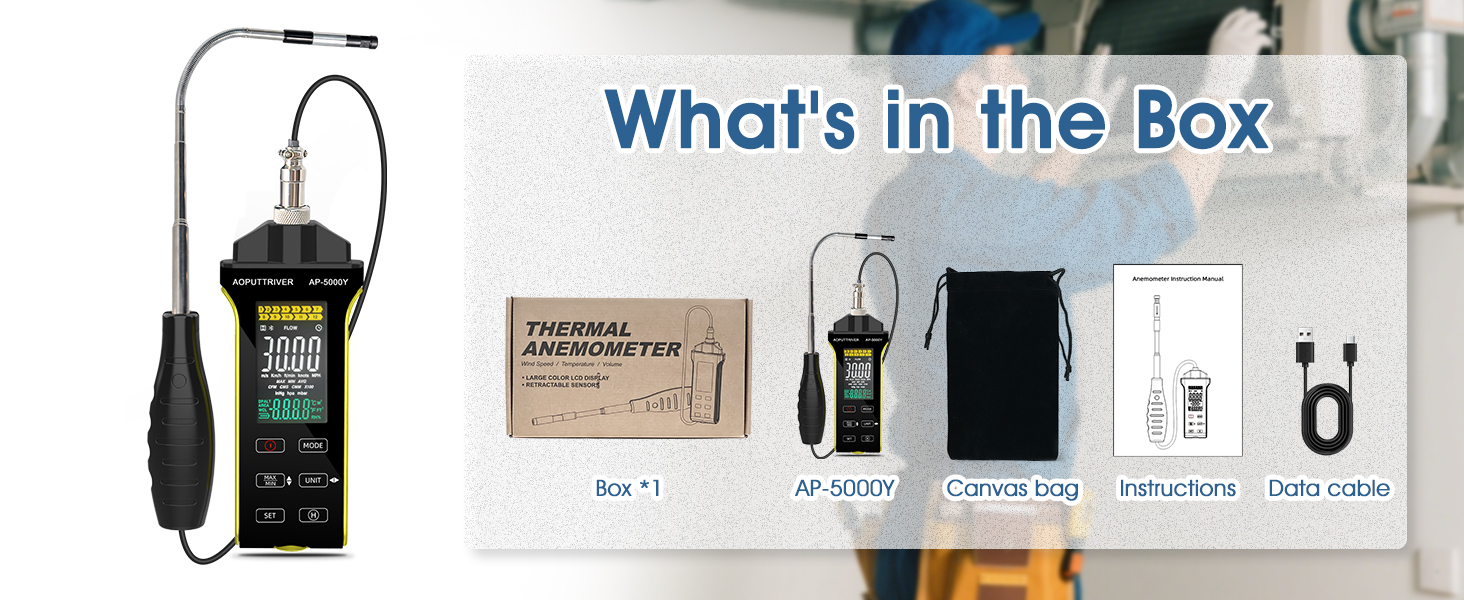
Image: Detailed steps for connecting the internal battery. This involves removing the battery cover with a screwdriver, connecting the battery cable, and then securing the cover.
- Zabezpiecz pokrywę baterii:
Once the battery is connected, carefully place the battery back into its compartment and tighten the cover using the screwdriver. - Naładuj urządzenie:
Connect the provided Type-C data cable to the anemometer and a suitable USB power source. The device is powered by a 600mAh lithium-ion battery. The battery icon on the LCD will indicate charging status. Charge until the battery icon shows a full charge. Note: The device cannot be turned on while it is charging.
4. Instrukcja obsługi
4.1 Urządzenie ponadview i sterowanie
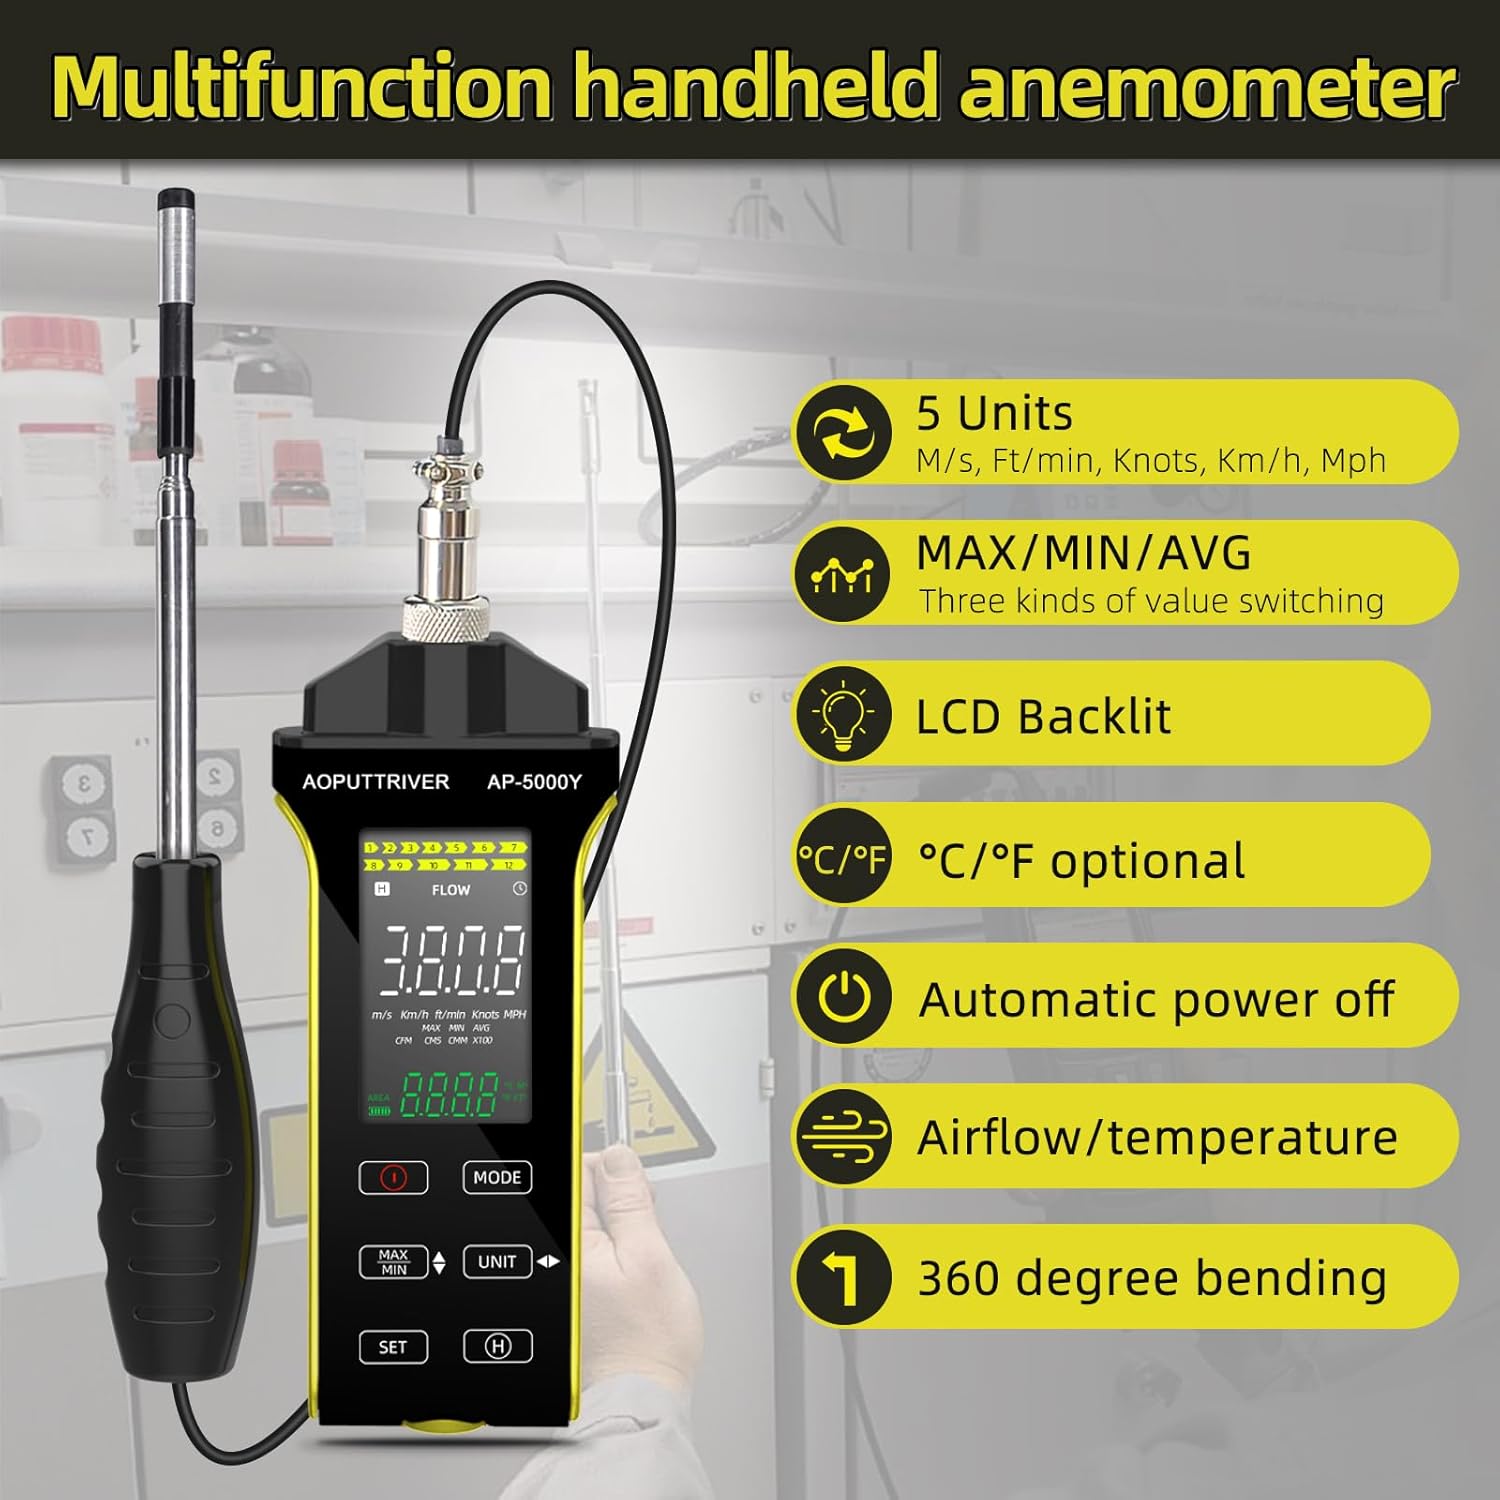
Image: Labeled diagram of the AP-5000Y anemometer, highlighting the LCD screen, power button, mode selection, unit selection, data retention, and the retractable sensor probe with its protective cover.
- Przycisk włączania/wyłączania: Naciśnij, aby włączyć lub wyłączyć urządzenie.
- Przycisk TRYB: Cycles through different measurement functions (Air Speed, Air Volume, Temperature).
- Przycisk JEDNOSTKA: Changes the measurement units for the selected function (e.g., m/s, km/h, ft/min, knots, mph for wind speed; CFM/CMM for airflow; °C/°F for temperature).
- Przycisk MAX/MIN/ŚREDNIA: Toggles between maximum, minimum, and average values recorded during a measurement session.
- Przycisk SET: Used for data retention (data hold) and other settings.
- Wyświetlacz LCD: Shows real-time measurements, units, battery status, and other indicators. Features a backlight for visibility in low-light conditions.
4.2 Wykonywanie pomiarów
- Włączanie: Press the On/Off button to turn on the anemometer. The LCD display will illuminate.
- Wybierz tryb: Naciśnij TRYB button to choose between wind speed, airflow, or temperature measurement.
- Wybierz jednostki: Naciśnij JEDNOSTKA button to select your desired measurement units.
- Przygotuj sondę: Gently pull out the retractable probe to the desired length. Remove the sensor protective cover. The probe can be rotated and twisted 360 degrees for optimal positioning in various spaces.

Image: A user demonstrating the use of the AP-5000Y anemometer with its flexible, retractable probe extended and bent to measure airflow inside a ventilation duct.
- Pozycja sondy: Place the sensor end of the probe directly into the airflow or area you wish to measure. Ensure the sensor is fully exposed to the flow for accurate readings.
- Przeczytaj pomiary: Observe the real-time values on the LCD display. You can press the MAX/MIN/ŚREDNIE przycisk do view the maximum, minimum, or average readings during your measurement session.
- Przechowywanie danych: Naciśnij USTAWIĆ Naciśnij przycisk, aby zamrozić aktualny odczyt na wyświetlaczu. Naciśnij go ponownie, aby zwolnić.
- Wyłączone: After use, retract the probe and replace the sensor protective cover. Press the On/Off button to turn off the device. The anemometer also features an automatic power-off function to conserve battery.
4.3 LCD Display with Backlight
The LCD display provides clear readings of wind speed, airflow, temperature, and humidity. It is equipped with a backlight for enhanced visibility in various lighting conditions. To activate or deactivate the backlight, refer to the specific instructions in the full user manual if not controlled automatically.

Image: A comparison showing the AP-5000Y's LCD display in both a well-lit room and a dark environment, demonstrating the clarity provided by its backlight feature.
5. Konserwacja
- Czyszczenie: Wipe the device and probe with a soft, dry cloth. Do not use abrasive cleaners or solvents. The probe is waterproof and dustproof, but avoid submerging the main unit in liquids.
- Pielęgnacja czujnika: Always replace the sensor protective cover when the probe is not in use to prevent damage to the delicate hot wire sensor.
- Pielęgnacja baterii: Recharge the lithium-ion battery when the low battery indicator appears on the display. For long-term storage, ensure the battery is partially charged (around 50%) and store the device in a cool, dry place.
- Składowanie: Store the anemometer in its canvas bag to protect it from dust and physical damage.
6. Rozwiązywanie Problemów
| Problem | Możliwa przyczyna | Rozwiązanie |
|---|---|---|
| Urządzenie się nie włącza | Akumulator nie jest podłączony lub jest rozładowany | Ensure the internal battery is properly connected (refer to Setup section). Charge the device using the Type-C cable. |
| Niedokładne odczyty | Incorrect probe placement, wrong unit selected, sensor obstruction | Ensure the probe's hot wire sensor is fully exposed to the airflow. Verify that the correct measurement mode and units are selected. Clean the sensor if necessary. |
| Wyświetlacz jest pusty lub przyciemniony | Low battery, backlight off | Recharge the battery. Check if the backlight needs to be manually activated (refer to Operating Instructions). |
| Urządzenie się nie ładuje | Cable issue, power source issue | Ensure the Type-C cable is securely connected. Try a different USB power adapter or port. |
7. Specyfikacje
| Funkcja | Specyfikacja |
|---|---|
| Zakres prędkości powietrza | 0.1 ~ 30 m / s |
| Jednostki prędkości powietrza | m/s, km/h, stopy/min, węzły, mile na godzinę |
| Zakres temperatury powietrza | 0 ~ 45 ° C (32 ~ 113 ° F) |
| Zakres objętości powietrza | 0 ~ 999900 m³/min (CFM/CMM) |
| Rozmiar sondy | 298.5 x 40.84 x 23.7 mm (retractable) |
| Bateria | 600mAh litowo-jonowy |
| Interfejs ładowania | Typ C |
| Wymiary (jednostka główna) | 5.74 x 2.36 x 1.1 cala |
| Waga | 237 gram |
| Tworzywo | Plastikowy |
| Wyświetlacz | LCD z podświetleniem |
| Cechy specjalne | Retractable 360° revolving probe, MAX/MIN/AVG, Data Hold, Auto Power-Off, Waterproof & Dustproof Probe |
8. Gwarancja i wsparcie
For specific warranty information regarding your AOPUTTRIVER AP-5000Y Hot Wire Anemometer, please refer to the documentation included with your purchase or contact the seller directly. Warranty terms may vary based on region and retailer.
Should you encounter any issues or require technical assistance, please contact AOPUTTRIVER customer support through their official website or the retailer from whom you purchased the product. Please have your model number (AP-5000Y) and purchase details ready when contacting support.