
1. Wprowadzenie
This manual provides instructions for the CallToU Wireless Door Chime Door Opening Sensor. This device is designed to notify you when a door or window is opened, offering a solution for monitoring entrances, securing premises, and assisting with caregiving. It features a wireless design, adjustable volume, and multiple melody options.
2. Główne cechy
- Door Opening Detection: Alerts you immediately when a door or window is opened.
- Nadajnik wodoodporny IP55: The transmitter sensor is IP55 rated, allowing for outdoor installation in areas like entryways, garages, or back doors, protecting against rain and moisture.
- AAA Battery Powered Transmitter: Uses easily replaceable AAA batteries (one included per sensor) with an LED indicator for low battery status.
- Wireless Communication up to 150m: Provides reliable signal transmission across multiple rooms or floors, up to a maximum range of 150 meters in open areas.
- Rozszerzalny system: Both receivers and transmitters can be added to manage multiple doors or windows simultaneously.
- Regulowana głośność i melodie: Features 5 volume levels (0dB to approximately 110dB) and 55 selectable melodies to suit various environments and preferences.
- AC Powered Receiver: The receiver plugs directly into a standard AC outlet, requiring no batteries.

Obraz: Ponadview of the CallToU Door Chime system highlighting its features like waterproof design, AAA battery, low battery notification, long range, adjustable volume, and expandability.

Image: The IP55 waterproof transmitter sensor, suitable for outdoor use in various weather conditions.
3. Zawartość opakowania
W skład pakietu wchodzą następujące elementy:
- Receiver Unit (AC powered) x 2
- Transmitter Sensor (AAA battery powered) x 1
- AAA Battery x 1 (for transmitter)
- Taśma dwustronna klejąca
- Śruby montażowe i kotwy
- Mały śrubokręt krzyżakowy
- English Instruction Manual (Japanese version available via QR code in the manual)

Image: Visual representation of the package contents, including receiver, door sensor, double-sided tape, screwdriver, and instruction manual.
4. Instrukcje konfiguracji
4.1 Installing the Transmitter Sensor
- Przygotuj powierzchnię: Clean the surface where the sensor will be installed to ensure proper adhesion.
- Przyklej taśmę klejącą: Apply the double-sided adhesive tape to the back of both the main sensor unit and the smaller magnetic strip.
- Zamontuj czujnik: Attach the main sensor unit to the door frame or window frame. Attach the smaller magnetic strip to the door or window itself.
- Zapewnij prawidłowe wyrównanie: The distance between the main sensor unit and the magnetic strip must be within 3 cm when the door/window is closed. Ensure they are aligned horizontally for optimal performance.
- Montaż baterii: Open the transmitter sensor cover using the provided screwdriver and insert the AAA battery, ensuring correct polarity.
Note: This sensor is not suitable for metal doors, as metal can interfere with its operation. If the gap between the sensor and magnet is greater than 3cm, it may not function correctly.

Image: Step-by-step guide for installing the transmitter sensor, showing surface cleaning, tape application, and correct alignment within 3cm, with warnings for wide gaps and metal doors.
4.2 Installing the Receiver Unit
- Plug the receiver unit directly into a standard AC power outlet.
- Place the receiver in a central location or an area where you wish to receive notifications. The wireless range is up to 150 meters.
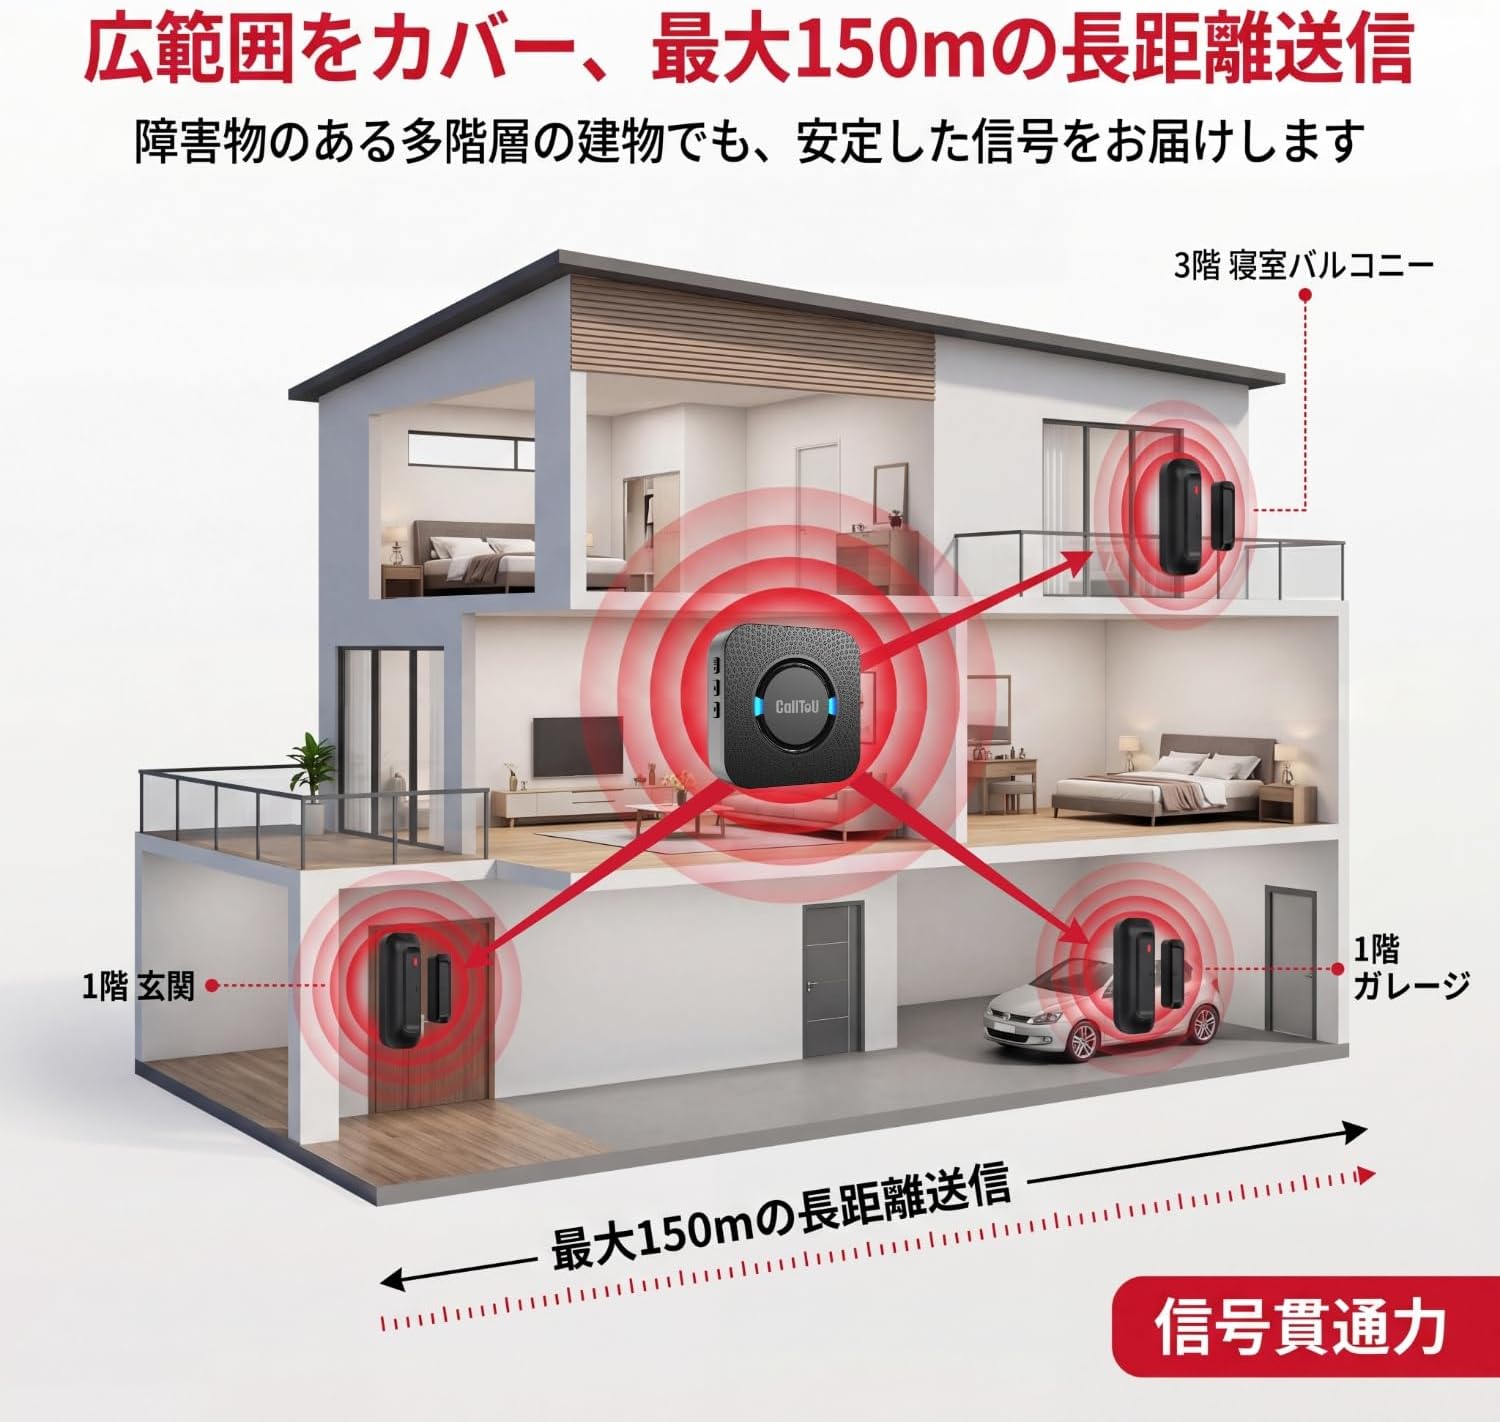
Image: Diagram illustrating the 150m wireless communication range, showing signal transmission from sensors on different floors and garage to a central receiver.
5. Działanie
5.1 Pairing Sensors (if needed)
The units are typically pre-paired. If re-pairing or adding new sensors:
- Podłącz odbiornik.
- Press and hold the pairing button on the receiver (refer to the detailed manual for exact button location) until an indicator light flashes.
- Trigger the transmitter sensor by separating the main unit and magnetic strip. The receiver should chime, indicating successful pairing.
5.2 Regulacja głośności
- On the receiver unit, locate the volume control button.
- Press the button repeatedly to cycle through the 5 available volume levels (0dB to 110dB). Select the desired volume.
5.3 Zmiana melodii
- On the receiver unit, locate the melody selection buttons (often labeled "forward" and "back").
- Press these buttons to browse through the 55 available melodies.
- The selected melody will play as you cycle through them. The last played melody will be saved.

Image: Illustration of the receiver unit showing volume adjustment from 0dB (silent) to 110dB (loud), and the selection of 55 different melodies.
6. Konserwacja
6.1 Battery Replacement (Transmitter Sensor)
- When the LED indicator on the transmitter sensor flashes or the signal becomes weak, it's time to replace the battery.
- Use the provided small Phillips screwdriver to open the battery compartment cover on the transmitter.
- Remove the old AAA battery and insert a new one, ensuring correct polarity (+/-).
- Dokładnie zamknij pokrywę komory baterii.

Image: Diagram showing the internal components of the transmitter sensor and the process of replacing the AAA battery, along with a visual of the low battery indicator.
6.2 Czyszczenie
Przetrzyj urządzenia miękką, suchą ściereczką. Nie używaj środków czyszczących o właściwościach ściernych ani rozpuszczalników.
7. Specyfikacje
| Funkcja | Szczegół |
|---|---|
| Marka | CallToU |
| Model | 1-2 |
| Moc odbiornika | Wtyczka AC |
| Moc nadajnika | 1 bateria AAA (w zestawie) |
| Stopień wodoodporności nadajnika | IP55 |
| Zasięg bezprzewodowej | Do 150 metrów (otwarta przestrzeń) |
| Poziomy głośności | 5 (0dB do 110dB) |
| Opcje melodii | 55 |
| Wymiary odbiornika | 80 x 80 x 24 mm (około) |
| Wymiary nadajnika | 72 x 25 x 20 mm (około) |
| Waga produktu | 250 g (waga opakowania) |

Obraz: Szczegółowy view of the receiver and transmitter, showing their components and approximate dimensions.
8. Rozwiązywanie Problemów
- Brak dźwięku z odbiornika:
- Ensure the receiver is properly plugged into a live AC outlet.
- Check the volume setting; it might be set to 0dB (silent). Adjust the volume.
- Verify the transmitter sensor battery is not depleted. Replace if necessary.
- Re-pair the transmitter and receiver if they have lost connection.
- Transmitter Not Triggering:
- Check the distance between the main sensor unit and the magnetic strip. It must be within 3 cm when closed.
- Ensure the transmitter battery is not depleted. Replace if necessary.
- Verify the sensor is not installed on a metal surface, which can interfere with its operation.
- Krótki zasięg bezprzewodowy:
- Obstacles like thick walls, metal structures, or other electronic devices can reduce the wireless range. Try repositioning the receiver or transmitter.
- Sprawdź, czy bateria nadajnika nie jest słaba.
- Fałszywe alarmy:
- Upewnij się, że czujnik i magnes są solidnie zamontowane i nie przesuwają się.
- Verify the gap between the sensor and magnet is consistent and within 3cm when closed.
9. Gwarancja i wsparcie
CallToU provides support for initial defects or malfunctions. If you encounter any issues with your product, please contact customer support through your order history. Please refer to the detailed English instruction manual (or the Japanese version accessible via QR code) for further information.


