
1. Wprowadzenie
This manual provides essential information for the safe and efficient operation of your PowMr 4000W Hybrid Solar Inverter. This device is designed to convert 24VDC battery power into 110/120VAC pure sine wave electricity, integrating a 140A MPPT charge controller for optimal solar energy utilization. It supports various battery types and off-grid system configurations. Please read this manual thoroughly before installation and use, and retain it for future reference.
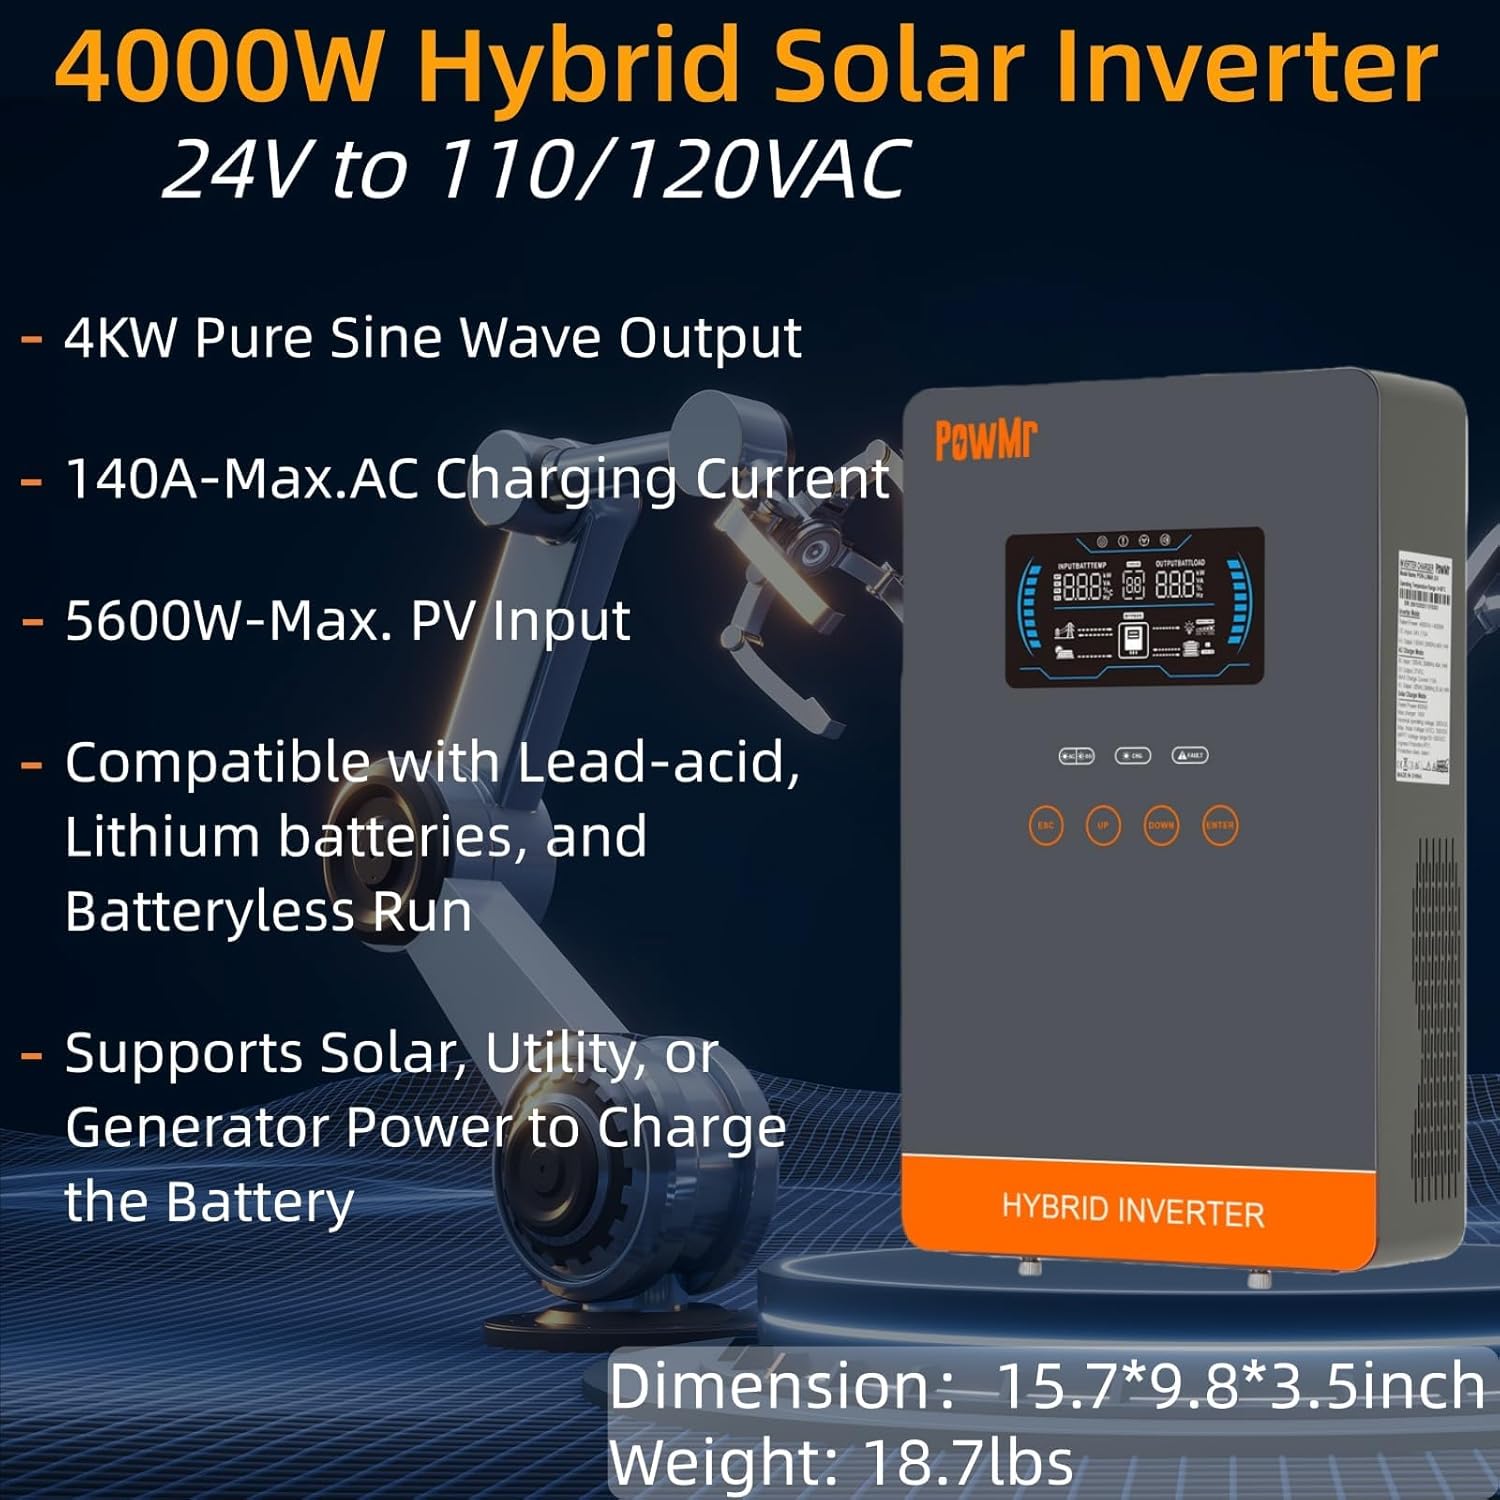
Image: The PowMr 4000W Hybrid Solar Inverter, highlighting its 4KW pure sine wave output, 140A max AC charging current, 5600W max PV input, compatibility with various batteries, and support for solar, utility, or generator power to charge the battery. Dimensions are 15.7"L x 9.8"W x 3.5"H and weight is 18.7lbs.
2. Instrukcje bezpieczeństwa
Aby zmniejszyć ryzyko porażenia prądem, pożaru lub obrażeń ciała, należy zawsze przestrzegać następujących środków ostrożności:
- Instalacja musi być przeprowadzona przez wykwalifikowany personel.
- Upewnij się, że całe okablowanie ma właściwy rozmiar i jest właściwie zaizolowane.
- Nie rozmontowuj falownika. Wewnątrz nie ma żadnych części, które mogłyby zostać naprawione przez użytkownika.
- Trzymaj falownik z dala od materiałów łatwopalnych, wilgoci i bezpośredniego światła słonecznego.
- Aby zapobiec przegrzaniu, należy zapewnić odpowiednią wentylację wokół falownika.
- Przed przystąpieniem do prac konserwacyjnych lub podłączania przewodów należy zawsze odłączyć wszystkie źródła zasilania (panele fotowoltaiczne, akumulator, wejście prądu przemiennego).
- Podczas instalacji i konserwacji należy nosić odpowiedni sprzęt ochrony osobistej (PPE).
3. Koniec produktuview
3.1. Funkcje
- Czysta fala sinusoidalna na wyjściu: Zapewnia stabilne i czyste zasilanie, odpowiednie dla delikatnych urządzeń elektronicznych.
- Zintegrowany kontroler ładowania MPPT: 140A MPPT for efficient solar charging.
- Szeroka kompatybilność baterii: Supports AGM, Gel, Lead-acid, Lithium-ion, and LiFePO4 batteries.
- Tryb bezbateryjny: Can power loads directly from PV/AC grid without a connected battery.
- Wiele trybów ładowania: Solar Only, Mains Only, Mains & Solar Hybrid.
- Wiele trybów wyjściowych obciążenia: Utility Priority, Solar Priority, Solar and SBU Priority.
- Ochrona zaawansowana: Zwarcie, ponad voltage, pod voltage, overload, reverse polarity, over-temperature, and backfill protection.
- Przyjazny dla użytkownika interfejs: 6.25-inch LCD screen with touch controls for real-time data display.
- Porty komunikacyjne: RS485 and RS232 for monitoring and control.
3.2. Identyfikacja komponentów

Image: A detailed diagram of the PowMr Hybrid Solar Inverter, showing its front panel and connection ports. Key components labeled include: 1. LCD display, 2. Status indicator, 3. Charging indicator, 4. Fault indicator, 5. Function touch buttons, 6. On/off switch, 7. AC input, 8. AC output, 9. PV input, 10. Battery input, 11. RS485/RS232 communication port.
3.3. Funkcje ochronne

Image: An illustration detailing the comprehensive protection features of the inverter, including Short Circuit Protection, Over-Load Protection, Over Current Protection, Backfill Protection, Over Voltage Protection, Over-Temperature Protection, Under VoltagOchrona e i ochrona przed przeładowaniem.
4. Zawartość opakowania
Po rozpakowaniu sprawdź, czy wszystkie przedmioty są obecne i nieuszkodzone:
- PowMr 4000W Hybrid Solar Inverter
- Instrukcja obsługi (ten dokument)
- Communication Cables (if applicable, check packaging)
- Sprzęt montażowy (jeśli dotyczy, sprawdź opakowanie)
5. Instalacja i konfiguracja
5.1. Montaż falownika
Select a suitable location for mounting the inverter. It should be:
- W pomieszczeniu, chronić przed bezpośrednim działaniem promieni słonecznych, deszczem i kurzem.
- Dobra wentylacja, pozwalająca na rozprowadzanie ciepła.
- Close to the battery bank to minimize cable length and voltagkropla.
- On a solid, non-flammable surface.
5.2. Schemat połączeń
Follow the wiring diagram carefully. Incorrect wiring can cause damage to the inverter, batteries, or connected loads, and may pose a safety hazard.

Image: A comprehensive wiring diagram illustrating connections for PV input, Mains/Generator input, AC output, and Battery input. It specifies voltage ranges, current ratings, and recommended wire gauges for each connection point.
5.3. Podłączenie akumulatora
The inverter is compatible with various 24V battery types. Ensure your battery bank matches the inverter's voltagi wymagania.

Image: An illustration showing the inverter's compatibility with various battery types including AGM, GEL, FLD (Flooded), LI (Lithium-ion), SLD (Sealed Lead-Acid), and USER-defined settings. It also indicates a maximum battery charging current of 140A (utility charging + solar charging).
- Connect the battery cables to the inverter's battery terminals, ensuring correct polarity (positive to positive, negative to negative).
- Mocno dokręć wszystkie połączenia.
5.4. PV Array Connection
- Connect the solar panel array to the PV input terminals, observing correct polarity.
- Ensure the PV array's open circuit voltage and power are within the inverter's specifications.
5.5. Podłączenie wejścia/wyjścia prądu przemiennego
- Connect the AC utility grid or generator to the AC input terminals.
- Podłącz obciążenia prądu przemiennego do zacisków wyjściowych prądu przemiennego.
- Ensure all AC connections are properly grounded.
6. Instrukcja obsługi
6.1. Włączanie/wyłączanie zasilania
- Włączanie: Ensure all connections are secure. First, connect the battery, then the PV array, and finally the AC input. Press the On/Off switch.
- Aby wyłączyć: Disconnect the AC input, then the PV array, and finally the battery. Press the On/Off switch.
6.2. Wyświetlacz LCD i elementy sterujące
The LCD screen displays real-time system data. Use the touch buttons to navigate menus and adjust settings.
6.3. Setting Charging and Output Modes
Falownik oferuje elastyczne tryby ładowania i mocy wyjściowej, dostosowane do różnych potrzeb w zakresie zarządzania energią.

Image: An illustration detailing the three charging modes (1. Only Solar, 2. Only Utility, 3. Solar+Utility) and three output modes (1. Utility First, 2. Solar First (default), 3. SBU priority). Steps to set programs are also provided: 1. Long press and hold ENTER button for 3s, 2. Press UP and DOWN to select setting programs, 3. Press ENTER to confirm or ESC to exit.
6.3.1. Tryby ładowania
- Tylko energia słoneczna: Ładuje akumulatory wyłącznie z paneli słonecznych.
- Tylko sieć: Charges batteries exclusively from the AC utility grid or generator.
- Sieciowe i hybrydowe solarne: Prioritizes solar charging, supplementing with AC utility/generator if solar power is insufficient.
6.3.2. Load Output Modes
- Priorytet użyteczności: Loads are primarily powered by the AC utility grid. Inverter switches to battery/solar if utility fails.
- Priorytet energii słonecznej: Loads are primarily powered by solar and battery. Inverter switches to utility if solar/battery power is insufficient.
- Priorytet SBU (energia słoneczna-akumulatorowa-użytkowa): Loads are primarily powered by solar, then battery, and finally by utility as a last resort.
7. Konserwacja
Regularna konserwacja zapewnia optymalną wydajność i długą żywotność falownika.
- Czyszczenie: Periodically clean the inverter's exterior with a dry cloth. Do not use liquid cleaners.
- Wentylacja: Ensure cooling fan vents are clear of dust and obstructions. The triple cooling fan design helps dissipate heat efficiently.
- Znajomości: Co roku należy sprawdzić wszystkie połączenia elektryczne pod kątem szczelności i oznak korozji.
- Środowisko: Maintain a clean, dry, and well-ventilated environment around the inverter. The dust-proof design helps prevent dust ingress.
8. Rozwiązywanie Problemów
If you encounter issues, refer to the following common problems and solutions. For persistent issues, contact customer support.
| Problem | Możliwa przyczyna | Rozwiązanie |
|---|---|---|
| Falownik się nie włącza | Brak połączenia z baterią; Niski poziom naładowania bateriitage; On/Off switch off | Check battery connections; Charge battery; Turn on switch |
| Brak wyjścia AC | Overload; Short circuit; Inverter fault | Reduce load; Check for short circuits; Restart inverter |
| Ładowanie fotowoltaiczne nie działa | PV array disconnected; Insufficient sunlight; PV voltage za niskie/wysokie | Check PV connections; Ensure adequate sunlight; Verify PV array specifications |
| Ostrzeżenie o przeciążeniu | Connected loads exceed inverter capacity | Disconnect some loads; Ensure total load is within 4000W |
| Ostrzeżenie o wysokiej temperaturze | Słaba wentylacja; Zbyt wysoka temperatura otoczenia | Clear vents; Improve airflow; Relocate inverter if necessary |
9. Specyfikacje
Technical specifications for the PowMr 4000W Hybrid Solar Inverter:
| Parametr | Wartość |
|---|---|
| Numer modelu | POW-LVM4K-24V-FBA2 |
| Znamionowa moc wyjściowa | 4000 W |
| Wejście Voltage (prąd stały) | 24 V prądu stałego |
| Objętość wyjściatage (prąd przemienny) | 110/120 V AC |
| Przebieg wyjściowy | Czysta fala sinusoidalna |
| Maks. Obwód otwarty PV Objętośćtage | 350 V prądu stałego |
| Tablica fotowoltaiczna MPPT Objętośćtage Zakres | 55-350 V prądu stałego |
| Maksymalna moc wejściowa PV | 5600 W |
| Znamionowa objętość wejściowa siecitage | 110/120 V AC |
| Max. Hybrid Charging Current (AC+PV) | 140A |
| Komunikacja | RS485, RS232 |
| Typ wyświetlacza | LCD |
| Wymiary (dł. x szer. x wys.) | 15.7" dł. x 9.8" szer. x 3.5" wys. |
| Waga | 18.7 lbs (approximate, derived from image) |
10. Gwarancja i wsparcie
10.1. Informacje o gwarancji
The PowMr 4000W Hybrid Solar Inverter comes with an 18-miesięczna gwarancja od daty zakupu. Niniejsza gwarancja obejmuje wady materiałowe i wykonawcze powstałe w wyniku normalnego użytkowania. Nie obejmuje ona uszkodzeń spowodowanych nieprawidłową instalacją, niewłaściwym użytkowaniem, wypadkami, nieautoryzowanymi modyfikacjami lub klęskami żywiołowymi.
10.2. Obsługa klienta
For technical assistance, warranty claims, or any questions regarding your PowMr inverter, please contact PowMr customer support through the retailer's platform or the official PowMr website. Please have your model number (POW-LVM4K-24V-FBA2) and purchase date available when contacting support.