
1. Ważne informacje dotyczące bezpieczeństwa
Przed montażem i użytkowaniem łóżka piętrowego prosimy o dokładne zapoznanie się z instrukcją. Zachowaj instrukcję do wykorzystania w przyszłości.
- Nośność: The upper bunk is designed to support a maximum weight of 175 lbs (79 kg). The lower bunk is designed to support a maximum weight of 250 lbs (113 kg).
- Zalecany wiek: Górne łóżko piętrowe nie jest odpowiednie dla dzieci poniżej 6 roku życia.
- Zagrożenie upadkiem: Ensure guardrails are properly installed on the upper bunk. Do not allow horseplay on or under the bed. Always use the ladder for access to the upper bunk.
- Wymagania dotyczące materaca: Use only mattresses that meet the specified dimensions for twin size beds. Ensure the mattress thickness does not exceed the maximum indicated by the guardrail height.
- Montaż: Assembly should be performed by two adults. Ensure all fasteners are securely tightened before use. Periodically check and re-tighten fasteners.
- Wentylacja: Do not obstruct the ventilation openings of the light strip.
- Bezpieczeństwo elektryczne: Ensure the light strip is connected to a suitable power source and handled according to electrical safety guidelines. Disconnect power before cleaning or maintenance.
2. Zawartość opakowania
Przed rozpoczęciem montażu sprawdź, czy wszystkie elementy są obecne. Jeśli brakuje którejkolwiek części lub jest ona uszkodzona, skontaktuj się z obsługą klienta.
- Bed frame components (headboards, footboards, side rails, slats)
- Wardrobe unit components (panels, hanging rod, shelves)
- Four storage drawers (drawer fronts, sides, bottoms, hardware)
- Drabina
- Light strip and power adapter
- Pegboard panels and mounting hardware
- Assembly hardware (screws, bolts, nuts, cam locks, dowels)
- Assembly tools (Allen wrench, screwdriver)
3. Instalacja i montaż
Aby prawidłowo złożyć łóżko, należy postępować zgodnie z poniższymi krokami. Zaleca się montaż łóżka w pomieszczeniu, w którym będzie ono użytkowane.
- Przygotuj obszar: Przygotuj odpowiednią przestrzeń do montażu. Rozłóż wszystkie elementy na miękkiej, czystej powierzchni, aby zapobiec zarysowaniom.
- Assemble the Wardrobe Unit: Begin by assembling the main panels of the wardrobe unit. Secure the hanging rod and internal shelves as instructed.
- Attach Pegboard Panels: Mount the pegboard panels to the sides of the wardrobe unit using the provided hardware.
- Zainstaluj pasek świetlny: Carefully attach the integrated light strip to the designated area within the wardrobe. Ensure the wiring is routed safely and securely.
- Złóż ramy łóżek: Construct the upper and lower bed frames by attaching the side rails to the headboards and footboards.
- Connect Wardrobe to Bed Frame: Securely attach the assembled wardrobe unit to the bed frames using the connecting hardware.
- Montaż listew łóżka: Place and secure the wooden slats onto both the upper and lower bed frames. Ensure they are evenly spaced and firmly attached.
- Montaż szuflad: Construct the four storage drawers. Insert the drawer slides into the bed frame and attach the drawers.
- Zamontuj drabinę: Securely attach the ladder to the upper bunk frame.
- Kontrola końcowa: Verify that all bolts, screws, and fasteners are tightly secured. Do not overtighten.

Image: Fully assembled Polibi Twin Size Bunk Bed, showcasing the integrated wardrobe, four storage drawers, and ladder. The bed is shown in a room setting with bedding.

Obraz: Zbliżenie view of the wooden bed slats installed on the bed frame, demonstrating their support structure.
4. Instrukcja obsługi
4.1 Using the Wardrobe and Storage
- Drążek do zawieszania: Utilize the integrated hanging rod for organizing clothes. Ensure items are distributed evenly to prevent excessive strain.
- Półka do przechowywania: The top shelf within the wardrobe is suitable for hats, accessories, or folded garments.
- Szuflady do przechowywania: The four deep-set drawers beneath the bed frame are designed for storing blankets, pillows, clothing, or other items. Pull drawers gently to open and push firmly to close.
- Pegboard Panels: Use standard pegboard hooks (not included) to customize storage on the pegboard panels for headphones, bags, keys, or decorative items.
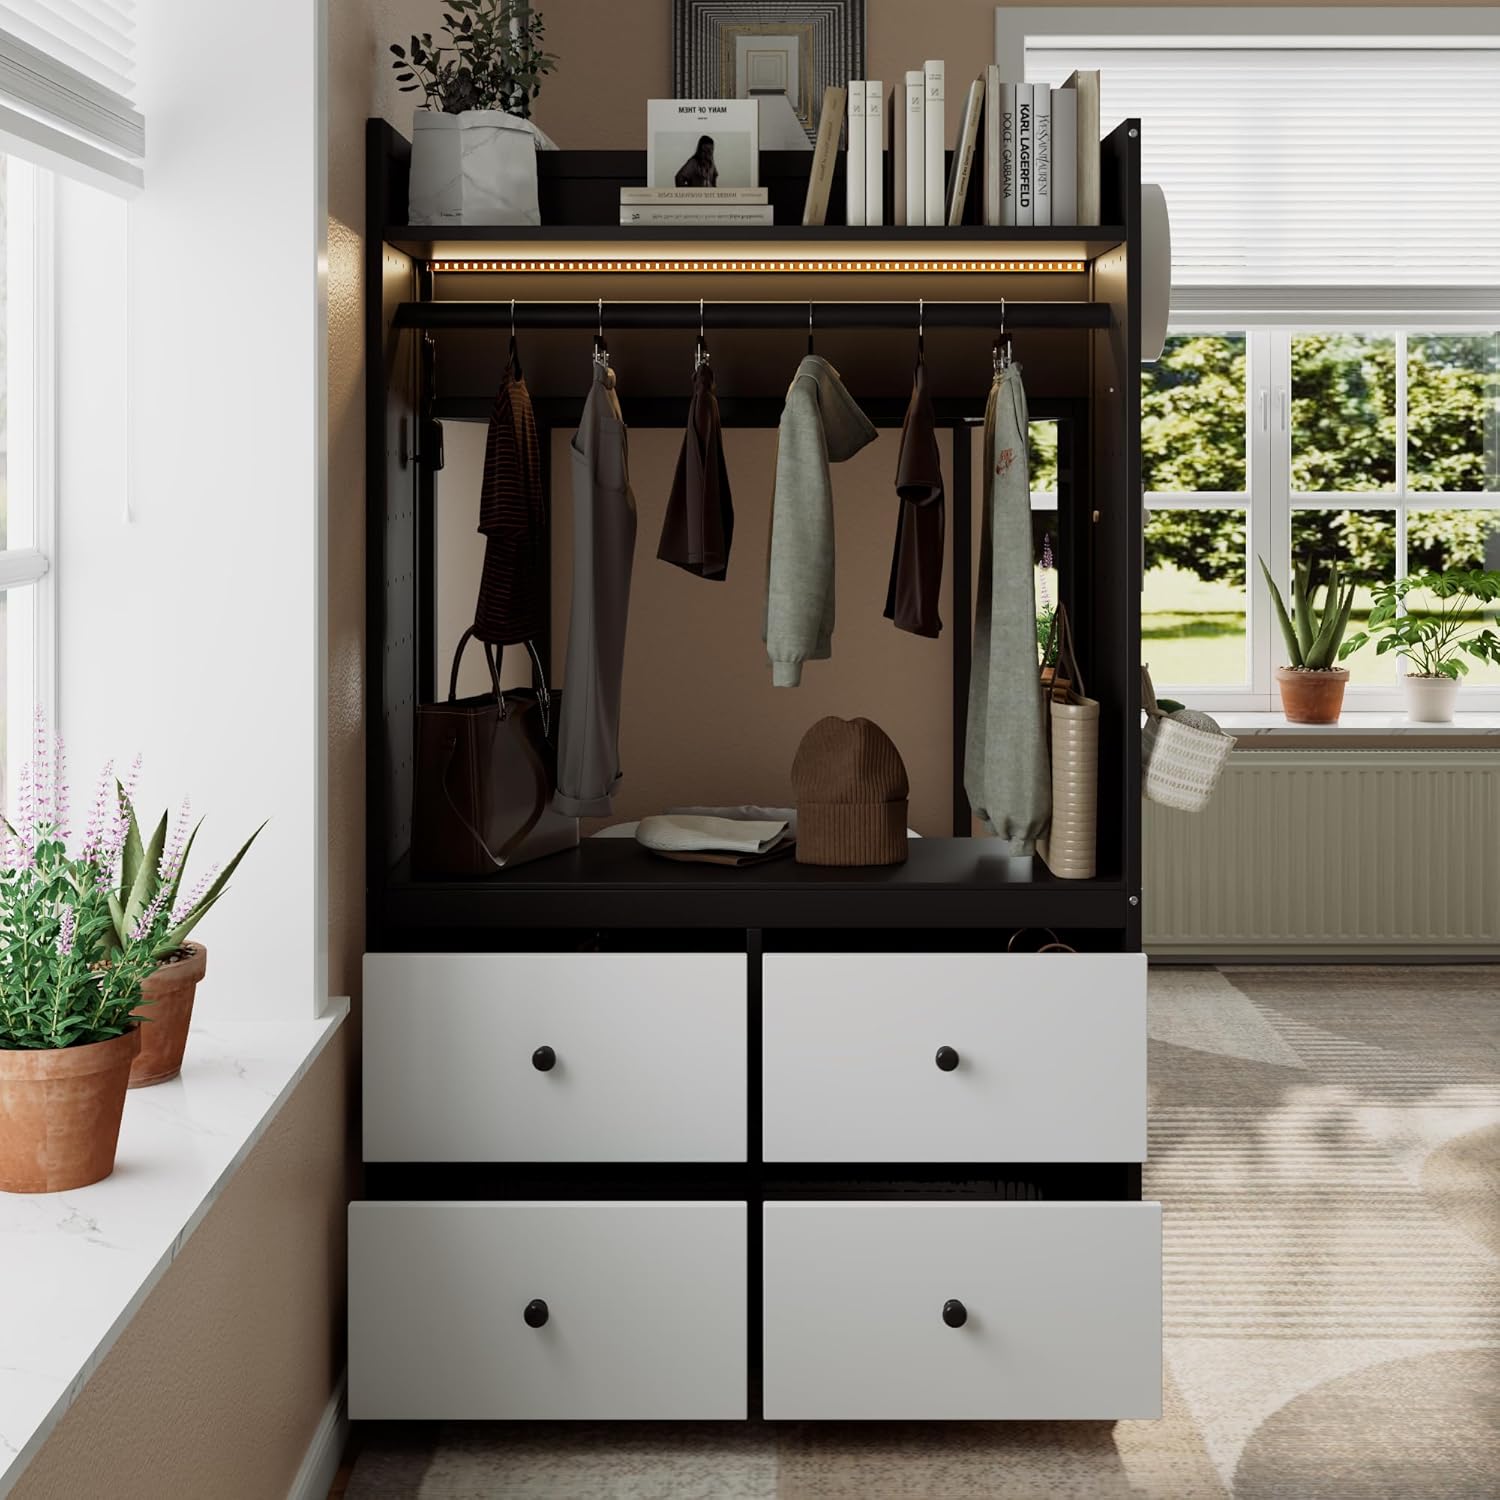
Obraz: Wnętrze view of the built-in wardrobe, showing clothes hanging on the rod, a top shelf, and the integrated light strip illuminating the space.

Obraz: Szczegółowy view of one of the four storage drawers pulled open, revealing its interior and the drawer knob.
4.2 Integrated Light Strip
- Włączanie/wyłączanie: The light strip is typically controlled by an inline switch or a remote control (if included). Refer to the light strip's specific instructions for operation.
- Regulacja jasności/koloru: Some light strips offer adjustable brightness or color settings. Consult the light strip's manual for these features.

Image: Close-up of the light strip installed above the hanging rod inside the wardrobe, showing its connection cable.
5. Konserwacja
- Czyszczenie: Przetrzyj powierzchnie miękką, damp szmatką. Unikaj silnych środków chemicznych i ściernych środków czyszczących, które mogą uszkodzić wykończenie.
- Kontrola elementów złącznych: Periodically (every 3-6 months) inspect all bolts, screws, and fasteners to ensure they remain tight. Re-tighten as necessary to maintain structural integrity and prevent squeaking.
- Pasek świetlny: Keep the light strip free from dust. If the light strip malfunctions, consult the manufacturer's instructions for troubleshooting or replacement.
- Prowadnice szuflad: Jeżeli szuflady stają się sztywne, nałóż niewielką ilość smaru silikonowego na prowadnice szuflad.
6. Rozwiązywanie Problemów
- Skrzypienie łóżka: Check all fasteners and tighten any loose connections. Ensure the bed is on a level surface.
- Drawers Stick/Don't Close Smoothly: Verify that the drawer slides are properly aligned and free of obstructions. Ensure drawers are not overloaded. Lubricate slides if necessary.
- Light Strip Not Working: Check the power connection and ensure the adapter is plugged into a working outlet. Verify the inline switch (if present) is in the 'on' position. If issues persist, the light strip may require replacement.
- Chwiejna rama: Ensure all structural bolts are fully tightened. Check for uneven flooring and use shims if needed to stabilize the bed.
7. Specyfikacje
| Numer modelu | B0GLP7X6FT |
| Marka | polibi |
| Kolor | Czarny |
| Rozmiar | Bliźniak |
| Tworzywo | Drewno |
| Wymiary produktu (dł. x szer. x wys.) | 92.7" x 40" x 65" |
| Cechy specjalne | Built-in Wardrobe, 4 Storage Drawers, Integrated Light Strip, Pegboard Organizer |

Image: Diagram illustrating the key dimensions of the Polibi Twin Size Bunk Bed, including length (92.7"), width (40"), and height (65").
8. Gwarancja i wsparcie
Polibi products are manufactured with quality and care. For specific warranty details, please refer to the warranty card included with your purchase or visit the official Polibi webstrona.
If you encounter any issues or require assistance with assembly, missing parts, or product operation, please contact Polibi customer support:
- Webstrona: Visit the Polibi Store on Amazon
- E-mail/Telefon: Refer to your purchase documentation or the Polibi webna tej stronie znajdziesz najbardziej aktualne dane kontaktowe.