Wstęp
This manual provides detailed instructions for setting up, operating, and maintaining your Bmax Mini PC B1 Pro. The B1 Pro is a compact and efficient mini desktop computer powered by an Intel Celeron N4000 processor, designed for various applications including office work, web browsing, and e-learning. It features 8GB LPDDR4 RAM, 128GB eMMC storage, 4K dual display support, and comes pre-installed with Windows 11 Pro.
Co jest w pudełku
Sprawdź zawartość paczki, aby upewnić się, że znajdują się w niej wszystkie elementy:
- 1x B1 Pro Intel Celeron N4000 Mini PC
- 1x HDMI Cable (1.5m)
- 1x zasilacz (wtyczka amerykańska)
- 1x User Guide (Multi-language)
- 1x VESA Mount (with Screws)

Image: Contents of the Bmax B1 Pro package, including the mini PC, HDMI cable, power adapter, user guide, and VESA mount with screws.
Produkt ponadview
Front and Side Ports
The Bmax B1 Pro Mini PC is equipped with a variety of ports for connectivity and expansion:
- 3.0 USB Porty: 2x for high-speed data transfer.
- 2.0 USB Porty: 2x for connecting peripherals.
- Port HDMI: 1x for video output, supporting up to 4K UHD resolution.
- Port VGA: 1x for video output, supporting up to 1080P HD resolution.
- Port Ethernet: 1x Gigabit Ethernet (1000Mbps) for wired network connection.
- Gniazdo słuchawkowe 3.5 mm: 1x for audio input/output.
- Gniazdo kart Micro SD: 1x for additional storage expansion.
- Moc w: Wejście zasilania prądem stałym.
- Przycisk zasilania: Aby włączyć/wyłączyć urządzenie.
- Wyczyść pamięć CMOS: Button for resetting BIOS settings.

Obraz: Szczegółowy view of the Bmax B1 Pro Mini PC, highlighting the location and type of each port, including USB 3.0, USB 2.0, Micro SD card slot, Power In, Power Button, HDMI, Ethernet, 3.5mm Headset Jack, VGA, and Clear CMOS button.
Główne cechy
- Edytor: Intel Celeron N4000 (Dual-Core, up to 2.6GHz).
- System operacyjny: Preinstalowany system Windows 11 Pro.
- Pamięć: 8 GB pamięci RAM LPDDR4.
- Składowanie: 128GB eMMC internal storage, expandable via M.2 2280 SATA SSD (up to 1TB) and Micro SD card.
- Grafika: Intel UHD Graphics 600, supporting 4K UHD via HDMI and 1080P HD via VGA.
- Łączność: Dual-Band Wi-Fi (2.4G/5G), Bluetooth 4.2, Gigabit Ethernet.
- Obsługa wyświetlania: Dual display output via HDMI and VGA ports.
- Chłodzenie: Fanless passive cooling design for silent operation.
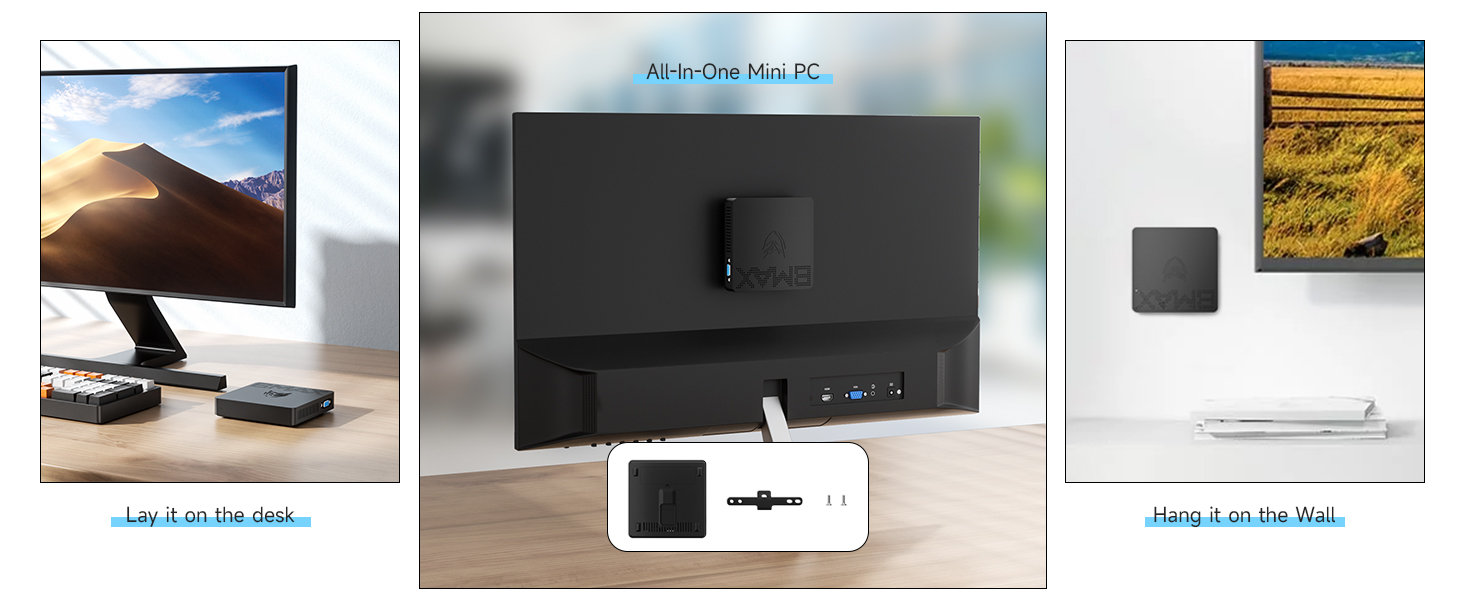
Image: Diagram illustrating the Intel Gemini Lake N4000 processor with specifications including 2 Cores, 2 Threads, 14nm Nanometre, 4MB Cache, 6W Power Consumption, and 2.6 GHz Burst Frequency.

Image: The Bmax B1 Pro Mini PC set up with two monitors, demonstrating its dual screen display capability via HDMI and VGA, alongside Wi-Fi 2.4GHz/5GHz and Bluetooth 4.2 icons.
Instrukcje konfiguracji
- Podłącz do wyświetlacza: Connect your monitor or TV to the Mini PC using the provided HDMI cable or a VGA cable (not included). The HDMI port supports 4K UHD, and the VGA port supports 1080P HD. For dual display, connect both ports to separate monitors.
- Podłącz urządzenia peryferyjne: Podłącz klawiaturę i mysz USB do dostępnych portów USB.
- Podłącz do zasilania: Podłącz zasilacz do portu DC-in w komputerze Mini PC, a następnie podłącz zasilacz do gniazdka elektrycznego.
- Włączanie: Press the power button on the Mini PC. The device will boot up automatically.
- Początkowa konfiguracja systemu Windows: Follow the on-screen instructions to complete the initial setup of Windows 11 Pro, including language, region, network connection, and user account creation.
Instrukcja obsługi
Podstawowa obsługa
- Włączanie/wyłączanie: Press the power button to turn the Mini PC on. To turn off, use the Windows shutdown option or press and hold the power button for a few seconds.
- Uruchom ponownie: Użyj opcji ponownego uruchomienia systemu Windows.
- Tryb uśpienia: Use the Windows sleep option or briefly press the power button.
Łączność sieciowa
- Wi-Fi: The Mini PC supports Dual-Band Wi-Fi (2.4G/5G). To connect, go to Windows Settings > Network & Internet > Wi-Fi, select your network, and enter the password.
- Ethernet: For a wired connection, plug an Ethernet cable into the Gigabit Ethernet port.
- Bluetooth: The device supports Bluetooth 4.2. To pair devices, go to Windows Settings > Bluetooth & devices.
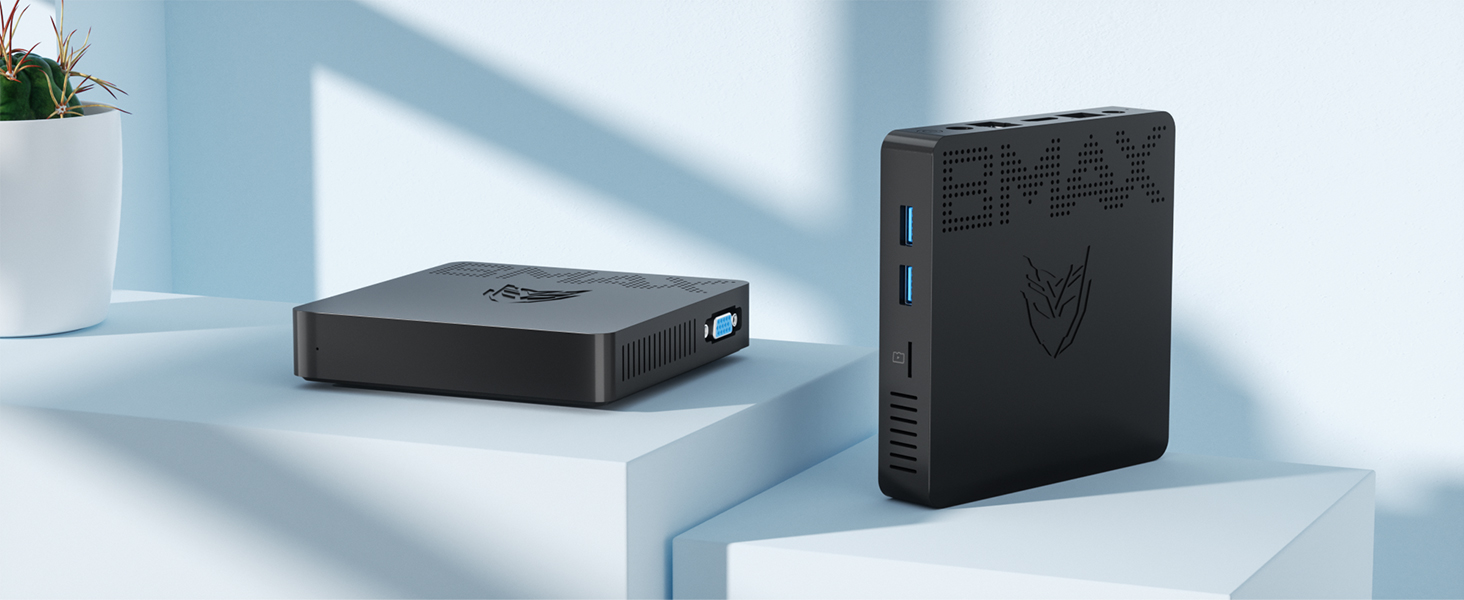
Image: The Bmax B1 Pro Mini PC on a desk next to a keyboard and mouse, with icons indicating 2.4GHz/5GHz Wi-Fi and Bluetooth 4.2 connectivity.
Konfiguracja podwójnego wyświetlacza
Aby skorzystać z funkcji podwójnego wyświetlania:
- Podłącz główny monitor do portu HDMI.
- Connect your secondary monitor to the VGA port.
- Once both monitors are connected and powered on, Windows should automatically detect them.
- Right-click on the desktop, select "Display settings," and configure your display preferences (e.g., extend, duplicate).
Rozszerzenie pamięci masowej
The Bmax B1 Pro comes with 128GB eMMC storage. For additional storage, you can install an M.2 2280 SATA SSD (up to 1TB, sold separately) or use a Micro SD card.
M.2 SSD Installation Steps:
- Ensure the Mini PC is powered off and disconnected from the power adapter.
- Locate the bottom cover of the Mini PC.
- Carefully remove the screws securing the bottom cover.
- Gently open the cover to access the internal components.
- Locate the M.2 2280 slot. Insert your M.2 SATA SSD into the slot and secure it with the provided screw (if applicable, or use one from the SSD package).
- Załóż dolną pokrywę i przykręć ją śrubami.
- Power on the Mini PC. You may need to initialize and format the new SSD in Windows Disk Management before use.

Image: A sequence of five images demonstrating the process of installing an M.2 2280 SATA SSD into the Bmax B1 Pro Mini PC, showing how to open the case and insert the drive.
Instalacja uchwytu VESA
The included VESA bracket allows you to mount the Bmax B1 Pro behind a monitor or TV, creating a clutter-free workspace.
- Attach the VESA bracket to the back of your monitor or TV using the provided screws. Ensure it is securely fastened to the VESA mounting holes.
- Slide the Bmax B1 Pro Mini PC onto the VESA bracket until it clicks into place.
- Connect all necessary cables (power, HDMI, peripherals) to the Mini PC.

Image: Three-step diagram showing how to install the Bmax B1 Pro Mini PC onto the back of a monitor using the VESA mount, illustrating the bracket attachment and PC sliding into place.
Konserwacja
- Czyszczenie: Do czyszczenia obudowy Mini PC należy używać miękkiej, suchej ściereczki. Nie należy używać płynów czyszczących ani aerozoli.
- Wentylacja: Ensure the ventilation holes are not obstructed to maintain proper airflow for the fanless cooling system.
- Aktualizacje oprogramowania: Regularnie aktualizuj system Windows i sterowniki, aby zapewnić optymalną wydajność i bezpieczeństwo.
- Zarządzanie pamięcią masową: Okresowo czyść niepotrzebne filei aplikacji w celu zwolnienia miejsca na dysku.
- Warunki środowiskowe: Operate the Mini PC in a well-ventilated area, away from direct sunlight, heat sources, and excessive moisture.
Rozwiązywanie problemów
| Problem | Możliwa przyczyna | Rozwiązanie |
|---|---|---|
| Brak zasilania / Urządzenie nie włącza się. | Zasilacz nie jest podłączony lub jest uszkodzony; problem z gniazdkiem elektrycznym. | Ensure the power adapter is securely connected to the Mini PC and a working power outlet. Try a different outlet. |
| Brak obrazu na monitorze. | Monitor not connected or turned on; incorrect input source; faulty cable. | Check HDMI/VGA cable connections. Ensure monitor is powered on and set to the correct input source. Try a different cable or monitor if possible. |
| Brak połączenia Wi-Fi. | Wi-Fi disabled; incorrect password; router issue. | Check Wi-Fi settings in Windows. Ensure Wi-Fi is enabled and the password is correct. Restart your router. |
| Niska wydajność. | Too many applications running; low storage space; outdated drivers. | Close unnecessary applications. Free up disk space. Update Windows and drivers. Consider adding an M.2 SSD for faster storage. |
| Urządzenia USB nie zostały rozpoznane. | Faulty USB port; driver issue; device malfunction. | Spróbuj innego portu USB. Zaktualizuj sterowniki USB. Przetestuj urządzenie na innym komputerze. |
Specyfikacje
| Marka | Bmax |
| Nazwa modelu | B1 Pro |
| System operacyjny | Windows 11 Pro |
| Model procesora | Procesor Intel Celeron N4000 |
| Prędkość procesora | Do 2.6 GHz |
| Koprocesor graficzny | Karta graficzna Intel UHD 600 |
| Zainstalowana pamięć RAM | 8 GB pamięci LPDDR4 |
| Pojemność pamięci masowej | 128 GB eMMC |
| Możliwość rozbudowy pamięci masowej | M.2 2280 SATA SSD (up to 1TB), Micro SD Card |
| Łączność bezprzewodowa | Wi-Fi 2.4G/5G, Bluetooth 4.2 |
| Łączność przewodowa | Gigabitowy Ethernet (1000 Mb/s) |
| Wyjście wideo | 1x HDMI (4K UHD), 1x VGA (1080P HD) |
| Porty USB | 2x USB 3.0, 2x USB 2.0 |
| Interfejs audio | Gniazdo słuchawkowe 3.5 mm |
| Metoda chłodzenia | Chłodzenie pasywne bez wentylatora |
| Wymiary | 4.7" x 4.7" x 0.9" (w przybliżeniu) |
| Waga | 8.5 uncji (w przybliżeniu) |
| Dodatkowe funkcje | VESA Mount Support, Wake-on-LAN, RTC Wake, Auto Power On |

Image: The Bmax B1 Pro Mini PC next to a smartphone, illustrating its compact size with dimensions of 4.72 inches (L) x 4.72 inches (W) x 1.02 inches (H) and a weight of 220g.
Gwarancja i wsparcie
Bmax provides comprehensive support for your Mini PC B1 Pro:
- Gwarancja: Produkt objęty jest 12-miesięczną gwarancją liczoną od daty zakupu.
- Gwarancja satysfakcji: A 30-day satisfaction guarantee is offered.
- Wsparcie techniczne: Dostępne jest dożywotnie wsparcie techniczne.
- Obsługa klienta: Our customer service team is available 24/7 to assist with any inquiries or issues you may encounter. Please refer to the contact information provided in the included User Guide or visit the official Bmax webwitryna wsparcia.