
1. Koniec produktuview
The ORDRO Z36 is a versatile 4K camcorder designed for capturing high-quality video and still images. It features 4K Ultra HD video recording and 64 MP photo capabilities, complemented by an 18x digital zoom for capturing distant subjects. The camcorder includes an integrated LED fill light for improved visibility in low-light conditions and an IR night vision mode for recording in complete darkness. Its 3.0-inch IPS flip screen rotates 270° for flexible viewing and self-recording. For convenience, a wireless remote control is included, along with a mini tripod for stable shots. The Z36 supports various creative modes such as time-lapse, slow motion, and continuous shooting, making it suitable for a range of recording needs.
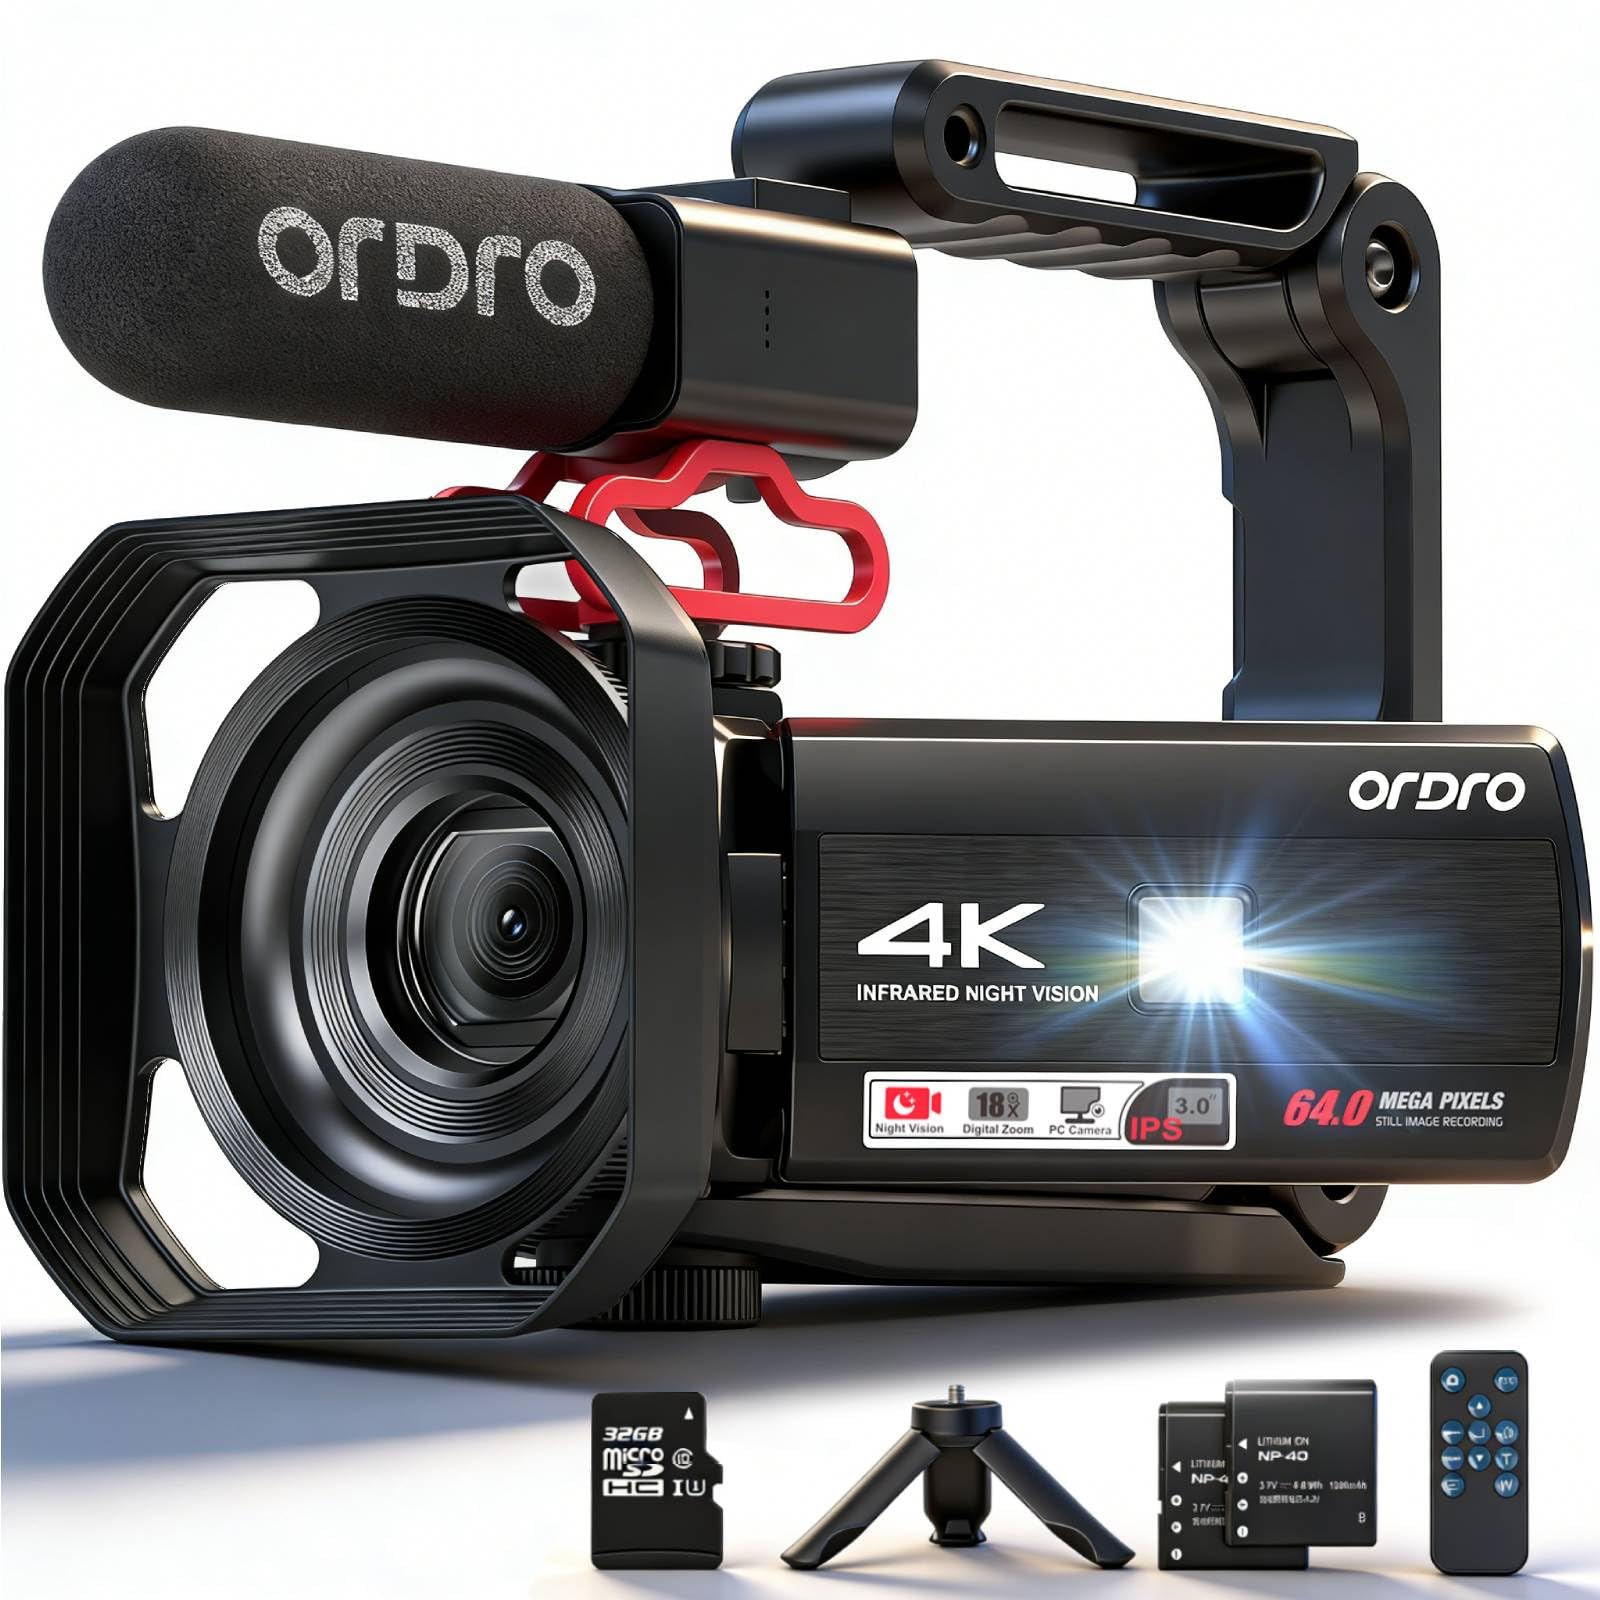
Image 1.1: The ORDRO Z36 4K Camcorder, showcasing its compact design and the 3.0-inch IPS flip screen in an extended position.
2. Konfiguracja
2.1 Rozpakowanie i zawartość opakowania
Ostrożnie rozpakuj wszystkie elementy. Upewnij się, że znajdują się w nich następujące elementy:
- ORDRO Z36 4K Camcorder
- Akumulator do ponownego ładowania
- Kabel USB
- Bezprzewodowy pilot zdalnego sterowania
- Miniaturowy statyw
- Instrukcja obsługi (ten dokument)
- Power Adapter (may be included separately)
2.2 Instalacja i ładowanie akumulatora
- Locate the battery compartment on the bottom or side of the camcorder.
- Otwórz pokrywę komory.
- Włóż akumulator, upewniając się, że styki są prawidłowo ustawione.
- Dokładnie zamknij pokrywę komory baterii.
- Connect the camcorder to a power source using the provided USB cable and power adapter. The charging indicator light will illuminate.
- Allow the battery to charge fully before first use. The indicator light will change or turn off when charging is complete.
2.3 Instalacja karty pamięci
A memory card (SD card, not included) is required to store videos and photos. The camcorder supports up to 128GB SD cards (Class 10 or higher recommended).
- Locate the SD card slot, usually on the side of the camcorder.
- Otwórz pokrywę gniazda.
- Włóż kartę SD metalowymi stykami skierowanymi w odpowiednią stronę (patrz schemat obok gniazda). Wciśnij, aż zatrzaśnie się na swoim miejscu.
- Zamknij pokrywę gniazda.
- Ważny: Format the memory card in the camcorder's menu before first use to ensure compatibility and optimal performance.
2.4 Pierwsze włączenie i ustawienia
- Naciśnij i przytrzymaj Moc Naciskaj przycisk, aż ekran się zaświeci.
- Upon first power-on, you may be prompted to set the language, date, and time. Use the navigation buttons to select options and confirm.
- Adjust other basic settings as desired through the camcorder's menu system.
3. Instrukcja obsługi
3.1 Podstawowe sterowanie
Familiarize yourself with the main buttons:
- Przycisk zasilania: Włącza/wyłącza kamerę.
- Przycisk nagrywania/migawki: Rozpoczyna/zatrzymuje nagrywanie wideo lub robienie zdjęć.
- Dźwignia zoomu (W/T): Reguluje zoom cyfrowy (szeroki kąt/teleobiektyw).
- Przycisk menu: Dostęp do menu ustawień kamery.
- Przyciski nawigacyjne: Służy do poruszania się po menu i wybierania opcji.
- Przycisk trybu: Przełącza między trybami wideo, zdjęć i odtwarzania.
3.2 Nagrywanie wideo
- Ensure the camcorder is in video recording mode (check the icon on the screen).
- Skadruj ujęcie korzystając z 3.0-calowego odchylanego ekranu.
- Naciśnij Record/Shutter button once to start recording. A red indicator or recording timer will appear on the screen.
- Naciśnij Record/Shutter ponownie, aby zatrzymać nagrywanie.
- To adjust video resolution (e.g., 4K), access the video settings in the menu.
3.3 Robienie zdjęć
- Switch the camcorder to photo mode using the Tryb przycisk.
- Wykadruj temat.
- Naciśnij Record/Shutter button to capture a 64 MP still image.
3.4 Zoom cyfrowy
Użyj Dźwignia powiększenia (W for wide, T for telephoto) to adjust the 18x digital zoom. Move the lever towards 'T' to zoom in and towards 'W' to zoom out.
3.5 IR Night Vision and LED Fill Light
- IR Night Vision: Activate this mode via the menu for recording in extremely low light or complete darkness. The image will appear monochrome.
- Światło wypełniające LED: For additional illumination in dim environments, activate the built-in LED light. This can usually be toggled on/off via a dedicated button or menu option.
3.6 3.0-inch IPS Flip Screen
The screen can be rotated up to 270° to allow for various shooting angles, including self-recording (vlogging). Gently pull the screen out from the side and rotate it to your desired position.
3.7 bezprzewodowy pilot zdalnego sterowania
The included remote control allows for convenient operation from a distance. Ensure the remote's battery is installed and point it towards the camcorder's IR receiver. Functions typically include record start/stop, zoom, and mode selection.
3.8 Specjalne funkcje nagrywania
- Czas wygaśnięcia: Capture a series of images over time and combine them into a sped-up video. Set the interval and duration in the menu.
- Zwolnione tempo: Record video at a higher frame rate to play back in slow motion. Select this option in video settings.
- Ciągłe strzelanie: Take multiple photos in quick succession. Useful for capturing fast-moving subjects.
3.9 Odtwarzanie i File Przenosić
- Odtwarzanie nagranego dźwięku: Przełącz się do trybu odtwarzania za pomocą Tryb button. Use navigation buttons to browse and play back recorded videos or view zdjęcia.
- Podłączanie do komputera: Connect the camcorder to your computer using the USB cable. The camcorder will appear as a removable disk, allowing you to transfer files bezpośrednio.
4. Konserwacja
4.1 Czyszczenie kamery
- Obiektyw: Use a soft, lint-free cloth specifically designed for optical lenses. For stubborn smudges, use a small amount of lens cleaning solution. Avoid touching the lens with your fingers.
- Ekran: Wipe the screen gently with a soft, dry microfiber cloth. Do not use abrasive cleaners.
- Ciało: Użyj miękkiego, lekko damp cloth to clean the camcorder body. Avoid excessive moisture.
4.2 Pielęgnacja baterii
- Charge the battery fully before first use and whenever the battery indicator is low.
- Unikaj częstego całkowitego rozładowywania baterii, ponieważ może to skrócić jej żywotność.
- If storing the camcorder for an extended period, remove the battery and store it in a cool, dry place with approximately 50% charge.
4.3 Przechowywanie
Store the camcorder in a dry, dust-free environment away from direct sunlight and extreme temperatures. Use a protective case when transporting the device.
4.4 aktualizacji oprogramowania sprzętowego
Periodically check the ORDRO official website for any available firmware updates. Firmware updates can improve performance, add new features, or fix bugs. Follow the instructions provided on the webnależy zachować ostrożność podczas przeprowadzania aktualizacji.
5. Rozwiązywanie Problemów
| Problem | Możliwa przyczyna | Rozwiązanie |
|---|---|---|
| Kamera nie włącza się. | Bateria jest rozładowana lub nieprawidłowo włożona. | Charge the battery fully. Reinsert the battery, ensuring correct orientation. |
| Nie można nagrywać filmów/robić zdjęć. | Karta pamięci jest pełna, nie została włożona lub jest uszkodzona. Wybrano nieprawidłowy tryb. | Insert a memory card. Format the card (backup data first). Switch to video or photo mode. |
| Słaba jakość obrazu/wideo. | Obiektyw jest brudny. Niewystarczające oświetlenie. Nieprawidłowe ustawienia. | Clean the lens. Use LED fill light or IR night vision as appropriate. Adjust resolution settings. |
| Kamera zawiesza się lub przestaje reagować. | Błąd oprogramowania. | Remove and reinsert the battery to perform a hard reset. If issue persists, check for firmware updates. |
| Pilot nie działa. | Remote battery drained. Obstruction between remote and camcorder. | Replace the remote control battery. Ensure a clear line of sight to the camcorder's IR receiver. |
Jeśli po wypróbowaniu tych rozwiązań problem nadal występuje, skontaktuj się z obsługą klienta.
6. Specyfikacje
- Marka: ORDRO
- Model: Z36
- Rozdzielczość wideo: 4K Ultra HD
- Rozdzielczość zdjęcia: 64 MP
- Zoom cyfrowy: 18x
- Ekran: 3.0-inch IPS Flip Screen (270° rotation)
- Technologia czujników: CMOS
- Cechy szczególne: IR Night Vision, LED Fill Light, Time-lapse, Slow Motion, Continuous Shooting
- Łączność: USB
- Format przechwytywania wideo: MP4
- Bateria: 1 D type rechargeable battery (included)
- Minimalna ogniskowa: 1 milimetrów
- Maksymalna ogniskowa: 999 milimetrów
7. Gwarancja i wsparcie
The ORDRO Z36 Camcorder comes with a standard manufacturer's warranty. Please refer to the warranty card included in your package for specific terms and conditions, including the warranty period and coverage details.
For technical support, service, or inquiries regarding your product, please visit the official ORDRO weblub skontaktuj się z działem obsługi klienta. Dane kontaktowe zazwyczaj można znaleźć na stronie producenta. webmiejscu lub w opakowaniu produktu.
Notatka: Zachowaj paragon jako dowód zakupu na wypadek reklamacji.