
1. Wprowadzenie
This manual provides essential information for the safe and efficient operation of your THKFMSRC GD3024EMH High Frequency Off-Grid MPPT Solar Inverter. Please read this manual thoroughly before installation and use, and retain it for future reference.
The GD3024EMH is a high-frequency off-grid solar inverter designed to convert DC power from solar panels into AC power for household appliances. It features Maximum Power Point Tracking (MPPT) technology for optimized solar energy harvesting and operates as a hybrid system.
2. Informacje dotyczące bezpieczeństwa
OSTRZEŻENIE: Nieprzestrzeganie tych instrukcji bezpieczeństwa może spowodować porażenie prądem, pożar, poważne obrażenia lub śmierć.
- Instalacja musi być przeprowadzona przez wykwalifikowany personel.
- Upewnij się, że wszystkie przewody są prawidłowo spolaryzowane i pewnie podłączone.
- Nie należy używać falownika, jeśli jest uszkodzony lub wydaje się, że działa nieprawidłowo.
- Trzymaj falownik z dala od materiałów łatwopalnych, wilgoci i bezpośredniego światła słonecznego.
- Aby zapobiec przegrzaniu, należy zapewnić odpowiednią wentylację wokół falownika.
- Przed przystąpieniem do prac konserwacyjnych lub podłączania przewodów należy odłączyć wszystkie źródła zasilania (słoneczne, akumulatorowe, sieciowe).
3. Zawartość opakowania
Sprawdź, czy wszystkie wymienione poniżej elementy znajdują się w Twojej paczce. Jeśli brakuje któregokolwiek z nich lub jest on uszkodzony, skontaktuj się z dostawcą.
- THKFMSRC GD3024EMH Solar Inverter Unit
- Instrukcja obsługi (ten dokument)
- Sprzęt montażowy (śruby, kotwy)
- Kabel komunikacyjny (jeśli dotyczy)
4. Koniec produktuview
The THKFMSRC GD3024EMH inverter integrates a solar charge controller, inverter, and battery charger into one unit. It is designed to provide uninterrupted power support.
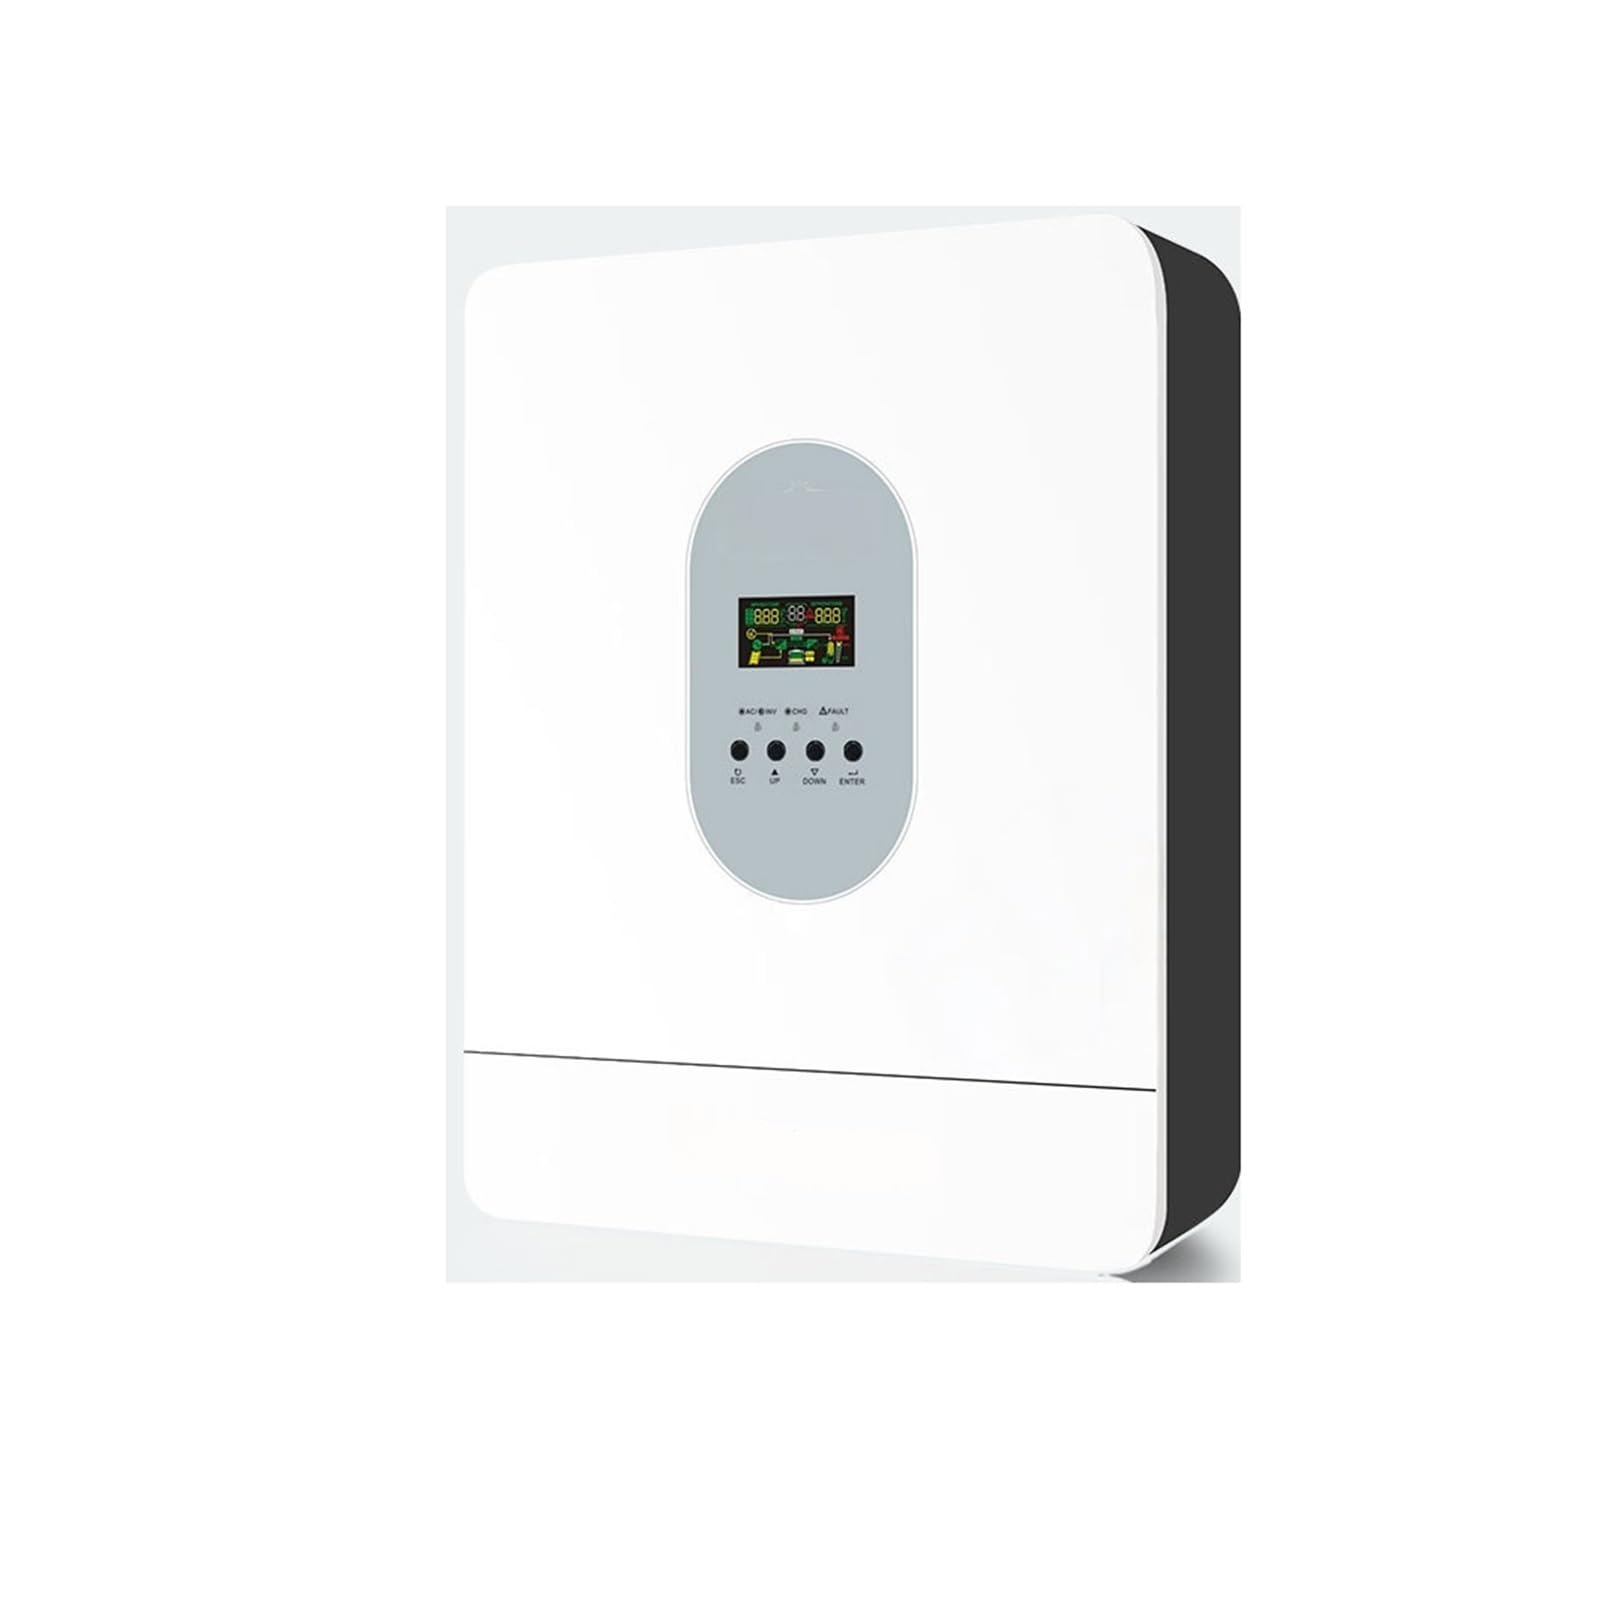
Rycina 4.1: Przód view of the THKFMSRC GD3024EMH solar inverter. This image displays the main unit with its control panel and various connection points for solar input, battery, and AC output.
4.1. Funkcje
- Czysty sinus falownik
- Wbudowany kontroler ładowania słonecznego MPPT
- Konfigurowalne wejście voltage Asortyment do sprzętu AGD i komputerów osobistych za pomocą ustawień LCD
- Konfigurowalny prąd ładowania akumulatora w oparciu o aplikacje za pomocą ustawień LCD
- Konfigurowalny priorytet AC / ładowarki słonecznej poprzez ustawienie LCD
- Kompatybilny z siecią objtage lub moc generatora
- Automatyczny restart podczas odzyskiwania prądu zmiennego
- Zabezpieczenie przed przeciążeniem/przegrzaniem/zwarciem
- Inteligentna konstrukcja ładowarki zapewniająca optymalną wydajność baterii
- Funkcja zimnego startu
5. Konfiguracja
5.1. Montaż falownika
- Choose a suitable mounting location:
- W pomieszczeniu, chronić przed bezpośrednim działaniem promieni słonecznych, deszczem i kurzem.
- Vertical wall mounting is recommended.
- Ensure sufficient clearance (at least 20 cm) around the unit for proper heat dissipation.
- Temperatura otoczenia powinna wynosić od 0°C do 55°C.
- Mark the positions for the mounting screws on the wall using the inverter as a template.
- Wywierć otwory i włóż kotwy ścienne (jeśli to konieczne).
- Securely mount the inverter to the wall using the provided screws.
5.2. Połączenia okablowania
CAUTION: Before making any connections, ensure all power sources (solar panels, batteries, AC input) are disconnected and turned off.
- Podłączenie akumulatora: Connect the battery cables to the inverter's battery terminals. Ensure correct polarity (+ to + and - to -). The GD3024EMH requires a 24V battery bank.
- Podłączenie panelu słonecznego: Connect the solar panel cables to the inverter's PV input terminals. Observe correct polarity. Ensure the open-circuit voltage of your solar array does not exceed the inverter's maximum PV input voltage.
- Podłączenie wejścia AC: If connecting to a utility grid or generator, connect the AC input cable to the designated AC input terminal.
- Podłączenie wyjściowe prądu przemiennego: Connect your loads (appliances) to the AC output terminals.
- Grunt: Connect the inverter to an earth ground using a suitable grounding wire.
Refer to the wiring diagram provided in the full product manual for detailed connection points.
6. Instrukcja obsługi
6.1. Pierwsze uruchomienie
- Sprawdź, czy wszystkie połączenia okablowania są bezpieczne i prawidłowe.
- Turn on the battery breaker/switch.
- Turn on the solar panel breaker/switch.
- Jeżeli używasz wejścia AC, włącz wyłącznik wejścia AC.
- Press and hold the ON/OFF button on the inverter for a few seconds to power it on. The LCD display will illuminate.
6.2. Wyświetlacz LCD i przyciski
Falownik wyposażony jest w wyświetlacz LCD i kilka przycisków umożliwiających monitorowanie i konfigurację.
- Wyświetlacz LCD: Wyświetla stan systemu w czasie rzeczywistym, głośność wejścia/wyjściatages, battery charge, and error codes.
- Przyciski funkcyjne: Typically include UP, DOWN, ENTER, and ESCAPE for navigating menus and adjusting settings.
6.3. Podstawowe ustawienia
Access the settings menu via the function buttons to configure parameters such as:
- Objętość wyjściatage/Częstotliwość: (e.g., 110V/60Hz for this model)
- Prąd ładowania: Adjust based on battery capacity.
- Objętość wejścia ACtage Zakres: For appliance or UPS mode.
- Charger Priority: Solar first, AC first, or Solar and AC.
- Priorytet źródła wyjściowego: Solar first, Utility first, or SBU (Solar-Battery-Utility).
Consult the detailed settings section in the complete manual for specific parameter adjustments.
7. Konserwacja
Regularna konserwacja zapewnia optymalną wydajność i długą żywotność falownika.
- Czyszczenie: Okresowo czyść zewnętrzną część falownika suchą szmatką. Upewnij się, że otwory wentylacyjne są wolne od kurzu i zanieczyszczeń.
- Znajomości: Annually check all electrical connections for tightness and corrosion. Re-tighten if necessary.
- Kontrola baterii: Regularly inspect battery terminals for corrosion and ensure battery fluid levels (if applicable) are correct.
- Środowisko: Upewnij się, że środowisko pracy mieści się w określonym zakresie temperatury i wilgotności.
WARNING: Disconnect all power sources before performing any cleaning or inspection.
8. Rozwiązywanie Problemów
W tej sekcji znajdziesz rozwiązania typowych problemów. W przypadku problemów, których tu nie wymieniono, skontaktuj się z pomocą techniczną.
| Problem | Możliwa przyczyna | Rozwiązanie |
|---|---|---|
| Falownik się nie włącza | Brak połączenia z baterią; Pojemność bateriitage too low; ON/OFF button not pressed correctly. | Check battery connections; Charge battery; Press and hold ON/OFF button. |
| Brak wyjścia AC | Overload; Short circuit; Inverter in fault mode. | Zmniejsz obciążenie; Sprawdź, czy nie ma zwarć w okablowaniu; Uruchom ponownie falownik. |
| Panele słoneczne nie ładują akumulatora | Incorrect PV connection; Insufficient sunlight; PV voltage za niskie/za wysokie. | Check PV wiring polarity; Ensure panels are in direct sunlight; Verify PV array voltage mieści się w specyfikacji. |
| Wyświetlony kod błędu | Konkretna usterka systemowa. | Refer to the full manual's error code section for detailed explanations and solutions. |
9. Specyfikacje
Key technical specifications for the THKFMSRC GD3024EMH (24V-110V) model:
- Model: GD3024EMH
- Objętość systemutage: 24V prądu stałego
- Objętość wyjścia ACtage: 110 V prądu zmiennego
- Inverter Efficiency: 98% (zgodnie z opisem produktu)
- Źródło zasilania: Battery Powered (Hybrid with Solar/AC)
- Cotage: 1 kWh (as per product specifications, likely refers to energy capacity or rated power)
- Typ: High Frequency Off-Grid MPPT Solar Inverter
- ASIN: B0GHF554WP
Note: Detailed specifications, including maximum PV input, charge current, and surge power, are available in the complete product datasheet.
10. Gwarancja i wsparcie
For warranty information, please refer to the warranty card included with your product or contact your point of purchase. THKFMSRC products are designed for reliability and performance.
For technical support, troubleshooting assistance, or spare parts, please contact THKFMSRC customer service through the retailer where the product was purchased or visit the official THKFMSRC webstrona dla danych kontaktowych.
When contacting support, please have your model number (GD3024EMH) and ASIN (B0GHF554WP) ready.