1. Wprowadzenie
Thank you for choosing the OLAKIDS 14-inch Kids Bike. This manual provides essential information for the safe assembly, operation, and maintenance of your child's bicycle. Please read these instructions carefully before assembly and use, and retain them for future reference. This bike is designed for children aged 3-6 years with a rider height of 37.4"-43.3" (95-110 cm).
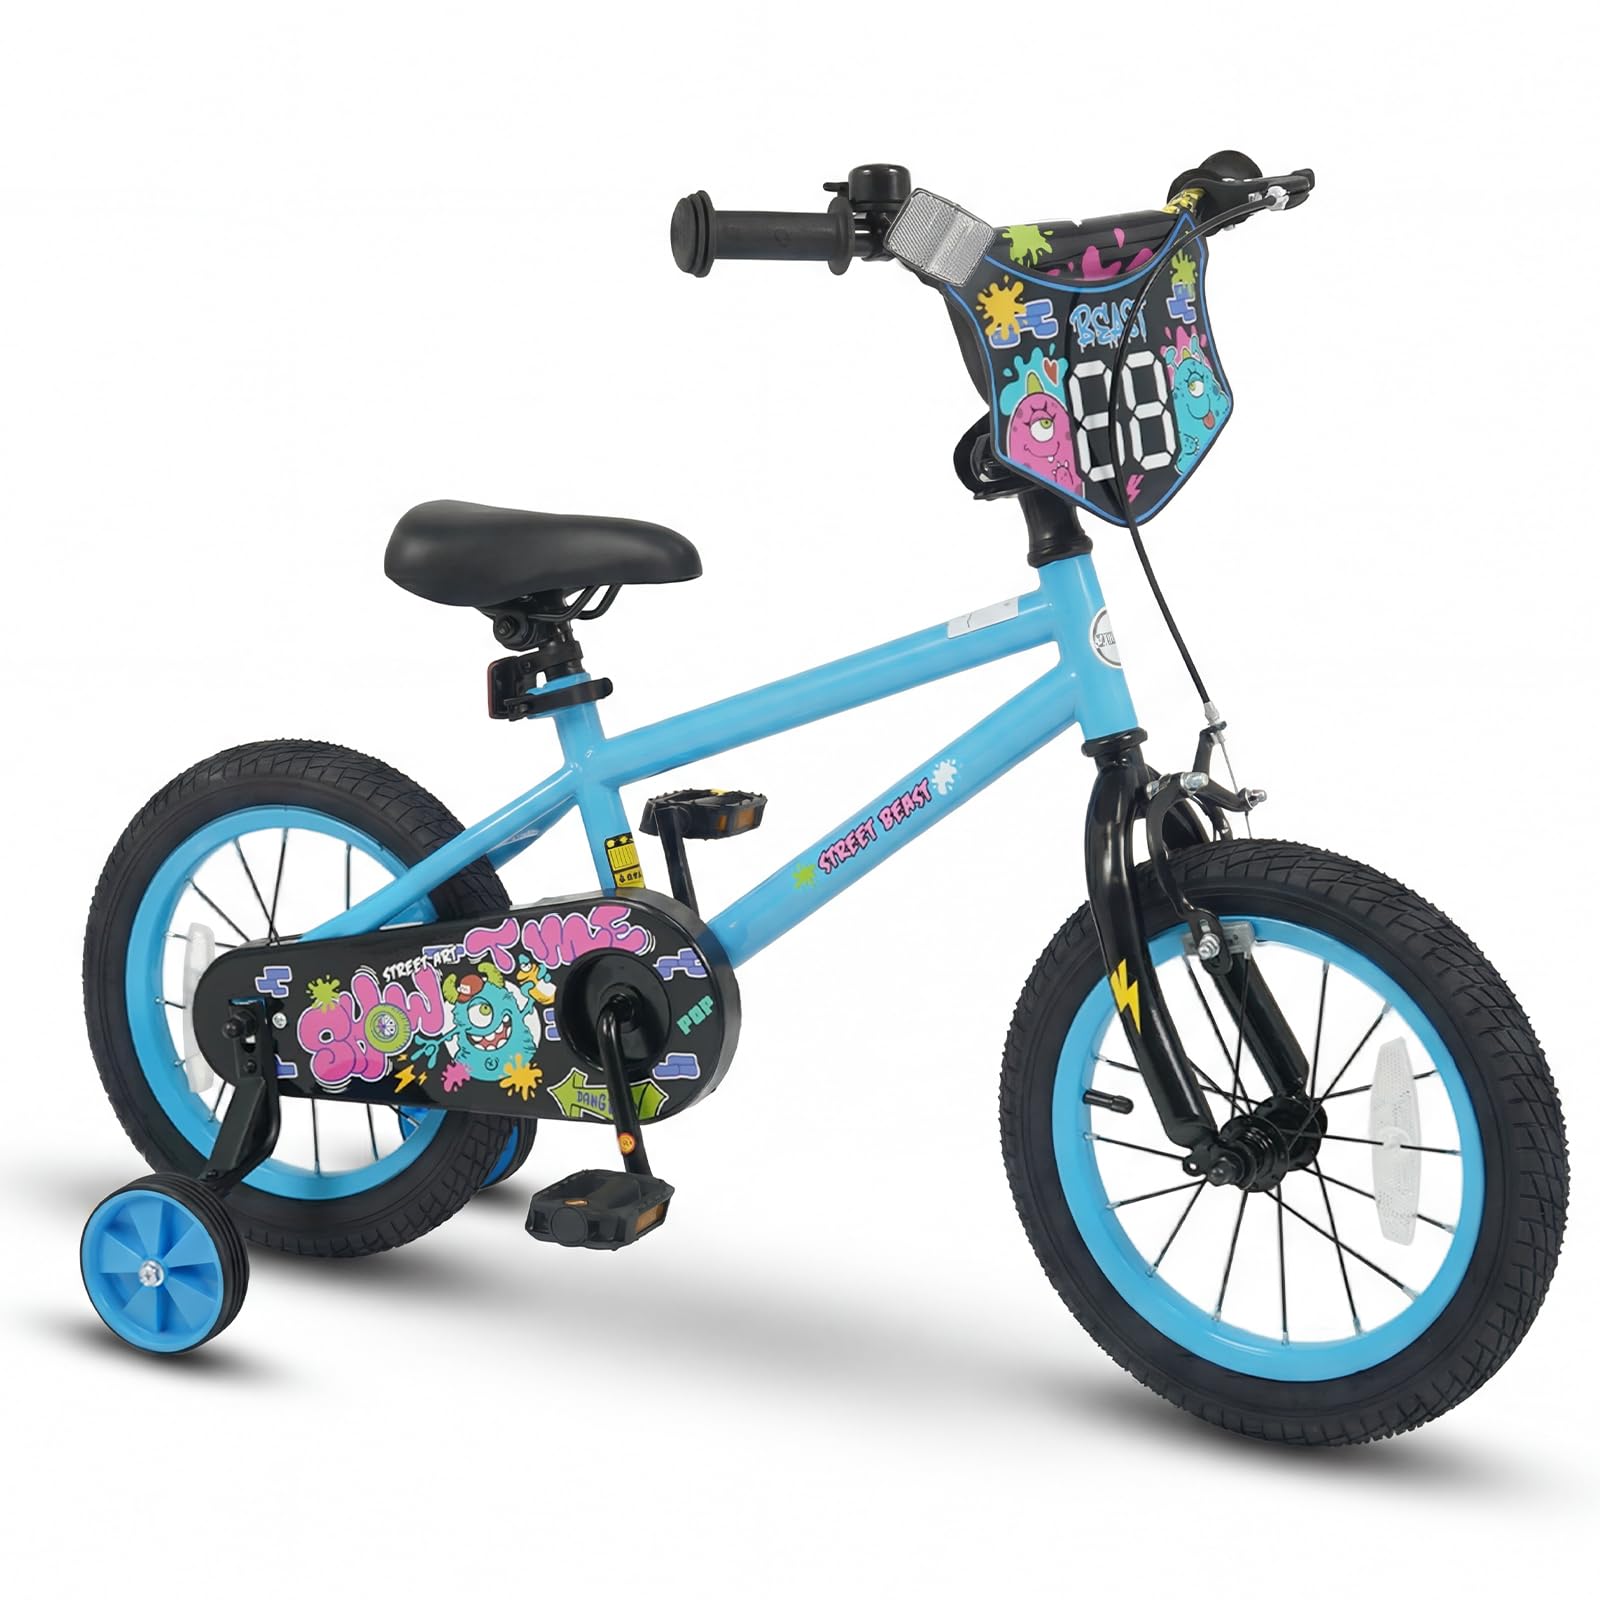
Image: A child riding the OLAKIDS 14-inch Kids Bike.
2. Informacje dotyczące bezpieczeństwa
Always prioritize safety when operating the bicycle. Failure to follow these safety guidelines may result in injury.
- Zastosowanie kasku: Zawsze upewnij się, że motocyklista nosi prawidłowo dopasowany kask spełniający normy bezpieczeństwa.
- Nadzór: Dzieci powinny zawsze znajdować się pod opieką osoby dorosłej podczas jazdy.
- Kontrola przed jazdą: Before each ride, check that the brakes are functioning correctly, tires are properly inflated, and all bolts and quick releases are securely tightened.
- Środowisko jazdy: Ride in safe areas away from traffic, obstacles, and steep inclines.
- Reflectors and Bell: Ensure all reflectors are clean and visible, and the safety bell is functional to alert others.
- Odzież: Avoid loose clothing that could get caught in the wheels or chain.

Image: Sturdy carbon steel frame and fully enclosed chain guard for safe riding.
3. Zawartość opakowania
The OLAKIDS Kids Bike is 85% pre-assembled. Please verify that all components listed below are present in the packaging before beginning assembly.
- 1 x OLAKIDS Kids Bike (main frame with wheels, chain, and rear brake pre-assembled)
- 1 x Handlebar assembly
- 1 x Seat post with saddle
- 2 x Training Wheels (detachable)
- 2 x Pedały
- 1 x DIY Drawing Board
- 1 x Safety Bell
- 1 x Instrukcja obsługi
- 1 x Wrench and other essential assembly tools

Image: All included components for the OLAKIDS Kids Bike.
4. Instrukcja montażu
Follow these steps to complete the assembly of your OLAKIDS Kids Bike.
- Montaż kierownicy: Insert the handlebar stem into the fork tube. Ensure the handlebar is straight and aligned with the front wheel. Tighten the stem bolt securely using the provided wrench.
- Attach the Front Wheel (if not pre-installed): If the front wheel is separate, align it with the fork dropouts and insert the axle. Secure it with the axle nuts, ensuring the wheel spins freely and is centered.
- Montaż sztycy: Insert the seat post with the saddle into the seat tube of the bike frame. Adjust the height as needed (refer to Section 5) and tighten the quick-release lever or bolt securely.
- Zamontuj pedały: Identify the left (L) and right (R) pedals. The left pedal screws counter-clockwise, and the right pedal screws clockwise. Thread them into the crank arms and tighten firmly with the wrench.
- Montaż kółek treningowych: Attach the training wheels to the rear axle using the provided bolts and washers. Ensure they are securely fastened and provide stable support.
- Attach DIY Drawing Board and Bell: Secure the DIY drawing board to the handlebar using the provided fasteners. Mount the safety bell on the handlebar in an easily accessible position.
- Kontrole końcowe: Double-check all bolts, nuts, and quick releases for tightness. Ensure brakes are functional and tires are inflated to the recommended pressure.
5. Dostosowania
Proper adjustments ensure comfort and safety for the rider.
5.1 Regulacja wysokości siedzenia
The seat height is adjustable to accommodate your child's growth. To adjust, loosen the quick-release lever or bolt on the seat post clamp, raise or lower the seat until the child can comfortably touch the ground with their toes while seated, then re-tighten securely.
5.2 Regulacja wysokości kierownicy
The handlebar height can be adjusted by loosening the stem bolt, raising or lowering the handlebar to a comfortable position for the rider, and then re-tightening the bolt firmly.
5.3 Training Wheels Adjustment/Removal
The detachable training wheels provide stability for beginners. As your child gains confidence and balance, the training wheels can be removed. To remove, simply loosen the bolts securing them to the rear axle and detach.

Image: Adjustable seat and detachable training wheels for growing children.
6. Kierowanie Rowerem
Understanding the bike's controls is crucial for safe riding.
6.1 Układ hamulcowy
This bike is equipped with a dual braking system for enhanced safety:
- Hamulec ręczny: Umieszczony na kierownicy hamulec steruje przednim kołem. Delikatnie ściśnij dźwignię, aby zwolnić lub zatrzymać pojazd.
- Hamulec gwintowany: Activated by pedaling backward, this brake controls the rear wheel. Apply backward pressure on the pedals to engage.
Teach your child to use both brakes smoothly and effectively. Practice braking in a safe, open area.

Image: Dual brake system featuring handbrake and coaster brake.
6.2 DIY Drawing Board
The integrated DIY drawing board allows children to personalize their bike. Use washable markers to draw and color on the board, fostering creativity. Ensure the board is clean and dry before each use.

Image: Creative DIY drawing board on the handlebar.
7. Konserwacja
Regular maintenance will prolong the life of the bicycle and ensure safe operation.
- Czyszczenie: Regularnie czyść rower za pomocąamp cloth and mild soap. Avoid using high-pressure washers directly on bearings or electrical components.
- Ciśnienie w oponach: Przed każdą jazdą sprawdź ciśnienie w oponach. Utrzymuj zalecane ciśnienie w PSI (funtach na cal kwadratowy) wskazane na boku opony.
- Smarowanie łańcucha: Periodically lubricate the chain with bicycle-specific chain lubricant to ensure smooth operation and prevent rust.
- Kontrola hamulców: Regularnie sprawdzaj zużycie klocków hamulcowych i przetarcia linek hamulcowych. W razie potrzeby dostosuj napięcie hamulców, aby zapewnić skuteczną siłę hamowania.
- Dokręcenie śruby: Periodically check and tighten all bolts and nuts, especially on the handlebars, seat post, wheels, and pedals.
- Składowanie: Przechowuj rower w suchym miejscu, z dala od bezpośredniego światła słonecznego i ekstremalnych temperatur, aby zapobiec rdzewieniu i degradacji materiału.

Image: Child-friendly details including comfortable seat, safety bell, anti-slip handlebars, and reflectors.
8. Rozwiązywanie Problemów
W tej sekcji omówiono typowe problemy, na które możesz natrafić.
- Brakes not engaging effectively: Check brake cable tension and brake pad alignment. Adjust as necessary. Ensure brake pads are not worn out.
- Pedals are stiff or noisy: Lubricate the pedal bearings if possible, or check if pedals are securely tightened.
- Chain slipping or noisy: Clean and lubricate the chain. Check for bent or damaged chain links.
- Tires losing air quickly: Inspect tires for punctures. Check valve stem for leaks. Ensure tire beads are properly seated on the rim.
- Rower wydaje się niestabilny: Ensure all bolts, especially on the handlebars and wheels, are securely tightened. Check if training wheels (if installed) are properly aligned and tightened.
9. Specyfikacje
Detailed specifications for the OLAKIDS 14-inch Kids Bike.
| Funkcja | Specyfikacja |
|---|---|
| Numer modelu | TS10352 |
| Typ roweru | Rower dzieciecy |
| Rozmiar koła | 14 cali |
| Materiał ramy | Stal węglowa |
| Styl hamulca | Handbrake (Front), Coaster Brake (Rear) |
| Liczba prędkości | 1 |
| Zakres wysokości siedziska | 20"-22" (51-55 cm) |
| Wysokość kierownicy | 29" (73 cm) |
| Zalecany przedział wiekowy | 3-6 lata |
| Zalecany wzrost jeźdźca | 37.4"-43.3" (95-110 cm) |
| Maksymalna nośność | 143 funta (65 kg) |
| Wymiary produktu | Wymiary 100.99 x 50.01 x 75.01 cm |
| Waga przedmiotu | 11.09 kilogramów |
| Wymagany montaż | Tak (85% wstępnie zmontowane) |

Image: Product size diagram and specification table.
10. Gwarancja i wsparcie
The OLAKIDS Kids Bike comes with a 6-miesięczna gwarancja from the date of purchase, covering manufacturing defects. This warranty does not cover damage resulting from misuse, accidents, improper assembly, or normal wear and tear.
For technical support, warranty claims, or any questions regarding your product, please contact the manufacturer:
Producent: Olakidy
Informacje kontaktowe: AKUSTIK, 11250 POPLAR AVE BLDG C, FONTANA
Please have your model number (TS10352) and proof of purchase ready when contacting support.