Wstęp
This manual provides comprehensive instructions for the assembly, operation, and maintenance of your VINGLI Queen Platform Bed Frame. Please read this document carefully before beginning assembly or use to ensure proper setup and safe operation. Keep this manual for future reference.
Ważne informacje dotyczące bezpieczeństwa
Twoje bezpieczeństwo jest najważniejsze. Prosimy o przestrzeganie poniższych wytycznych:
- Exercise caution around sharp edges during assembly and regular use to prevent injury.
- Ensure all components are properly assembled and securely tightened before placing a mattress on the frame. Improper assembly can lead to instability.
- Be mindful of the bed frame's legs to avoid tripping hazards, especially in dimly lit rooms.
- The bed frame is designed for stability, but some movement may occur. Use caution when getting in and out of bed.
- Do not exceed the maximum weight capacity of 1000 lbs for Queen size bed frames.
Zawartość opakowania
Before starting assembly, please verify that all the following parts are present and undamaged:
- Elementy zagłówka
- Elementy podnóżka
- Szyny boczne (lewa i prawa)
- Center support beam and legs
- Metal support slats
- Integrated charging station unit
- LED light strips with remote control
- Mattress slide stoppers
- Sprzęt montażowy (śruby, nakrętki, podkładki, klucz imbusowy)
Instrukcja montażu
Follow these step-by-step instructions to assemble your VINGLI Queen Platform Bed Frame. It is recommended to have two people for efficient and safe assembly.
- Rozpakuj i zorganizuj: Carefully unpack all components and lay them out on a clean, soft surface (e.g., a rug or blanket) to prevent scratches. Identify each part and hardware.
- Montaż zagłówka i podnóżka: Attach the headboard and footboard panels to their respective metal frames using the provided hardware.
- Połącz szyny boczne: Securely connect the assembled headboard and footboard to the side rails using the designated bolts and nuts. Ensure all connections are tight.
- Wsparcie Centrum Instalacji: Attach the center support beam and its legs to the main frame. Adjust the height of the center legs if necessary to ensure even support.
- Umieść listwy: Lay the metal support slats across the frame. Ensure they are evenly spaced and secured to the side rails as per the design. The drop-in design helps keep the mattress in place.
- Podłącz stację ładującą: Mount the charging station unit to the designated location on the bed frame, typically on a side rail or headboard.
- Zainstaluj oświetlenie LED: Carefully apply the LED light strips to the designated channels on the headboard and footboard. Connect the LED strips to the power unit.
- Secure Mattress Stoppers: If included, attach the mattress slide stoppers to prevent the mattress from shifting.
- Kontrola końcowa: Double-check all connections, bolts, and screws to ensure they are fully tightened.

This image illustrates the simple drop-in connection mechanism for assembling the bed frame, highlighting the ease of putting together the metal components.

This image highlights the recessed area where the mattress sits, designed to keep it securely in place and prevent sliding.

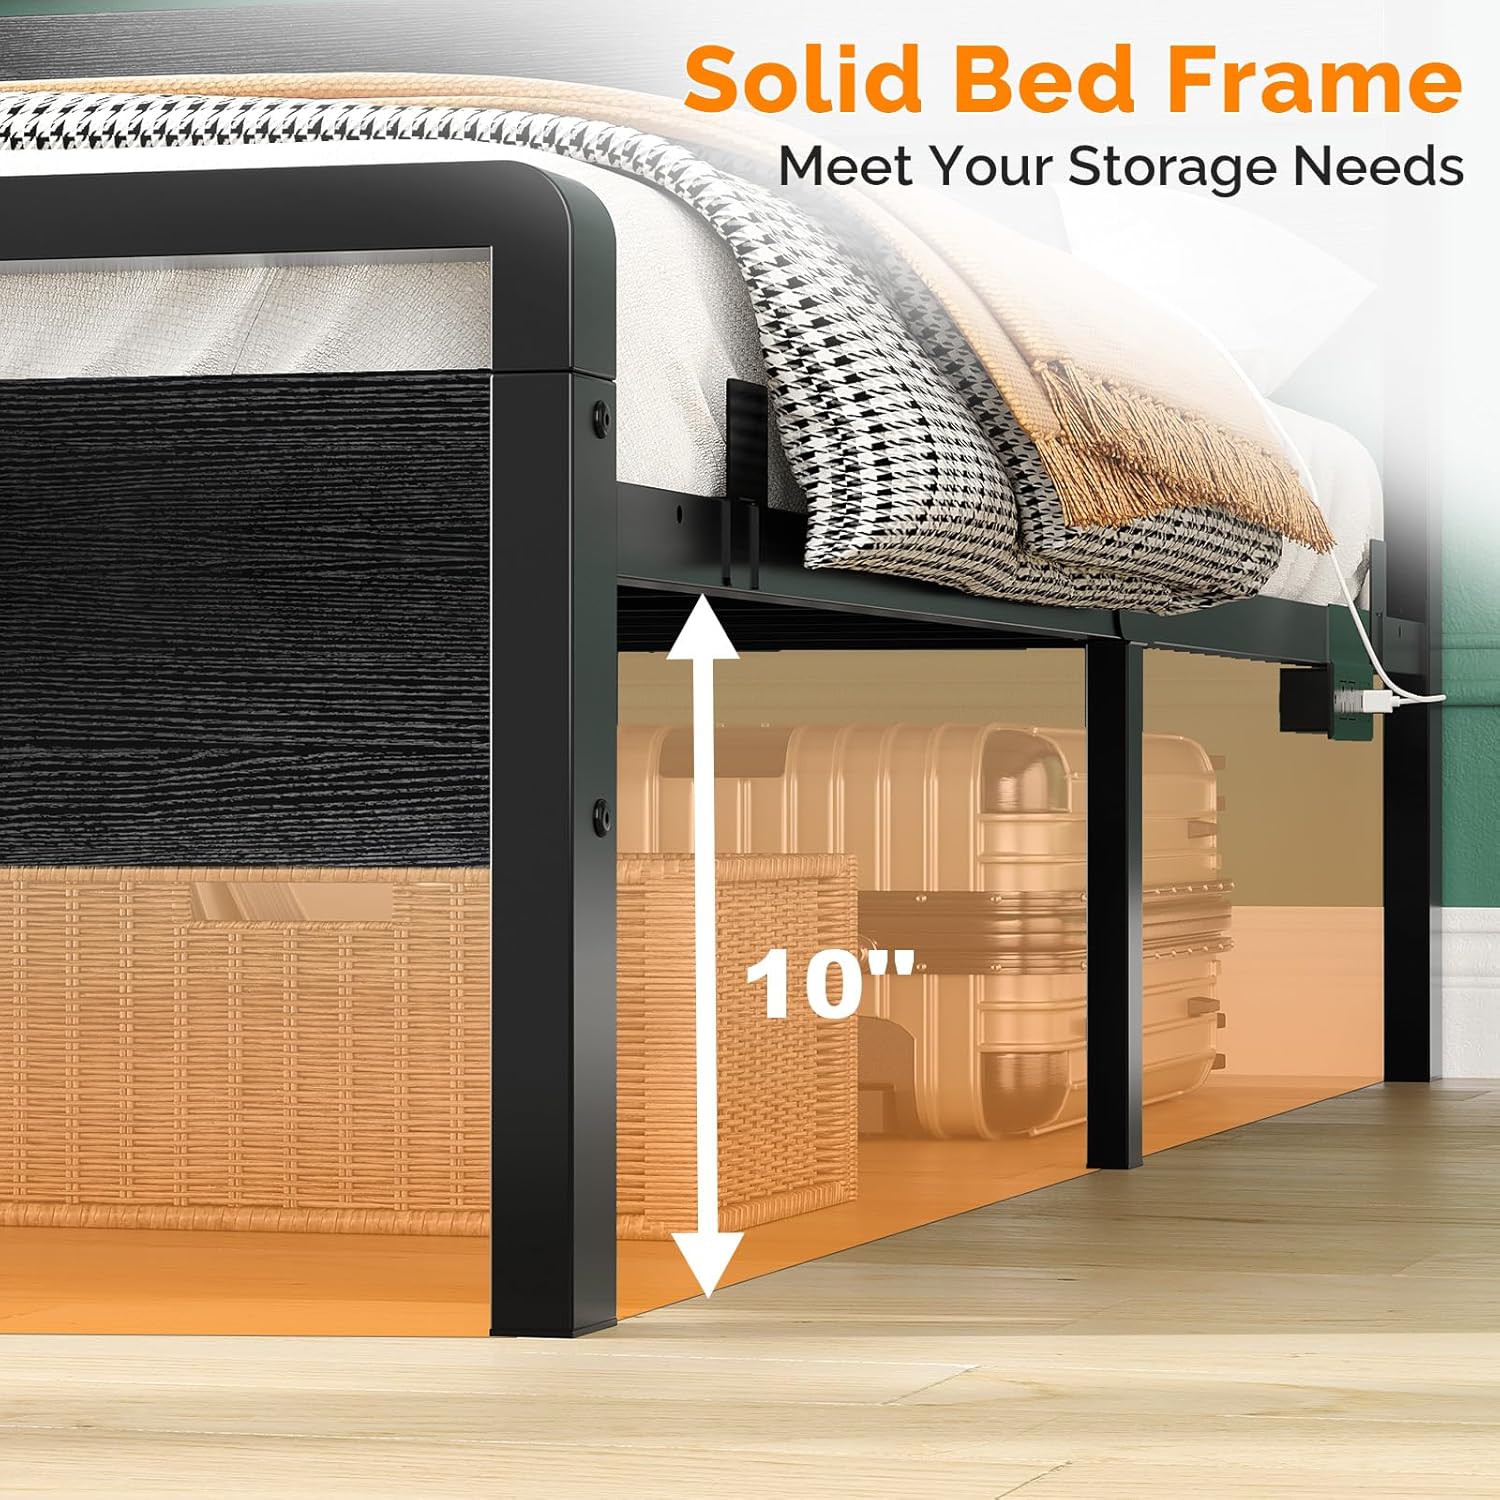
Szczegółowy view of the bed frame's solid construction, showcasing the rustic wood grain finish on the headboard and footboard, thicker metal frame, and rounded corners for safety.
Instrukcja obsługi
Korzystanie ze świateł LED
The integrated RGB LED lights can be controlled via the included remote control or a compatible mobile application.
- Podłączenie zasilania: Ensure the LED power adapter is securely plugged into both the bed frame's power unit and a functional wall outlet.
- Zdalne sterowanie: Use the remote control to power the lights on/off, select from over 6000 colors, adjust brightness levels, and set various timing functions.
- Aplikacja mobilna: For advanced features and customization, download the recommended mobile application (details typically found in the LED light's separate instruction sheet) and connect it to your LED system.

This image displays the bed frame with its smart RGB LED lighting feature, highlighting the remote control and mobile app for color changing, brightness adjustment, timing, and custom styles.
Korzystanie ze stacji ładującej
The bed frame includes a built-in charging station for convenient power access.
- Zasilanie: Ensure the bed frame's main power cord (5.2-foot) is securely plugged into a functional wall outlet.
- Ładowanie urządzenia: Connect your electronic devices to the available 2 AC outlets, 2 USB ports, or 1 Type-C port for charging.
- Środki ostrożności: Avoid overloading the charging station by connecting too many high-power devices simultaneously.
Szczegółowy view of the integrated charging station on the bed frame, featuring two AC outlets, two USB ports, and one Type-C port for convenient device charging.
Konserwacja i pielęgnacja
Właściwa konserwacja przedłuży żywotność i wygląd ramy łóżka.
- Czyszczenie: Wipe the bed frame with a dry, soft cloth for general cleaning. Avoid using harsh chemicals, abrasive cleaners, or polishes that could damage the finish.
- Połączenia zasilania: Periodically check all power connections for the charging station and LED lights to ensure they remain secure and free from damage.
- Paski LED: Keep the LED strips free from dust and debris to maintain optimal light output and prevent overheating.
- Frame Tightness: Over time, bolts and screws may loosen. Tighten all frame components as needed to ensure stability and prevent any potential squeaking.
Rozwiązywanie problemów
Jeśli napotkasz jakiekolwiek problemy z ramą łóżka, zapoznaj się z poniższymi typowymi problemami i ich rozwiązaniami:
- Oświetlenie LED nie działa:
Rozwiązanie: Check if the LED power adapter is securely plugged into both the bed frame's power unit and the wall outlet. Ensure the remote control battery is functional and correctly inserted. - Porty ładowania nie działają:
Rozwiązanie: Verify the bed frame's main power cord is plugged into a live wall outlet. Test with different devices and charging cables to rule out device-specific issues. - Piszczące dźwięki:
Rozwiązanie: Re-tighten all assembly bolts and screws throughout the frame. Ensure all metal slats are properly seated and secured in their designated positions. - Niestabilność/chwiejność ramy łóżka:
Rozwiązanie: Check all connections for tightness. Ensure the center support legs are correctly installed, making firm contact with the floor, and are adjusted to the correct height.
Specyfikacje
Detailed specifications for the VINGLI Queen Platform Bed Frame:
| Funkcja | Szczegół |
|---|---|
| Rozmiar | Królowa |
| Wymiary produktu | 84.65" dł. x 60.24" szer. x 41.73" wys. |
| Tworzywo | Drewno konstrukcyjne, Metal |
| Kolor | Czarny |
| Cechy specjalne | 2.4-inch thick solid metal legs, Round Corner Design, Squeak Resistant, LED Lighting, Charging Station |
| Prześwit pod łóżkiem | 12 cali |
| Nośność | Do 1000 funtów |
| Porty ładowania | 2 AC Outlets, 2 USB Ports, 1 Type-C Port |
| Wymagany montaż | Tak |
| Numer modelu | B0G3B2N8GL |
| UPC | 840323541725 |

This diagram provides the overall dimensions of the Queen size VINGLI platform bed frame: 84.7 inches Length, 60.2 inches Width, and 41.7 inches Height, along with its 1000 lbs weight capacity.

This image illustrates the generous 12-inch clearance beneath the bed frame, providing ample space for under-bed storage solutions.
Oficjalny film o produkcie
Ten film przedstawia wizualny przeglądview of the VINGLI Metal Bed Frame with LED and USB features, demonstrating its assembly, design elements, and functionality.
Gwarancja i wsparcie
Informacje o gwarancji
For detailed warranty information regarding your VINGLI Queen Platform Bed Frame, please refer to the documentation included with your original purchase. Warranty terms and conditions may vary.
Obsługa klienta
If you require further assistance, have questions, or need to report a missing or damaged part, please contact VINGLI customer service directly. You can also visit the official VINGLI Store on Amazon aby uzyskać więcej informacji i zasobów wsparcia.