
1. Wprowadzenie
Thank you for choosing the Midea MRT18D3BBB 18 Cu. Ft. Top Freezer Refrigerator. This manual provides important information regarding the installation, operation, maintenance, and troubleshooting of your appliance. Please read it thoroughly before use and keep it for future reference.
1.1 Informacje dotyczące bezpieczeństwa
Always follow basic safety precautions when using electrical appliances to reduce the risk of fire, electric shock, or injury. This refrigerator is designed for freestanding installation only. Ensure proper grounding and do not use extension cords. Keep ventilation openings clear of obstruction.
2. Konfiguracja i instalacja
Prawidłowa instalacja ma kluczowe znaczenie dla optymalnej pracy i trwałości lodówki.
2.1 Rozpakowanie
Carefully remove all packaging materials, including foam and adhesive tape. Dispose of packaging responsibly. Inspect the refrigerator for any shipping damage. If damage is found, contact your retailer immediately.
2.2 Wymagania dotyczące lokalizacji
- Place the refrigerator on a strong, level floor capable of supporting its weight (approximately 177 pounds).
- Allow adequate space around the unit for proper air circulation. Maintain at least 2 inches (5 cm) of space at the back and sides, and 4 inches (10 cm) at the top.
- Unikaj bezpośredniego światła słonecznego i źródeł ciepła (np. pieca, grzejnika).
- This model is garage-ready, designed to operate stably in ambient temperatures ranging from 38°F (3°C) to 110°F (43°C).
2.3 Poziomowanie lodówki
Ensure the refrigerator is level to allow the doors to close properly and for efficient operation. Adjust the leveling feet located at the bottom front of the unit by turning them clockwise to raise or counter-clockwise to lower.
2.4 Podłączenie elektryczne
Connect the refrigerator to a dedicated, grounded 115V, 60Hz AC outlet. Do not use an adapter or extension cord. Ensure the power cord is not pinched or damaged.
After connecting, wait at least 2-4 hours before loading food to allow the internal temperature to stabilize.
3. Obsługa lodówki
3.1 Kontrola temperatury
The refrigerator features an adjustable temperature control. Locate the control dial or button inside the fresh food compartment. Settings typically range from 'Cold' to 'Coldest' or 'Super Cool'.

Obraz: Adjusting the temperature control. The control panel shows settings from 'Cold' to 'Coldest' and 'Super Cool', with a 'Setting' button.
For initial setup, set the control to a medium setting. Allow several hours for the temperature to stabilize before making further adjustments. 'Super Cool' setting provides rapid cooling for newly added items.
3.2 Cechy wnętrza

Obraz: Empty interior of the refrigerator. Shows adjustable shelves, crisper drawers, and door bins in both the fresh food and freezer compartments.

Obraz: Refrigerator interior with food. Demonstrates the capacity and organization with various items on shelves and in door bins.
- Regulowane półki: The glass shelves can be adjusted to different heights to accommodate various food items.
- Gallon-Sized Door Bins: The door bins are designed to hold larger containers, including gallon-sized milk jugs.
- Szuflady na warzywa i owoce: Located at the bottom of the fresh food compartment, these drawers help maintain optimal humidity for fruits and vegetables.
- Oświetlenie wewnętrzne: The refrigerator is equipped with LED lighting for clear visibility of contents.

Obraz: Door bin storage. Shows various packaged cheese products stored neatly in a clear door bin.
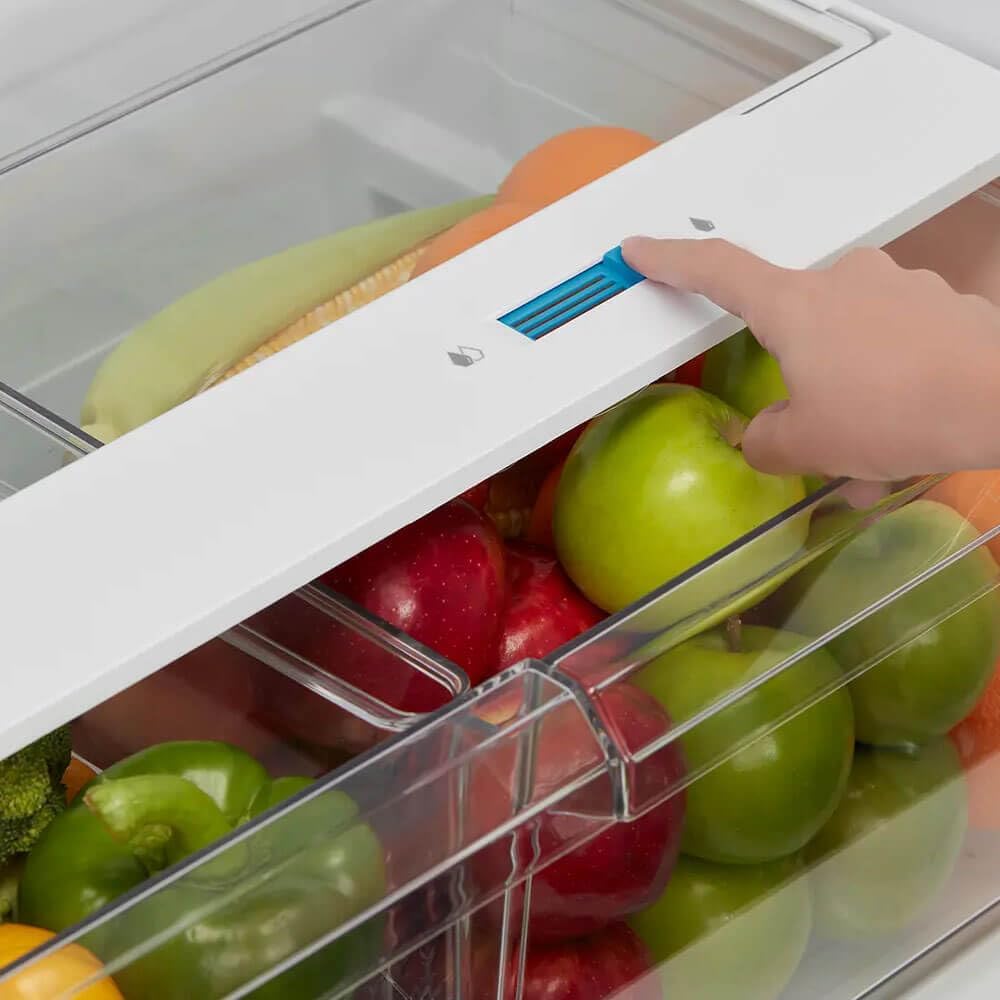
Obraz: Crisper humidity control. A hand adjusts a slider on a crisper drawer containing apples, corn, and other vegetables.

Obraz: Interior LED light. A rectangular LED light panel illuminates the top of the fresh food compartment.
3.3 Frost-Free Defrost System
This refrigerator features a frost-free defrost system, eliminating the need for manual defrosting in both the freezer and fresh food compartments. Ice buildup is automatically managed.

Obraz: Refrigerator back panel. Shows the internal back wall with horizontal vents, part of the frost-free cooling system.
4. Konserwacja i pielęgnacja
Regular cleaning and maintenance will ensure your refrigerator operates efficiently and hygienically.
4.1 Czyszczenie wnętrza
- Odłącz lodówkę przed czyszczeniem.
- Wash interior surfaces, shelves, and bins with a mild detergent and warm water solution. Rinse thoroughly and dry with a soft cloth.
- Nie należy używać środków czyszczących o działaniu ściernym, gąbek ściernych ani silnych środków chemicznych.
4.2 Czyszczenie powierzchni zewnętrznej
- Przetrzyj powierzchnie zewnętrzne miękką szmatką.ampz łagodnym detergentem.
- Regularnie czyść uszczelki drzwi, aby zapewnić szczelność.
4.3 Wyłączenie mocytages
W przypadku awarii zasilaniatage. Trzymaj drzwi lodówki zamknięte, aby utrzymać temperaturę wewnętrzną tak długo, jak to możliwe. Unikaj otwierania drzwi bez potrzeby.
5. Rozwiązywanie Problemów
Przed skontaktowaniem się z serwisem,view następujące typowe problemy i rozwiązania:
| Problem | Możliwa przyczyna | Rozwiązanie |
|---|---|---|
| Lodówka nie działa. | Brak zasilania urządzenia, odłączony przewód zasilający, zadziałał wyłącznik automatyczny. | Check power supply, ensure cord is plugged in, reset circuit breaker. |
| Temperatura nie jest wystarczająco niska. | Zbyt wysoka temperatura; drzwi otwierane zbyt często; dodano zbyt dużą ilość ciepłego jedzenia; słaba cyrkulacja powietrza. | Adjust temperature setting to a colder level; minimize door openings; allow time for new food to cool; ensure proper spacing around the unit. |
| Nietypowe dźwięki. | Refrigerator not level; items vibrating against each other; normal operating sounds (compressor, fan). | Wypoziomuj lodówkę, ułóż przedmioty na nowo; spodziewaj się normalnych dźwięków pracy. |
| Drzwi nie zamykają się całkowicie. | Door gasket dirty or damaged; refrigerator not level; food packages obstructing closure. | Wyczyść lub wymień uszczelkę, wypoziomuj lodówkę, ułóż produkty spożywcze na nowo. |
6. Specyfikacje
| Numer modelu: | MRT18D3BBB |
| Marka: | Midea |
| Pojemność: | 18 stopy sześciennej |
| Konfiguracja: | Pełnowymiarowa zamrażarka na górze |
| Kolor: | Czarny |
| Wymiary produktu (gł. x szer. x wys.): | 31" gł. x 32" szer. x 70" wys. |
| Waga przedmiotu: | 177 funta |
| Typ instalacji: | Wolnostojące |
| System odszraniania: | Frost Free (Automatic Defrost) |
| Metoda chłodzenia: | Kompresor |
| Gotowy garaż: | Stable cooling in temperatures from 38°F to 110°F |
| Kod UPC: | 840296505199 |
7. Informacje o gwarancji
This Midea refrigerator is covered by a 1-letnia gwarancja producenta from the date of purchase. This warranty covers defects in materials and workmanship under normal use. Please retain your proof of purchase for warranty claims. For full terms and conditions, refer to the warranty card included with your product or contact Midea customer support.
8. Obsługa klienta
If you have any questions, require technical assistance, or need to schedule service, please contact Midea Customer Support. Have your model number (MRT18D3BBB) and proof of purchase ready when you call.
For the most up-to-date contact information, please visit the official Midea website or refer to the documentation included with your appliance.
Wsparcie online: www.midea.com/us/support (Byłyample link, rzeczywisty link może się różnić)