1. Wprowadzenie
This manual provides essential information for the installation, configuration, operation, and maintenance of your Zyyini X99H Motherboard Kit. Please read these instructions carefully before proceeding with installation to ensure proper setup and optimal performance. Retain this manual for future reference.
2. Koniec produktuview
The Zyyini X99H Motherboard is designed for high-performance computing, offering robust compatibility and expansion options. It supports a range of CPUs and memory configurations, making it suitable for various computing needs.
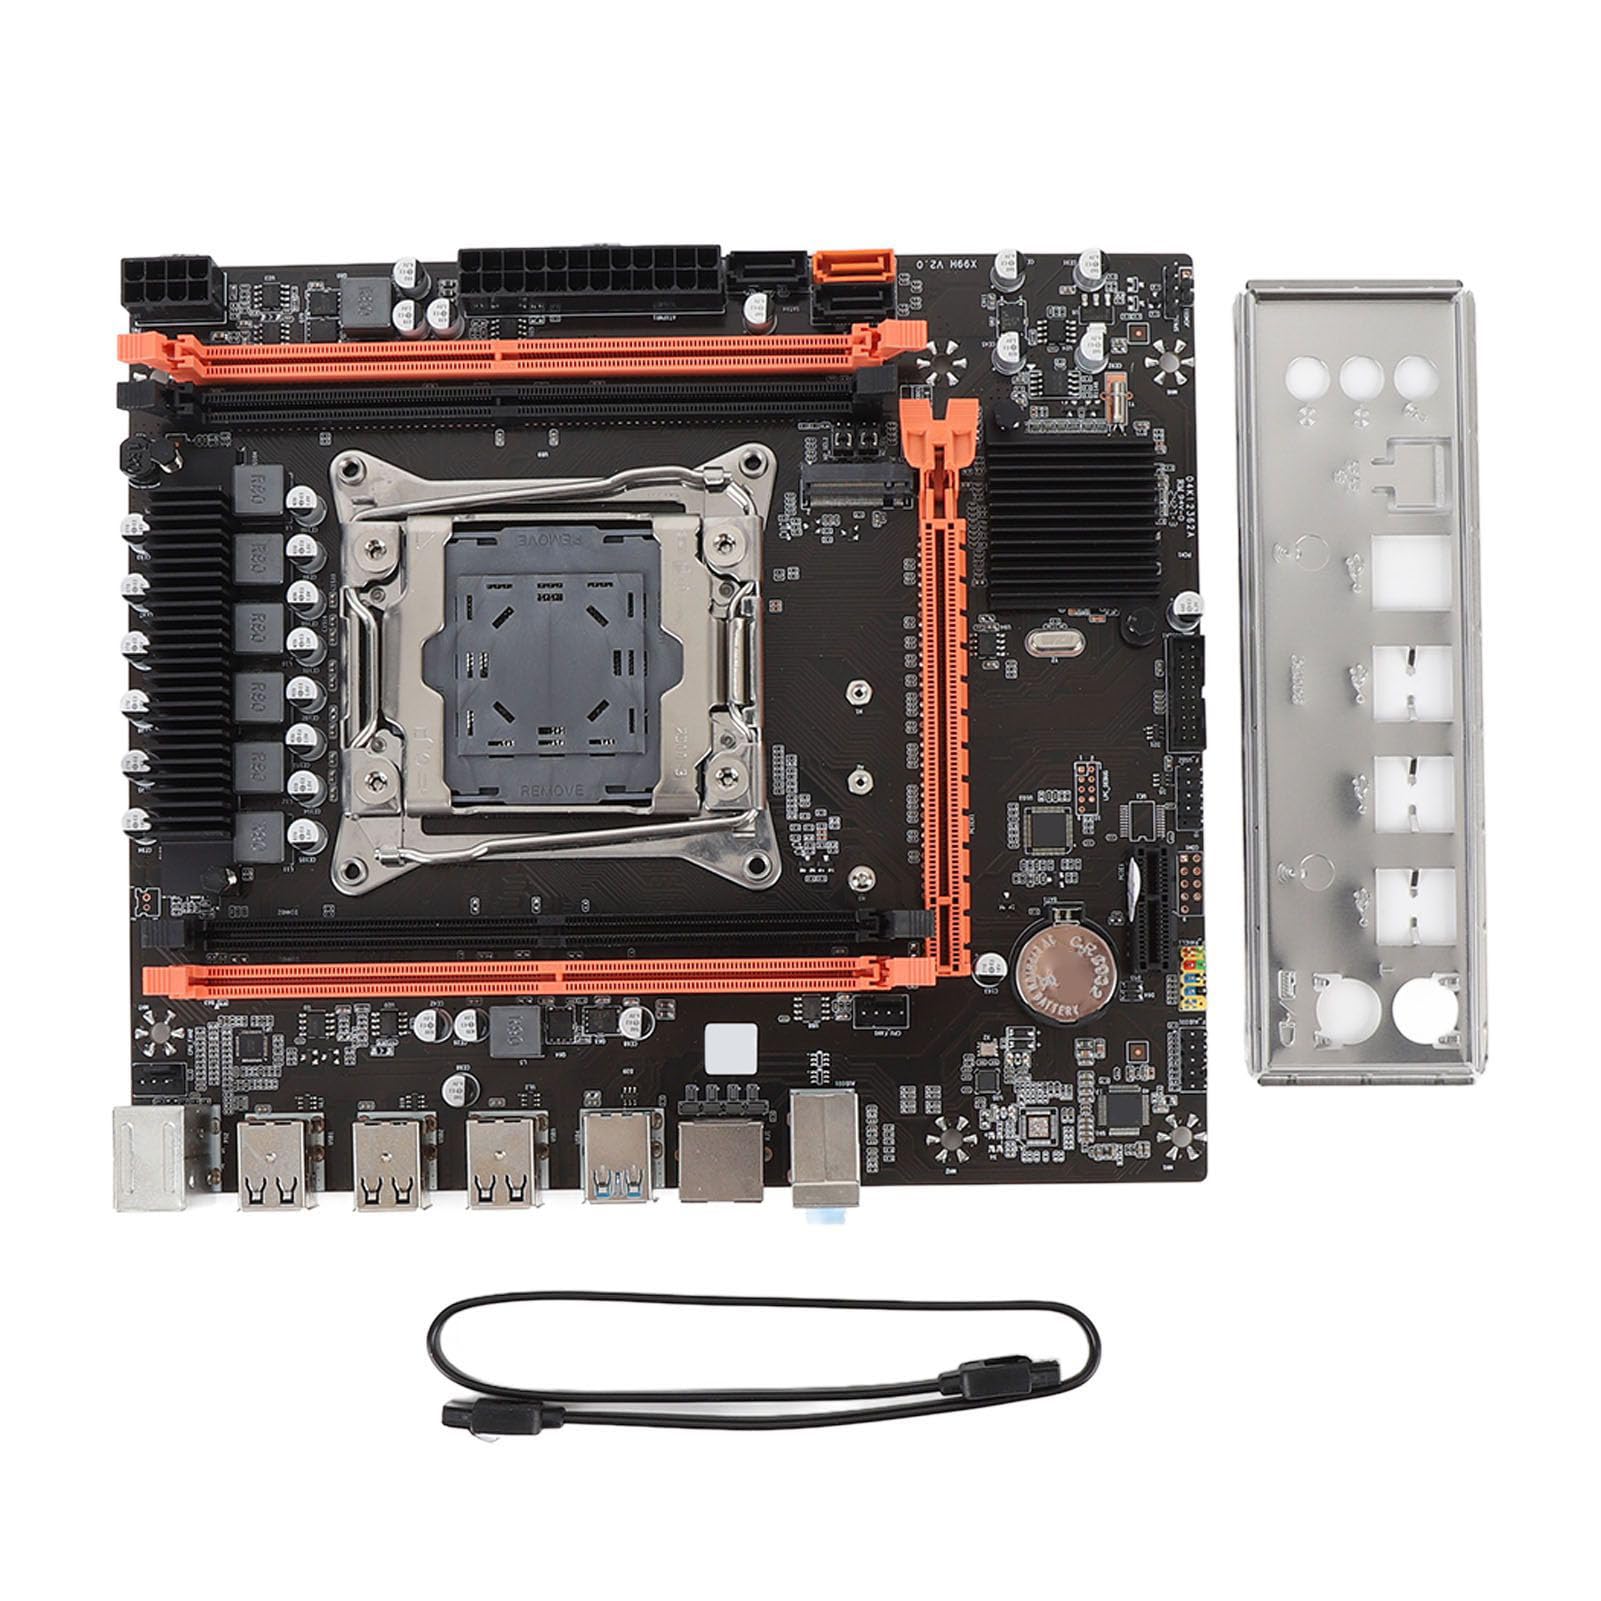
Rysunek 2.1: Koniecview of the Zyyini X99H Motherboard Kit.
Główne cechy:
- Silna kompatybilność: Features an LGA 2011-3 CPU socket, supporting Intel E5 V3/V4 and i7 58xx/68xx series processors. Includes one 8-pin and one 24-pin power socket for stable power delivery.
- Impressive Memory Support: Equipped with four DDR4 DIMM slots, supporting up to 128GB of DDR4 memory at speeds of 2666, 2400, or 2133MHz.
- Serial ATA Ports: Includes Serial ATA ports for compact and easy storage device installation, ensuring high compatibility.
- Stabilna wydajność: Utilizes all solid capacitors for enhanced stability and extended operational lifespan, contributing to reliable motherboard performance.
- Łatwa rozbudowa: Provides HD multimedia (HDMI) and VGA interfaces for display output, along with an M.2 slot that supports both NGFF and NVME protocols for high-speed storage expansion. It also features a PCI Express 16X slot for graphics cards.
3. Specyfikacje
Below are the detailed technical specifications for the Zyyini X99H Motherboard Kit:

Rysunek 3.1: Widok z góry na dół view of the Zyyini X99H Motherboard, highlighting component layout.
| Funkcja | Specyfikacja |
|---|---|
| Struktura płyty głównej | M-ATX |
| Zestaw układów scalonych | X99H |
| Gniazdo procesora | LGA 2011-3 |
| Supported CPU Types | Intel E5 V3/V4, i7 58xx/68xx series |
| Typ pamięci | DDR4 2666/2400/2133MHz |
| Gniazda pamięci | 4 x moduł pamięci DDR4 |
| Maksymalna pojemność pamięci | 128 GB |
| Graphics Card Standard Support | PCI Express 16X |
| Gniazda rozszerzeń | 1 x PCIE x16, 1 x PCIE x1, 1 x NVME M.2 Interface (Serial ATA, PCIE with Jumper Switch) |
| Interfejsy USB | 6 x USB 2.0, 2 x USB 3.0 (rear I/O), USB3.0 Pins (1 Set), USB2.0 Pins (1 Set) |
| Serial ATA Ports | 2 x Serial ATA 2.0, 1 x Serial ATA 3.0 |
| Wyjścia wideo | HDMI, VGA, |
| Interfejs sieciowy | 1 x RJ45 |
| PS/2 Interface | 1 x PS/2 Keyboard/Mouse Universal Interface |
| Wbudowana bateria | CR2032x1 240 mAh |
4. Konfiguracja i instalacja
Prawidłowa instalacja ma kluczowe znaczenie dla stabilności i wydajności systemu. Postępuj zgodnie z poniższymi krokami.
4.1. Przygotowanie
- Zadbaj o to, aby Twoje miejsce pracy było czyste i dobrze oświetlone.
- Zbierz niezbędne narzędzia: śrubokręt krzyżakowy, opaskę antystatyczną na nadgarstek (zalecana).
- Przed dotknięciem podzespołów należy rozładować ładunki elektrostatyczne, dotykając uziemionego przedmiotu metalowego.
4.2. Instalacja procesora
Carefully install your LGA 2011-3 processor into the CPU socket.
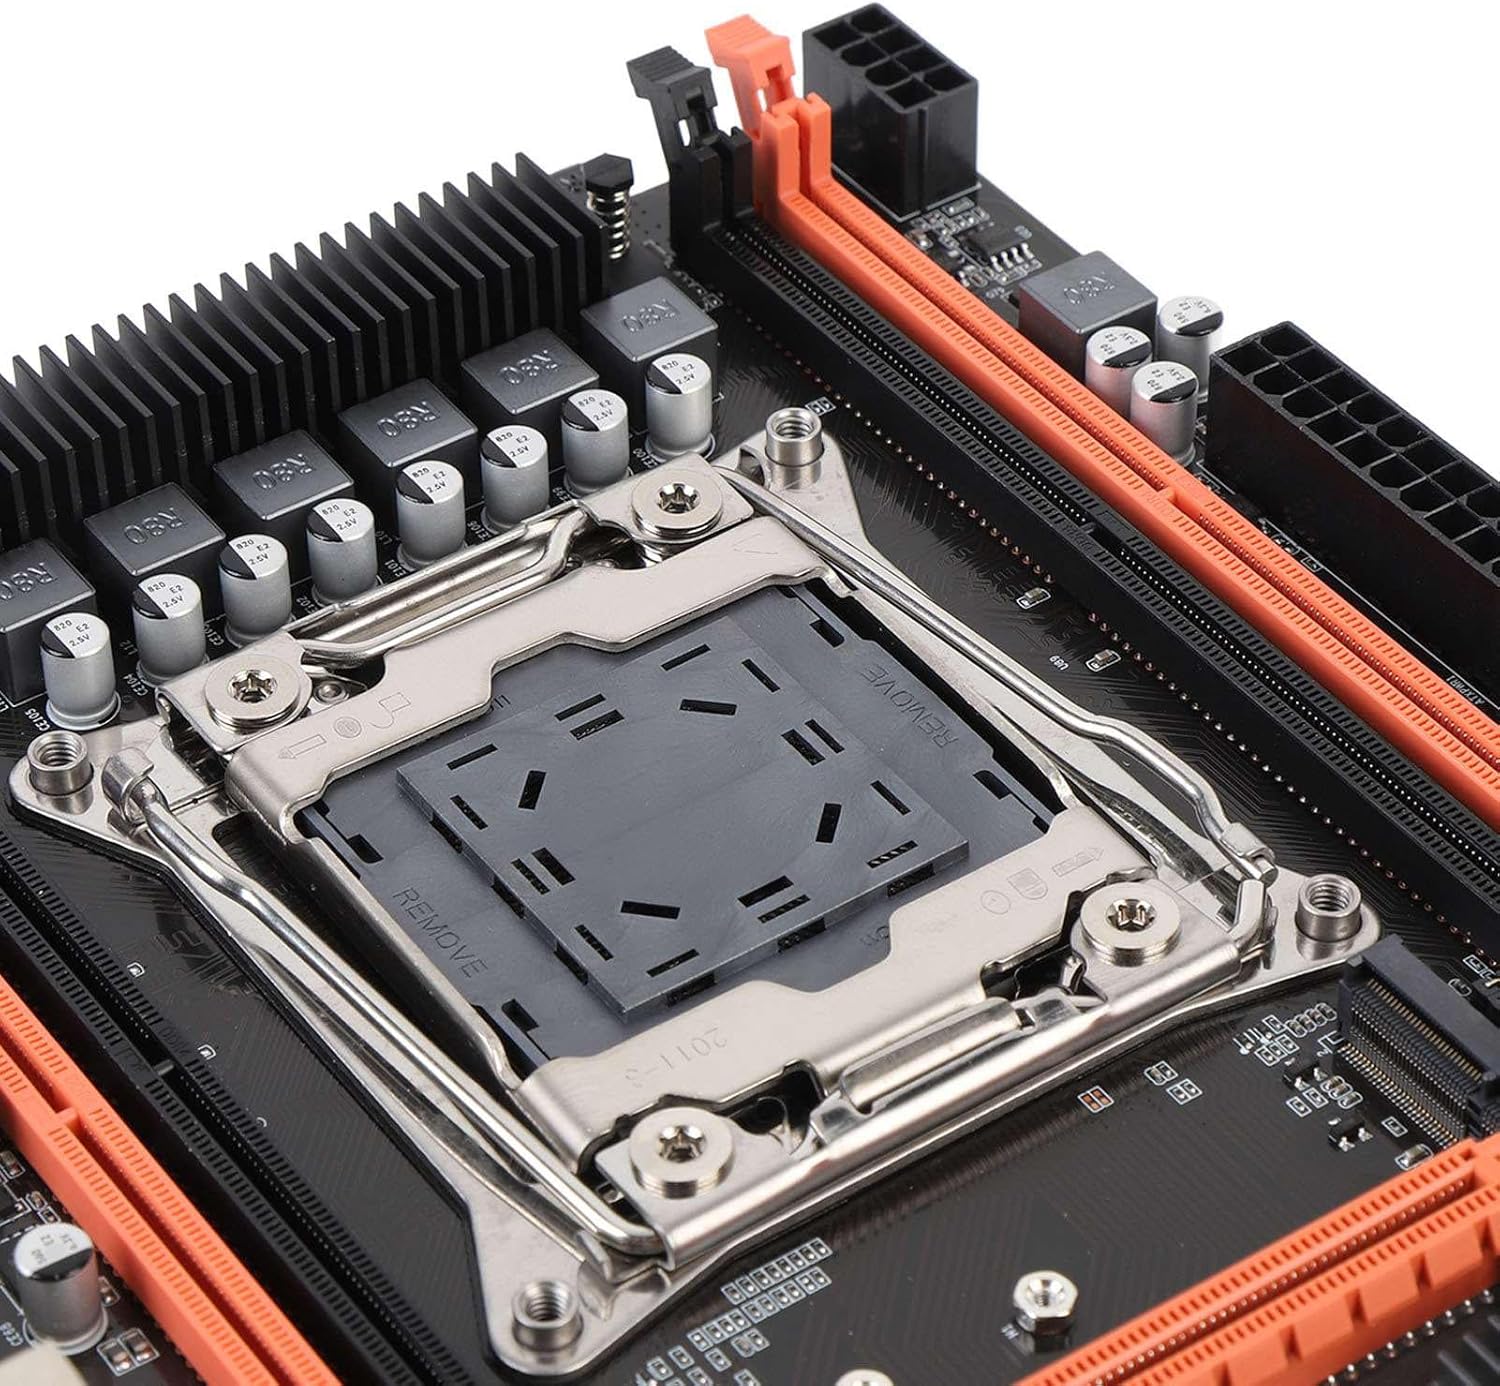
Rysunek 4.1: Zbliżenie view of the LGA 2011-3 CPU socket.
- Otwórz mechanizm blokujący gniazdo procesora.
- Align the CPU with the socket, ensuring the gold triangle on the CPU matches the indicator on the socket.
- Ostrożnie umieść procesor w gnieździe, nie używając siły.
- Zamknij mechanizm mocujący, aby zabezpieczyć procesor.
- Zainstaluj chłodzenie procesora zgodnie z instrukcją producenta.
4.3. Instalacja pamięci RAM
Install DDR4 memory modules into the DIMM slots.
- Otwórz zaciski na obu końcach gniazd DIMM.
- Dopasuj moduł pamięci do gniazda, upewniając się, że wycięcie na module pokrywa się z wypustką w gnieździe.
- Naciśnij mocno oba końce modułu pamięci, aż klipsy zatrzasną się na swoim miejscu.
4.4. Montaż płyty głównej
Mount the motherboard into your PC case.
- Zainstaluj osłonę I/O w tylnym otworze obudowy.
- Dopasuj płytę główną do dystansów w obudowie komputera.
- Przymocuj płytę główną za pomocą śrub.
4.5. Podłączanie zasilania
Connect the power supply unit (PSU) cables to the motherboard.
- Connect the 24-pin ATX power cable to the main power connector.
- Connect the 8-pin CPU power cable to the CPU power connector.
4.6. Podłączanie urządzeń pamięci masowej
Connect your SATA and NVME M.2 storage devices.

Rysunek 4.2: Zbliżenie view of the M.2 slot and SATA ports.
- For SATA drives, connect one end of the SATA data cable to the motherboard's SATA port and the other to the drive. Connect the SATA power cable from the PSU to the drive.
- For NVME M.2 SSDs, insert the M.2 module into the M.2 slot and secure it with the provided screw.
4.7. Podłączanie urządzeń peryferyjnych i panelu przedniego
Connect USB devices, front panel connectors, and other I/O.

Rysunek 4.3: Zbliżenie view of the rear I/O ports.
- Connect your mouse and keyboard to the PS/2 or USB ports.
- Connect front panel USB, audio, power switch, reset switch, and LED indicators to the corresponding headers on the motherboard. Refer to your PC case manual for specific pin assignments.
- Connect network cables to the RJ45 port.
4.8. Instalacja karty graficznej
Install your PCI Express graphics card.
- Otwórz zatrzask mocujący na gnieździe PCIe x16.
- Dopasuj kartę graficzną do gniazda i mocno dociśnij, aż zatrzaśnie się na miejscu.
- Przymocuj kartę graficzną do obudowy za pomocą śrubki.
- Connect any required PCIe power cables from the PSU to the graphics card.
5. Instrukcja obsługi
Once all components are installed, you can proceed with powering on your system.
5.1. Pierwsze uruchomienie
- Ensure all power cables are securely connected and the power supply is switched on.
- Naciśnij przycisk zasilania na obudowie komputera.
- System powinien się uruchomić, a na monitorze powinien pojawić się komunikat.
5.2. Dostęp do BIOS-u/UEFI
The BIOS (Basic Input/Output System) or UEFI (Unified Extensible Firmware Interface) allows you to configure fundamental system settings.
- During system startup, repeatedly press the designated key (commonly USUNĄĆ, F2, F10, Lub F12) aby wejść do narzędzia konfiguracji BIOS/UEFI.
- Within the BIOS/UEFI, you can adjust boot order, system time, fan speeds, and other hardware-related settings.
5.3. Instalacja sterownika
After installing your operating system, install the necessary drivers for your motherboard and other components.
- Obtain the latest drivers from the Zyyini webwitryny lub producentów komponentów websites (e.g., chipset, audio, LAN, graphics card).
- Install drivers in the recommended order (typically chipset first, then graphics, audio, LAN, etc.).
5.4. Instalacja systemu operacyjnego
Zainstaluj preferowany system operacyjny (np. Windows, Linux) z rozruchowego dysku USB lub płyty DVD.
- Configure the boot order in BIOS/UEFI to prioritize your installation media.
- Follow the on-screen instructions of your operating system installer.
6. Konserwacja
Regularna konserwacja pomaga zapewnić długowieczność i stabilną pracę płyty głównej i systemu.
- Utrzymuj czystość: Periodically clean dust from inside your PC case, especially around fans and heatsinks, using compressed air. Ensure the system is powered off and unplugged before cleaning.
- Sprawdź połączenia: Occasionally verify that all cables (power, data, peripheral) are securely connected to the motherboard and other components.
- Aktualizacje BIOS-u/UEFI: Check the Zyyini support website for BIOS/UEFI updates. Updates can improve compatibility, stability, and performance. Follow update instructions carefully to avoid system damage.
- Aktualizacje oprogramowania: Aktualizuj system operacyjny i sterowniki, aby zapewnić sobie optymalną wydajność i bezpieczeństwo.
7. Rozwiązywanie Problemów
W tej sekcji znajdziesz rozwiązania typowych problemów, na jakie możesz natrafić.
7.1. Brak zasilania / System się nie włącza
- Sprawdź połączenia zasilania: Ensure the 24-pin ATX and 8-pin CPU power cables are firmly connected to the motherboard and the power supply.
- Przełącznik zasilania: Verify that the power switch on the PSU is in the 'ON' position.
- Złącza na panelu przednim: Double-check the power switch connector on the motherboard's front panel header.
- Gniazdo ścienne: Sprawdź, czy gniazdko ścienne jest zasilane prądem, podłączając do niego inne urządzenie.
7.2. Brak obrazu na monitorze
- Połączenie monitora: Ensure the display cable (HDMI/VGA) is securely connected to both the graphics card/motherboard and the monitor.
- Karta graficzna: Jeśli używasz dedykowanej karty graficznej, upewnij się, że jest ona prawidłowo osadzona w gnieździe PCIe i że wszystkie wymagane kable zasilające są podłączone.
- BARAN: Ponownie zamontuj moduły RAM. Spróbuj uruchomić system z jedną kością RAM, jeśli masz ich więcej.
- Procesor: Sprawdź, czy procesor jest zainstalowany prawidłowo i czy chłodzenie procesora ma odpowiedni kontakt.
7.3. Niestabilność systemu / losowe awarie
- Przegrzanie: Check CPU and GPU temperatures. Ensure all fans are working correctly and heatsinks are free of dust.
- Problemy z pamięcią RAM: Run a memory diagnostic tool (e.g., Windows Memory Diagnostic) to check for faulty RAM.
- Problemy ze sterownikiem: Ensure all drivers are up-to-date and correctly installed.
- Zasilanie: Niewystarczające lub uszkodzone zasilanie może być przyczyną niestabilności.
7.4. Component Not Detected (e.g., Storage, USB Device)
- Sprawdź połączenia: Verify that the component's power and data cables are securely connected.
- Ustawienia BIOS/UEFI: Check if the component is enabled in the BIOS/UEFI settings. For M.2 drives, ensure the correct protocol (NVME/SATA) is selected if applicable via jumper switch.
- Kierowcy: Install the latest drivers for the component.
- Menedżer urządzeń: In your operating system, check Device Manager (Windows) or equivalent to see if the device is listed, even with an error.
8. Wsparcie i gwarancja
For technical support or warranty inquiries, please contact Zyyini customer service through the retailer where you purchased the product or visit the official Zyyini support website. Please have your product model (X99H) and purchase information ready when contacting support.
Specific warranty terms and conditions may vary by region and retailer. Please refer to your purchase documentation for detailed warranty information.