
Wstęp
The PYY Tire Grooving Tool is designed for precise modification and customization of tire treads. This tool allows users to deepen existing grooves or create new patterns on tires, enhancing traction and extending tire life. This manual provides essential information for the safe and effective operation, maintenance, and troubleshooting of your PYY Tire Grooving Tool.
Ważne informacje dotyczące bezpieczeństwa
Aby zapobiec obrażeniom ciała lub uszkodzeniu narzędzia, należy zawsze przestrzegać następujących środków ostrożności:
- Wear appropriate personal protective equipment, including safety glasses and heat-resistant gloves, during operation.
- Upewnij się, że miejsce pracy jest dobrze wentylowane i wolne od materiałów łatwopalnych.
- Disconnect the tool from the power source before performing any maintenance, changing blades, or when not in use.
- Do not touch the grooving blade when the tool is powered on or immediately after use, as it will be extremely hot.
- Trzymaj dzieci i osoby postronne z dala od obszaru operacyjnego.
- Use the tool only for its intended purpose of tire grooving.
Zawartość opakowania
Sprawdź, czy w przesyłce znajdują się wszystkie elementy:
- PYY Tire Grooving Tool (Handpiece)
- Power Control Unit (DC Tire Regroover)
- Kable zasilające
- Assorted Grooving Blades
- Rękawice ochronne
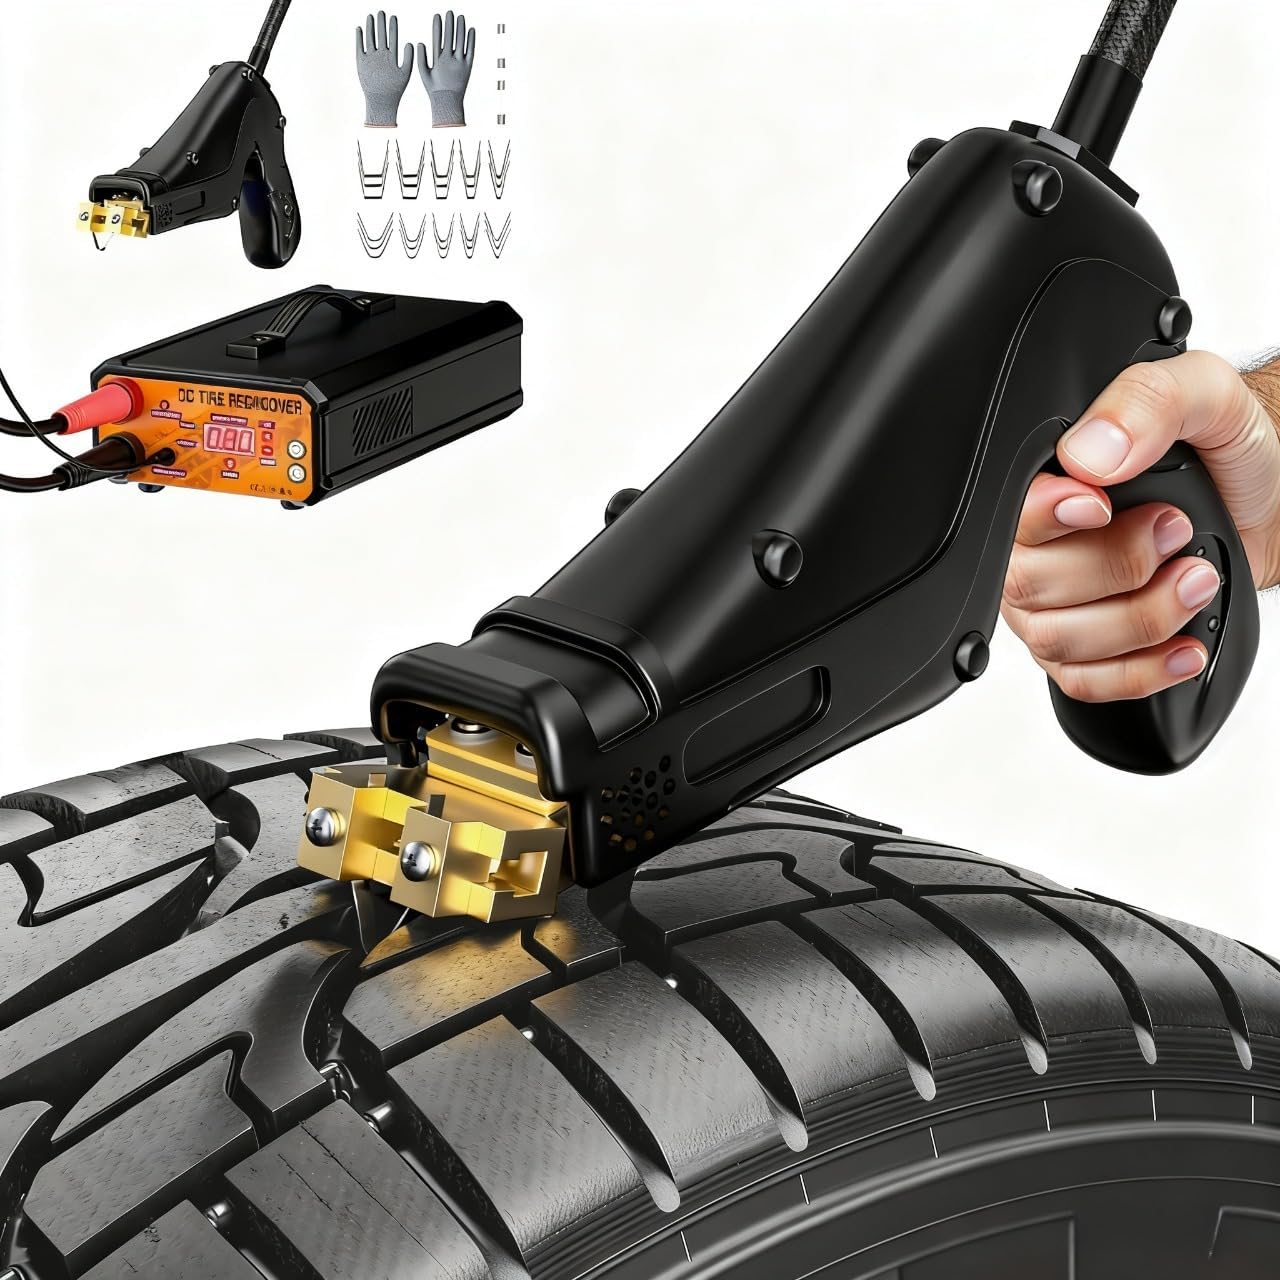
Image: The PYY Tire Grooving Tool kit, showing the main handpiece, the power control unit with a digital display, various grooving blades, and a pair of protective gloves. The handpiece is depicted in use on a tire, illustrating its function.
Instrukcje konfiguracji
Wykonaj poniższe kroki w celu wstępnej konfiguracji:
- Connect Power Control Unit: Place the power control unit on a stable, flat surface. Connect the power cable to the unit and then to a suitable 110V power outlet.
- Podłącz końcówkę ręczną: Plug the handpiece cable securely into the designated port on the power control unit.
- Install Grooving Blade: Ensure the tool is unplugged. Loosen the screws on the handpiece blade holder. Carefully insert the desired grooving blade into the holder, ensuring it is seated correctly. Tighten the screws firmly to secure the blade.
- Włączanie: Turn on the power control unit using the main power switch. The digital display should illuminate.
Operating the PYY Tire Grooving Tool
Proper operation ensures efficient and safe tire grooving:
- Tire Preparation: Clean the tire surface thoroughly to remove dirt, debris, and oil. Mark the desired grooving lines on the tire with a chalk or marker for guidance.
- Ustawienie temperatury: Use the controls on the power unit to set the desired temperature. Start with a lower setting and gradually increase it until the blade cuts smoothly through the rubber without excessive smoke or tearing. Different rubber compounds may require different temperatures.
- Grooving Technique: Hold the handpiece firmly with both hands if possible, or one hand if comfortable, ensuring a stable grip. Apply steady, consistent downward pressure and move the tool along the marked line at a uniform speed. Avoid jerky movements or excessive force, which can lead to uneven grooves or blade damage.
- Kontrola głębokości: The depth of the groove is controlled by the blade type and the pressure applied. Practice on a scrap tire or an inconspicuous area first to achieve the desired depth and consistency.
- Ochłonąć: After completing the grooving, turn off the power unit and allow the blade to cool down completely before handling or storing.
Konserwacja i pielęgnacja
Regular maintenance extends the life of your tool:
- Czyszczenie ostrza: After the blade has cooled, carefully remove it and clean any accumulated rubber residue using a stiff brush or appropriate cleaning solution. Ensure the blade is dry before reinstallation or storage.
- Czyszczenie jednostki: Wipe the power control unit and handpiece with a dry or slightly damp ściereczką. Nie używaj środków czyszczących o właściwościach ściernych ani nie zanurzaj urządzenia w wodzie.
- Składowanie: Store the tool and its components in a clean, dry place, away from direct sunlight and extreme temperatures. Keep blades in a protective container to prevent damage and injury.
- Kontrola kabla: Periodically inspect power and handpiece cables for any signs of wear, cuts, or damage. Replace damaged cables immediately.
Rozwiązywanie problemów
Aby zapoznać się z typowymi problemami i ich rozwiązaniami, zapoznaj się z poniższą tabelą:
| Problem | Możliwa przyczyna | Rozwiązanie |
|---|---|---|
| Tool not heating | Kabel zasilający nie jest podłączony; Wyłącznik zasilania jest wyłączony; Gniazdo jest uszkodzone | Check all cable connections; Ensure power switch is ON; Test outlet with another device |
| Uneven or rough grooves | Incorrect temperature setting; Inconsistent pressure/speed; Dull or damaged blade | Adjust temperature; Maintain steady pressure and speed; Replace blade |
| Ostrze nie tnie skutecznie | Temperature too low; Blade worn out; Incorrect blade for tire type | Increase temperature; Replace blade; Ensure correct blade type is used |
| Nadmierne zadymienie podczas pracy | Temperature too high; Too much pressure | Reduce temperature; Lessen downward pressure |
Dane techniczne
- Marka: PYY
- Numer modelu: PYYTJHC96011YEUS
- Moc: 1000 watów
- Tomtage: 110 wolty
- Tworzywo: Stal nierdzewna
- Handpiece Dimensions (L x W x H): Wymiary 15.24 x 1.27 x 12.7 cm
- Item Weight (Handpiece): 454 gramów
- Cechy: Anti-slip base (on handpiece for secure grip)
Gwarancja i obsługa klienta
For warranty information or technical support, please refer to the contact details provided with your purchase documentation or visit the official PYY webZachowaj paragon jako dowód zakupu.