
JideTech BC9
JideTech 5MP PoE IP Bullet Camera User Manual
Model: BC9
1. Koniec produktuview
The JideTech 5MP PoE IP Bullet Camera is designed for both indoor and outdoor surveillance, offering high-resolution video and advanced detection capabilities. It features a 1/2.8" Mstar SSC30KQ Chip and IMX335 Sensor, delivering smooth 2560 x 1920 resolution at 30 frames per second. Key features include 120 feet color night vision, human/vehicle detection, two-way audio, and IP66 weatherproofing.

Figure 1.1: JideTech 5MP PoE IP Bullet Camera. This image displays the main unit of the JideTech 5MP PoE IP Bullet Camera.
2. Co znajduje się w pudełku
Sprawdź, czy w opakowaniu znajdują się wszystkie komponenty:
- 1x JideTech 5MP PoE Camera (Outdoor)
- 1x Instrukcja obsługi
- 1x Installation Screw Package
- 1x Tail Line Waterproof Cap
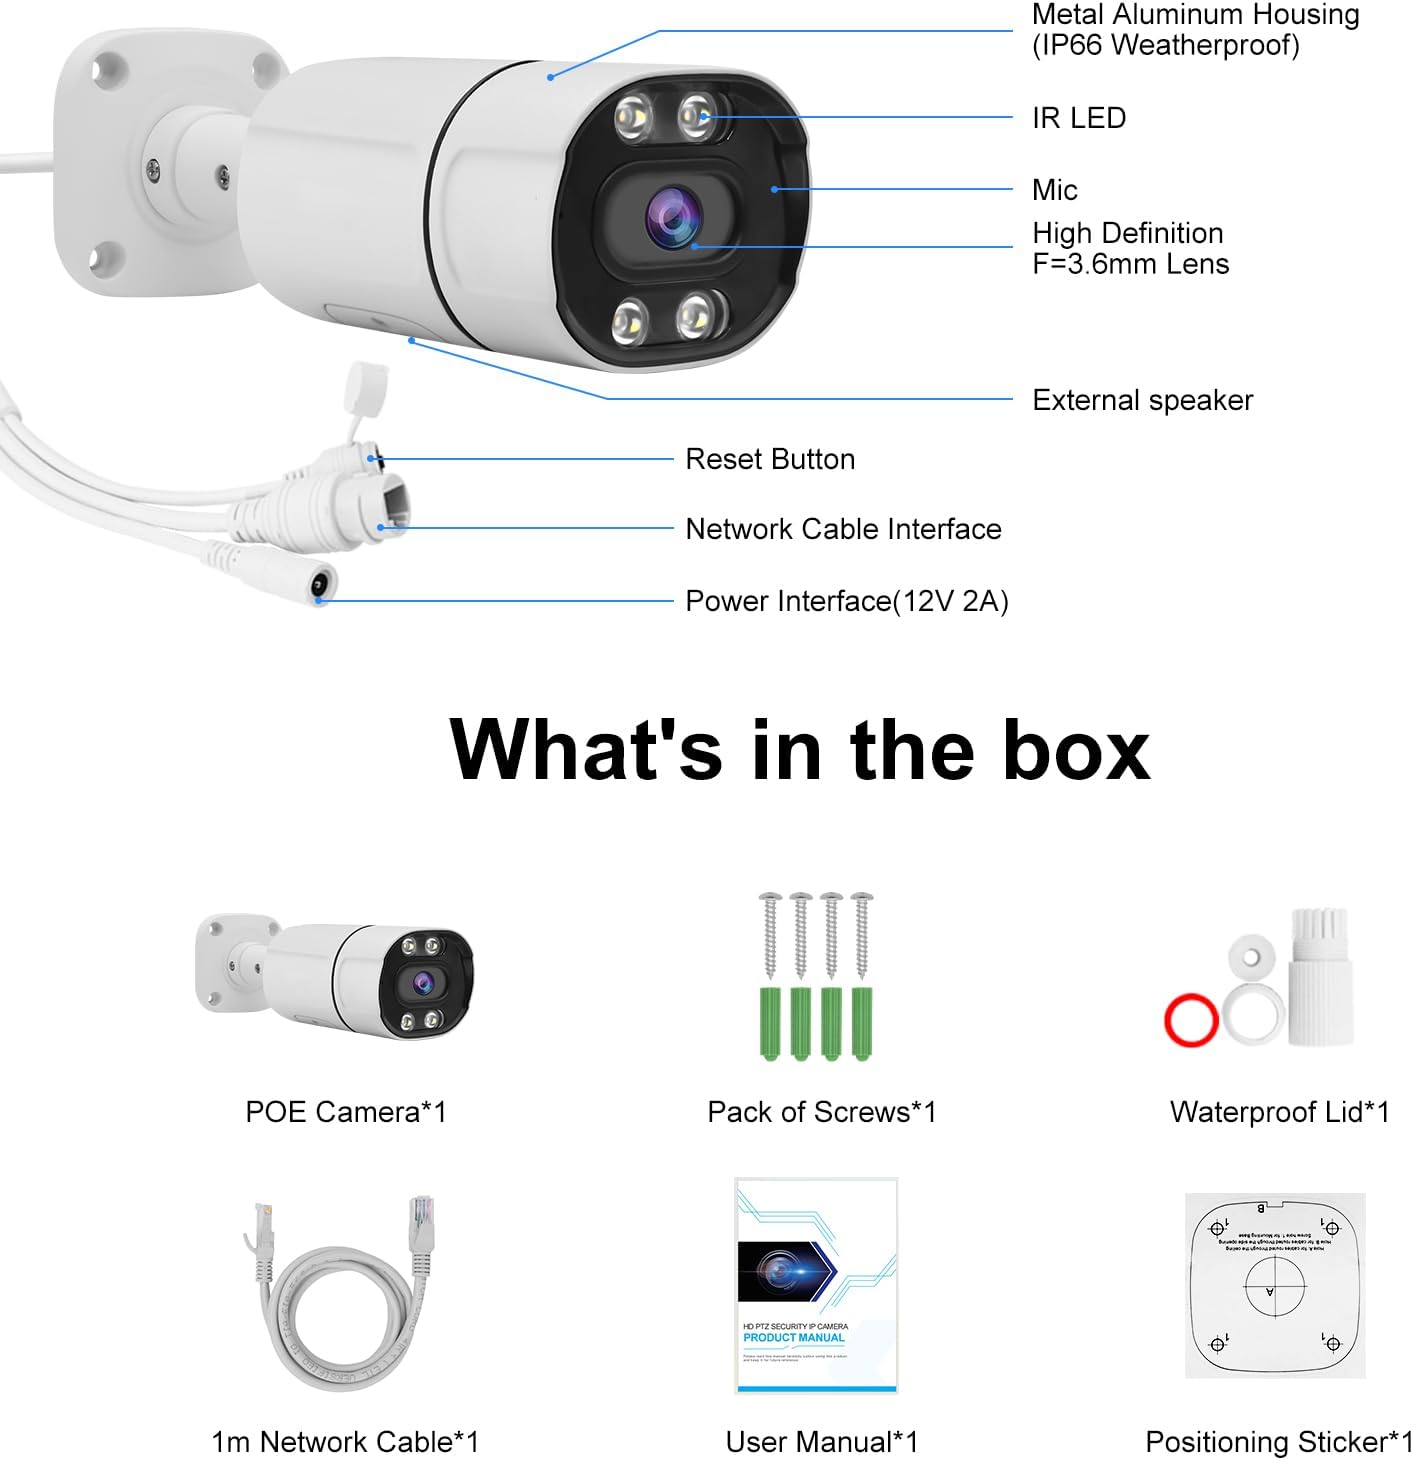
Figure 2.1: Package Contents. This image displays the JideTech 5MP PoE camera, installation screws, user manual, and tail line waterproof cap.
3. Konfiguracja i instalacja
The JideTech 5MP PoE IP Bullet Camera offers flexible connection options. Ensure proper power and network connections for optimal performance.
3.1 Metody połączenia
There are three primary ways to connect your PoE IP camera:
- Connect via NVR PoE (Power over Ethernet)
- Connect by DC12V Power Supply
- Connect via PoE Injector or PoE Switch
Video 3.1: PoE IP Camera 3 Ways to Connect. This video demonstrates the three different methods for connecting the JideTech PoE IP camera to your network and power source.
3.2 Detailed Connection Steps
Method 1: Connect via NVR PoE
This method simplifies installation by providing both power and data through a single Ethernet cable from a Power over Ethernet (PoE) Network Video Recorder (NVR).
- Podłącz jeden koniec kabla Ethernet do portu PoE kamery.
- Connect the other end of the Ethernet cable to a PoE port on your NVR.
- Ensure the NVR is connected to your router and a power source.
- Connect a monitor to the NVR to view kanał kamery.
- Access the NVR interface to configure and view Aparat fotograficzny.

Figure 3.2: NVR PoE Connection Diagram. This diagram illustrates how to connect the camera to a PoE NVR, which then connects to a router and monitor for local viewing, and allows remote access via mobile devices.
Method 2: Connect by DC12V Power Supply
This method uses a separate power adapter for the camera and connects to your network via a standard Ethernet cable to a router.
- Connect the DC12V power adapter to the camera's power input.
- Podłącz zasilacz do standardowego gniazdka elektrycznego.
- Connect one end of an Ethernet cable to the camera's LAN port.
- Podłącz drugi koniec kabla Ethernet do dostępnego portu LAN w routerze.
- Ensure your router is powered on and connected to the internet for remote access.

Figure 3.3: DC12V Power Supply Connection Diagram. This diagram illustrates connecting the camera to a router using a DC12V power supply for power and an Ethernet cable for data, enabling access via mobile devices and laptops.
Method 3: Connect via PoE Injector or PoE Switch
This method is suitable when you need to power the camera over Ethernet but do not have a PoE NVR. A PoE injector or switch provides the necessary power.
- Podłącz jeden koniec kabla Ethernet do portu PoE kamery.
- Connect the other end of this Ethernet cable to a PoE output port on a PoE injector or PoE switch.
- Connect the PoE injector/switch to a power source.
- Connect a standard Ethernet cable from the PoE injector/switch's data input (or an uplink port on the switch) to a LAN port on your router.
- Upewnij się, że wszystkie urządzenia są włączone.

Figure 3.4: PoE Injector/Switch Connection Diagram. This diagram illustrates connecting the camera to a PoE switch, which provides both power and data, and then connects to a router for network access.
4. Instrukcja obsługi
4.1 Początkowy dostęp i konfiguracja
After connecting the camera, you will need to access its interface for initial setup. This typically involves using a dedicated mobile application (e.g., "Viedolink" for iOS/Android) or a web przeglądarkę na komputerze podłączonym do tej samej sieci.
- Download the "Viedolink" app from your device's app store.
- Postępuj zgodnie z instrukcjami w aplikacji, aby dodać kamerę. Zazwyczaj polega to na zeskanowaniu kodu QR na kamerze lub ręcznym wpisaniu jej identyfikatora.
- Set up a secure password for your camera.
- Configure network settings if necessary (e.g., static IP address).
4.2 Monitorowanie i nagrywanie wideo
The camera provides Ultra HD 5MP resolution (2560 x 1920@30fps) for clear video monitoring.

Figure 4.1: 5MP Full HD Image Quality. This image demonstrates the superior clarity and detail provided by the 5MP resolution compared to a 2MP image.
The camera supports up to a 512GB MicroSD card for local storage. Recording options typically include continuous recording, scheduled recording, and event-triggered recording (e.g., motion detection).
4.3 Widzenie nocne
The camera features advanced night vision capabilities, providing clear images up to 120 feet (36 meters) in low-light conditions, including color night vision.

Figure 4.2: 5MP Day & Night Vision. This image illustrates the camera's ability to capture clear video both during the day and at night, with night vision extending up to 120 feet.
4.4 Human/Vehicle Detection and Motion Alerts
Utilizing cutting-edge detection algorithms, the camera can accurately identify people and vehicles, reducing false alarms from other movements. When a person or vehicle is detected, the camera sends real-time alert messages to your mobile phone or email.

Figure 4.3: Smart Human/Vehicle Detection. This image demonstrates the camera's intelligent detection capabilities, distinguishing between human and vehicle movement.

Figure 4.4: Motion Detection and Alarm. This image illustrates how the camera detects motion and sends instant alerts via email or app notifications, allowing for timely action.
4.5 Dźwięk dwukierunkowy
The built-in microphone and speaker enable two-way communication through the camera. This allows you to speak with visitors or deter intruders directly via the app.

Figure 4.5: Two-Way Audio Communication. This image demonstrates the camera's two-way audio feature, allowing real-time conversation with individuals near the camera.
5. Konserwacja
To ensure the longevity and optimal performance of your JideTech 5MP PoE IP Bullet Camera, follow these maintenance guidelines:
- Czyszczenie: Regularnie czyść obiektyw aparatu miękką,amp cloth to remove dust, dirt, or smudges that may affect image quality. Avoid abrasive cleaners.
- Ochrona przed warunkami atmosferycznymi: The camera features an IP66 waterproof rating and a stable aluminum casing, designed to withstand various weather conditions (hot, snow, rain). However, ensure the tail line waterproof cap is securely installed to protect connections.
- Aktualizacje oprogramowania układowego: Okresowo sprawdzaj producenta website or the Viedolink app for firmware updates. Keeping the firmware updated ensures access to the latest features and security enhancements.
- Zarządzanie kablami: Ensure all cables are securely connected and protected from environmental damage or tamping.
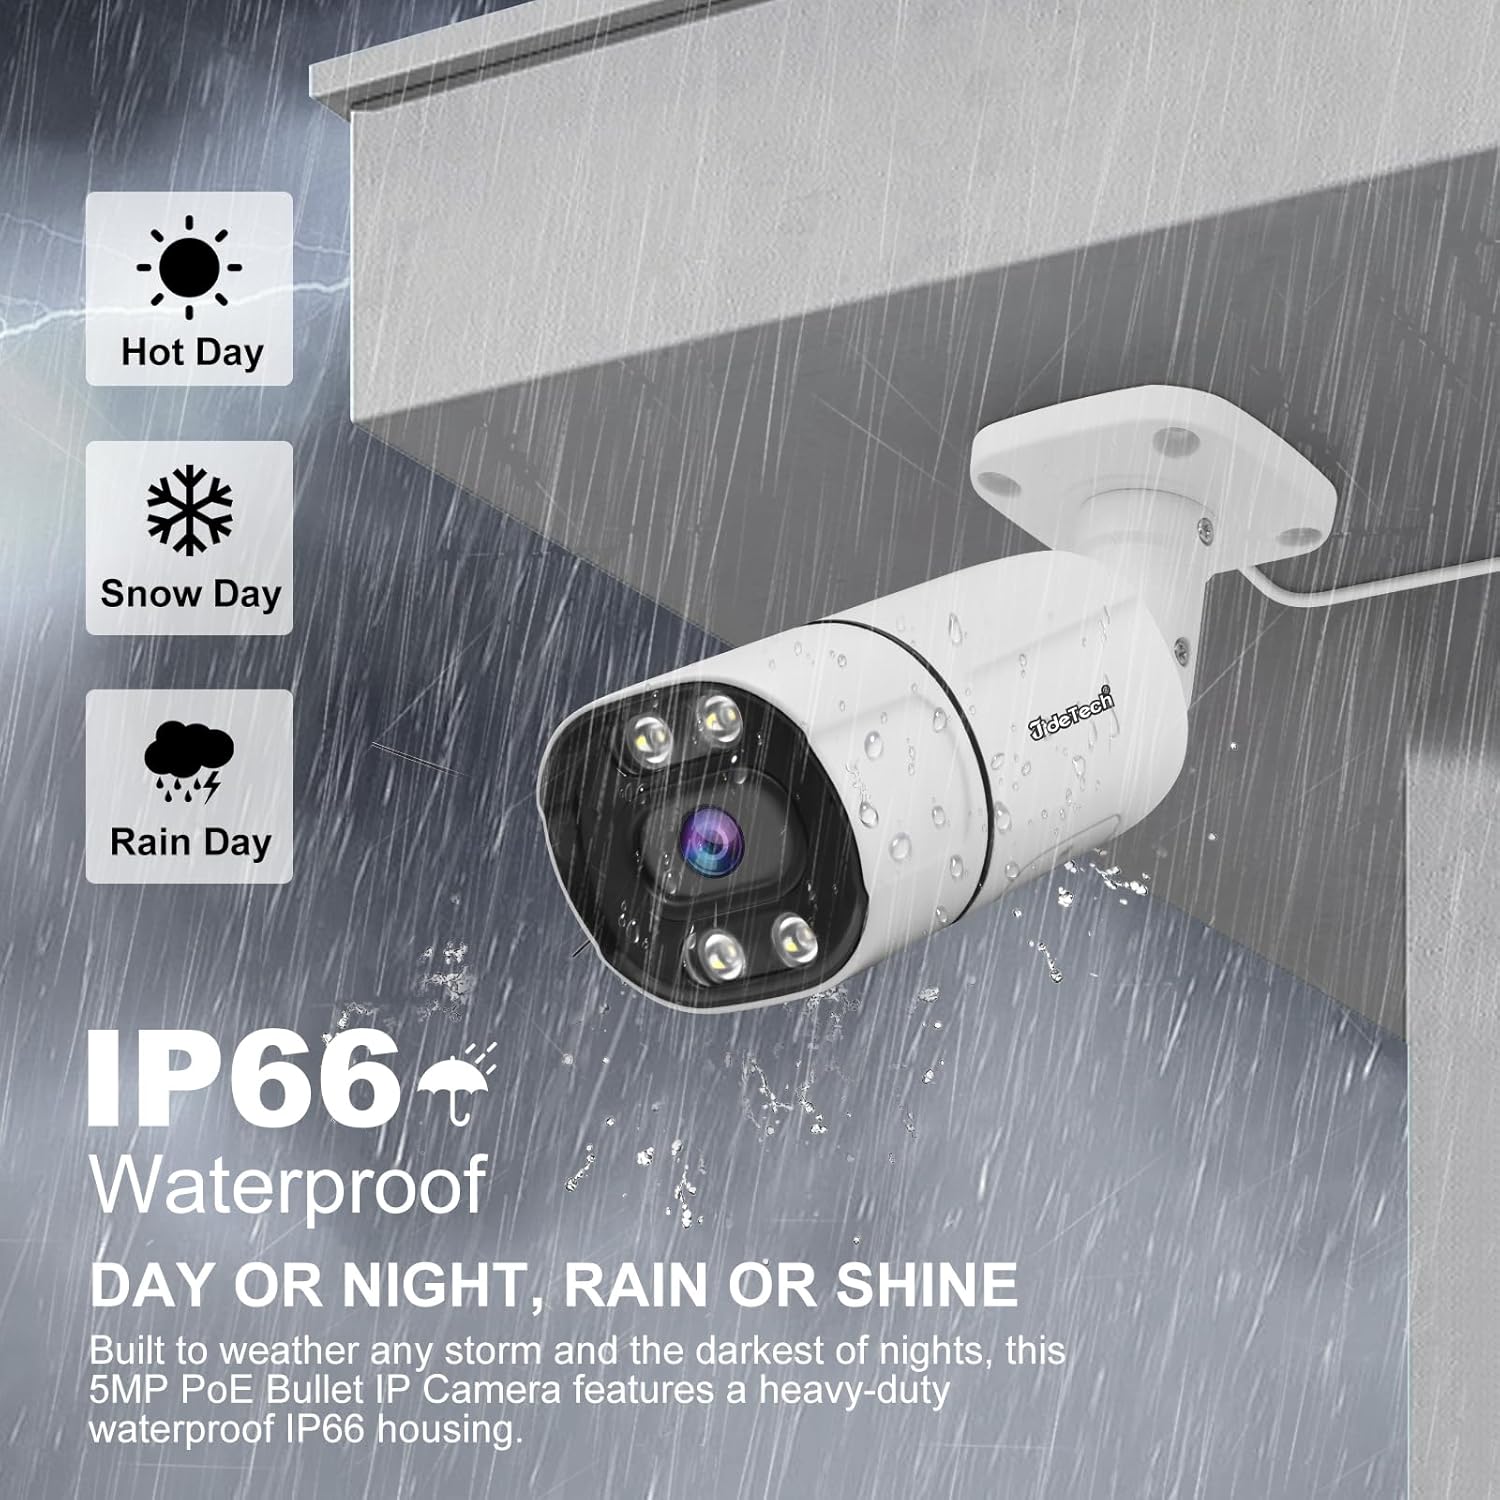
Figure 5.1: IP66 Waterproof Rating. This image emphasizes the camera's robust design, capable of operating reliably in diverse weather conditions.
6. Rozwiązywanie Problemów
If you encounter issues with your JideTech 5MP PoE IP Bullet Camera, refer to the following common troubleshooting steps:
- Brak obrazu/Offline:
- Check all power connections to the camera, NVR, PoE switch/injector, and router.
- Verify that Ethernet cables are securely connected and not damaged.
- Ensure the camera and NVR/router are on the same network segment.
- Restart the camera, NVR, and router.
- Słaba jakość obrazu:
- Wyczyść obiektyw aparatu.
- Sprawdź, czy w polu widzenia kamery nie ma przeszkód. view.
- Ensure sufficient lighting for night vision if applicable.
- Verify camera resolution settings in the app or NVR.
- Wykrywanie ruchu nie działa:
- Check motion detection sensitivity settings in the app.
- Sprawdź, czy strefy wykrywania są prawidłowo skonfigurowane.
- Verify notification settings (app push, email) are enabled and correctly configured.
- Problemy z dwukierunkowym dźwiękiem:
- Sprawdź ustawienia głośności mikrofonu i głośnika w aplikacji.
- Upewnij się, że nie ma żadnych przeszkód fizycznych blokujących mikrofon lub głośnik.
- Test network connectivity, as audio streaming requires a stable connection.
If these steps do not resolve the issue, please refer to the support section of this manual.
7. Specyfikacje
| Funkcja | Szczegół |
|---|---|
| Nazwa modelu | BC9 |
| Efektywna rozdzielczość wideo | 5 MP (2560x1920) |
| Szybkość klatek | 30 klatek na sekundę |
| Obiektyw | Stała ostrość 3.6mm |
| Zakres noktowizora | Do 120 stóp (36 metrów) |
| Typ noktowizora | Color Night Vision, Infrared+LED |
| Audio | Dwukierunkowa transmisja dźwięku (wbudowany mikrofon i głośnik) |
| Wykrywanie | Human/Vehicle Detection, Motion Detection |
| Składowanie | Karta Micro SD (do 512 GB) |
| Łączność | PoE (Power over Ethernet), Ethernet (Wired), ONVIF, RTMP, RTSP |
| Źródło zasilania | Corded Electric (DC12V or PoE) |
| Zastosowanie wewnątrz/na zewnątrz | Wewnątrz, Na zewnątrz |
| Poziom wodoodporności | Wodoodporność IP66 |
| Tworzywo | Metal |
| Wymiary (dł. x szer. x wys.) | 7.87 x 3.94 x 2.76 cala |
| Waga przedmiotu | 1.26 funta |
| Kompatybilne urządzenia | Desktop, Digital Video Recorder, Laptop, Smartphone, Tablet |
| Kodowanie wideo | H.264, H.265, H.265+ |
8. Gwarancja i wsparcie
JideTech is committed to providing quality products and customer satisfaction. For any issues or inquiries regarding your camera, please contact JideTech customer service.
- Kontakt: Refer to the contact information provided in the product packaging or on the official JideTech website. You may also contact the seller via the Amazon platform.
- Gwarancja: Information regarding the product warranty period and terms can be found in the included warranty card or on the manufacturer's webstrona.
Ask a question about this manual
Ask about setup, troubleshooting, compatibility, parts, safety, or missing instructions. Manuals+ will review the question and use this page’s manual context to help answer it.