1. Wprowadzenie
Thank you for choosing the Sannwsg Oval Shape 6.5x10 FT Metal Chicken Coop. This manual provides essential information for the safe assembly, operation, and maintenance of your new poultry enclosure. Please read these instructions carefully before beginning assembly and retain them for future reference. This coop is designed to provide a secure and comfortable environment for chickens, rabbits, ducks, and other small animals, and can also serve as a protective garden enclosure.

Figure 1: Product Dimensions and Capacity Overview. This image illustrates the overall size of the coop and its suitability for various small animals.
2. Instrukcje bezpieczeństwa
- Always wear appropriate safety gear, such as gloves, during assembly to prevent injuries.
- Ensure all connections are securely fastened before allowing animals into the enclosure.
- Regularly inspect the coop for any signs of wear, damage, or loose components. Repair or replace as necessary.
- Position the coop on a level, stable surface to prevent tipping.
- Keep children and pets away from the assembly area until construction is complete.
- This enclosure is designed for small animals. Do not use it for purposes other than its intended use.
- Be aware of local weather conditions. In strong winds or heavy snow, take precautions to secure the cover and frame.

Figure 2: Predator Protection Features. This image demonstrates the secure design of the coop, including tough netting and a narrow door gap, to protect animals from predators.
3. Zawartość opakowania
Przed rozpoczęciem montażu należy sprawdzić, czy wszystkie wymienione poniżej części są obecne i nieuszkodzone. Jeśli brakuje którejkolwiek części lub jest ona uszkodzona, prosimy o kontakt z działem obsługi klienta.
- Rury ramowe ze stali ocynkowanej
- Hexagonal Wire Mesh (Poultry Netting)
- UV-Resistant Polyethylene Tarp (Anti-UV Cover)
- Chicken Perching Ladder (Eucalyptus Wood & Galvanized Pipes)
- Bungee Balls
- Releasable Zip Ties
- Assembly Hardware (bolts, nuts, connectors)
- Instrukcja obsługi

Figure 3: Included Components. This image displays the key parts provided for assembling the chicken coop.
4. Instalacja i montaż
Assembly typically requires two people and can be completed in approximately 3 hours. Follow the numbered steps provided in the separate assembly guide included with your product.
4.1. Montaż ramy
- Rozpakuj wszystkie elementy i rozłóż je na czystej, płaskiej powierzchni.
- Connect the galvanized steel pipes according to the diagrams in the assembly guide to form the main arched frame structure. Ensure all connections are secure.
- Attach the base supports and any additional reinforcement parts to the main frame.

Figure 4: Assembly Process. This image shows two individuals working together to assemble the coop frame, indicating the recommended effort and time.
4.2. Wire Mesh Installation
- Unroll the hexagonal wire mesh and carefully attach it to the assembled frame using the provided releasable zip ties.
- Start from one end and work your way around, ensuring the mesh is taut and securely fastened to all frame sections.
- Trim any excess mesh with wire cutters, ensuring no sharp edges remain.
- Pay close attention to the door area, ensuring the mesh forms a secure barrier with a narrow gap.
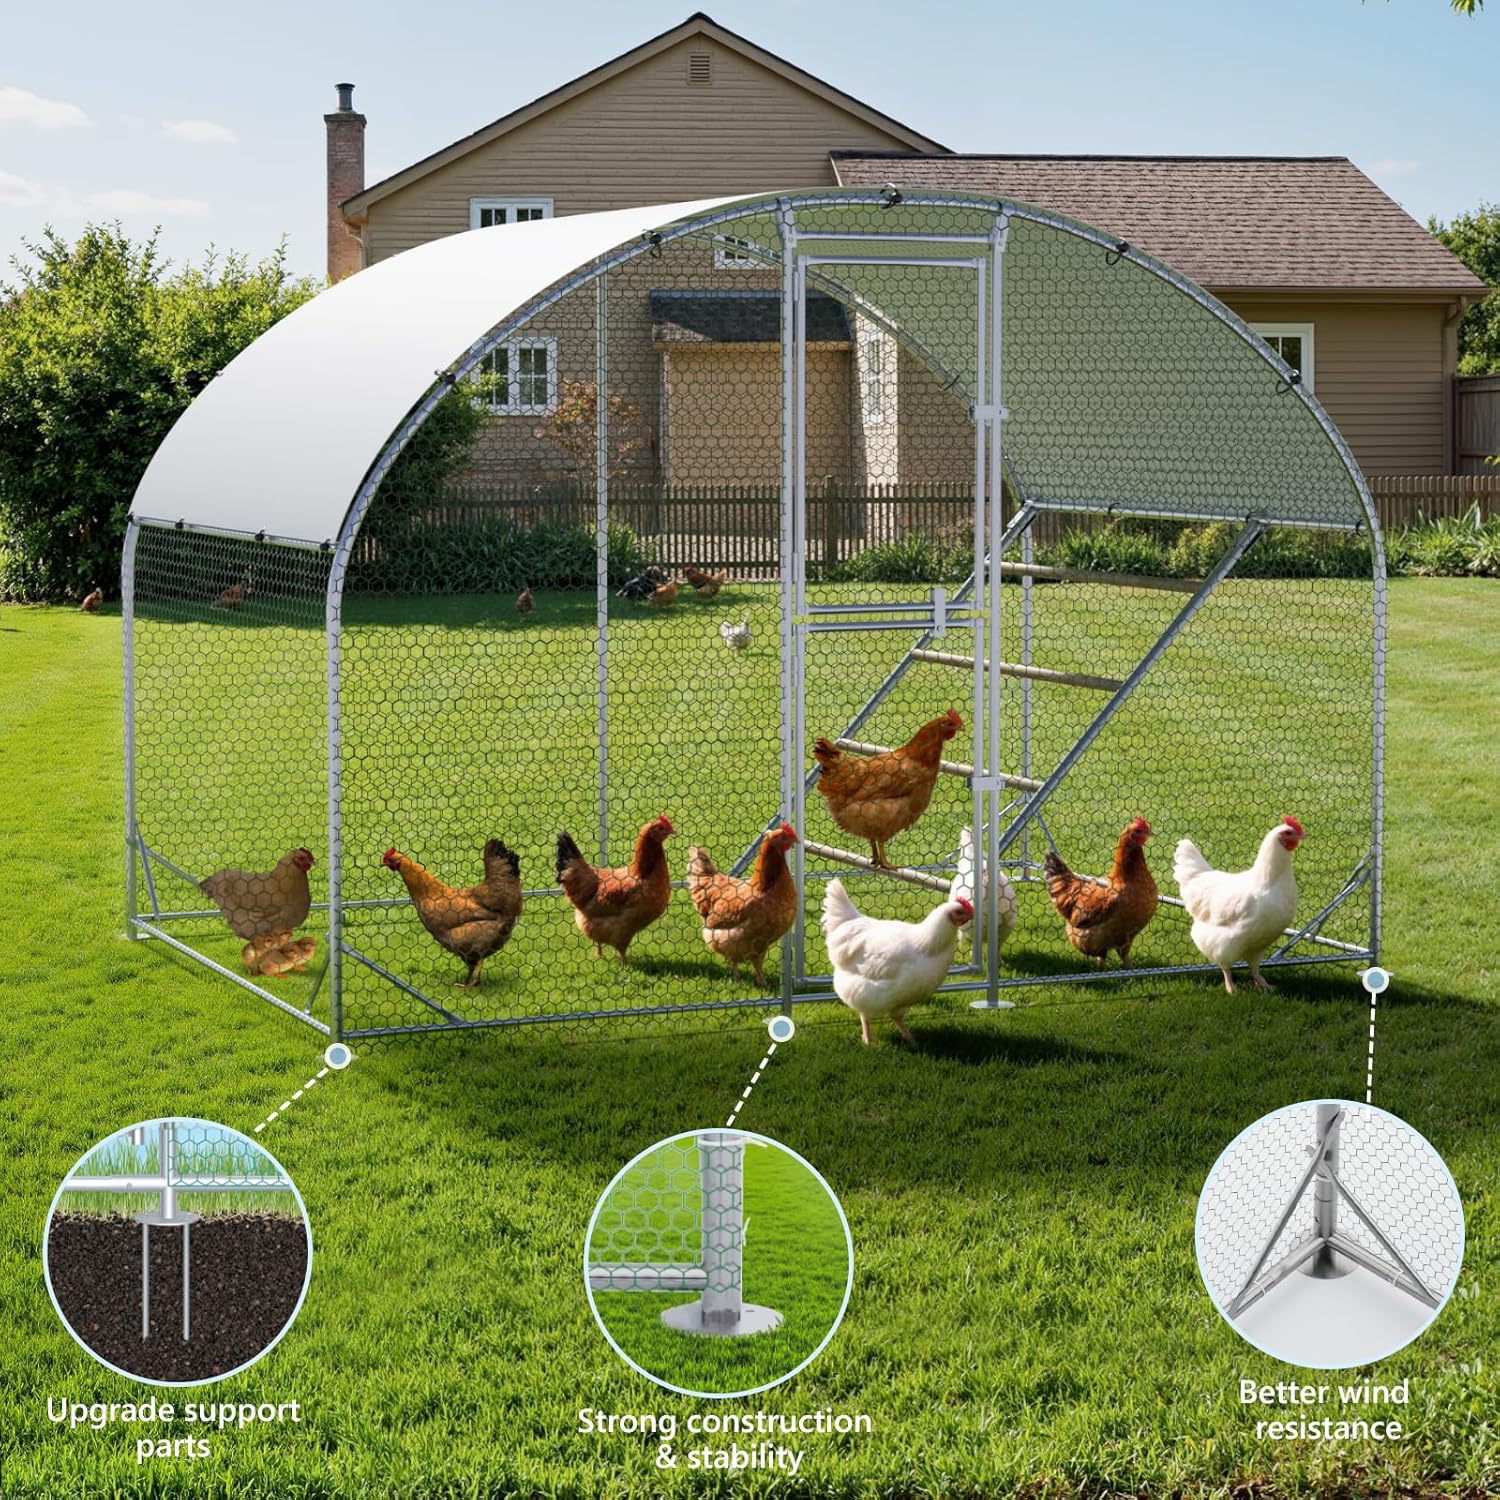
Figure 5: Frame and Mesh Details. This image illustrates the strong construction and secure mesh installation, emphasizing stability and wind resistance.
4.3. Instalacja pokrywy
- Drape the UV-resistant polyethylene tarp over the top of the arched frame.
- Secure the cover to the frame using the bungee balls, ensuring it is taut and provides full coverage to protect against rain and UV rays.

Figure 6: Weather Protection Cover. This image highlights the benefits of the full-size cover, providing waterproofing and UV protection.
4.4. Perching Ladder Installation
- Assemble the chicken perching ladder according to its specific instructions.
- Place the assembled perch inside the coop in a suitable location, ensuring it is stable and accessible for your animals.

Figure 7: Chicken Perching Ladder. This image shows the included perching ladder installed within the coop, providing roosting space for chickens.
5. Instrukcja obsługi
5.1. Accessing the Coop
The coop features a main walk-in door for full access and a convenient half-door feeding system.
- To enter the coop, unlatch and open the main door. Ensure it is securely closed and latched after entry/exit to prevent escapes and predator intrusion.
- The arched roof design allows for easy walk-in access without needing to bend excessively.

Figure 8: Easy Access Design. This image highlights the spacious arched roof, allowing comfortable walk-in access for users.
5.2. System karmienia
Utilize the independent feeding port (half-door) to provide food and water to your animals without fully opening the main door. This minimizes the risk of animals escaping.

Figure 9: Convenient Feeding Port. This image demonstrates the use of the half-door feeding system, allowing easy feeding without full entry.
6. Konserwacja
6.1. Czyszczenie
- Regularly remove animal waste and soiled bedding from the coop to maintain hygiene and prevent odors.
- The PVC-coated wire mesh can be easily cleaned with water and a mild detergent. Rinse thoroughly.
- Periodically clean the galvanized pipes to prevent dirt buildup.
6.2. Cover Care
- Ensure the UV-resistant cover remains taut to prevent water pooling, which can lead to stretching or damage.
- Clean the cover periodically with water to remove dirt and debris.
- In extreme weather conditions (e.g., heavy snowfall), remove accumulated snow from the cover to prevent structural stress.
6.3. Frame and Mesh Inspection
- Inspect the galvanized steel frame for any signs of rust or structural fatigue. While designed for durability, regular checks extend product life.
- Check the wire mesh for any tears, holes, or loose sections that could compromise animal safety or allow predator entry. Repair immediately using additional zip ties or replacement mesh if necessary.
- Ensure all bolts and connections remain tight.
7. Rozwiązywanie Problemów
| Problem | Możliwa przyczyna | Rozwiązanie |
|---|---|---|
| Animals escaping | Door not latched, gaps in mesh, animals digging under frame. | Ensure all doors are securely latched. Inspect mesh for holes and repair. Consider burying the bottom edge of the mesh or adding a skirt to prevent digging. |
| Predator entry | Compromised mesh, unsecured door, gaps at ground level. | Reinforce mesh with additional zip ties or stronger wire. Ensure doors are locked. Secure the base of the coop to the ground. |
| Water pooling on cover | Cover not taut, improper installation. | Re-adjust and re-secure the cover using bungee balls to ensure it is taut and slopes correctly for drainage. |
| Coop instability | Nierówne podłoże, luźne połączenia ramy. | Relocate to a level surface. Tighten all frame connections. Ensure ground stakes (if applicable) are fully inserted. |
8. Specyfikacje
- Model: Oval Shape 6.5x10 FT
- Wymiary całkowite (dł. x szer. x wys.): 118.11" x 78.74" x 78.74" (approximately 9.84 ft x 6.56 ft x 6.56 ft)
- Cover Area: 64.29 stóp kwadratowych
- Rozmiar drzwi: 23.6" x 63"
- Wire Mesh Size: 39.3" x 85 ft (roll)
- Tworzywo: Galvanized Steel (frame), Polyester (cover), PVC Coated Wire Mesh, Eucalyptus Wood (perch)
- Rekomendacja rasy: Wszystkie rozmiary ras
- Konkretne zastosowania: Outdoor poultry enclosure, rabbit/duck house, garden enclosure
- Cechy szczególne: Adjustable, Easy to Clean, Waterproof, Anti-UV Cover, Feeding Door, Chicken Perch

Figure 10: Material Quality Comparison. This image highlights the durable materials used in the Sannwsg coop, including galvanized pipes and PVC-coated wire mesh.
9. Gwarancja i wsparcie
For warranty information, missing parts, or technical support, please refer to the contact information provided at the point of purchase or on the Sannwsg official website. Please have your model number (Oval Shape 6.5x10 FT) and purchase date ready when contacting support.