
1. Wprowadzenie
Thank you for choosing the ACASIS 40Gbps Mac mini M4 Dock. This device is designed to expand the capabilities of your Mac mini M4, offering ultra-fast data transmission, additional storage, and enhanced display options. This manual provides detailed instructions for setup, operation, and troubleshooting to ensure optimal performance.
2. Główne cechy
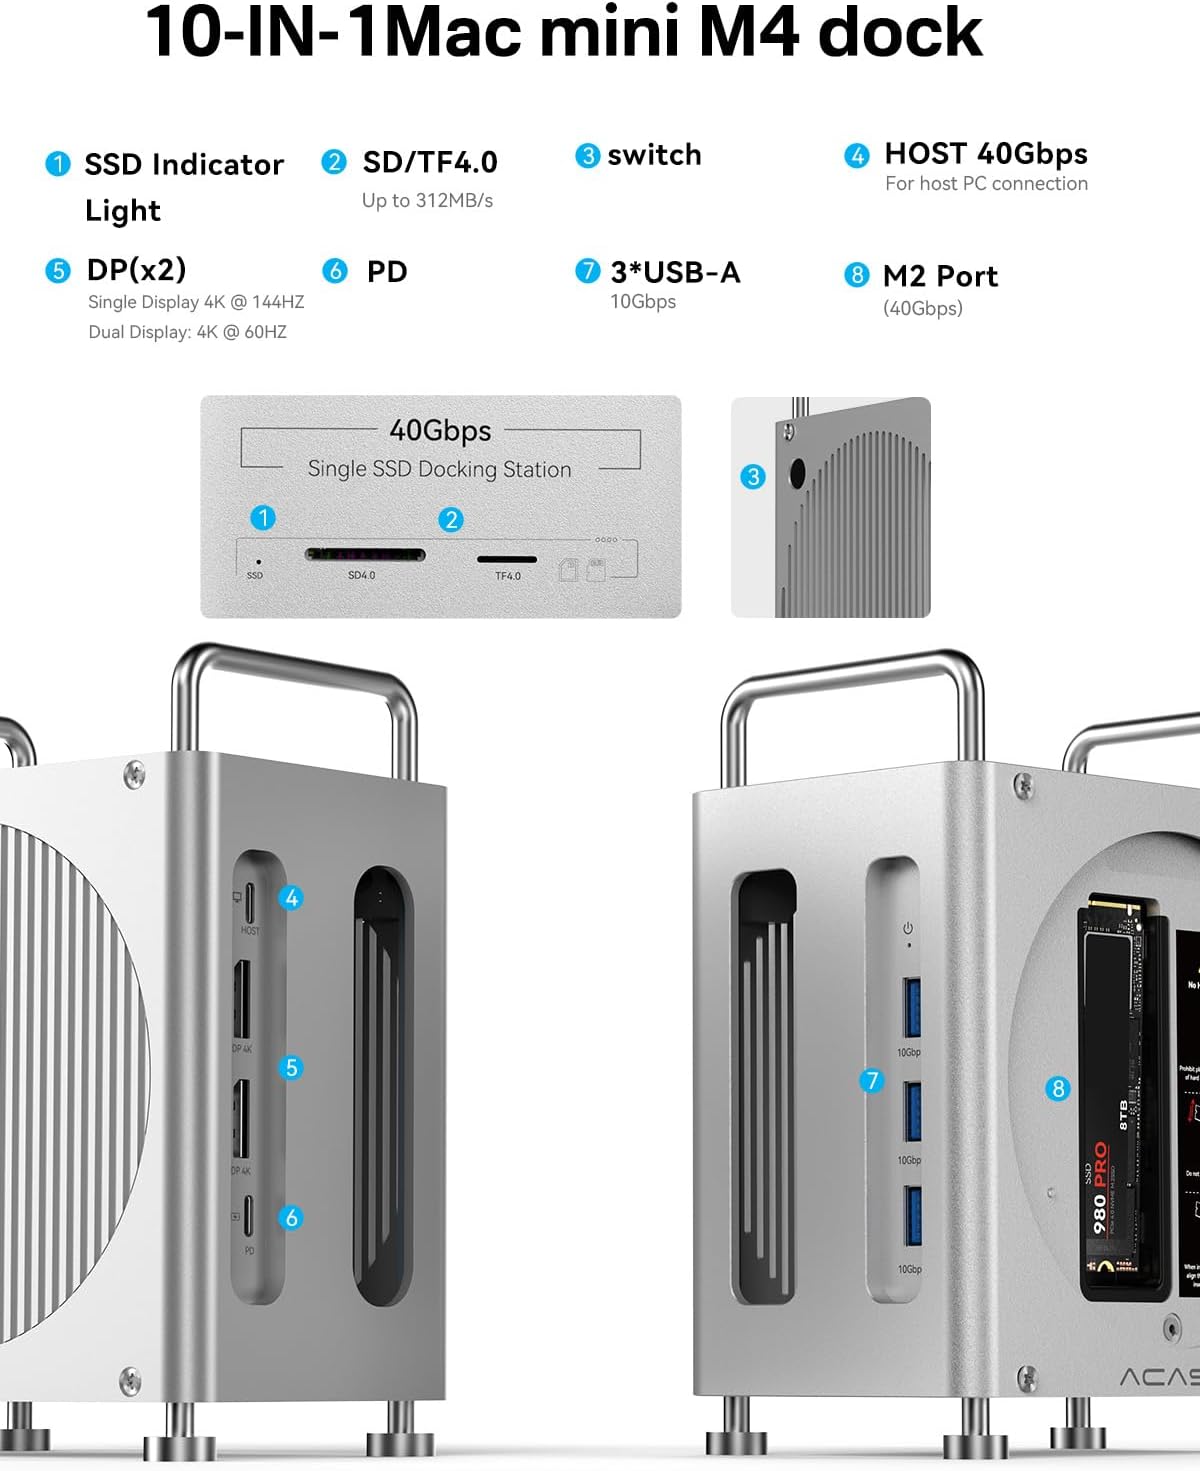
- 40Gbps Ultra-Fast Transmission: Experience rapid data transfer speeds for demanding tasks.
- Zintegrowana obudowa SSD: Supports a single NVMe SSD up to 8TB for massive storage expansion.
- Dual DisplayPort Outputs: Connect two external monitors for high-resolution displays (4K@144Hz single, 4K@60Hz dual).
- Łączność 10 w 1: Includes 3x USB-A 10Gbps ports and SD/TF 4.0 card slots for wide compatibility.
- Dedicated Power Button: For convenient control of the dock.
- Durable Aluminum Alloy Design: Provides robust protection and efficient heat dissipation.
3. Zawartość opakowania
Sprawdź, czy w przesyłce znajdują się wszystkie elementy:
- ACASIS Mac mini M4 Dock
- 40Gbps USB-C to USB-C Cable
- Zasilacz
- Śrubokręt
- SSD Snap
- Podkładki termiczne do dysków SSD
- Instrukcja obsługi

4. Przewodnik konfiguracji
4.1 Installing the SSD (Optional)
- Przygotuj obudowę: Use the provided screwdriver to remove the four screws on the bottom panel of the dock. Gently remove the bottom cover.
- Włóż dysk SSD: Align your M.2 NVMe SSD with the slot. Insert the drive at a 45-degree angle and secure it with the rubber plug. Apply the thermal pad(s) to the SSD for optimal heat dissipation.
- Wymień pokrywę: Replace the bottom cover and tighten the four screws.

4.2 Placing Your Mac mini M4
- Ensure the Mac mini M4 is powered off.
- Carefully align the Mac mini M4 with the top opening of the dock. The power button on the Mac mini should align with the auxiliary power button on the dock.
- Gently slide the Mac mini M4 into the dock until it is securely seated.
4.3 Podłączanie stacji dokującej
- Podłączenie zasilania: Connect the provided power adapter to the dock's PD port.
- Połączenie hosta: Use the 40Gbps USB-C to USB-C cable to connect the dock's HOST port to a Thunderbolt port on your Mac mini M4.
- Urządzenia peryferyjne: Connect your DisplayPort monitors, USB-A devices (keyboard, mouse, USB drives), and SD/TF cards to the respective ports on the dock.
- Włączanie: Press the power switch on the dock to begin use.

Video: An official ACASIS video demonstrating the setup and features of the Mac mini M4 Dock, including port connections and SSD installation.
5. Instrukcja obsługi
5.1 Przesyłanie danych
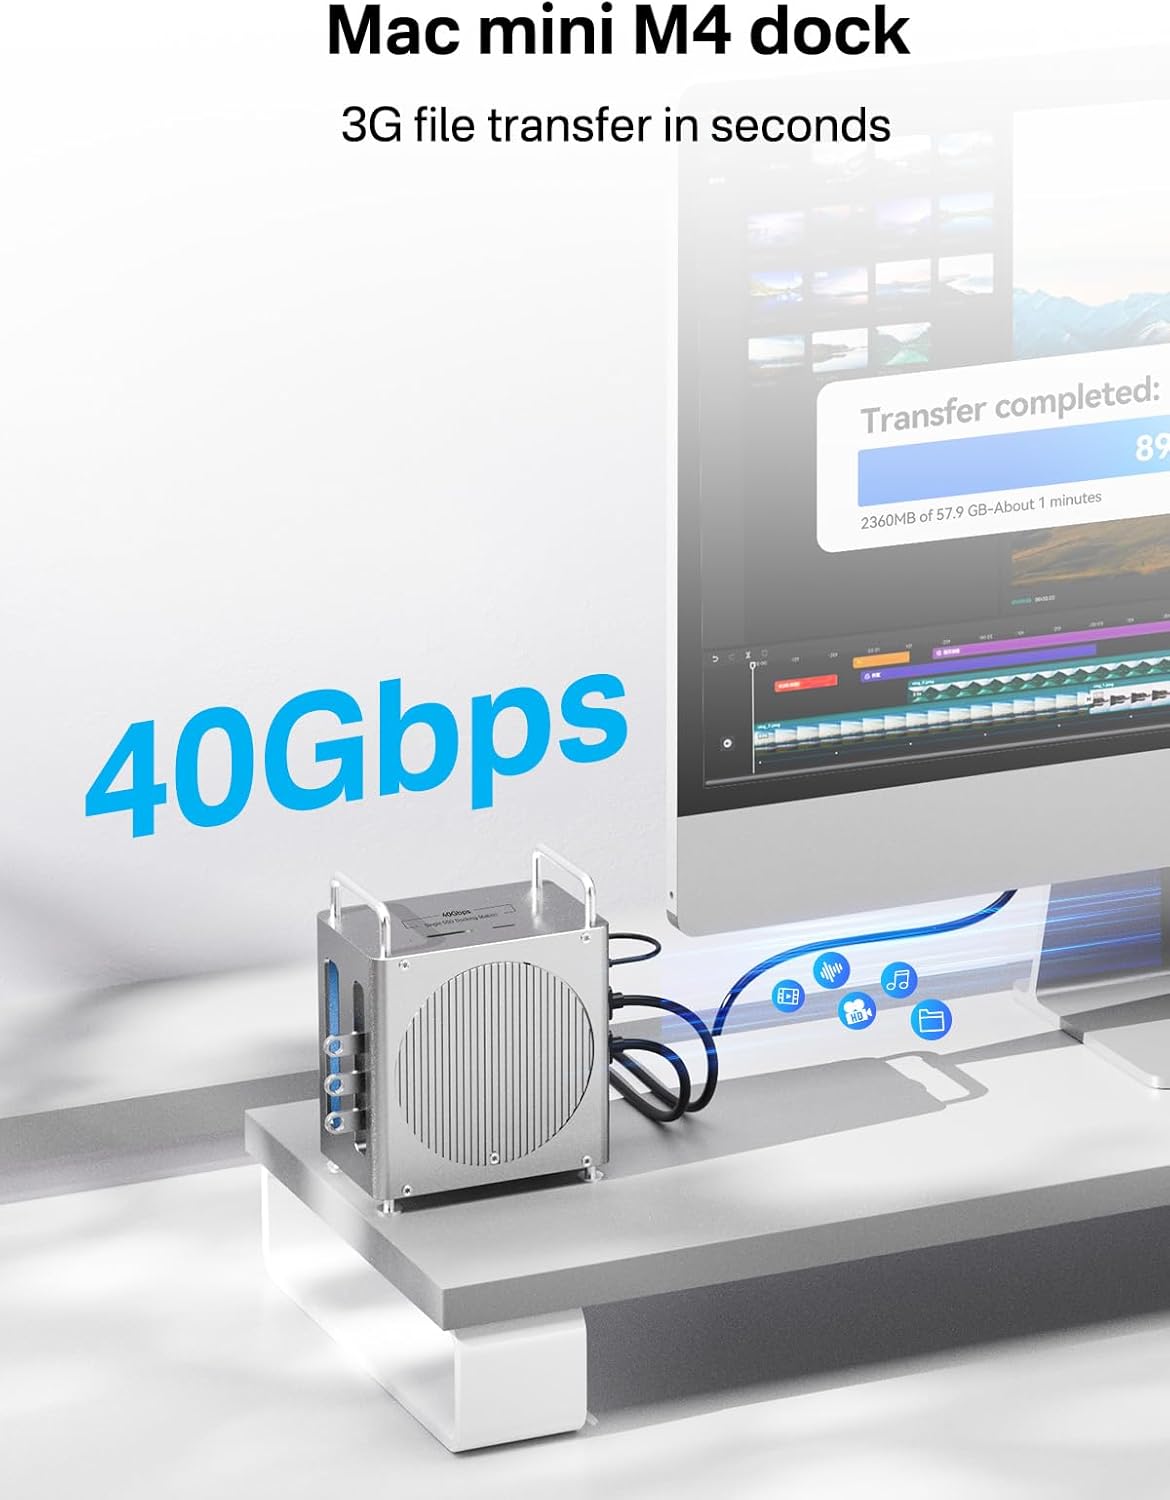
The 40Gbps host connection allows for ultra-fast data transfer between your Mac mini M4 and connected devices, including the internal NVMe SSD. Simply drag and drop files as you would with any external storage device. The 10Gbps USB-A ports also provide high-speed connectivity for compatible USB devices.
5.2 Wyjście wyświetlacza
Utilize the dual DisplayPort outputs to extend or mirror your Mac mini M4's display. For optimal performance, use direct DP to DP cables without adapters. Adjust display settings in your macOS System Settings.
- Single Display: Up to 4K resolution at 144Hz.
- Dual Display: Up to 4K resolution at 60Hz for each monitor.
5.3 Funkcjonalność czytnika kart
Insert SD 4.0 or TF 4.0 cards into the designated slots on the top of the dock. The card reader supports speeds up to 312MB/s, ideal for photographers and videographers.

6. Konserwacja
- Czyszczenie: Do czyszczenia zewnętrznej części stacji dokującej używaj miękkiej, suchej ściereczki. Unikaj płynnych środków czyszczących i materiałów ściernych.
- Rozpraszanie ciepła: The aluminum alloy design and perforated structure aid in heat dissipation. Ensure proper airflow around the dock to prevent overheating, especially during heavy use.
- SSD Care: If you experience issues with your SSD, ensure it is properly seated and the thermal pads are correctly applied.

7. Rozwiązywanie Problemów
Q1: My DisplayPort isn't detecting the monitor. Is this a product defect?
If your monitor shows 'No Signal', here are a few possible reasons:
- You might be using a DP to HDMI cable, which can cause compatibility issues. We recommend using a direct DP to DP cable without any adapters.
- The monitor's input source may be set incorrectly. Make sure to set the monitor input to DP.
- The HOST cable must be connected to a Thunderbolt port on your Mac Mini M4 for the dock to work.
Wypróbuj poniższe kroki:
- Connect the dock's HOST port to your computer's Thunderbolt port using the original USB-C to USB-C cable. Press the power button on the dock to turn it on.
- Plug the original power adapter into the dock's PD charging port.
- Use a DP to DP cable to connect your monitor to the dock's DP port, and set your monitor's input source to DP.
- Note: If the issue continues, try connecting your monitor to another device with a DP port to see if it works properly.
Q2: My USB port isn't recognizing devices. Is this a product defect?
(Regarding issue: USB port not working)
If your USB devices aren't working, here's what might be happening:
- The HOST connection might be unstable.
- The dock may not be powered on.
Wypróbuj poniższe rozwiązanie:
- Use the original USB-C to USB-C cable to connect the HOST port to your computer's Thunderbolt port. Make sure the dock is turned on.
- Connect the original power adapter to the dock's PD power port.
- Plug your USB device (flash drive, mouse, keyboard, etc.) into the dock and check if it works.
- Note: If the device still doesn't work, try plugging it into another computer to see if the issue is with the device itself.
Q3: My dock disconnected during use, and my SSD isn't being detected.
If your dock disconnects or your SSD isn't detected during use, here's why that might happen:
- The M.2 SSD or HOST connection may be loose.
- Your SSD may require more power—make sure the dock is connected to a power source.
Here's what you can do:
- Turn off the dock and unplug it. Remove the SSD and gently clean the gold connectors with an eraser before reinserting it.
- Always use the power adapter when connecting high-power devices like SSDs to ensure stable performance.
- Note: When using multiple devices at once, always keep the dock plugged into power for best results.
Q4: Do I need to connect the dock to a power source during use?
Think of the external power adapter as your dock's "gas station." It makes sure every connected device gets enough "fuel" to run at full speed, reliably, without draining your Mac's battery.
Q5: The indicator lights on the device are too bright. Why are they there?
The power light shows whether your Mac Mini M4 is on, and the SSD light tells you if your SSD is installed correctly. These lights help you understand what's happening—like whether the device is powered on, transferring data, or experiencing an error—without needing to check your computer. If the lights are too bright, you can place a small piece of tape over them to soften the glow.

8. Specyfikacje
| Funkcja | Szczegół |
|---|---|
| Model | B0FQTZ2BN4 |
| Marka | AKAZ |
| Interfejs hosta | USB typu C (40 Gb/s) |
| Obudowa SSD | Single M.2 NVMe, up to 8TB capacity |
| Wyświetl wyjścia | 2 x DisplayPort (4K@144Hz single, 4K@60Hz dual) |
| Porty USB | 3 x USB-A (10 Gb/s) |
| Czytnik kart | SD 4.0, TF 4.0 (up to 312MB/s) |
| Dostarczanie mocy (PD) | 20 W |
| Tworzywo | Stop aluminium |
| Kompatybilne urządzenia | Mac mini M4 |
| Wymiary produktu | 5.35" dł. x 4.43" szer. x 6.69" wys. |
| Waga przedmiotu | 900 gramów (1.98 funta) |
9. Gwarancja i wsparcie
ACASIS provides a 24-miesięczny serwis gwarancyjny dla tego produktu. Dodatkowo dostępne jest dożywotnie wsparcie techniczne.
For technical assistance or warranty claims, please contact ACASIS customer support:
- E-mail: wsparcie@acasis.com
- Godziny otwarcia: 7x24 hours online service
