
Wstęp
Thank you for choosing the ErGear Single Monitor Mount. This manual provides detailed instructions for the safe and efficient installation, operation, and maintenance of your monitor mount. Please read this manual thoroughly before installation and keep it for future reference.
This monitor mount is designed to enhance your workspace by providing flexible positioning for a single monitor, promoting ergonomic viewing, and freeing up desk space. It supports monitors from 13 to 34 inches with VESA patterns of 75x75mm or 100x100mm, and a maximum load of 19.8 lbs (9 kg).
Informacje dotyczące bezpieczeństwa
OSTRZEŻENIE: Niezapoznanie się z instrukcją i nieprzestrzeganie jej może skutkować obrażeniami ciała, uszkodzeniem mienia lub unieważnieniem gwarancji. W przypadku niezrozumienia instrukcji lub wątpliwości co do bezpieczeństwa instalacji prosimy o kontakt z działem obsługi klienta.
- Nie przekraczać maksymalnego udźwigu wynoszącego 9 kg (19.8 funtów).
- Ensure the mounting surface (desk) can safely support the combined weight of the mount and your monitor.
- Use only the provided hardware. Do not use damaged or missing parts.
- Produkt przeznaczony jest wyłącznie do użytku wewnątrz pomieszczeń.
- Podczas instalacji należy trzymać dzieci i zwierzęta z daleka.
- Okresowo sprawdzaj, czy mocowanie jest bezpieczne i czy wszystkie elementy mocujące są dobrze dokręcone.
Zawartość opakowania
Please verify that all components are present and undamaged before proceeding with installation. If any parts are missing or damaged, contact customer support for assistance.
- Zespół ramienia monitora
- Biurko Clamp Opierać
- Płyta VESA
- Zestaw montażowy (śruby, podkładki, dystanse do montażu VESA)
- Allen Keys for adjustments
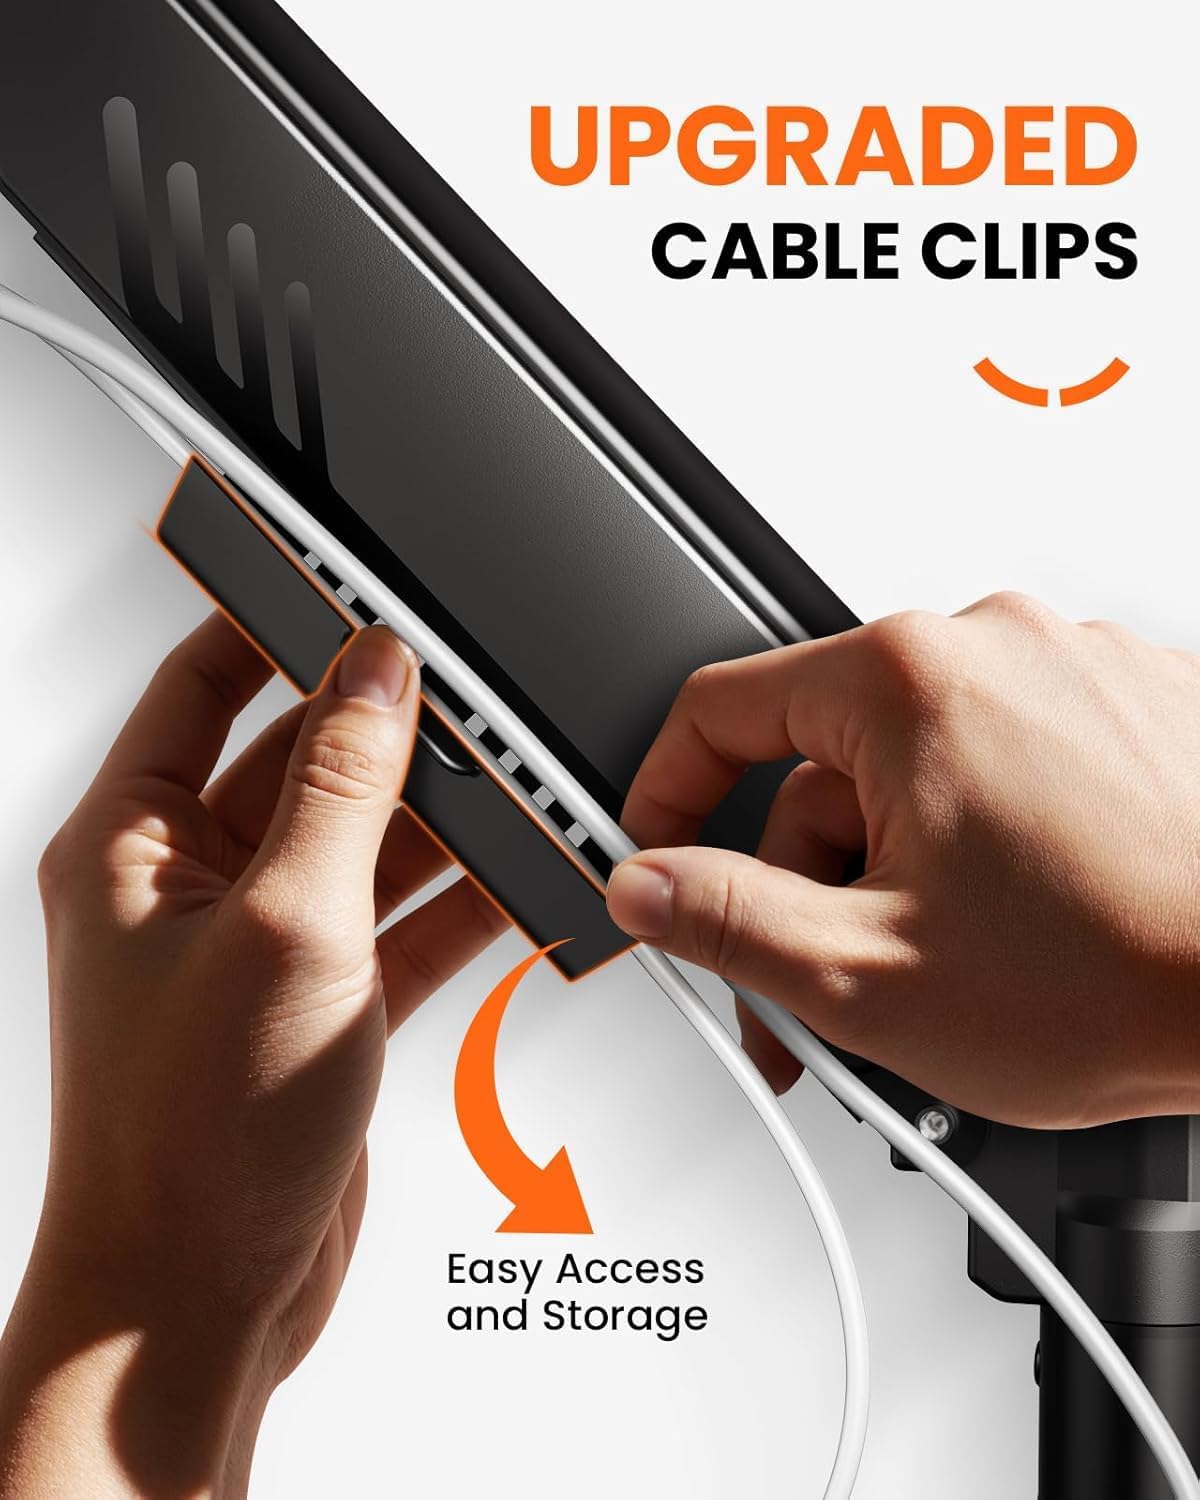
- Zaciski kablowe
Instrukcje konfiguracji
Step 1: Attach the Desk Clamp
Zabezpiecz biurko klamp base to your desk. Ensure the clamp is tightened firmly to provide a stable foundation for the monitor arm. The clamp features an anti-slip base and a larger contact area for improved stability.

Step 2: Attach the VESA Plate to Your Monitor
Align the VESA plate with the mounting holes on the back of your monitor. Use the appropriate screws, washers, and spacers from the hardware kit. This mount supports VESA patterns of 75x75mm and 100x100mm. The design allows for tool-free installation of the VESA plate onto the monitor arm.

Step 3: Mount the Monitor to the Arm
Once the VESA plate is secured to your monitor, slide the monitor (with the attached VESA plate) onto the monitor arm. Ensure it clicks into place or is secured with the provided locking mechanism.
Krok 4: Zarządzanie kablami
Utilize the integrated cable clips on the monitor arm to route and organize your monitor and power cables. This helps maintain a clean and tidy workspace.
Instrukcja obsługi
The ErGear Single Monitor Mount offers dynamic flexibility for optimal viewkomfort.
Regulacja wysokości
The monitor arm allows for flexible height adjustment to achieve an ergonomic eye-level viewing position. Gently push or pull the monitor to the desired height. If the monitor sags or rises too easily, adjust the gas spring tension using the provided Allen key (refer to the tension adjustment section in troubleshooting if needed).

Pochylenie, obrót i rotacja
The monitor arm provides extensive movement capabilities:
- Przechylenie: Adjust the monitor screen from +80° to -50° to reduce glare and optimize viewkąty.
- Obracać: Swivel the monitor ±90° left or right to share your screen or adjust for different tasks.
- Obrót: Rotate the monitor 360° for portrait or landscape orientation.

Konserwacja
To ensure the longevity and optimal performance of your ErGear Single Monitor Mount, follow these maintenance guidelines:
- Czyszczenie: Przetrzyj uchwyt miękką ściereczką.amp szmatką. Unikaj środków czyszczących o działaniu ściernym i rozpuszczalników, które mogą uszkodzić wykończenie.
- Kontrole okresowe: Regularnie sprawdzaj wszystkie śruby i połączenia, aby upewnić się, że są dobrze dokręcone. W razie potrzeby dokręć je ponownie.
- Regulacja sprężyny gazowej: If the monitor does not stay in position or is difficult to move, adjust the gas spring tension as described in the troubleshooting section.
Rozwiązywanie problemów
| Problem | Możliwa przyczyna | Rozwiązanie |
|---|---|---|
| Monitor opada lub nie utrzymuje się na żądanej wysokości. | Napięcie sprężyny gazowej jest zbyt słabe w stosunku do wagi monitora. | Use the provided Allen key to turn the tension screw clockwise (+) to increase tension until the monitor holds its position. |
| Monitor is difficult to move up or down. | Napięcie sprężyny gazowej jest zbyt duże. | Use the provided Allen key to turn the tension screw counter-clockwise (-) to decrease tension until the monitor moves smoothly. |
| Monitor is unstable or wobbles. | Biurkoamp is not tight enough or VESA plate screws are loose. | Upewnij się, że biurko jestamp is securely tightened to the desk. Check and tighten all VESA plate screws. |
| Monitor does not fit the mount. | Incorrect monitor size or VESA pattern. | Verify your monitor's size (13-34 inches) and VESA pattern (75x75mm or 100x100mm) against the product specifications. |
Specyfikacje
| Funkcja | Szczegół |
|---|---|
| Numer modelu | EGDMA71B-SS-EU |
| Marka | Przekładnia |
| Kompatybilny rozmiar monitora | 13 - 34 cali |
| Maksymalna ładowność | 19.8 funta (9 kg) |
| Zgodność ze standardem VESA | 75x75mm, 100x100mm |
| Typ montażu | Biurko Clamp |
| Typ ruchu | Articulating Gas Spring |
| Regulacja wysokości | Up to 14.17 inches (from desk surface) |
| Maksymalne rozszerzenie | 20.6 cali |
| Zakres pochylenia | +80° / -50° |
| Zakres obrotu | ±90° |
| Obrót | 360° |
| Kolor | Czarny |
| UPC | 840478844160 |
| GTIN | 840478844160 |

Gwarancja i wsparcie
ErGear is committed to providing high-quality products and customer satisfaction. This product comes with a standard manufacturer's warranty. For specific warranty details, please refer to the documentation included with your purchase or visit the official ErGear webstrona.
If you encounter any issues during installation or operation, or if you have any questions, please do not hesitate to contact ErGear customer support. Our team is available to assist you.
Informacje kontaktowe: Please refer to your product packaging or the official ErGear webstrona zawierająca najnowsze dane kontaktowe działu obsługi klienta.


