Wstęp
Thank you for choosing the SIMPLUS 3-in-1 Corded Stick Vacuum Cleaner. This manual provides essential information for the safe and efficient operation, maintenance, and troubleshooting of your new appliance. Please read it thoroughly before first use and keep it for future reference.
Składniki produktu
Your SIMPLUS 3-in-1 Corded Stick Vacuum Cleaner comes with several components designed for versatile cleaning.

Figure 1: Product Components and Dimensions. This image illustrates the main body, two PVC connecting hoses, a floor brush, a flat brush, and a filter element. Key dimensions are also provided.
- Treść główna: Zawiera silnik, pojemnik na kurz i elementy sterujące.
- PVC Connecting Hoses (x2): Used to extend the reach of the vacuum.
- Szczotka podłogowa: Primary attachment for floor cleaning.
- Flat Brush (Crevice Tool): Do wąskich przestrzeni i narożników.
- Element filtra: Part of the 3-layer filtration system.
Konfiguracja i montaż
Aby zmontować odkurzacz przed pierwszym użyciem, wykonaj poniższe czynności.
- Zamontuj rurę przedłużającą: Connect the PVC connecting hoses to the main body and the floor brush. Ensure they click securely into place.
- Zamontuj szczotkę podłogową: Insert the floor brush into the end of the assembled extension tube.
- Wstaw filtr: Ensure the 3-layer filter system (HEPA F8 filter, cyclone filter, microporous sponge filter) is correctly installed inside the dust cup.
- Podłączenie zasilania: Podłącz przewód zasilający do odpowiedniego gniazdka elektrycznego.
Video: RoneAir W800 Getting Started Guide. This video demonstrates the assembly process, including connecting the extension tubes and attachments, and shows how to install and remove the filter for cleaning.
Instrukcja obsługi
Your SIMPLUS vacuum offers versatile cleaning modes for different needs.
Używanie jako odkurzacza ręcznego
For general floor cleaning, use the vacuum in its stick configuration with the floor brush attached.
- Włączanie: Press the power button located on the main body.
- Manewrowanie: The brush head rotates 30° left/right and 150° forward/backward, allowing easy access under furniture and around obstacles.
- Zalecane powierzchnie: Ideal for hardwood floors, tiles, and low-pile carpets.

Figure 2: Flexible Brush Head. The brush head's swivel steering allows for easy cleaning under sofas, beds, and other low-clearance areas.
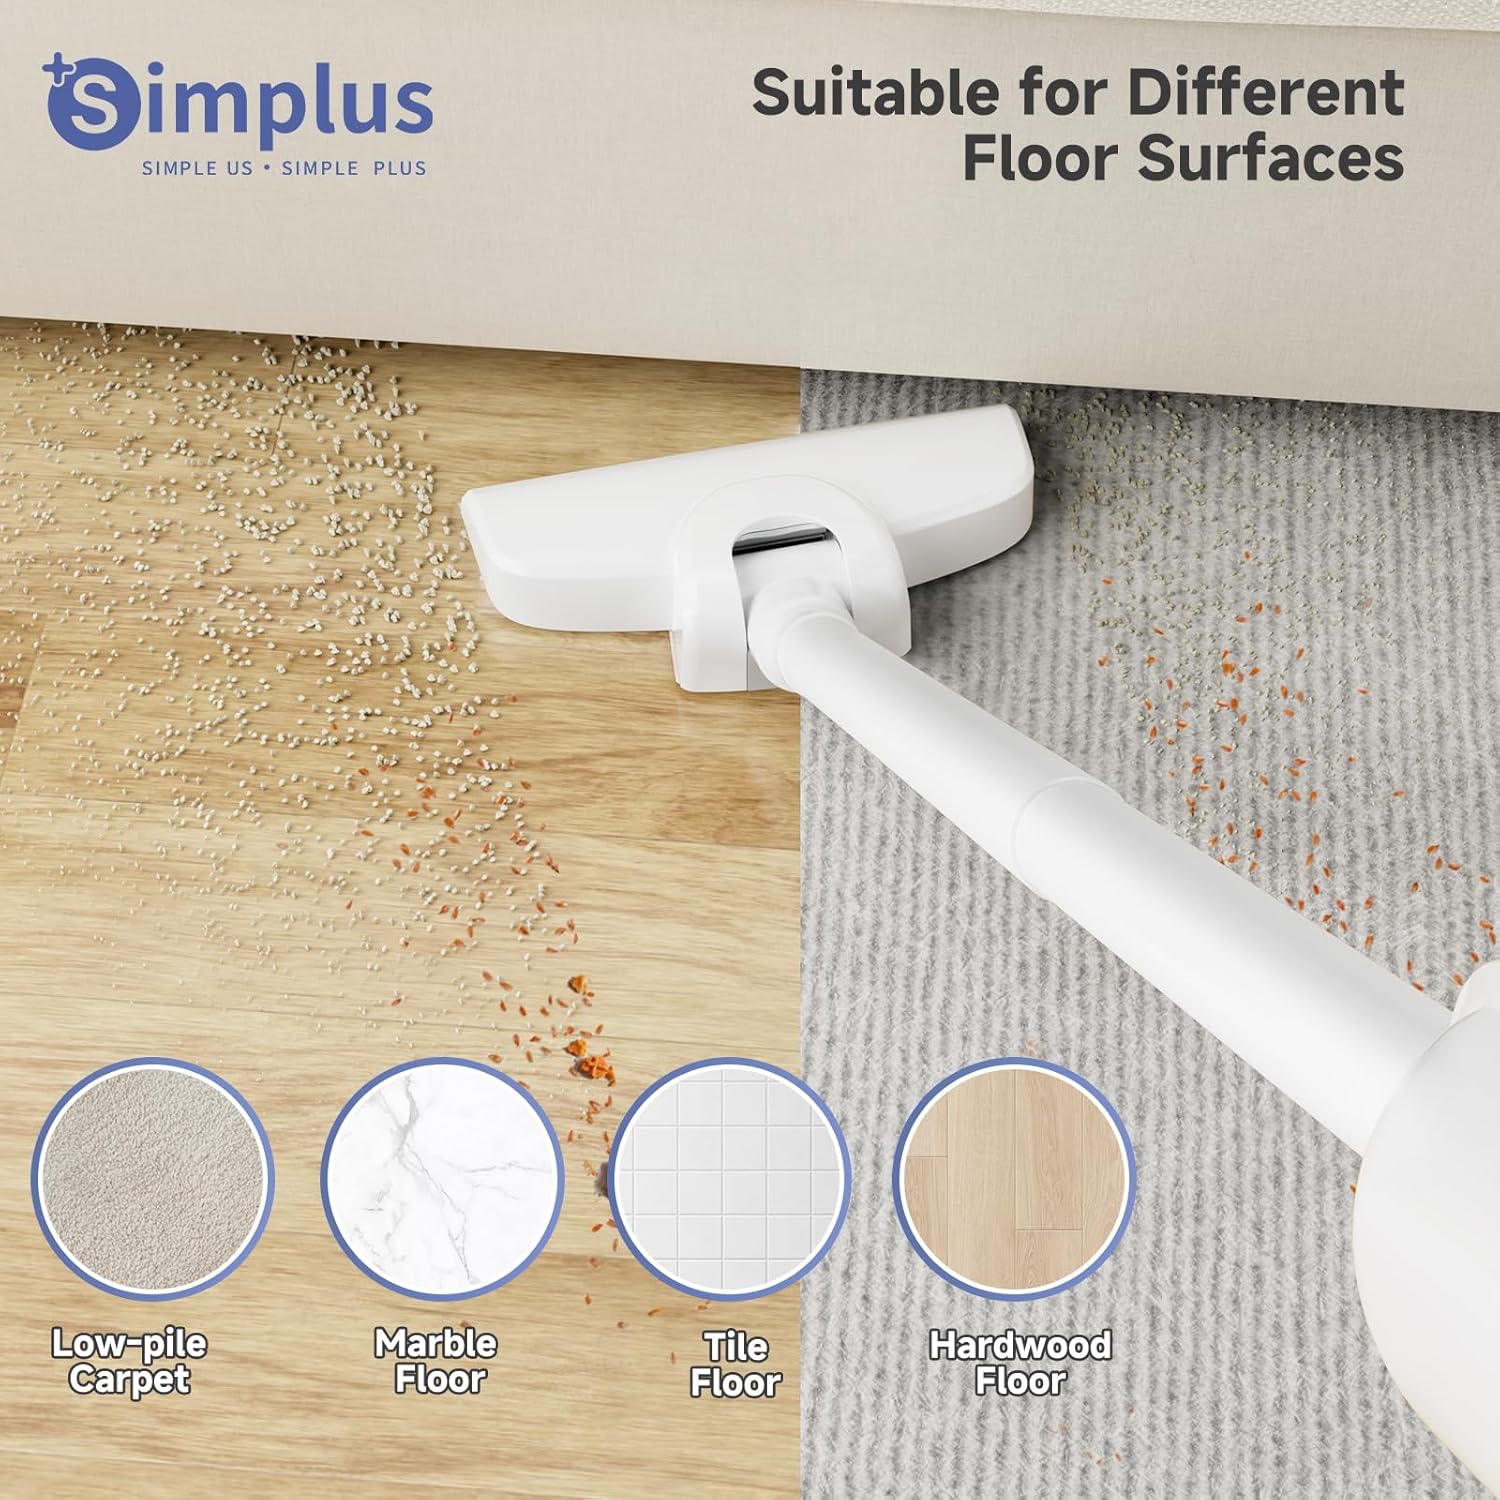
Figure 3: Suitable for Different Floor Surfaces. The vacuum is effective on various hard floor types and low-pile carpets.
Używanie jako odkurzacz ręczny
Detach the extension tubes and floor brush to use the main body as a handheld vacuum for targeted cleaning.
- Attach Flat Brush: Connect the flat brush (crevice tool) directly to the main body for cleaning sofa gaps, car interiors, and tight corners.
- Włączanie: Naciśnij przycisk zasilania.
Video: Vacuum Cleaners for Home (Preview). This short video demonstrates the handheld vacuum in action, quickly cleaning a sofa surface.
Konserwacja
Regularna konserwacja zapewnia optymalną wydajność i wydłuża żywotność odkurzacza.
Opróżnianie pojemnika na kurz
Empty the 0.35L dust cup regularly, especially after each use, to maintain strong suction.
- Odłącz pojemnik na kurz: Press the release button on the main body to detach the dust cup.
- Pusta zawartość: Hold the dust cup over a waste bin and empty the collected debris.

Figure 4: Effortless Dust Cup Emptying. The dust cup is designed for easy removal and emptying.
Czyszczenie filtra
The HEPA F8 filter is washable and reusable. Clean it periodically to prevent clogging and maintain suction power.
- Usuń filtr: Twist and pull out the filter element from the dust cup.
- Filtr do mycia: Płucz filtr pod bieżącą wodą, aż będzie czysty. Nie używaj detergentu.
- Filtr suchy: Pozostaw filtr do całkowitego wyschnięcia na powietrzu na co najmniej 24 godziny przed ponownym włożeniem. Upewnij się, że jest całkowicie suchy, aby zapobiec uszkodzeniu silnika.
- Ponowny montaż: Place the dry filter back into the dust cup and reattach the dust cup to the main body.

Figure 5: 3-Layer High-Efficiency Filtration. The multi-layer filter system captures fine particles for cleaner exhaust air.
Video: RoneAir W800 Getting Started Guide. This video demonstrates how to remove, clean, and reinsert the vacuum's filter.
Rozwiązywanie problemów
Jeśli masz problemy z odkurzaczem, zapoznaj się z poniższymi, częstymi problemami i ich rozwiązaniami.
| Problem | Możliwa przyczyna | Rozwiązanie |
|---|---|---|
| Utrata ssania | Full dust cup; Clogged filter; Blockage in nozzle/tube. | Empty dust cup; Clean/wash filter; Check for and remove blockages. |
| Odkurzacz się nie włącza | Niepodłączony; Problem z gniazdkiem elektrycznym; Uszkodzony przewód. | Ensure plug is secure; Test outlet with another device; Contact customer support if cord is damaged. |
| Nietypowy hałas | Blockage in the air path; Loose parts. | Check for and remove blockages; Ensure all parts are securely assembled. |
Specyfikacje
| Funkcja | Szczegół |
|---|---|
| Marka | SIMPLUS |
| Nazwa modelu | Odkurzacz |
| Numer modelu przedmiotu | XCQH002WH00-US |
| Źródło zasilania | Elektryczny przewodowy (400W) |
| Moc ssania | 15KPA |
| Typ filtra | HEPA F8 Filter (Washable & Reusable) |
| Pojemność pojemnika na kurz | 0.35 Liters (12 OZ) |
| Waga przedmiotu | 1.87 funta (0.85 kg) |
| Wymiary produktu | 5.71" dł. x 5.31" szer. x 15.16" wys. |
| Funkcja specjalna | 3-in-1 Multifunctional (Stick/Handheld), Flexible Brush Head |
| Zalecenia dotyczące powierzchni | Hard Floor, Low-Pile Carpet |
Gwarancja i wsparcie
For warranty information or technical support, please refer to the contact details provided with your product packaging or visit the official SIMPLUS webZachowaj paragon jako dowód zakupu.