
1. Wprowadzenie
Dziękujemy za zakupasing the Shark EVOPOWER SYSTEM BOOST+ Cordless Stick Vacuum Cleaner. This manual provides essential information for the safe and efficient operation, maintenance, and troubleshooting of your new vacuum cleaner. Please read these instructions thoroughly before first use and keep them for future reference.

Figure 1: Shark EVOPOWER SYSTEM BOOST+ Cordless Stick Vacuum Cleaner with Automatic Dust Collection Dock.
2. Informacje dotyczące bezpieczeństwa
Zawsze przestrzegaj podstawowych zasad bezpieczeństwa podczas korzystania z urządzeń elektrycznych, aby zmniejszyć ryzyko pożaru, porażenia prądem lub obrażeń. To urządzenie jest przeznaczone wyłącznie do użytku domowego.
- Nie stosować na zewnątrz ani na mokrych powierzchniach.
- Nie należy używać jako zabawki. Należy zachować szczególną ostrożność, gdy jest używany przez dzieci lub w ich pobliżu.
- Używaj wyłącznie zgodnie z opisem w niniejszej instrukcji. Używaj wyłącznie zalecanych przez producenta akcesoriów.
- Nie dotykaj wtyczki ani urządzenia mokrymi rękami.
- Nie wkładać żadnych przedmiotów do otworów. Nie używać z zablokowanymi otworami; utrzymywać w czystości, bez kurzu, kłaczków, włosów i wszystkiego, co może ograniczyć przepływ powietrza.
- Trzymaj włosy, luźne ubrania, palce i inne części ciała z dala od otworów i ruchomych części.
- Przed odłączeniem zasilania wyłącz wszystkie elementy sterujące.
3. Zawartość opakowania
Sprawdź, czy w pakiecie znajdują się wszystkie komponenty:
- Główna jednostka próżniowa (przenośna)
- Przedłużacz
- Floor Nozzle with 360 Intelligent Nozzle
- Automatic Dust Collection Dock
- Kabel ładujący
- Mini Motorhead
- Brush Crevice Tool
- Dysza wielofunkcyjna
- Multi-Cloth (Amazon.co.jp exclusive model)
- Instrukcja obsługi
4. Montaż i konfiguracja
4.1 Montaż odkurzacza
- Włóż rurę przedłużającą do głównego urządzenia odkurzacza, aż do momentu jej pewnego zatrzaśnięcia.
- Attach the floor nozzle to the other end of the extension wand, ensuring it clicks into place.
4.2 Setting up the Automatic Dust Collection Dock
Place the automatic dust collection dock on a flat, stable surface near a power outlet. Connect the charging cable to the dock and plug it into the outlet. The vacuum will automatically charge and empty its dust cup when placed on the dock.
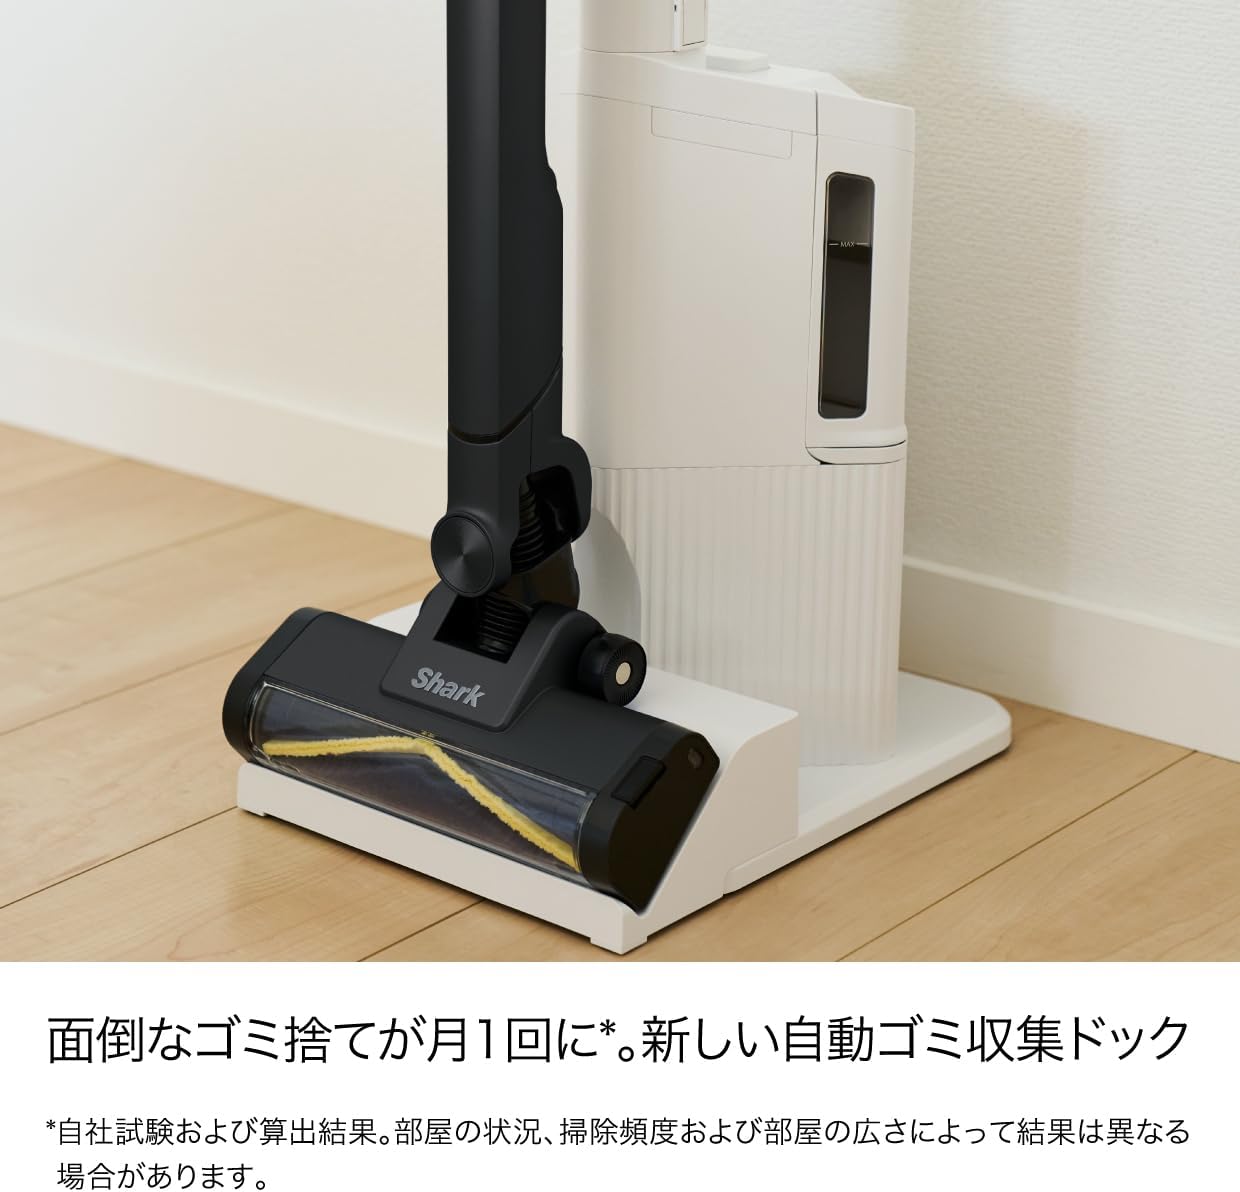
Figure 2: Vacuum cleaner docked in the automatic dust collection station.
5. Instrukcja obsługi
5.1 Włączanie/wyłączanie
Press the power button on the handle to turn the vacuum on or off. The vacuum will start in its default cleaning mode.
5.2 360 Intelligent Nozzle for All-Direction Cleaning
The unique 360 Intelligent Nozzle is designed to capture debris from all directions – front, back, left, and right. This reduces cleaning time and ensures thorough dirt removal.

Figure 3: The 360 Intelligent Nozzle effectively cleans from multiple directions.
5.3 Smart iQ Technology (iQ, Floor, and Edge Sensors)
The vacuum features Smart iQ Technology, which uses three sensors to optimize cleaning performance:
- iQ Sensor: Detects the amount of debris and automatically adjusts suction power. The iQ indicator lights on the handheld unit change color (green for low, yellow for medium, red for high) to visualize debris levels.
- Czujnik podłogowy: Detects the floor type (e.g., hard floor, carpet) and automatically adjusts the brush roll speed for optimal cleaning.
- Edge Sensor: Detects walls and edges, increasing suction power by up to 2.5 times to thoroughly clean along baseboards and in corners.

Figure 4: iQ Sensor and indicator lights.

Figure 5: Floor Sensor adjusting to carpet.

Figure 6: Edge Sensor in action.
5.4 Korzystanie z trybu przenośnego i akcesoriów
The main vacuum unit can be detached from the extension wand to function as a powerful handheld cleaner. Simply press the release button to detach. Attach the desired accessory for specific cleaning tasks:
- Mini Motorhead: Ideal for cleaning upholstery, pet hair, and small carpets.
- Brush Crevice Tool: Perfect for tight spaces, corners, and dusting delicate surfaces.
- Wielodyszowa: Versatile tool for various surfaces and quick clean-ups.

Figure 7: Handheld mode and included accessories.
5.5 Blue LED Headlight
The floor nozzle is equipped with a blue LED headlight that illuminates dust and debris on the floor, making it easier to spot and clean even in dimly lit areas.
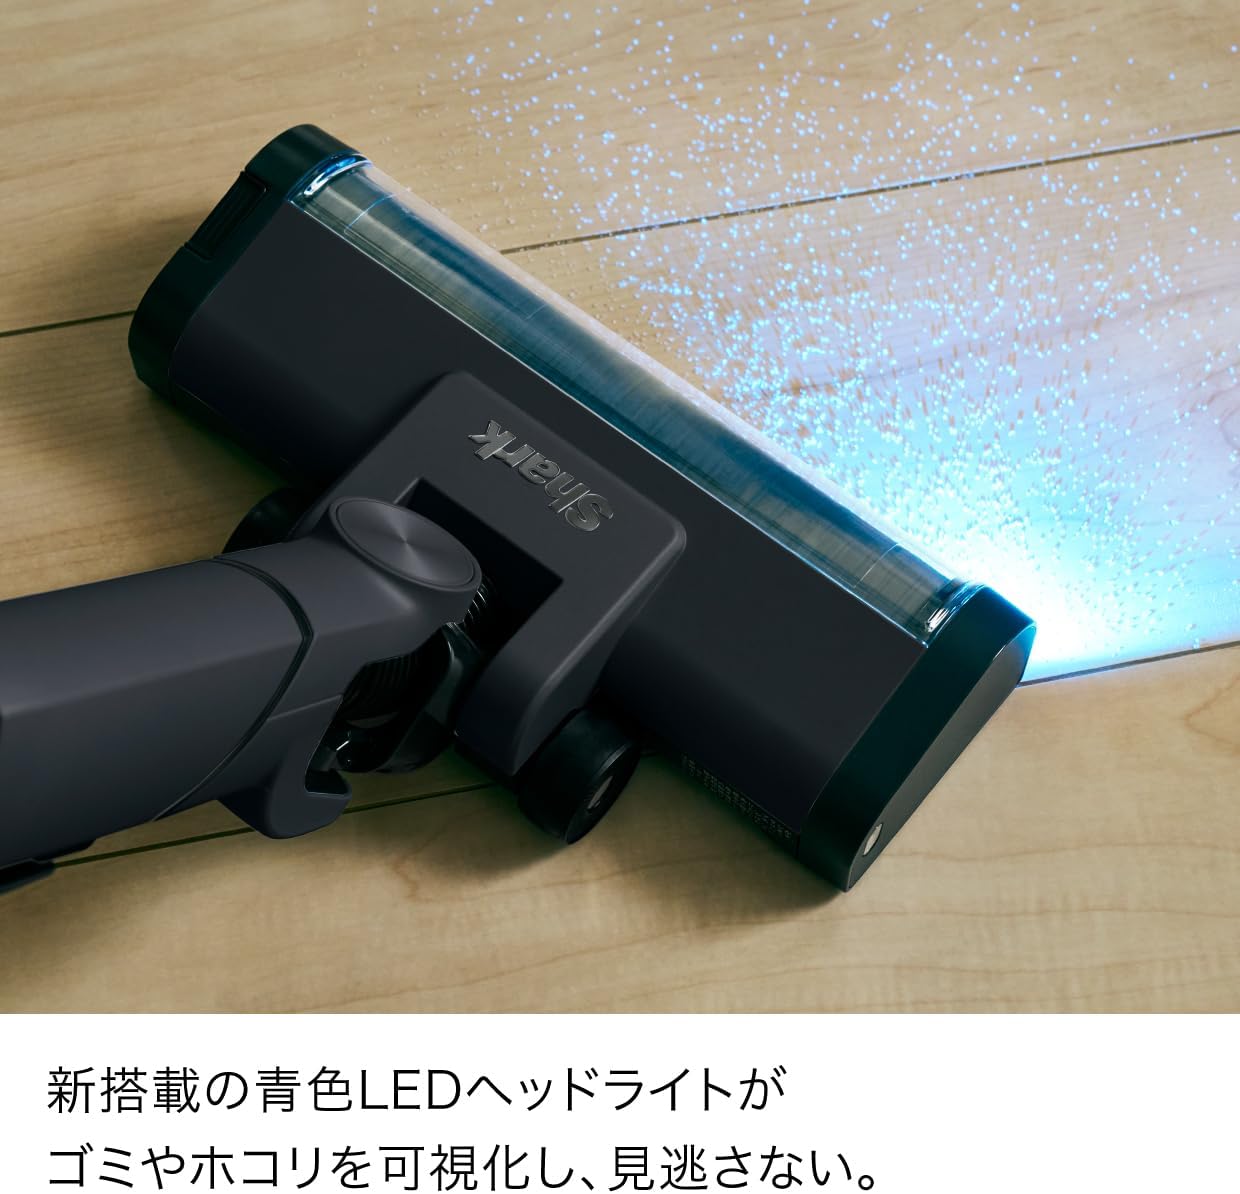
Figure 8: Blue LED Headlight illuminating debris.
6. Konserwacja
6.1 Automatyczne zbieranie kurzu
When the vacuum is placed on the automatic dust collection dock, it will automatically transfer collected debris from the vacuum's dust cup to the dock's larger dust bag. This reduces the frequency of manual dust disposal to approximately once a month, depending on usage and environment.

Figure 9: Automatic dust collection mechanism.
6.2 Emptying the Handheld Dust Cup (Manual)
If not using the automatic dock, or for quick emptying of the handheld unit, press the dust cup release button to open the bottom flap and empty debris directly into a trash bin.

Figure 10: One-touch manual dust disposal.
6.3 Cleaning the Brush Roll and Dust Cup
Both the brush roll and the dust cup are easily removable and washable. Regularly clean these components to maintain optimal suction and performance.
- To remove the brush roll, locate the release tab on the side of the floor nozzle and slide it to unlock. Lift out the brush roll.
- To remove the dust cup, press the release button on the main unit and detach it.
- Rinse the brush roll and dust cup with water. Ensure they are completely dry before reassembling.

Figure 11: Washable dust cup and brush roll for easy maintenance.
6.4 Hair Tangle-Free Technology
The brush roll is designed with hair tangle-free technology to prevent hair from wrapping around it, simplifying maintenance.

Figure 12: Hair tangle-free brush roll.
7. Rozwiązywanie Problemów
| Problem | Możliwa przyczyna | Rozwiązanie |
|---|---|---|
| Odkurzacz się nie włącza | Akumulator nie jest naładowany. | Całkowicie naładuj baterię. |
| Utrata ssania | Pojemnik na kurz jest pełny lub filtr jest zatkany. | Opróżnij pojemnik na kurz i wyczyść filtr. |
| Szczotka rolkowa się nie obraca | Przeszkoda w wałku szczotkowym. | Usuń splątane włosy i zanieczyszczenia ze szczotki obrotowej. |
| Automatic dust collection not working | Dock dust bag is full or vacuum not properly seated. | Replace the dock dust bag. Ensure the vacuum is correctly placed on the dock. |
8. Specyfikacje
| Funkcja | Szczegół |
|---|---|
| Marka | Rekin |
| Numer modelu | LC701JBKNC |
| Kolor | Warm Black |
| Współczynnik kształtu | Pionowo |
| Wymiary produktu (dł. x szer. x wys.) | Wymiary 28 x 26.2 x 106 cm |
| Czas ładowania | 3.5 godzin |
| Kraj pochodzenia | Chiny |
| Producent | RekinNinja |
9. Gwarancja i wsparcie
For warranty information and customer support, please refer to the warranty card included in your product packaging or visit the official Shark webZachowaj paragon jako dowód zakupu.


