
1. Wprowadzenie
Thank you for choosing the Temtop W100 Lite Professional Weather Station. This device provides real-time monitoring of indoor and outdoor temperature and humidity, atmospheric pressure, weather forecasts, moon phases, and includes an alarm clock function. This manual will guide you through the setup, operation, and maintenance of your weather station to ensure optimal performance.
2. Zawartość opakowania
Proszę sprawdzić zawartość opakowania po rozpakowaniu:
- Jednostka główna stacji pogodowej
- Czujnik zewnętrzny
- Zasilacz
- Instrukcja obsługi

Image: Contents of the Temtop W100 Lite package, showing the main weather station unit, the outdoor sensor, and the power adapter.
3. Koniec produktuview
Familiarize yourself with the main components and display features of your Temtop W100 Lite Weather Station.
3.1 Wyświetlacz jednostki głównej

Obraz: Przód view of the Temtop W100 Lite Weather Station, displaying various weather parameters and time information.
The main unit features a clear color display that shows the following information:
- Temperatura i wilgotność zewnętrzna
- Temperatura i wilgotność w pomieszczeniu
- Weather Forecast (Sunny, Partially Sunny, Cloudy, Rainy, Snowy)
- Czas i data
- Faza księżyca
- Ciśnienie atmosferyczne
- Comfort Level Indicator (Wet, Comfort, Dry)
- Sunrise and Sunset Times (for selected city)
3.2 Main Unit Buttons and Outdoor Sensor

Obraz: Szczegółowy view of the weather station display with labels indicating each data field.
Obraz: Tył view of the weather station, highlighting the battery compartment, power input, and control buttons.
The main unit features several control buttons on the back for settings adjustment:
- Przycisk SET: Enters/confirms settings.
- UP/CH Button: Adjusts values upwards, changes channels.
- DOWN/MEM Button: Adjusts values downwards, accesses min/max memory.
- Przycisk ALERT: Sets temperature alerts.
- Przycisk alarmowy: Sets alarm time.
- CITY Button: Selects city for sunrise/sunset times.
The outdoor sensor transmits temperature and humidity data wirelessly to the main unit.
4. Konfiguracja
4.1 Zasilanie urządzenia
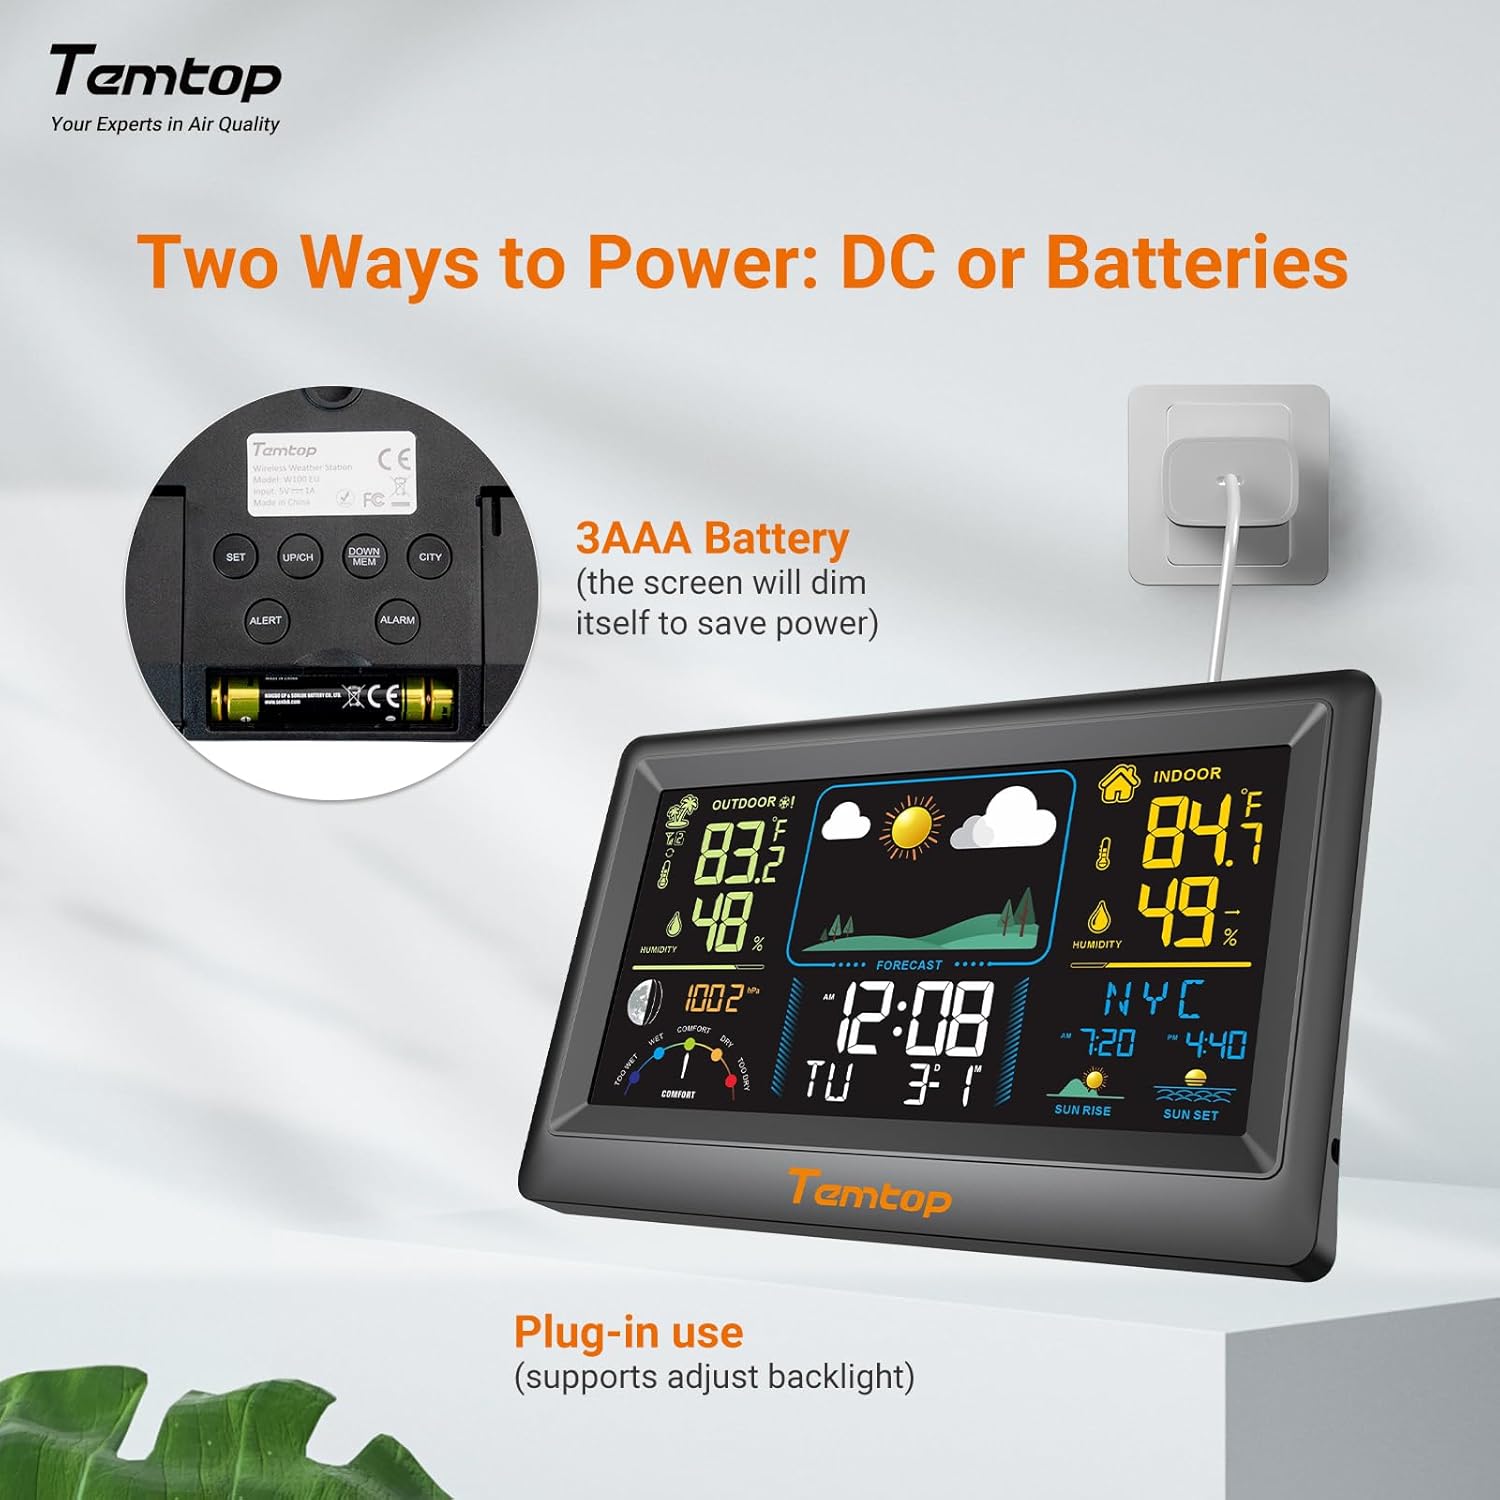
The weather station can be powered by either the included AC adapter or 3x AAA batteries (not included for the main unit, but included for the outdoor sensor). For continuous backlight and optimal performance, AC power is recommended.
- Jednostka główna: Insert the AC adapter into the power port on the back of the unit and plug it into a wall outlet. Alternatively, insert 3x AAA batteries into the battery compartment.
- Czujnik zewnętrzny: Insert 2x AAA batteries into the outdoor sensor's battery compartment.

Obraz: Byłyample of digital displays, illustrating the clear readouts of temperature and humidity.

Image: Illustration of power modes, showing the weather station connected via AC adapter and the battery compartment. AC mode allows adjustable backlight, while battery mode conserves power by dimming the display.
4.2 Umiejscowienie czujnika zewnętrznego
Place the outdoor sensor in a shaded area, protected from direct sunlight and rain, to ensure accurate temperature and humidity readings. The sensor has a wireless range of up to 100 meters (328 feet) in an open, unobstructed area.

Image: Diagram showing the wireless range of the outdoor sensor from the main unit, suitable for gardens, terraces, or rooftops.
4.3 Ustawienia początkowe (czas, data, miasto)
Follow these steps to set the correct time, date, and city for accurate sunrise/sunset times:
- Naciśnij i przytrzymaj USTAWIĆ button to enter setting mode. The hour field will begin to flash.
- Użyj UP/CH I DÓŁ/PAMIĘĆ przyciski do regulacji godziny.
- Naciskać USTAWIĆ to confirm the hour and move to the next item (minute, year, month, day). Repeat the adjustment and confirmation process for each.
- After setting the date, briefly press the MIASTO button. The city code will flash.
- Użyj UP/CH button to scroll through the list of cities until you find your location.
- Na koniec naciśnij USTAWIĆ to confirm your city selection. The sunrise, sunset times, and date will now be accurately displayed.
Video: This video demonstrates how to set the time, date, and city on your Temtop W100 Lite Weather Station to ensure accurate display of local sunrise and sunset times.
5. Działanie
5.1 Interpretacja wyświetlacza
The main display is divided into several sections for easy reading:
- Sekcja zewnętrzna: Shows current outdoor temperature and humidity, and temperature trend.
- Sekcja wewnętrzna: Displays current indoor temperature and humidity, and temperature trend.
- Prognoza pogody: Icons indicate the predicted weather for the next 12 hours (Sunny, Partially Sunny, Cloudy, Rainy, Snowy).
- Data i godzina: Aktualny czas, dzień tygodnia i data.
- Faza Księżyca: Wyświetla aktualną fazę księżyca.
- Ciśnienie atmosferyczne: Shows current barometric pressure and its trend.
- Poziom komfortu: A gauge indicating indoor comfort levels (Wet, Comfort, Dry).
- Wschód zachód: Displays the local sunrise and sunset times for the selected city.

Image: Visual representation of the five weather forecast modes and moon phases displayed on the weather station.
5.2 Wybór jednostki temperatury
To switch between Celsius (°C) and Fahrenheit (°F), briefly press the UP/CH button during normal display mode.
5.3 Min/Max Temperature and Humidity Records
The weather station automatically records the minimum and maximum temperature and humidity values over a 24-hour period. Briefly press the DÓŁ/PAMIĘĆ przycisk do view these records. Press again to cycle through min/max indoor and outdoor values.
5.4 Ustawianie alarmów
The device supports both time alarms and temperature alerts.
- Alarm czasu: Naciśnij ALARM button to enter alarm setting mode. Use UP/CH I DÓŁ/PAMIĘĆ to adjust the alarm time, and ALARM to confirm. The snooze function can be activated by pressing any button (except ALARM) when the alarm sounds.
- Alerty temperaturowe: Naciśnij ALARM button to set high/low temperature alerts for indoor or outdoor readings. Use UP/CH I DÓŁ/PAMIĘĆ to set the desired temperature thresholds.
6. Konserwacja
- Wyczyść wyświetlacz iasing z miękkim, damp ściereczka. Nie należy używać środków czyszczących o właściwościach ściernych ani rozpuszczalników.
- Replace batteries in the outdoor sensor when the low battery indicator appears on the main unit.
- Unikaj wystawiania jednostki głównej na bezpośrednie działanie promieni słonecznych, ekstremalnych temperatur i wilgoci.
7. Rozwiązywanie Problemów
| Problem | Możliwa przyczyna | Rozwiązanie |
|---|---|---|
| Brak obrazu na jednostce głównej. | Brak zasilania lub słabe baterie. | Ensure AC adapter is properly connected or replace batteries. |
| Odczyty zewnętrzne są niedokładne lub nie są wyświetlane. | Sensor out of range, interference, or low sensor batteries. | Move sensor closer to main unit, reduce obstructions, or replace sensor batteries. |
| Prognoza pogody wydaje się nieprawidłowa. | The forecast is based on atmospheric pressure changes and is an estimation. | Allow time for the station to calibrate (up to 24 hours). It provides a general trend, not a precise forecast. |
8. Specyfikacje
| Funkcja | Szczegół |
|---|---|
| Marka | Temtop |
| Model | EU-W100-Lite |
| Źródło zasilania | Battery (Main Unit: 3x AAA, Sensor: 2x AAA) / AC Adapter |
| Cechy specjalne | Customizable Alarms, Wireless Connectivity |
| Technologia łączności | Bezprzewodowy |
| Kolor | Czarny |
| Technologia czujników | Bezprzewodowy |
| Operating Temperature (Upper) | 40 stopni Celsjusza |
| Typ wyświetlacza | Wyświetlacz kolorowy |
| Waga przedmiotu | 100 gram |
9. Gwarancja i wsparcie
Temtop products are designed for reliability and performance. For warranty information, technical support, or service inquiries, please refer to the warranty card included in your package or visit the official Temtop webZachowaj paragon jako dowód zakupu.