1. Konfiguracja i instalacja
Follow these steps for proper installation of your Aquonderful Smart Bidet Toilet Seat. Ensure all water connections are secure to prevent leaks.
1.1 Zawartość opakowania

Opis obrazu: An illustration showing the contents of the product box, including the bidet seat, instruction manual, screws, gaskets, steel disc, mounting plate, anchoring rubber, PE pipe, and a three-way valve.
1.2 Toilet Compatibility Check
Before installation, verify your toilet's compatibility. This model is designed for elongated toilets. An electrical outlet must be available near the toilet.

Opis obrazu: A diagram illustrating how to measure a toilet for compatibility, showing dimensions for elongated and round bowls. It also highlights the requirement for an electrical outlet for the bidet to function.
1.3 Instalacja krok po kroku
- Wyłącz dopływ wody: Locate the water shut-off valve behind your toilet and turn it clockwise to stop the water flow. Flush the toilet to drain the tank.
- Usuń istniejącą deskę sedesową: Unscrew and remove your current toilet seat and lid.
- Montaż zaworu T: Disconnect the existing water supply hose from the toilet tank. Apply plumber's tape to the threads of the T-valve. Connect the T-valve to the toilet tank's water inlet. Reconnect the original water supply hose to the bottom of the T-valve.
- Przygotuj płytę montażową: Insert the rubber anchoring pieces into the toilet's mounting holes. Place the mounting plate over these holes, ensuring the metal brackets are aligned. Secure the mounting plate by inserting and tightening the screws through the brackets into the rubber anchors.
- Zamontuj siedzisko bidetowe: Slide the Aquonderful bidet seat onto the secured mounting plate until it clicks into place.
- Connect Bidet Water Hose: Connect the provided PE pipe (bidet water hose) from the side of the bidet seat to the open port on the T-valve.
- Przywróć wodę i prąd: Turn the water shut-off valve counter-clockwise to restore water supply. Check for any leaks. Plug the bidet seat's power cord into a grounded electrical outlet.
- Początkowe płukanie systemu: After plugging in, the bidet will perform an initial self-check. It is recommended to press the "Bidet" button while holding down the seat sensor (or covering it with your hand) to flush the internal water lines.

Opis obrazu: A four-panel illustration detailing the installation process: 1. Removing the old fixing plate. 2. Assembling accessories like screws and mounting plate. 3. Installing the new bidet seat. 4. Connecting the water supply hoses.
1.4 Przewodnik wideo po instalacji
Opis filmu: An official Aquonderful video demonstrating the complete installation process of the Model 208 Smart Bidet Toilet Seat. It covers shutting off water, installing the T-valve, mounting the seat, connecting hoses, and initial testing of functions.
2. Instrukcja obsługi
Your Aquonderful Smart Bidet Toilet Seat offers a range of customizable features for a personalized experience. All functions are controlled via the integrated side panel.
2.1 Panel sterowania ponadview

Opis obrazu: Od góry do dołu view of the bidet toilet seat, highlighting the integrated control panel on the right side. The panel features various buttons for different functions and settings.

Opis obrazu: A detailed diagram labeling the buttons and their corresponding functions on the bidet's control panel, including Stop, Light, Kids, Rear Wash, Pulsation, Adjustable Water Temp, Adjustable Heated Seat, ECO Mode, Adjustable Nozzle Position, Drying, Front Wash, Strong Pressure, Adjustable Water Pressure, Adjustable Air Dryer Temp, Auto, Turbo Wash, and Power On/Off.
2.2 Funkcje prania
The bidet offers multiple wash modes with adjustable settings.
- Mycie Tyłu: For posterior cleansing.
- Mycie przodu: Do oczyszczania kobiecego ciała.
- Mycie wirowe: A stronger, more focused wash.
- Pulsacja: Zapewnia pulsujący strumień wody dający efekt masażu.
- Oscylacyjne mycie: The nozzle moves back and forth for a wider cleaning area.
- Regulowane ciśnienie wody: Customize the intensity of the water spray.
- Regulowana pozycja dyszy: Adjust the nozzle's position for optimal cleaning.
- Dysza samoczyszcząca: Dysza wykonuje cykl samoczyszczenia przed i po każdym użyciu.

Opis obrazu: A collage of four images demonstrating various bidet wash functions: rear wash with oscillating movement, front wash with oscillating movement, the nozzle oscillating for cleaning, and the nozzle performing a self-cleaning rinse.
2.3 ustawień temperatury
- Podgrzewane siedzenie: Enjoy a warm seat with adjustable temperature levels (High, Medium, Low).
- Ciepła woda: The water spray temperature is adjustable (High, Medium, Low) for comfort.
- Suszarka na ciepłe powietrze: After washing, use the warm air dryer with adjustable temperature settings (High, Medium, Low) to reduce toilet paper usage.

Opis obrazu: An image highlighting key features of the bidet seat: slow closing seat and lid, heated seat, warm air dryer, night light, and stainless steel nozzle.
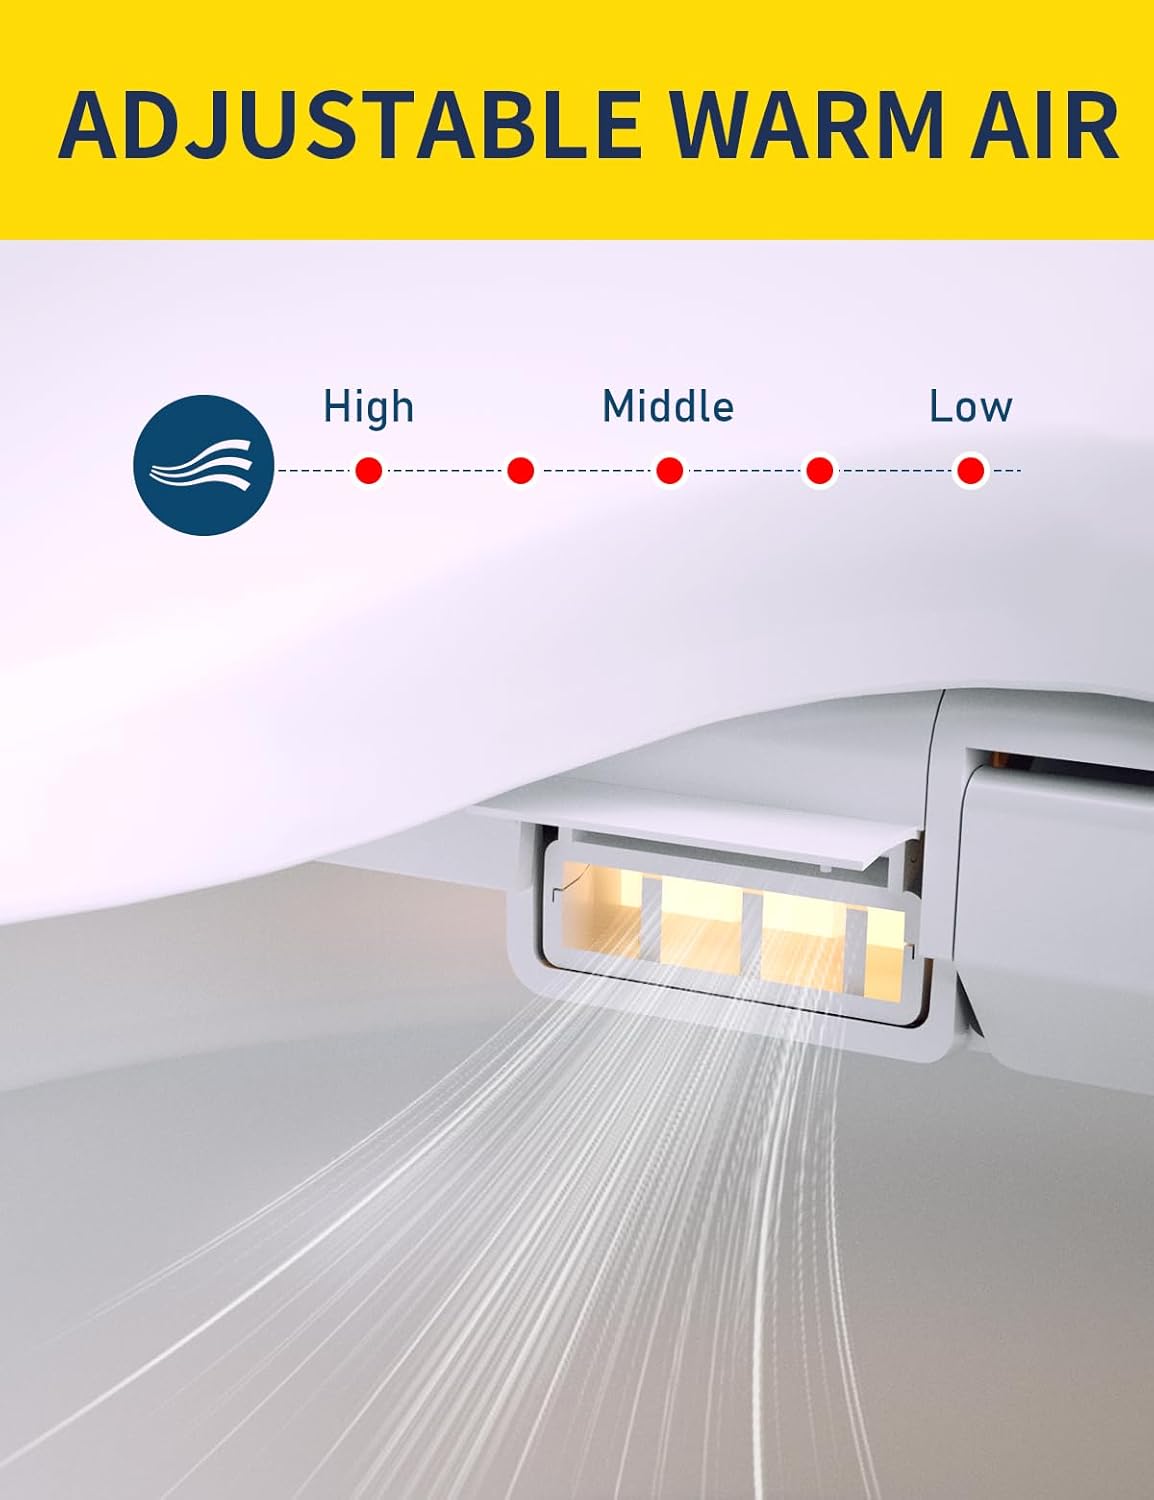
Opis obrazu: Zbliżenie view of the bidet's warm air dryer vent, indicating adjustable settings for high, middle, and low air temperatures.
2.4 dodatkowych funkcji
- Lampka nocna LED: A soft glow illuminates the bowl for nighttime use.
- Slow-Closing Lid: The seat and lid close gently and quietly.
- Tryb ekologiczny: An energy-saving mode that reduces power consumption by turning off heat and night light until the seat is occupied.
- Tryb dziecięcy: A pre-set gentle wash and dry cycle suitable for children. This mode operates without requiring the seat sensor to be covered.
- Czujnik siedzenia: Most functions require the user to be seated for activation, indicated by a sensor on the seat.
3. Konserwacja
Regular cleaning and maintenance will ensure the longevity and hygienic operation of your bidet toilet seat.
- Czyszczenie zewnętrzne: Przetrzyj zewnętrzne powierzchnie deski sedesowej miękką, miękką szmatką.amp cloth and a mild, non-abrasive cleaner. Avoid harsh chemicals, as they can damage the finish.
- Czyszczenie dysz: The bidet features a self-cleaning nozzle. For additional cleaning, gently pull out the nozzle and wipe it with a soft cloth. Do not use excessive force.
- Czyszczenie filtra: Periodically check and clean the water inlet filter located at the T-valve connection. Turn off the water supply before attempting to clean the filter.
- Odwapnianie: If you live in an area with hard water, mineral deposits may accumulate. Consult a plumbing professional for descaling recommendations if necessary.
- Zimowanie (jeśli dotyczy): If the bidet is installed in an unheated area where temperatures may drop below freezing, ensure to drain all water from the unit to prevent damage. Refer to the full manual for detailed winterization steps.
4. Rozwiązywanie Problemów
If you encounter issues with your bidet toilet seat, refer to the following common solutions. For persistent problems, contact customer support.
| Problem | Możliwa przyczyna | Rozwiązanie |
|---|---|---|
| Brak zasilania/Urządzenie się nie włącza | Power cord unplugged, circuit breaker tripped, seat sensor not activated. | Ensure power cord is securely plugged in. Check circuit breaker. Sit on the seat or cover the seat sensor to activate functions. |
| Bez rozpylania wody | Water supply valve closed, water hose kinked, water inlet filter clogged, seat sensor not activated. | Open the water supply valve. Check for kinks in the hose. Clean the water inlet filter. Ensure the seat sensor is activated. |
| Temperatura wody nie jest ciepła | Water heater not activated, temperature setting too low. | Adjust water temperature setting on the control panel. Allow a few moments for water to heat up. |
| Siedzenie nie jest podgrzewane | Heated seat function off, temperature setting too low, ECO mode active. | Adjust seat temperature setting. Disable ECO mode if immediate heat is desired. |
| Air dryer not working or not warm | Dryer function off, temperature setting too low. | Activate dryer function. Adjust air temperature setting. |
| Wyciek wody | Loose connections, damaged hose or seal. | Turn off water supply immediately. Check all connections for tightness. If leakage persists, contact a qualified plumber or customer support. |
5. Specyfikacje
| Funkcja | Szczegół |
|---|---|
| Marka | Obfity |
| Numer modelu | 208 |
| Kolor | Biały |
| Tworzywo | Akrylonitryl-butadien-styren (ABS) |
| Styl | Nowoczesny |
| Kształt | Owalny (wydłużony) |
| Wymiary produktu | 20" dł. x 18" szer. |
| Waga przedmiotu | 11 funtów |
| Źródło zasilania | Wymaga gniazdka elektrycznego |
| Zawarte komponenty | Bidet seat, installation hardware, PE pipe |
6. Informacje o gwarancji
The Aquonderful Smart Bidet Toilet Seat is covered by a manufacturer's warranty against defects in materials and workmanship. For specific details regarding warranty coverage, duration, and terms, please refer to the warranty card included with your product or visit the official Aquonderful webstrona.
Proszę zachować dowód zakupu na potrzeby roszczeń gwarancyjnych.
7. Obsługa klienta
For technical assistance, troubleshooting, or inquiries about your Aquonderful Smart Bidet Toilet Seat, please contact our customer support team.
- Wsparcie online: Odwiedź Aquonderful Store on Amazon Aby uzyskać odpowiedzi na często zadawane pytania i informacje o produktach.
- Wsparcie e-mailowe: Refer to your product manual for the dedicated customer service email address.
- Wsparcie telefoniczne: Refer to your product manual for the dedicated customer service phone number.
Kontaktując się z pomocą techniczną, przygotuj numer modelu (208) i datę zakupu.


