1. Informacje dotyczące bezpieczeństwa
Please read all safety instructions before installing or operating the ID-COOLING FX360 LCD PE CPU Liquid Cooler. Failure to follow these instructions may result in product damage, property damage, or personal injury.
- Ensure your computer system is powered off and disconnected from the power source before installation.
- Aby uniknąć uszkodzeń, należy obchodzić się z elementami ostrożnie.
- Do not open the liquid cooler's sealed components (pump, radiator, tubing) as this may void the warranty and cause leaks.
- Przechowywać produkt w miejscu niedostępnym dla dzieci i zwierząt domowych.
- Należy używać wyłącznie dostarczonego sprzętu montażowego i akcesoriów.
- Ensure proper ventilation around your computer case to prevent overheating.
2. Zawartość opakowania
Verify that all components are present in the package before beginning installation. If any items are missing or damaged, contact ID-COOLING support.
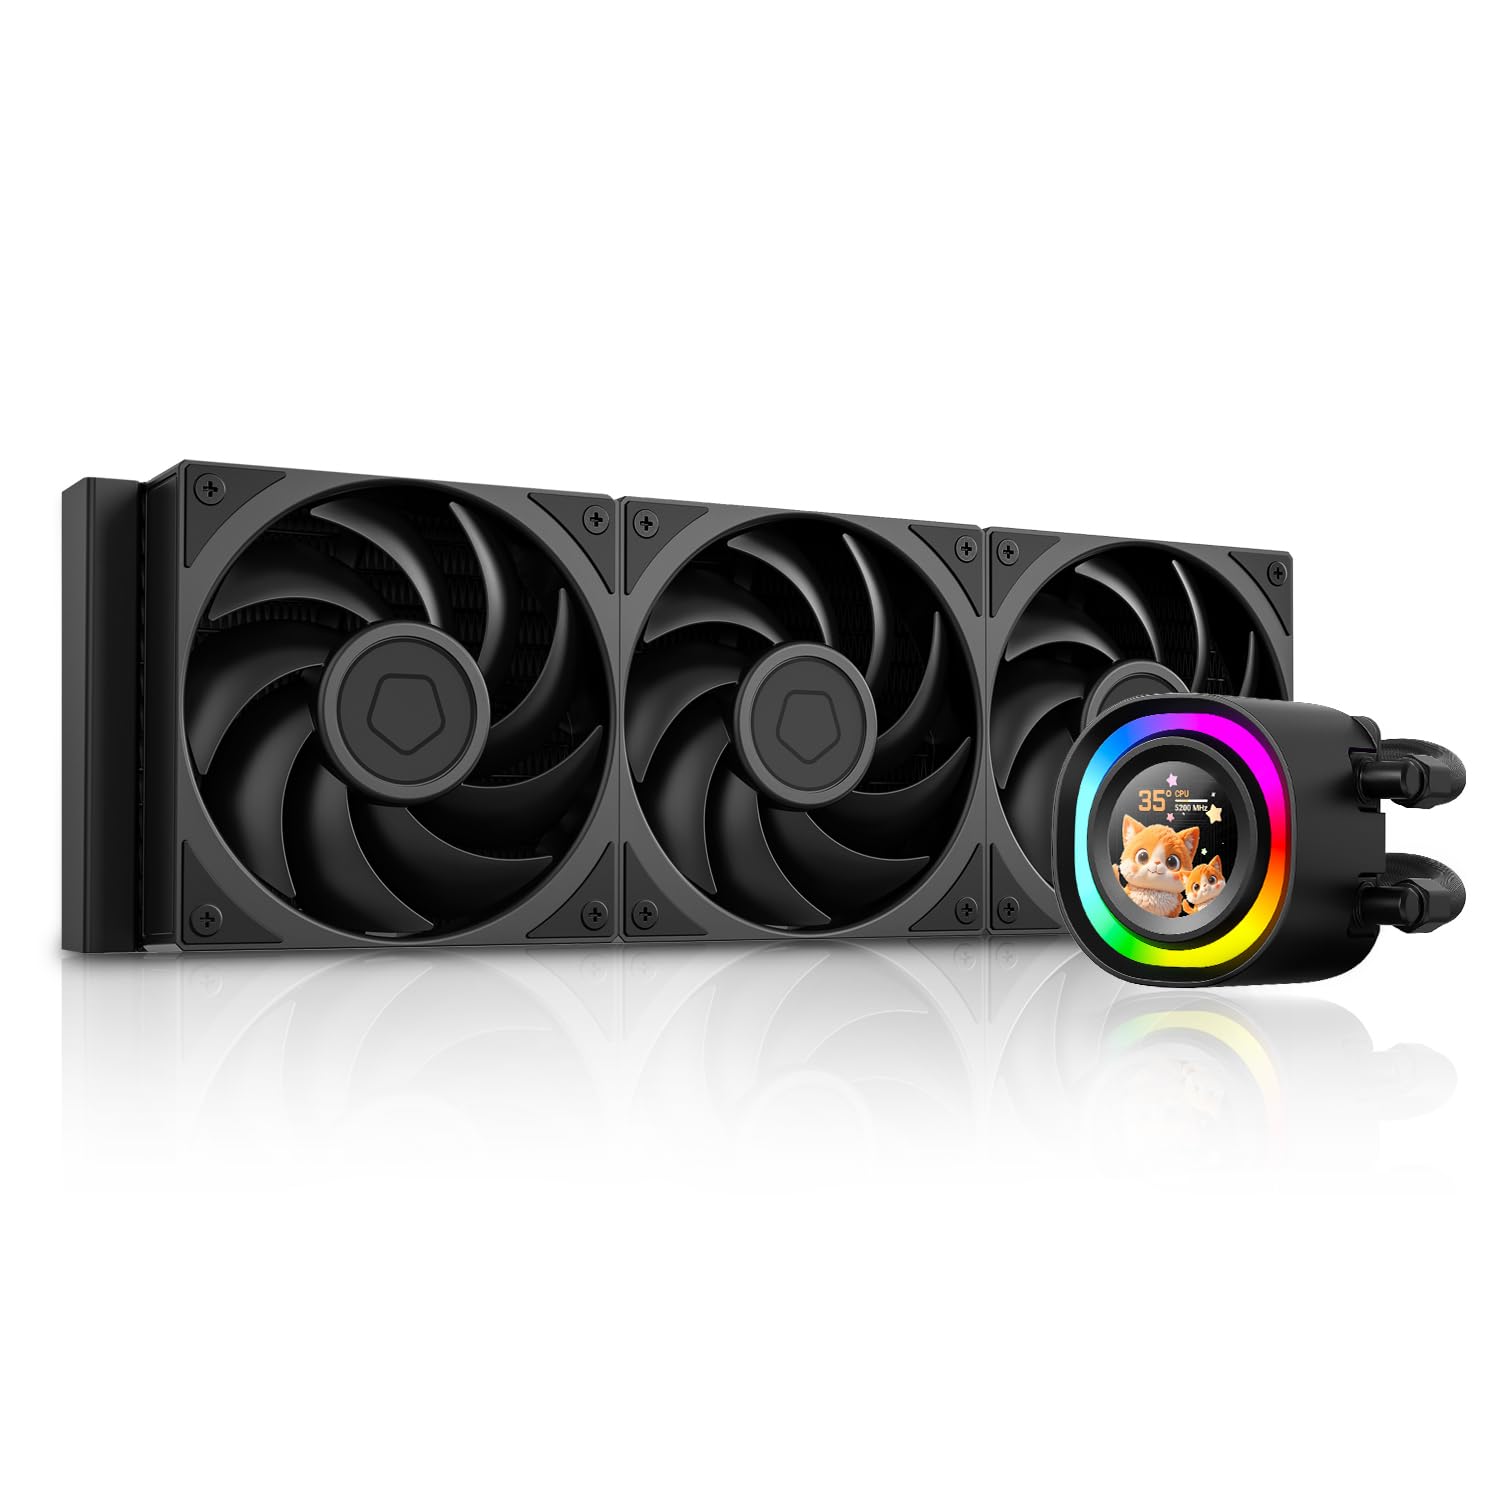
- FX360 LCD PE AIO Liquid Cooler (Radiator with 3x 120mm fans pre-installed, Pump with LCD display)
- Intel Mounting Brackets (LGA1851/1700/1200/115X)
- Uchwyty montażowe AMD (AM5/AM4)
- Backplate for Intel Sockets
- Śruby montażowe i dystanse
- Thermal Paste (ID-COOLING FROST X45)
- Kabel nagłówkowy USB 2.0
- Kabel ARGB
- Instrukcja obsługi

Image: All included installation hardware for the ID-COOLING FX360 LCD PE, including various mounting brackets, screws, thermal paste, and cables.
3. Konfiguracja i instalacja
This section outlines the general steps for installing the liquid cooler. Refer to the detailed installation guide provided in the product packaging for specific instructions for your CPU socket type.
3.1 Przygotuj płytę główną
- Install the appropriate backplate (for Intel) or retention clips (for AMD) onto your motherboard.
- Secure the standoffs for your CPU socket type.
3.2 Nałóż pastę termoprzewodzącą
- Dokładnie wyczyść powierzchnię procesora.
- Apply a small amount of thermal paste (e.g., a pea-sized dot) to the center of the CPU's integrated heat spreader (IHS).
3.3 Mount the Pump
- Align the pump head with the mounting holes on the motherboard.
- Gently press the pump onto the CPU, ensuring even contact.
- Zabezpiecz pompę dołączonymi śrubami motylkowymi lub nakrętkami, dokręcając je po przekątnej, aż będą dobrze przylegać. Nie dokręcaj zbyt mocno.
3.4 Install the Radiator and Fans
- Mount the radiator to an available fan mounting location in your PC case (e.g., top, front, or side). Ensure adequate clearance.
- The three 120mm fans are typically pre-installed on the radiator. Ensure their airflow direction is optimal for your case's cooling configuration.
3.5 Podłącz kable
- Podłącz 3- lub 4-pinowy kabel zasilający pompę do złącza CPU_FAN lub AIO_PUMP na płycie głównej.
- Connect the fan power cable (daisy-chained from the radiator fans) to a SYS_FAN or CHA_FAN header on your motherboard.
- Connect the USB 2.0 header cable from the pump to an available USB 2.0 header on your motherboard. This is required for LCD display functionality and software control.
- Connect the ARGB cable from the pump to a 5V 3-pin ARGB header on your motherboard for lighting synchronization, if desired.

Image: The ID-COOLING FX360 LCD PE liquid cooler fully installed within a computer case, showing the pump head on the CPU and the radiator mounted at the top.
Wideo: Ponadview of the ID-COOLING FX360 LCD PE, demonstrating its features and appearance. This video is provided by the seller, ID-COOLING.
4. Instrukcja obsługi
Once installed, the ID-COOLING FX360 LCD PE will begin cooling your CPU. The LCD display and ARGB lighting offer customization options.
4.1 Pierwsze włączenie zasilania
- After completing installation and connecting all cables, power on your computer.
- The LCD display on the pump head should illuminate, and the ARGB ring will activate.
- Monitor CPU temperatures during initial operation to ensure proper function.
4.2 Personalizacja wyświetlacza LCD
The 1.48-inch (240x240 px) full-color LCD display can show system statistics, custom graphics, or personalized animations. To customize the display:
- Download and install the official ID-COOLING software from the manufacturer's webstrona.
- Connect the cooler's USB 2.0 cable to your motherboard.
- Use the software to select from preset themes, upload your own images (JPG, PNG), GIFs, or MP4 videos (240x240px resolution recommended).
- The software allows you to display real-time performance metrics such as CPU frequency, CPU/GPU usage, pump speed, fan speed, and temperature.

Obraz: Byłyamples of the fully customizable LCD display on the pump head, showing different images, GIFs, and system stats.

Image: The ID-COOLING software interface for customizing the LCD display, showing options for themes, system monitoring, and custom uploads.
4.3 Sterowanie oświetleniem ARGB
The ARGB lighting ring on the pump head can be controlled via:
- Oprogramowanie płyty głównej: If connected to a 5V 3-pin ARGB header, you can synchronize the lighting with your motherboard's RGB software (e.g., ASUS Aura Sync, MSI Mystic Light, Gigabyte RGB Fusion, ASRock Polychrome Sync).
- ID-COOLING Software: The dedicated software may also offer lighting control options.
5. Konserwacja
Regularna konserwacja pomaga zapewnić optymalną wydajność i długą żywotność chłodnicy cieczy.
- Czyszczenie kurzu: Okresowo czyść żeberka chłodnicy i wentylatory sprężonym powietrzem z kurzu. Upewnij się, że wentylatory nie obracają się podczas czyszczenia, aby zapobiec ich uszkodzeniu.
- Zarządzanie kablami: Ensure all cables are securely connected and not obstructing airflow.
- Kontrola wizualna: Occasionally inspect the tubing for any signs of wear, kinks, or leaks.
- Aktualizacje oprogramowania: Keep the ID-COOLING software updated to ensure compatibility and access to new features.
6. Rozwiązywanie Problemów
If you encounter issues with your ID-COOLING FX360 LCD PE, refer to the following common problems and solutions:
| Problem | Możliwa przyczyna | Rozwiązanie |
|---|---|---|
| Wysokie temperatury procesora | Improper thermal paste application; pump not running; fans not spinning; radiator clogged with dust. | Reapply thermal paste; check pump and fan connections to motherboard headers; clean radiator fins. |
| Wyświetlacz LCD nie działa | USB 2.0 cable not connected; software not installed or running; display cable loose. | Ensure USB 2.0 cable is securely connected to motherboard; install/update ID-COOLING software; restart computer. |
| Oświetlenie ARGB nie działa/nie synchronizuje się | ARGB cable not connected to 5V 3-pin header; incorrect motherboard software settings. | Connect ARGB cable to correct header; configure lighting settings in motherboard's RGB software. |
| Nietypowy hałas z pompy/wentylatorów | Air bubbles in loop (pump); fan bearing issue; fan hitting cables. | Orient radiator higher than pump (if possible) to allow air to settle; check for cable interference; contact support if noise persists. |
If the issue persists after attempting these solutions, please contact ID-COOLING customer support for further assistance.
7. Specyfikacje
Key technical specifications for the ID-COOLING FX360 LCD PE CPU Liquid Cooler:
| Funkcja | Szczegół |
|---|---|
| Numer modelu | FX360 LCD PE |
| Metoda chłodzenia | Płyn |
| Wymiary grzejnika | 396 x 120 x 27 mm (dł. x szer. x wys.) |
| Materiał grzejnika | Aluminium |
| Materiał zimnej płyty | Miedź |
| Wymiary wentylatora | Wymiary: 120 x 120 x 28 mm |
| Prędkość wentylatora | 0-2450 obr./min (±10%) |
| Max. Przepływ powietrza | 88.75 stopy sześcienne na minutę |
| Maks. Ciśnienie statyczne | 4.35 mmH2O |
| Poziom hałasu wentylatora | 34.3 dB(A) Max. |
| Złącze wentylatora | 4-Pin PWM |
| Prędkość pompy | 2900 RPM Max. |
| Poziom hałasu pompy | ~25 dB(A) |
| Pump Bearing | Łożysko ceramiczne |
| Wyświetlacz LCD | 1.48 inch (240x240 px), 18-bit, 262K colors |
| TDP Rating | Do 350 W |
| Kompatybilne gniazda Intel | LGA1851, LGA1700, LGA1200, LGA115X |
| Kompatybilne gniazda AMD | AM5, AM4 |
| Waga przedmiotu | 5.37 funta |

Obraz: Wybuch view of the pump head, highlighting the micro-channel cold plate, high-flow pump, 2900 RPM speed, and ceramic bearing for extreme cooling.

Obraz: szczegółowy view of the AP-128 fan, showing its dimensions, speed, airflow, static pressure, noise level, and connector type.
8. Gwarancja i wsparcie
ID-COOLING products are designed and manufactured to the highest quality standards. This product is covered by a limited warranty from the date of purchase.
- For detailed warranty terms and conditions, please refer to the warranty card included with your product or visit the official ID-COOLING webstrona.
- For technical support, troubleshooting assistance, or to inquire about replacement parts, please contact ID-COOLING customer service through their official webwitrynę lub dane kontaktowe podane w dokumentacji produktu.
- Zachowaj dowód zakupu (paragon lub fakturę) na wypadek reklamacji.