Wstęp
This manual provides detailed instructions for the assembly, operation, and maintenance of your Cooler Master Elite 502 White ATX High Airflow Minimalist PC Case. Please read this manual thoroughly before beginning installation to ensure proper setup and optimal performance.
Produkt ponadview
The Cooler Master Elite 502 is an ATX mid-tower PC case designed for high airflow and compatibility with modern components. It features a high-performance mesh front panel and supports a wide range of hardware configurations.
Główne cechy:
- Zgodność z płytą główną: Supports ATX and Micro-ATX motherboards.
- Odprawa GPU: Pomieści karty graficzne o długości do 410 mm.
- Wsparcie chłodzenia: Supports up to a 360mm liquid cooler and seven fans for efficient thermal management.
- Prześwit komponentów: CPU coolers up to 170mm height, PSUs up to 170mm length.
- Projekt przepływu powietrza: Large, unrestricted intake grill for superior airflow.
- Przednie I / O: Integrated USB Type-C port.

Figure 1: Motherboard Compatibility. This image illustrates the dimensions for ATX (12.0 in x 9.6 in) and Micro-ATX (9.6 in x 9.6 in) motherboards, demonstrating the case's support for both form factors.

Figure 2: GPU Clearance. Wewnętrzny view of the case showing the maximum GPU length of 410mm, indicating ample space for high-performance graphics cards.

Figure 3: Cooling Support. This image highlights the areas within the case that support liquid coolers up to 360mm and multiple cooling fans for optimal thermal efficiency.
Konfiguracja i instalacja
Follow these steps for proper assembly of your PC components within the Elite 502 case.
- Przygotuj sprawę:
Carefully remove the side panels. The tempered glass side panel is typically secured with thumb screws at the rear. The opposite side panel may also use thumb screws or a latch mechanism. Place the case on a stable, flat surface.

Figure 4: Case Interior. An unobstructed view of the case's interior, showing the motherboard tray, drive bays, and cable management cutouts, ready for component installation.
- Zainstaluj zasilacz (PSU):
Mount the PSU into its designated compartment at the bottom rear of the case. Secure it with screws. Ensure proper cable routing through the PSU shroud cutouts.

Figure 5: PSU Shroud. This image displays the ventilated PSU cover, designed to efficiently cool the power supply unit regardless of its orientation.
- Zainstaluj płytę główną:
Align your ATX or Micro-ATX motherboard with the standoffs inside the case. Secure the motherboard with screws. Connect the front panel headers (power, reset, USB, audio) to the motherboard. The case includes a USB Type-C port on the front I/O panel.

Figure 6: Front I/O Panel. Szczegółowy view of the integrated USB Type-C port and other front panel connectors, facilitating modern connectivity.
- Zainstaluj dyski pamięci masowej:
Install 2.5-inch SSDs or 3.5-inch HDDs into the designated drive bays. Refer to the case's internal layout for specific mounting points, often located behind the motherboard tray or within the PSU shroud area.
- Zainstaluj kartę graficzną (GPU):
Insert your graphics card into the appropriate PCIe slot on the motherboard. Secure it with the retention clip and a screw to the case's expansion slots. Ensure the GPU length does not exceed 410mm.
- Install Cooling Components:
Install CPU cooler (up to 170mm height) and any additional case fans or liquid cooling radiators. The case supports up to a 360mm liquid cooler. Ensure fans are oriented for optimal airflow (intake at front/bottom, exhaust at rear/top).

Figure 7: Unrestricted Airflow. This image demonstrates the effective airflow through the front mesh panel, highlighting the case's design for optimal cooling performance.

Figure 8: Large Intake Grill. Szczegółowy view of the front panel's large intake grill, designed to maximize air intake for efficient cooling.
- Zarządzanie kablami:
Route all cables neatly behind the motherboard tray using the provided cutouts and tie-down points. This improves airflow and aesthetics.
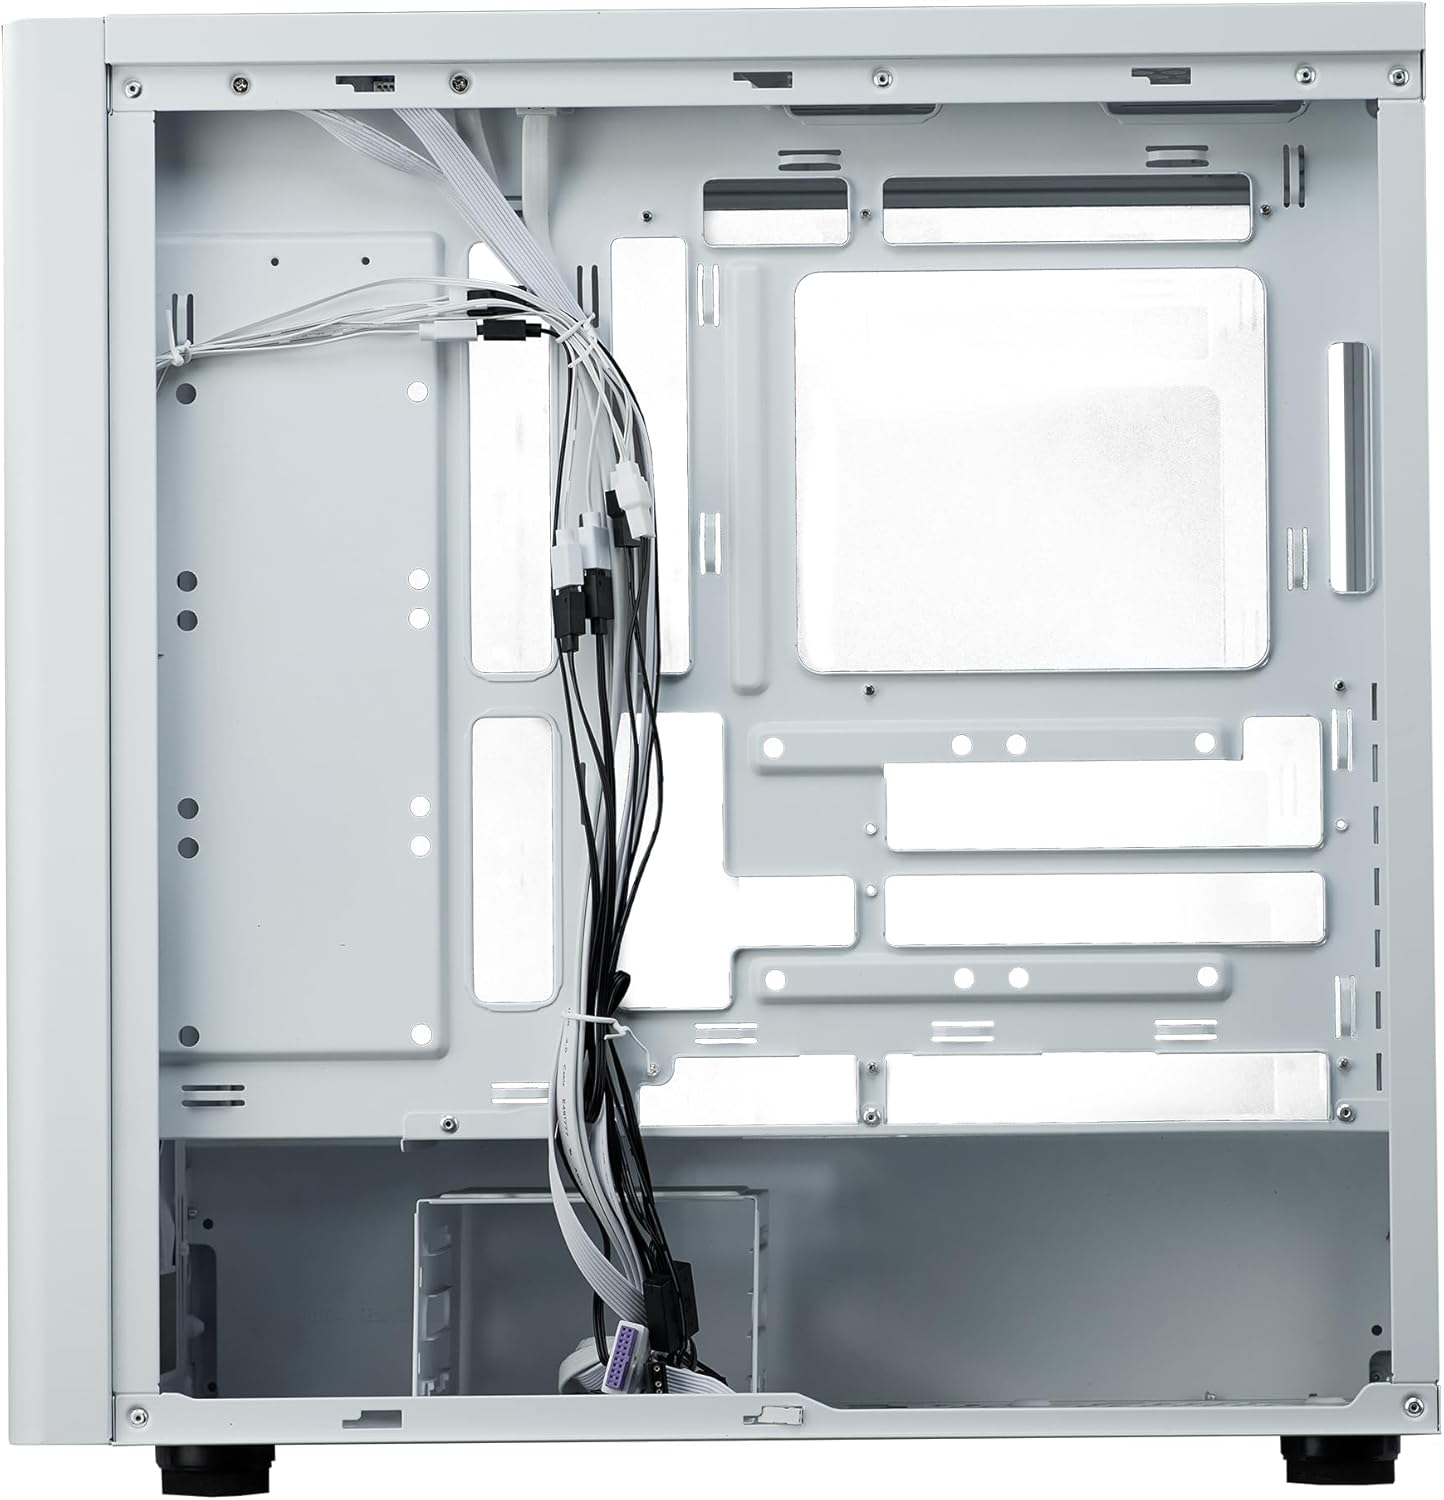
Figure 9: Cable Management. Wewnętrzny view from the rear side of the case, illustrating the space and tie-down points available for organized cable routing.
- Zamknij sprawę:
Once all components are installed and cables are managed, reattach the side panels. Ensure they are securely fastened.
Instrukcja obsługi
The Cooler Master Elite 502 is designed for continuous operation once components are properly installed. Ensure adequate ventilation around the case to maintain optimal temperatures.
- Włączanie: Press the power button located on the front I/O panel to start your system.
- Przepływ powietrza: The case's design prioritizes high airflow. Ensure the front mesh panel and any top/rear fan exhausts are not obstructed.
- Łączność: Utilize the front panel USB ports, including the USB Type-C, for convenient peripheral connections.
Konserwacja
Regularna konserwacja pomaga zapewnić długowieczność i wydajność obudowy i podzespołów komputera.
- Czyszczenie kurzu: Periodically clean dust filters (front, top, bottom) to maintain optimal airflow. The front mesh panel is removable for easy cleaning.
- Czyszczenie wnętrza: Użyj sprężonego powietrza, aby usunąć kurz z wewnętrznych podzespołów i łopatek wentylatora. Przed czyszczeniem upewnij się, że system jest wyłączony i odłączony od zasilania.
- Kontrola zarządzania kablami: Occasionally verify that internal cables remain neatly routed and do not obstruct airflow or fan operation.
Rozwiązywanie problemów
Jeśli napotkasz problemy, rozważ poniższe typowe kroki rozwiązywania problemów:
- Brak zasilania:
Check all power connections, including the PSU to the wall outlet, PSU to motherboard, and front panel power switch header to the motherboard. Ensure the PSU switch is in the 'ON' position.
- Przegrzanie:
Verify all case fans and CPU cooler fans are spinning correctly. Clean any dust filters or internal components that may be obstructing airflow. Ensure proper fan orientation (intake/exhaust).
- Nie działa USB/audio na przednim panelu:
Confirm that the front panel USB and audio headers are correctly connected to the motherboard. Check motherboard manual for correct pin assignments.
- Luźne elementy:
If experiencing intermittent issues, power down the system and check that all components (GPU, RAM, storage drives) are securely seated in their slots and properly fastened.
Specyfikacje
| Funkcja | Szczegół |
|---|---|
| Marka | Mistrz chłodnicy |
| Nazwa modelu | Elite 502 Biały |
| Numer modelu przedmiotu | E502-WGNN-SAZ |
| Typ sprawy | Mid Tower |
| Zgodność płyty głównej | ATX, Mikro ATX |
| Odprawa GPU | Do 410 mm |
| Wysokość chłodzenia procesora | Do 170 mm |
| Długość zasilacza | Do 170 mm |
| Wsparcie płynnego chłodzenia | Up to 360mm radiator |
| Wsparcie fanów | Do 7 wentylatorów |
| Przednie porty we / wy | 1x USB 3.0, 1x USB Type-C |
| Tworzywo | Stal stopowa, szkło hartowane |
| Kolor | Biały |
| Waga przedmiotu | 17.73 funtów (8.04 kg) |
| Wymiary produktu (dł. x szer. x wys.) | 18.66 x 18.94 x 9.06 cala (47.4 x 48.1 x 23.0 cm) |

Rysunek 10: Wymiary produktu. An illustration detailing the length, width, and height of the Cooler Master Elite 502 case.
Gwarancja i wsparcie
Aby uzyskać informacje o gwarancji i pomocy technicznej, zapoznaj się z oficjalną stroną Cooler Master webOdwiedź stronę internetową lub skontaktuj się bezpośrednio z działem obsługi klienta. Zachowaj dowód zakupu na wypadek reklamacji.
- Urzędnik Webstrona: www.coolermaster.com
- Obsługa klienta: Zapoznaj się z sekcją pomocy na oficjalnej stronie webstrona zawierająca dane kontaktowe i odpowiedzi na często zadawane pytania.