YCCTEAM 4-in-1 Joycon 2 Controller Charging Docking Station
YCCTEAM Switch 2 JoyCon Charger Instruction Manual
Model: 4-in-1 Joycon 2 Controller Charging Docking Station
1. Wprowadzenie
Dziękujemy za zakupasing the YCCTEAM Switch 2 JoyCon Charger. This 4-in-1 charging docking station is specifically designed for Nintendo Switch 2 Joy-Con controllers, providing a convenient and efficient way to charge up to four controllers simultaneously. Its magnetic alignment feature ensures secure placement and protects your controllers from wear. This manual will guide you through the setup, operation, and maintenance of your new charging dock.
2. Informacje dotyczące bezpieczeństwa
- Trzymaj urządzenie z dala od wody, wilgoci i wysokich temperatur.
- Nie próbuj demontować ani modyfikować ładowarki.
- Należy używać wyłącznie dołączonego kabla USB-C lub certyfikowanego odpowiednika.
- Podczas użytkowania należy zapewnić odpowiednią wentylację wokół stacji ładującej.
- This product is designed for Nintendo Switch 2 Joy-Con controllers only. Do not attempt to charge other devices.
3. Zawartość opakowania
Sprawdź przesyłkę, aby upewnić się, że znajdują się w niej wszystkie elementy:
- 1 × YCCTEAM Switch 2 JoyCon Charging Dock
- 1 × kabel ładujący USB-C
- 1 × Quick Start Guide (This Manual)

Image: Package contents including the charging dock, USB-C cable, and user manual.
4. Koniec produktuview
The YCCTEAM Switch 2 JoyCon Charger features a compact design with four charging slots, each equipped with magnetic alignment for easy and secure controller placement. LED indicators provide clear charging status at a glance.
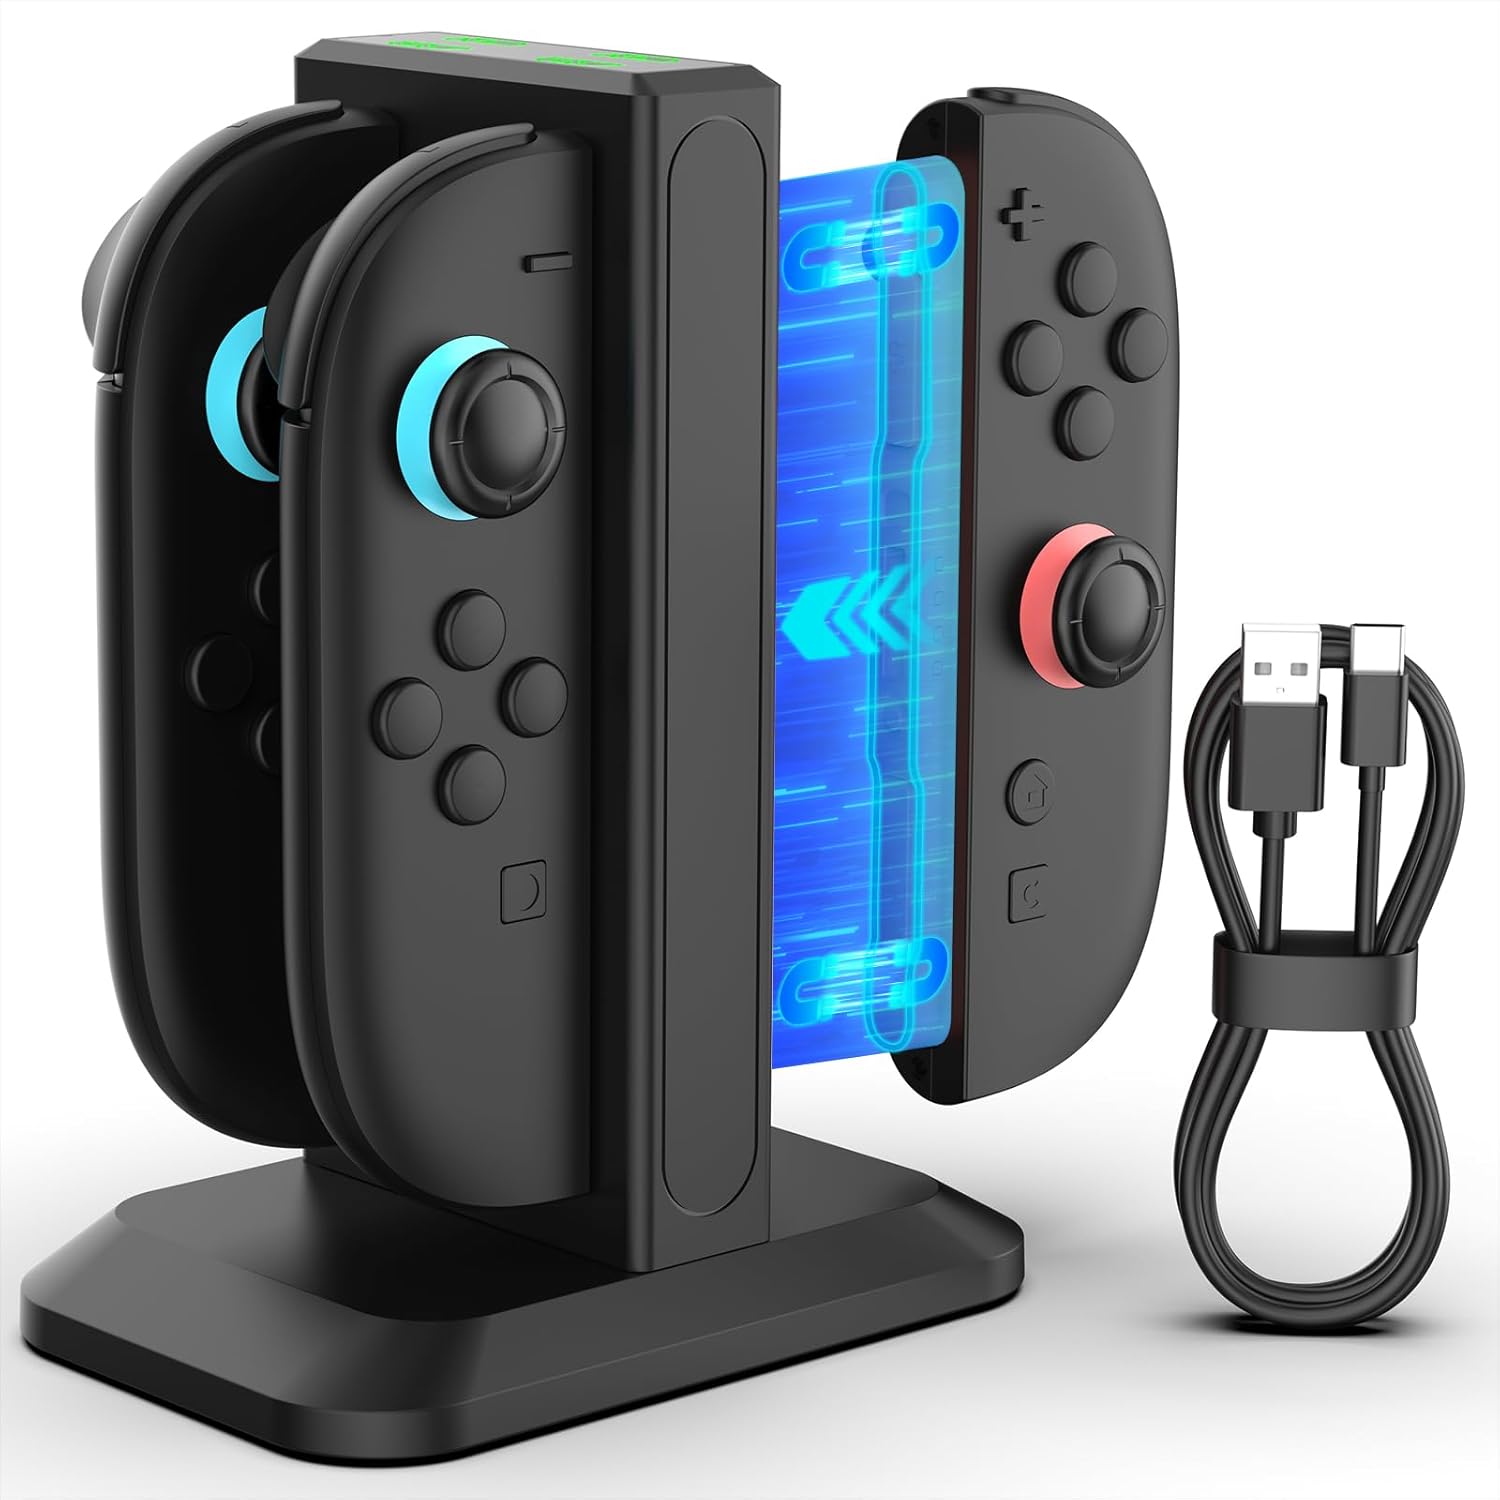
Image: The YCCTEAM Switch 2 JoyCon Charger with two Joy-Cons inserted, showcasinze względu na swoją konstrukcję i dołączony kabel USB-C.
4.1 Ładowanie magnetyczne
The charging dock utilizes smart magnetic alignment, which guides the Joy-Cons into the correct charging position effortlessly. This design reduces wear and tear on the charging ports and ensures a stable connection.

Obraz: Zbliżenie view illustrating the magnetic charging mechanism, showing a Joy-Con being guided into place by magnetic force.
4.2 Wskaźniki LED
Each charging slot is equipped with an LED indicator to show the charging status of the connected Joy-Con controller:
- Czerwone światło: Indicates that the Joy-Con controller is currently charging.
- Zielone światło: Indicates that the Joy-Con controller is fully charged or the slot is in standby mode.

Image: The charging dock displaying its LED indicators, with examples of red (charging) and green (fully charged/standby) lights.
5. Konfiguracja
- Place the YCCTEAM Switch 2 JoyCon Charger on a stable, flat surface.
- Connect the provided USB-C charging cable to the USB-C port on the back of the charging dock.
- Connect the other end of the USB-C cable to a compatible power source. This can be a USB hub, a wall outlet (with an AC adapter, not included), a computer USB port, or even your Nintendo Switch 2 TV dock.
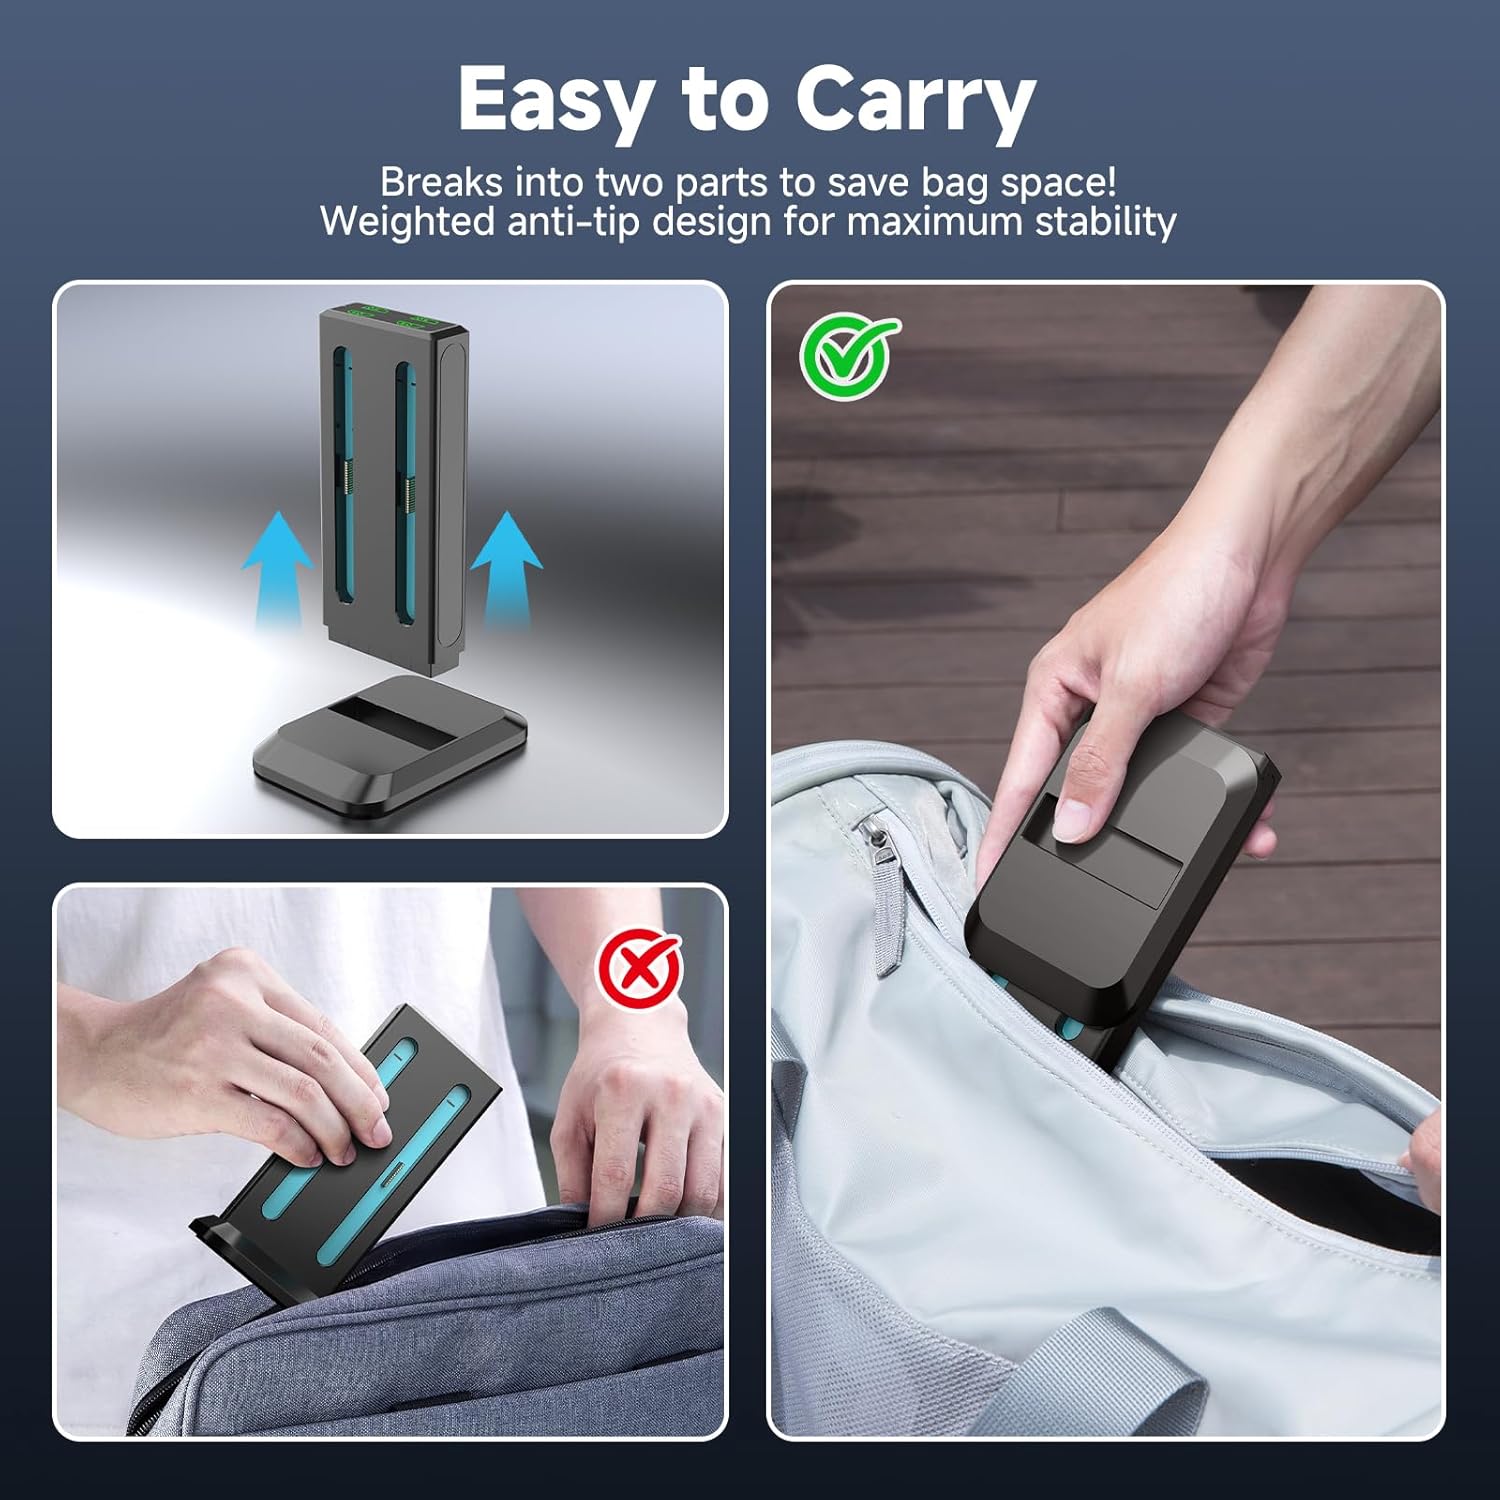
Image: Illustrations of different power sources that can be used to power the charging dock, such as a USB hub, Switch 2 dock, AC adapter, and computer.
6. Instrukcja obsługi
6.1 Charging Joy-Cons
- Ensure the charging dock is connected to a power source. The LED indicators will be green if no controllers are inserted.
- Align a Nintendo Switch 2 Joy-Con controller with an empty charging slot. The magnetic design will help guide it into place.
- Gently insert the Joy-Con into the slot until it clicks securely. The corresponding LED indicator will turn red, signifying that charging has begun.
- When the Joy-Con is fully charged, the LED indicator will turn green.
- You can charge up to four Joy-Cons simultaneously. A full charge typically takes approximately 2.5 hours.
6.2 Zgodność
This charging dock is exclusively designed for Nintendo Switch 2 Joy-Con controllers (2025 model). It is niekompatybilny with original Nintendo Switch (2017 model), Switch Lite, or Switch OLED Joy-Con controllers.
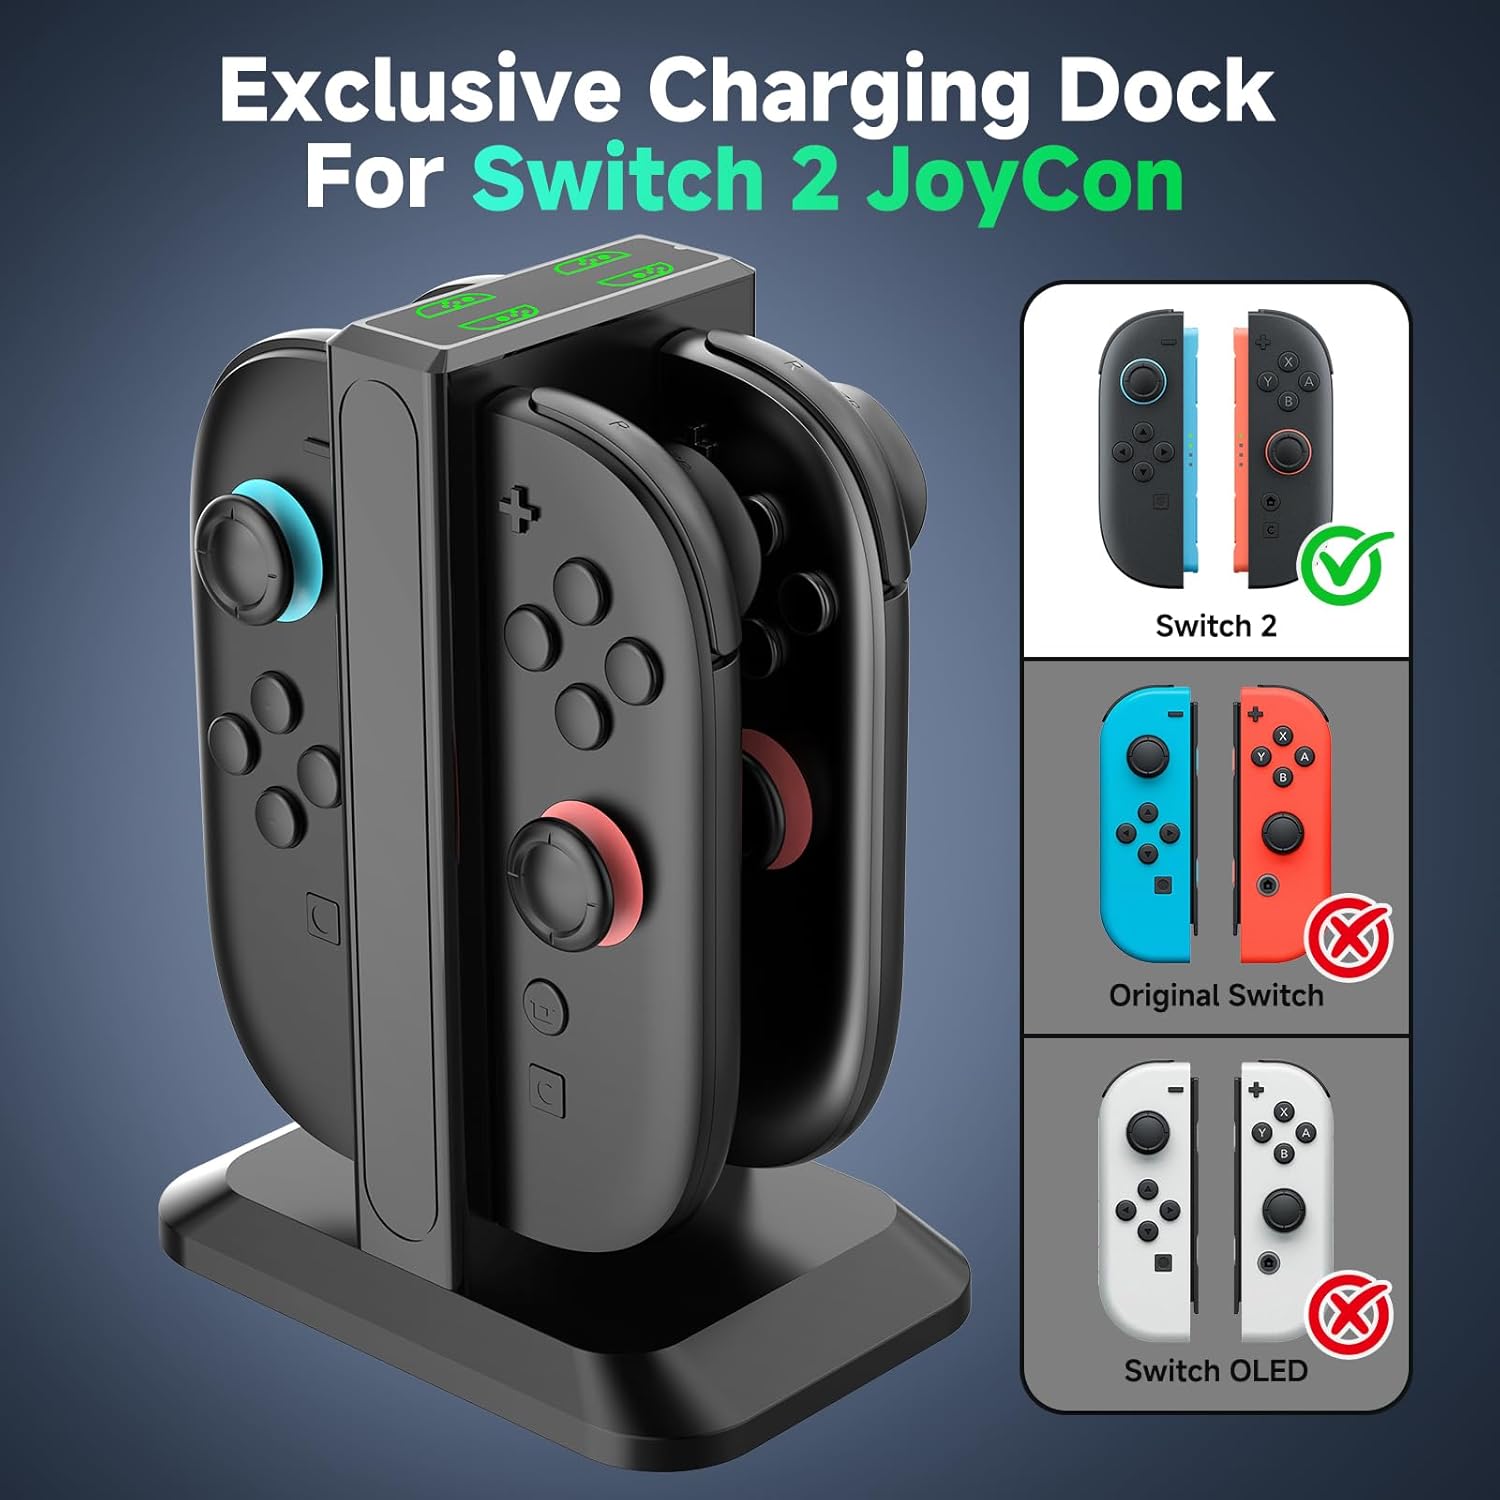
Image: A visual guide demonstrating that the charger is compatible only with Switch 2 Joy-Cons, explicitly showing incompatibility with older Switch models.
6.3 Portability and Organization
The charging dock features a detachable design, allowing it to break into two parts for easier portability and storage. Its weighted base ensures stability on any surface, helping to keep your gaming area tidy and organized.

Image: A visual representation of the charging dock separating into two pieces, making it convenient for travel and storage.

Image: A comparison showing a cluttered desk with loose controllers (before) and an organized desk with controllers neatly stored in the charging dock (after).
7. Konserwacja
- Czyszczenie: Disconnect the charger from the power source before cleaning. Use a soft, dry cloth to wipe the surface of the charging dock. Do not use liquid cleaners or abrasive materials.
- Składowanie: Jeśli ładowarka nie będzie używana przez dłuższy czas, należy ją przechowywać w chłodnym i suchym miejscu, z dala od bezpośredniego światła słonecznego.
8. Rozwiązywanie Problemów
| Problem | Możliwa przyczyna | Rozwiązanie |
|---|---|---|
| Joy-Con not charging (LED is green) | Joy-Con not properly seated; Not a Switch 2 Joy-Con; Power source issue. | Re-insert the Joy-Con, ensuring magnetic alignment. Verify it is a Nintendo Switch 2 Joy-Con. Check power cable connection and try a different USB port or power adapter. |
| Ładowarka nie włącza się | No power supply; Faulty cable or port. | Ensure the USB-C cable is securely connected to both the charger and the power source. Try a different USB-C cable or a different power source. |
| Powolne ładowanie | Insufficient power output from source. | Use a power source with adequate output (e.g., a wall adapter with 5V/1A or higher output). |
9. Specyfikacje
| Funkcja | Szczegół |
|---|---|
| Marka | YCCTEAM |
| Model | 4-in-1 Joycon 2 Controller Charging Docking Station |
| Zgodność | Nintendo Switch 2 Joy-Con controllers (2025 model) |
| Pojemność ładowania | 4 Joy-Con controllers simultaneously |
| Czas pełnego ładowania | Około 2.5 godzin |
| Wejście Voltage | 5 V (AC) |
| Prąd wyjściowy | 0.2 Amps |
| Objętość wyjściatage | 5 wolty |
| Technologia łączności | USB |
| Typ złącza | USB typu C |
| Waga przedmiotu | 7.4 uncji |
| Wymiary opakowania | 5.43 x 3.37 x 1.65 cala |
10. Gwarancja i pomoc techniczna
YCCTEAM products are designed for reliability and performance. For any questions, technical support, or warranty inquiries, please refer to the contact information provided with your purchase or visit the official YCCTEAM website. Our customer service team is ready to assist you.
Powiązane dokumenty - 4-in-1 Joycon 2 Controller Charging Docking Station
 |
Zasilacz YCCTEAM X-ONE do konsoli Xbox One: instrukcja obsługi i specyfikacja Kompleksowy przewodnik po zasilaczu YCCTEAM X-ONE (model: YCC-XB043) do konsoli Xbox One. Zawiera informacje dotyczące konfiguracji, wskazówki dotyczące użytkowania, informacje o bezpieczeństwie, rozwiązywaniu problemów i specyfikację. |
 |
YCCTEAM Wireless Pro Controller User Guide for Nintendo Switch, Switch Lite, OLED Official user guide for the YCCTEAM Wireless Pro Controller. Learn how to connect, use features, and troubleshoot your controller for Nintendo Switch, Switch Lite, and OLED consoles, plus PC compatibility. |
 |
YCCTEAM YCC-SW4001 Wireless Pro Controller User Guide for Nintendo Switch/Lite and PC Comprehensive user guide for the YCCTEAM YCC-SW4001 Wireless Pro game controller, detailing features, connection instructions for Nintendo Switch/Lite and PC, LED indicators, parameters, precautions, and testing. |
 |
Instrukcja obsługi kontrolera bezprzewodowego YCCTEAM do PS4, PS4 Slim, PS4 Pro i PC Szczegółowa instrukcja obsługi bezprzewodowego kontrolera do gier YCCTEAM, kompatybilnego z PS4, PS4 Slim, PS4 Pro i PC. Zawiera schemat kontrolera, instrukcje podłączania i parowania. |
 |
Instrukcja obsługi kontrolera bezprzewodowego YCCTEAM SW4004ZX-H Wireless Pro do konsoli Nintendo Switch Niniejsza instrukcja obsługi zawiera szczegółowe instrukcje dotyczące kontrolera bezprzewodowego YCCTEAM SW4004ZX-H Wireless Pro, obejmujące jego funkcje, metody połączenia z konsolą Nintendo Switch i komputerem, funkcje przycisków, wskaźniki LED, kalibrację oraz dane techniczne. Zawiera również informacje o zgodności z normami FCC. |
 |
Instrukcja obsługi kontrolera YCCTEAM SW4007MZ-H Switch Pro do konsoli Nintendo Switch i komputerów PC Oficjalna instrukcja obsługi kontrolera bezprzewodowego YCCTEAM SW4007MZ-H Pro. Dowiedz się więcej o funkcjach, instrukcjach połączenia Nintendo Switch z komputerem, wskaźnikach LED, specyfikacjach i rozwiązywaniu problemów. Zawiera informacje o zgodności z FCC. |