Produkt ponadview
This manual provides essential information for the assembly, operation, and maintenance of your Garvee 6x8 ft Aluminum Polycarbonate Greenhouse. Designed for year-round plant cultivation, this heavy-duty walk-in greenhouse features durable polycarbonate panels, a reinforced aluminum frame, and adjustable ventilation. Please read all instructions carefully before beginning assembly or use.
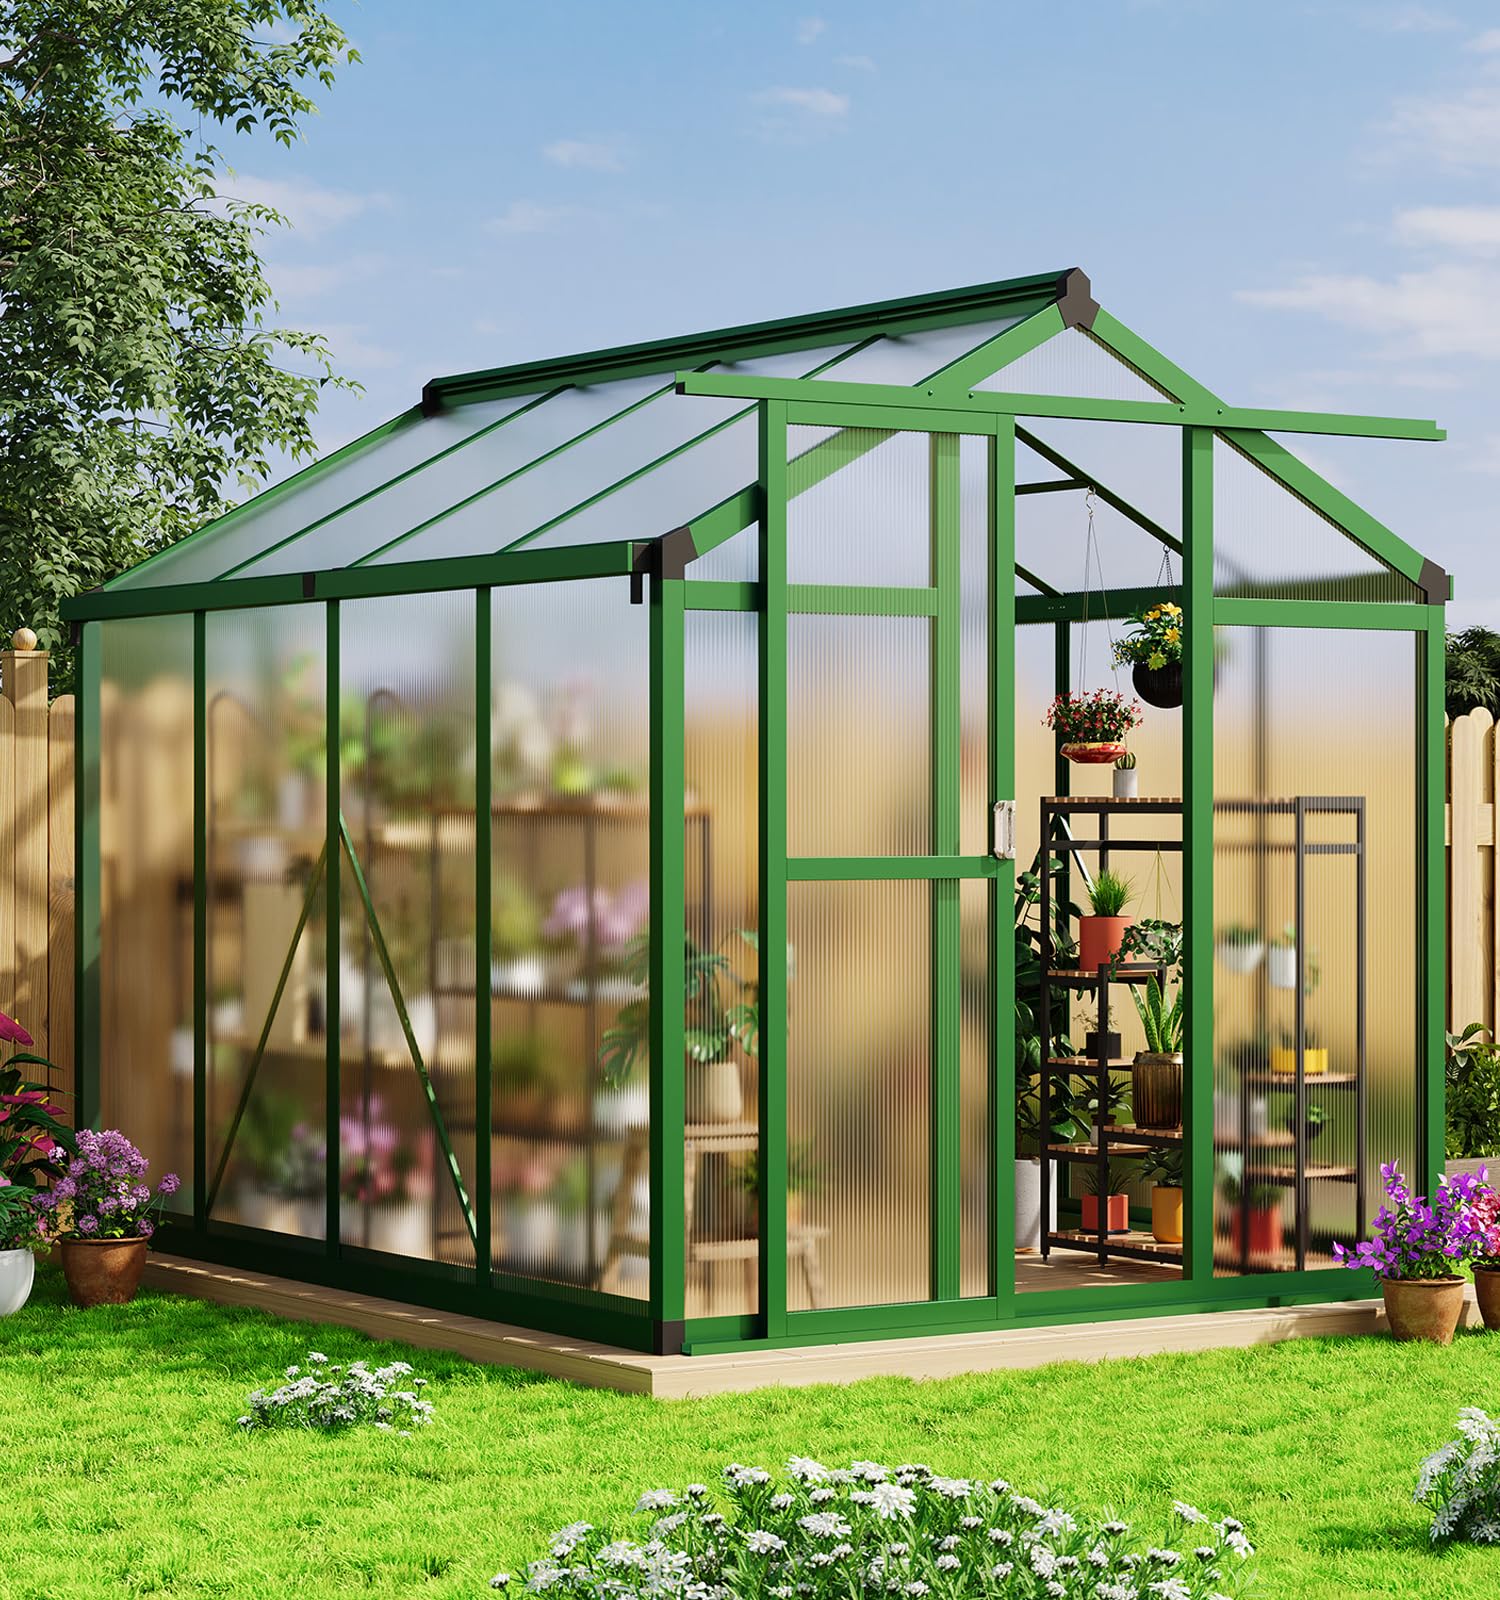
Figure 1: Garvee 6x8 ft Greenhouse in a garden setting, showcasing its spacious interior with various plants.
Informacje dotyczące bezpieczeństwa
Always follow the assembly instructions carefully to avoid injury from sharp edges or heavy components. Keep doors locked and ensure proper ventilation to prevent overheating and potential damage to the greenhouse. Be cautious of UV exposure while working in or around the greenhouse. Use caution when handling the drainage system and sink to avoid slips or falls. Always secure the greenhouse to the ground to prevent it from being blown over in high winds.
Konfiguracja i montaż
The Garvee 6x8 ft Greenhouse is designed for efficient and convenient installation. Detailed assembly videos and clear instruction manuals are provided to guide you through the process. Using PET panels can increase assembly speed and security. Ensure all necessary tools are available before starting.
Kroki montażu powyżejview
- Przygotuj bazę: Ensure a flat, stable ground for installation. Fix the provided ground spikes to secure the base frame.
- Złóż ramę: Connect the reinforced aluminum frame components according to the instructions.
- Install Polycarbonate Panels: Securely snap the 720 g/m² polycarbonate panels into the frame.
- Attach Doors and Vents: Install the lockable door and adjustable roof vents.
Assembly Visual Guide

Figure 2: Base frame assembly with ground nails for stability.

Figure 3: Attaching vertical frame components to the prepared base.

Figure 4: Polycarbonate panel installation into the greenhouse frame.
Filmy montażowe
How to Install a Greenhouse
Video 1: A detailed guide on the step-by-step installation process of the greenhouse.
Greenhouse Quick Installation
Film 2: Szybkie przejścieview of the greenhouse installation process, highlighting key steps.
Główne cechy
Upgraded Durable Construction
The Garvee 6x8 ft Greenhouse is constructed with 720 g/m² polycarbonate panels and reinforced aluminum frames, ensuring exceptional durability. It supports weight capacities of up to 110 LBS/sq ft, providing reliability in winter conditions. Four sets of reinforced ground nails and two heel mid-post auxiliary supports increase stability in heavy rain and high winds, offering year-round protection for your plants.
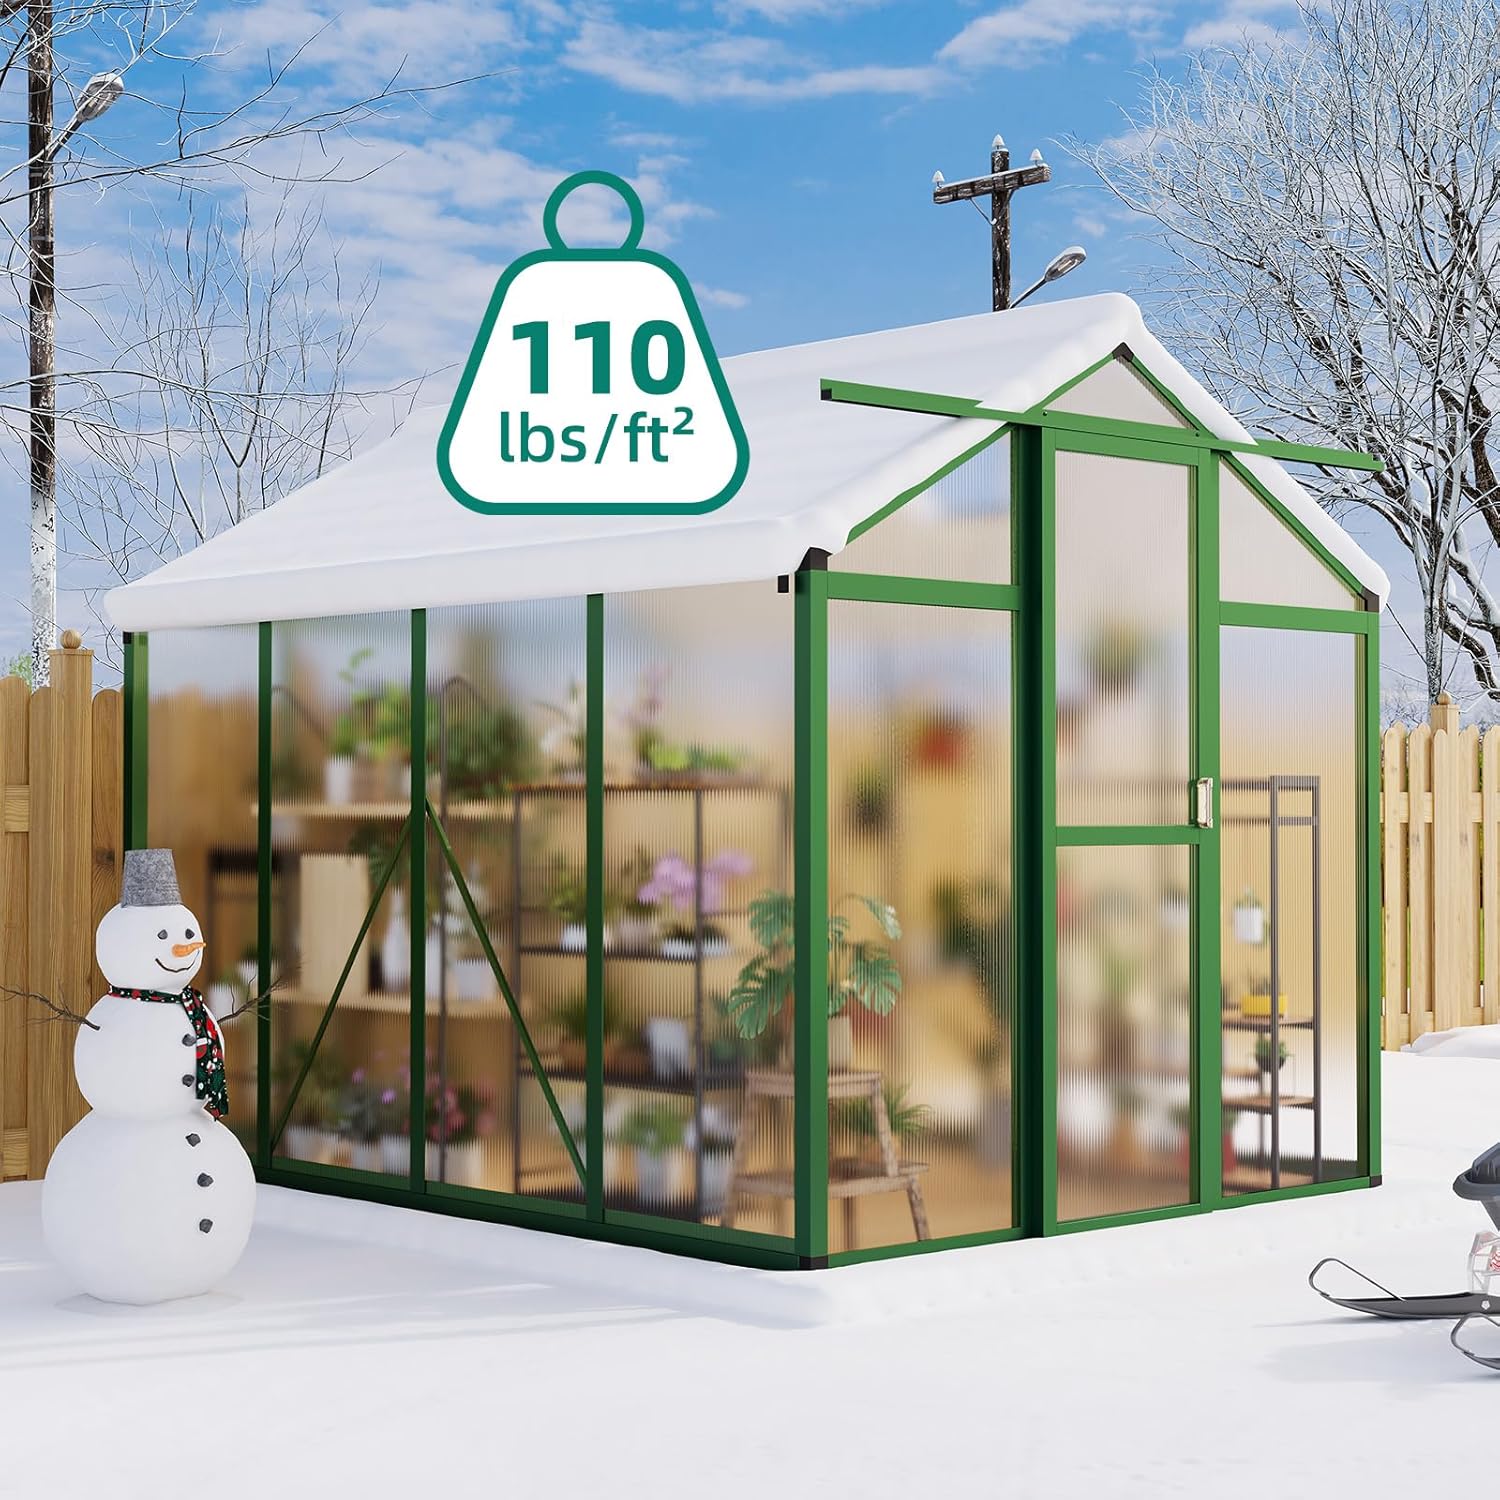
Figure 5: The greenhouse demonstrating its robust construction and ability to withstand snow load.
Large Heavy Duty Aluminum Greenhouses for Outdoors
Video 3: Highlights the heavy-duty aluminum construction and overall durability of the greenhouse.
Balanced Ventilation and Enhanced Safety
The greenhouse design combines adjustable ventilation with safe access, featuring lockable doors and ventilation windows for optimal air circulation and security. This ensures your plants thrive in a safe and controlled environment.
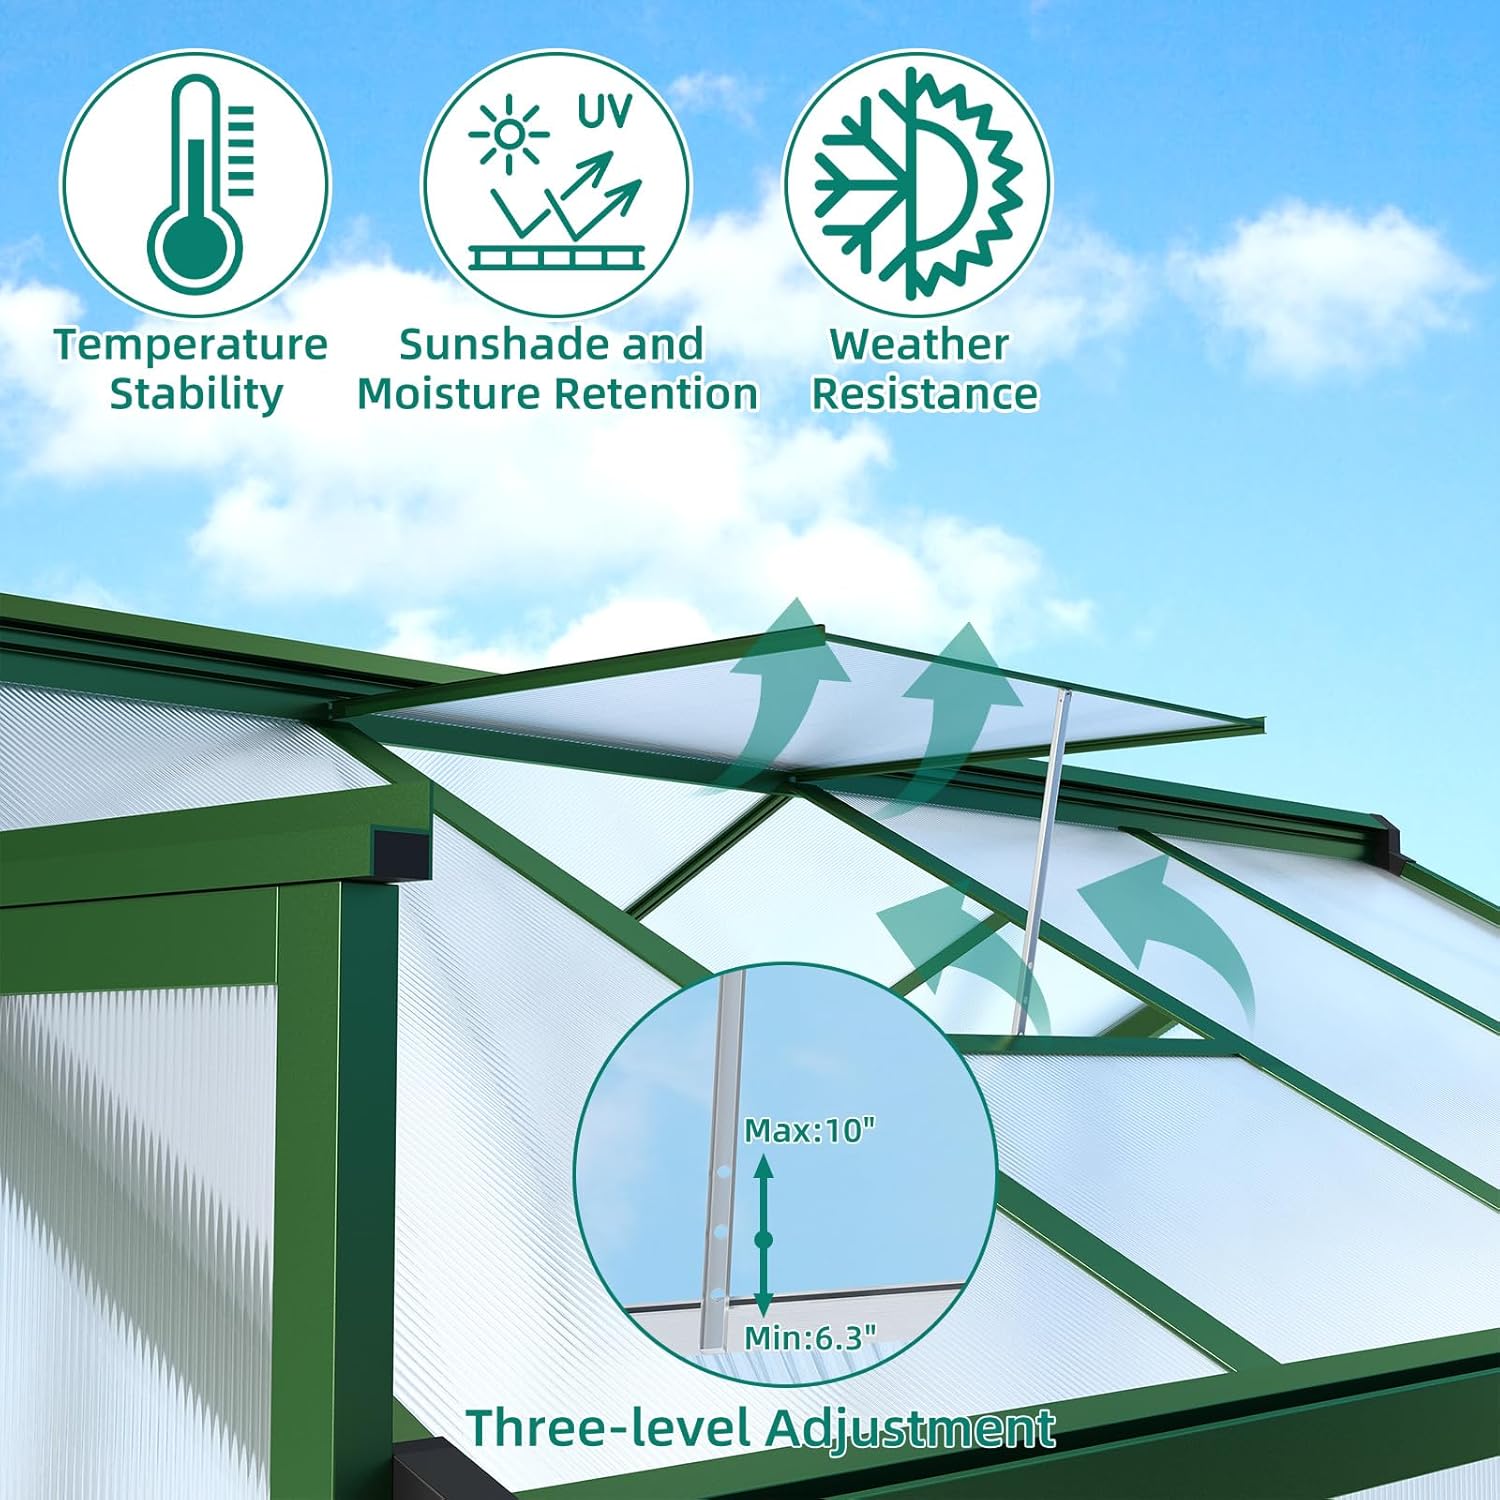
Figure 6: Adjustable roof vent with three-level adjustment for controlled airflow.

Rysunek 7: Szczegółowy view of PC panel locking, adjustable window, gutter system, and aluminum frame.
Greenhouse Details Display
Video 4: A visual display of various features and components of the greenhouse.
Ochrona UV
The greenhouse is equipped with panels featuring a UV coating on the surface to protect your plants from harmful sun rays while maximizing exposure to beneficial sunlight. This ideal balance promotes healthy growth and vibrant flowers.
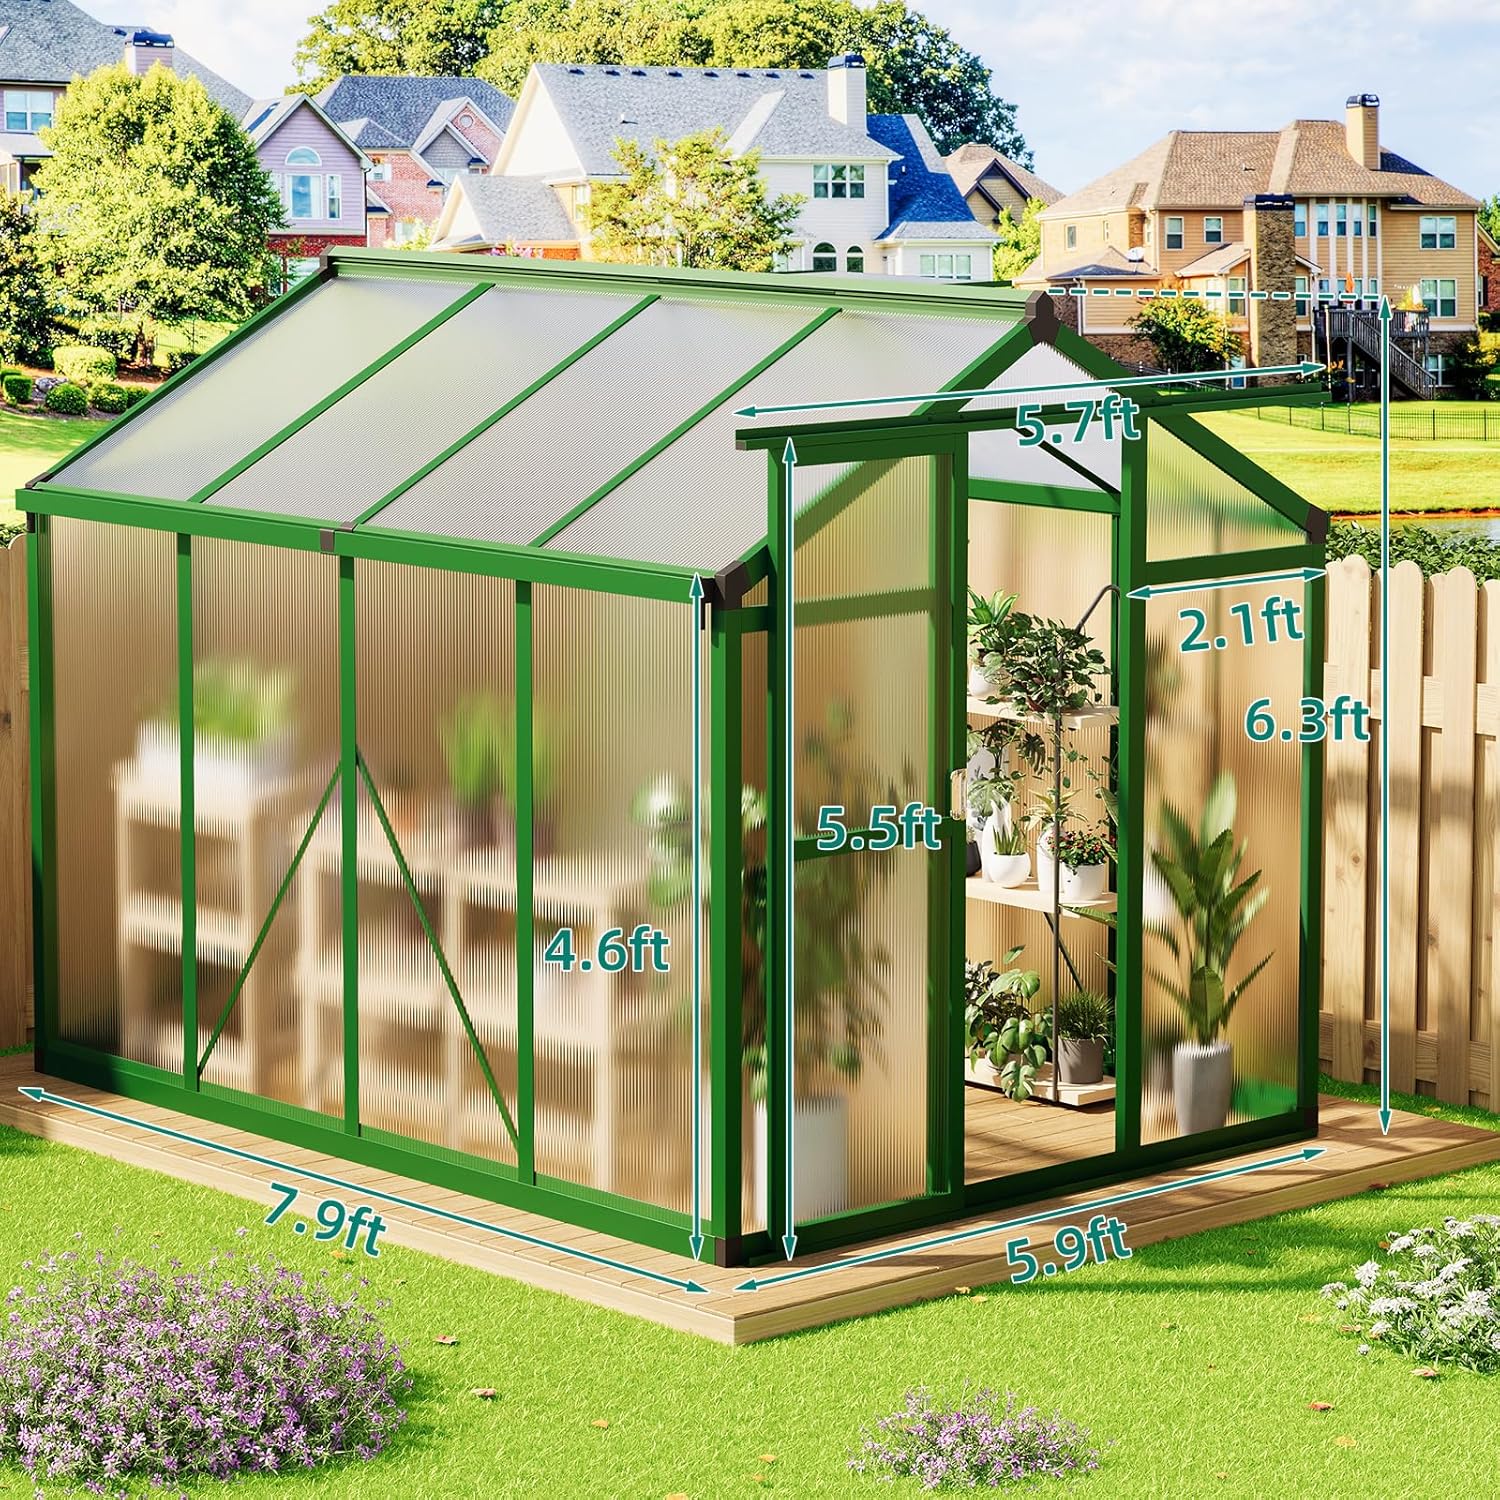
Figure 8: Greenhouse dimensions, highlighting its spacious design for plant growth.
Water Management Design
Our greenhouses are equipped with a cleverly designed drainage system with a sink at the top that helps to efficiently drain and collect rainwater. This feature simplifies maintenance, provides a sustainable water source for your plants, and increases the practicality of the greenhouse setting.

Figure 9: Integrated drainage system with gutters for efficient rainwater collection.
Instrukcja obsługi
Wentylacja
The greenhouse features adjustable roof vents. To open, gently push the vent arm outwards and secure it at the desired height using the provided adjustment points. This allows for optimal air circulation, preventing excessive heat buildup. To close, release the arm and lower the vent until it is fully shut.
Obsługa drzwi
The greenhouse is equipped with a lockable door for secure access. To open, unlatch the locking mechanism and slide or swing the door open. To close, ensure the door is fully shut and engage the locking mechanism to secure it. This helps maintain a controlled environment and protects your plants.
Konserwacja
Czyszczenie
Regularly clean the polycarbonate panels with mild soap and water to ensure maximum light transmission. Avoid abrasive cleaners or tools that could scratch the panels. Periodically clear any debris from the gutters and drainage system to ensure efficient rainwater collection.
Opieka sezonowa
Before winter, inspect the frame and panels for any loose connections and tighten as necessary. Ensure the greenhouse is securely anchored to withstand strong winds and heavy snow. During periods of heavy snow, gently remove excess snow from the roof to prevent structural strain, especially given its 110 LBS/sq ft capacity.
Rozwiązywanie problemów
Panel Instability
If panels appear loose or unstable, re-check all snap-in locking mechanisms and frame connections. Ensure all screws are tightened. In high wind areas, verify that ground anchors are properly installed and secured.
Słaba wentylacja
If the greenhouse becomes too hot, ensure roof vents are open to the maximum desired level. Check for any obstructions preventing airflow. Consider adding additional ventilation if temperatures remain consistently high.
Wyciek wody
Inspect panel seals and frame connections for any gaps. Ensure the drainage system is clear of blockages. Apply weather-resistant sealant to any persistent leak points if necessary.
Specyfikacje
| Funkcja | Szczegół |
|---|---|
| Marka | Garvee |
| Numer modelu | 0fHrlzC6wiYDfF_0GTdWgA |
| Rozmiar | 6x8 stóp |
| Wymiary produktu | 96 x 72 x 75.6 cala (96" dł. x 72" szer. x 75.6" wys.) |
| Waga przedmiotu | 37 funta |
| Materiał ramy | Aluminium |
| Materiał na okładkę | Poliwęglan (PC) |
| Liczba drzwi | 1 |
| Liczba otworów wentylacyjnych | 2 |
| Nośność | Up to 110 LBS/sq ft |
| Kolor | Srebrny |
Gwarancja i wsparcie
Garvee is committed to providing excellent customer service. We have a dedicated customer service team ready to assist with assembly questions, provide gardening insights, or address any concerns you may have. For support, please refer to the contact information provided with your purchase or visit the official Garvee website. We aim to ensure a smooth and satisfying experience from assembly to long-term use.


