
Ortur R1
Ortur R1 Class 1 Foldable Laser Engraver User Manual
Model: R1 | Brand: Ortur
1. Wprowadzenie
The Ortur R1 is a Class 1 foldable laser engraver designed for versatile and precise engraving on a variety of materials. Featuring a 1000mW 1064nm infrared laser module, it is suitable for engraving metals, plastics, acrylics, glass, and stones. Its compact, foldable design ensures ease of setup and portability, making it ideal for both home and professional use. This manual provides essential information for safe and effective operation, maintenance, and troubleshooting.

Image: The Ortur R1 laser engraver in its compact, folded state, highlighting its portability.
2. Informacje dotyczące bezpieczeństwa
The Ortur R1 is classified as a Class 1 laser product, ensuring reliable protection against laser hazards under normal operating conditions. Adherence to all safety guidelines is crucial for safe operation.
Kluczowe funkcje bezpieczeństwa:
- Watchdog Protection: Monitors system activity and initiates shutdown if anomalies are detected.
- Automatyczne wyłączenie: Automatically powers off the device under specific unsafe conditions.
- Limity ekspozycji: Designed to prevent laser exposure beyond safe limits.
- Wykrywanie przechyłu: Automatically stops operation if the machine is tilted beyond a safe angle.
- Lid-Stop: Engraving stops immediately if the protective lid is opened during operation.
- USB Lock Protection: The machine requires a specific USB key to be inserted to begin operation, preventing unauthorized use, especially by children.

Image: Visual representation of the Ortur R1's comprehensive safety mechanisms.
3. Zawartość opakowania
Upon unboxing your Ortur R1, ensure all the following components are present:
- Ortur R1 Laser Engraver Unit
- Płyta bazowa
- Wooden Piece (sampmateriał)
- Triangular Bar (tool)
- Brush (cleaning tool)
- Aluminium Sheet (sampmateriał)
- LU3-5B Focusing Plate
- Wrench (tool)
- Acrylic Sheet (sampmateriał)
- Czytnik kart
- USB Lock Key
- Kabel danych USB
- Jednostka Zasilająca

Image: The Ortur R1 laser engraver as packaged in its box.
4. Przewodnik konfiguracji
The Ortur R1 features a foldable design for quick setup. Follow these steps to prepare your engraver for use:
- Rozpakuj maszynę: Carefully remove the engraver and all accessories from its packaging.
- Zdejmij płytę bazową: Pull out the base plate from the top of the machine.
- Unfold the Machine: Turn the machine over and unfold it until you hear a click, indicating it is securely locked in the open position.
- Włóż płytę bazową: Slide the base plate into the designated slot at the bottom of the unfolded machine.
- Włóż kartę TF: Locate the TF card slot on the back of the machine and insert the provided TF card.
- Insert USB Lock Key: Insert the USB lock key into the USB port on the back of the machine. The machine will not operate without this key.
- Podłącz kable zasilania i danych: Connect the USB data cable and the power supply unit to their respective ports on the back of the machine, then plug the power supply into an electrical outlet.
- Zamknij drzwi: Ensure the protective orange door is closed before starting.
- Uruchom maszynę: Press the power button on the top of the machine to turn it on.
Video: This video demonstrates the complete unboxing and initial setup process for the Ortur R1 laser engraver, including inserting the base plate, connecting cables, and starting the machine.
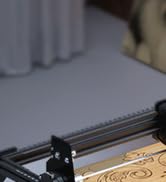
Image: Illustrated guide for the quick setup of the Ortur R1.
5. Działanie
5.1 Zgodność materiałów
The Ortur R1, equipped with a 1064nm infrared laser module, is capable of engraving a wide range of materials:
- Metale: Gold, silver, platinum, copper, brass, stainless steel, aluminum sheets.
- Tworzywa sztuczne: Various types of plastics.
- Acrylics: Clear and colored acrylics.
- Szkło: Suitable for glass engraving.
- Kamienie: Engraving on different types of stone.
- Leathers: Engraving on various leather products.

Image: Demonstrates the range of materials compatible with the 1064nm infrared laser module.
5.2 Focusing the Laser Module
Accurate focusing is essential for optimal engraving results. Use the provided focusing plate:
- Place the material to be engraved onto the base plate.
- Insert the LU3-5B focusing plate between the laser module and the material.
- Adjust the laser module's height until the focusing plate makes contact with the engraving item.
- Ensure the circular focusing plate faces left or right, not up or down, for correct alignment.

Image: Adjusting the laser module's focal length for precise engraving.
5.3 Using the APP Control
The Ortur R1 can be controlled via a dedicated mobile application, offering various creative functions:
- AI Algorithms: Automatically generate images optimized for engraving.
- Hand-Drawn Engraving: Sketch directly on your phone screen and engrave the design.
- Puzzle Mode: Customize designs with a modular, Lego-style interface.
- QR Code Generation: Upload text, photos, or videos to generate unique QR codes for engraving.
- Quick Custom Text Engraving: Instant input with over 19 fonts and multi-language support.
- Online/Offline Control: Control the engraver remotely and transfer filez łatwością.

Obraz: Ponadview of the Ortur R1's mobile application features.
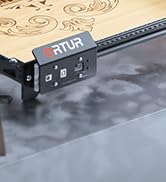
Image: Demonstrating remote control and file transfer capabilities via the app.
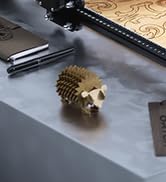
Image: The Ortur R1 app's creative features for users of all ages.
5.4 Proces grawerowania
After setting up the machine and focusing the laser, you can proceed with engraving:
- Przygotuj projekt: Use the Ortur app or LightBurn software to prepare your design.
- Ustaw parametry: Adjust engraving parameters (speed, power, passes) based on the material type and desired effect.
- Rozpocznij grawerowanie: Initiate the engraving process through the app or software. The machine will begin to engrave the design onto your material.

Obraz: Byłyample of a finished engraving on wood.
6. Konserwacja
Regular maintenance ensures the longevity and optimal performance of your Ortur R1 laser engraver:
- Wyczyść obiektyw: Periodically clean the laser lens with a soft, lint-free cloth and appropriate lens cleaner to prevent residue buildup that can affect laser performance.
- Usuń zanieczyszczenia: After each engraving session, use the provided brush or compressed air to remove any dust, debris, or small material particles from the engraving area and internal components.
- Sprawdź kable: Regularly check all cables (power, USB) for any signs of wear, fraying, or damage. Replace if necessary.
- Utrzymuj otwory wentylacyjne w czystości: Ensure that the ventilation openings on the machine are not obstructed to allow for proper airflow and prevent overheating.
- Przechowuj prawidłowo: When not in use, fold the engraver and store it in a clean, dry environment away from direct sunlight and extreme temperatures.
7. Rozwiązywanie Problemów
If you encounter issues with your Ortur R1, refer to the following common troubleshooting tips:
| Problem | Możliwa przyczyna | Rozwiązanie |
|---|---|---|
| Maszyna nie włącza się. | Power cable not connected, USB lock key not inserted, faulty power supply. | Ensure power cable is securely connected. Insert the USB lock key. Test with a different power outlet if possible. |
| Laser not engraving or weak engraving. | Incorrect focus, wrong power/speed settings, dirty laser lens, incompatible material. | Adjust the laser focus using the focusing plate. Verify power and speed settings for your material. Clean the laser lens. Ensure material is suitable for infrared laser engraving. |
| Machine stops during engraving. | Lid opened, machine tilted, software error, overheating. | Ensure the lid remains closed. Place the machine on a stable, level surface. Restart the software and machine. Check for clear ventilation. |
| Problemy z połączeniem aplikacji. | Bluetooth/Wi-Fi interference, outdated app, incorrect pairing. | Ensure Bluetooth/Wi-Fi is enabled and the device is within range. Update the app to the latest version. Re-pair the device with the engraver. |
For further assistance, please contact Ortur customer support.
8. Specyfikacje
- Wymiary produktu: 10.71 x 9.84 x 8.58 cala
- Numer modelu przedmiotu: R1
- Waga przedmiotu: 7.72 funta
- Producent: Ortur
- Moduł laserowy: 1000mW 1064nm Infrared Laser Module
- Klasa laserowa: Klasa 1
- Łączność: USB, App Control (Bluetooth/Wi-Fi)
9. Gwarancja i wsparcie
Ortur is committed to providing quality products and comprehensive customer service.
- Gwarancja: 365-day warranty from the date of product receipt.
- Wsparcie techniczne: 24/7 service and lifetime technical support.
- Kontakt: For any problems or inquiries, please contact Ortur directly through the Amazon platform or visit the official Ortur webwitryna zawierająca zasoby pomocy.
Image: Ortur's commitment to round-the-clock customer support.
Ask a question about this manual
Ask about setup, troubleshooting, compatibility, parts, safety, or missing instructions. Manuals+ will review the question and use this page’s manual context to help answer it.