
Wstęp
This manual provides detailed instructions for the installation, operation, and maintenance of your SHINYSNAKE G600 MATX MFF Gaming Case. The G600 is designed for high-performance computing in a compact form factor, featuring a solid wood front panel, tempered glass side panel, and an optional 11.3-inch auxiliary screen for real-time hardware monitoring. Please read this manual thoroughly before beginning assembly to ensure proper setup and optimal performance.
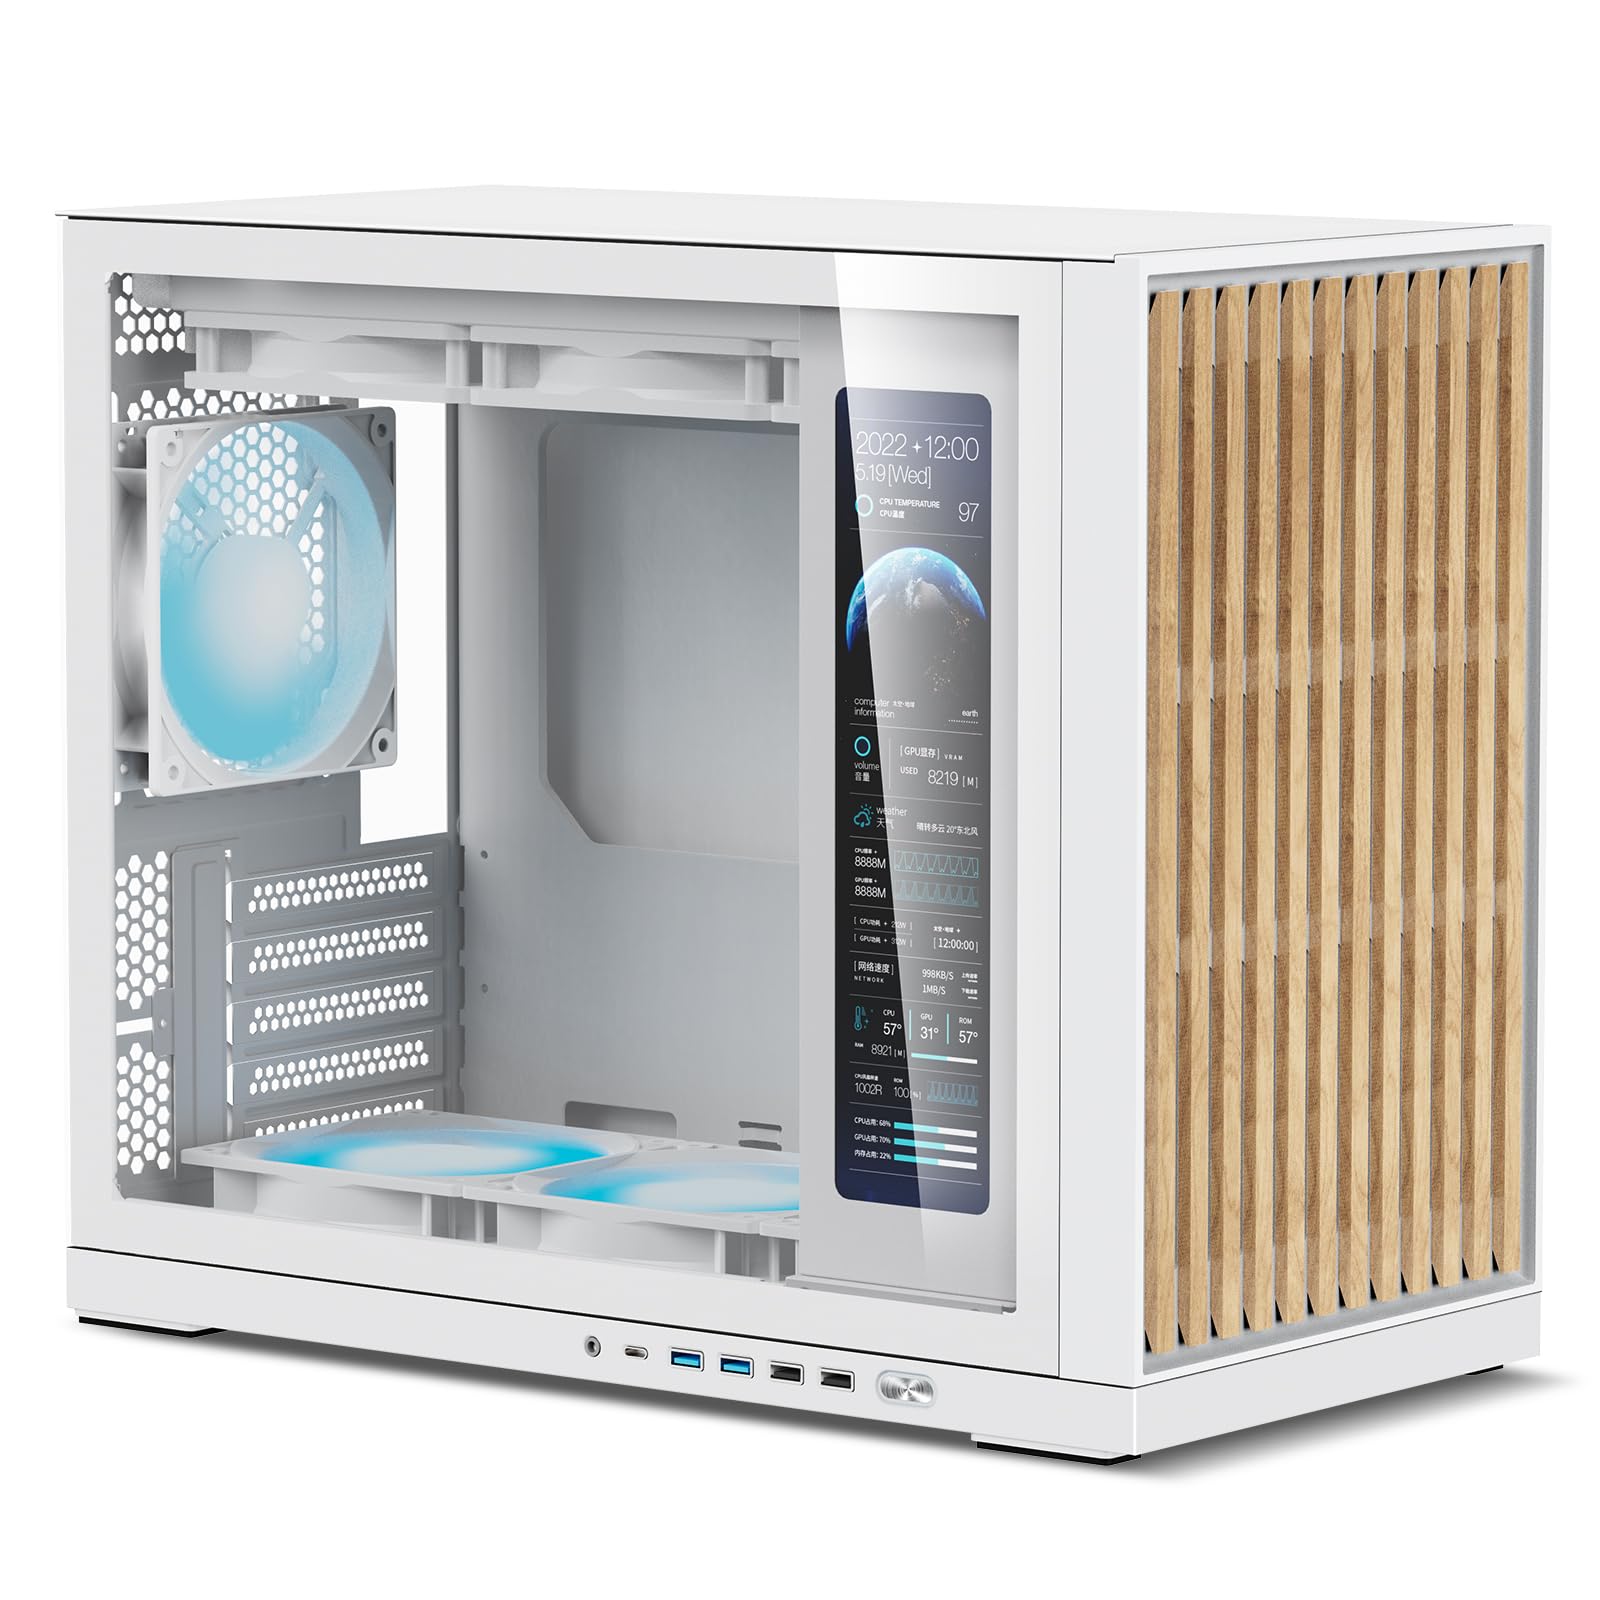
Image: The SHINYSNAKE G600 MATX MFF Gaming Case in white with its auxiliary screen displaying system information.
Informacje dotyczące bezpieczeństwa
- Przed instalacją lub demontażem jakichkolwiek podzespołów należy zawsze odłączyć zasilacz od gniazdka ściennego.
- Aby zapobiec uszkodzeniu delikatnych podzespołów wskutek wyładowań elektrostatycznych (ESD), należy nosić opaskę antystatyczną na nadgarstku.
- Aby uniknąć uszkodzeń fizycznych, należy obchodzić się z podzespołami ostrożnie.
- Małe części i narzędzia należy trzymać z dala od dzieci.
- Aby zapobiec przegrzaniu, należy zapewnić odpowiednią wentylację wokół obudowy.
- Do not operate the system with the side panels removed unless performing maintenance or troubleshooting.
Zawartość opakowania
Przed rozpoczęciem montażu należy sprawdzić, czy wszystkie elementy są obecne:
- SHINYSNAKE G600 MATX MFF Gaming Case (Auxiliary Screen Version)
- Skrzynka z akcesoriami (śruby, opaski kablowe, dystanse itp.)
- Instrukcja obsługi (ten dokument)
- Auxiliary Screen USB Cable
- Auxiliary Screen Power Cable
Konfiguracja i instalacja
Follow these steps for proper assembly of your PC components within the G600 case.
1. Przygotuj sprawę
- Carefully remove the tempered glass side panel and the solid wood front panel. These are typically secured with thumbscrews or a snap-on mechanism.
- Unpack the accessory box and identify the various screws and mounting hardware.

Image: The SHINYSNAKE G600 case with its side panel removed, showing the internal layout.
2. Instalacja płyty głównej
- Install the CPU, CPU cooler (if air cooler), and RAM onto your Micro-ATX or Mini-ITX motherboard outside the case.
- Align the motherboard with the standoffs inside the case. Ensure the I/O shield is correctly positioned.
- Przymocuj płytę główną za pomocą dołączonych śrub.
3. Instalacja zasilacza (PSU)
The G600 supports ATX PSUs up to 160mm in length and features a 3-level adjustable PSU chamber to optimize clearance for GPUs and cooling.
- Determine the optimal PSU chamber level based on your GPU length and AIO radiator thickness. Refer to the diagrams below for guidance.
- Mount the PSU to the adjustable bracket and secure it in the desired position.
- Route the necessary PSU cables through the cable management cutouts.

Image: Diagram illustrating the adjustable ATX PSU chamber for optimized clearance.

Image: Configuration for PSU Chamber Level 1, showing GPU and PSU length compatibility.

Image: Configuration for PSU Chamber Level 2, showing GPU and PSU length compatibility.

Image: Configuration for PSU Chamber Level 3, showing GPU and PSU length compatibility.
4. Instalacja karty graficznej (GPU)
The G600 supports GPUs up to 400mm in length (5-slot).
- Remove the necessary PCIe slot covers.
- Insert your GPU into the primary PCIe slot on the motherboard.
- Zabezpiecz kartę graficzną za pomocą śrub.
- Connect the appropriate PCIe power cables from the PSU to the GPU.
5. Instalacja układu chłodzenia
The G600 offers flexible cooling options:
- Chłodzenie powietrzem: Supports CPU air coolers up to 170mm tall. Up to 7 x 120mm fans can be installed (3x top, 1x rear, 3x bottom).
- Chłodzenie cieczą: Supports 360mm AIO radiators at the top or bottom, or a 120mm AIO at the rear. Note: A 360mm AIO at the top or bottom may affect other component clearances.
- Install your chosen fans or AIO radiator in the designated mounting points.
- Connect fan power cables to the motherboard or a fan controller.

Image: Diagram showing air cooling fan configurations and CPU cooler height support.

Image: Diagram showing liquid cooling AIO radiator support for top, bottom, and rear mounts.
6. Instalacja urządzenia pamięci masowej
The G600 supports various storage configurations:
- Rear: 1 x 2.5” SSD mount
- Bottom: 1 x 3.5” HDD mount (optional)
- Auxiliary Screen Bracket: 2 x 2.5” SSD mounts (if not using the screen)
- Mount your SSDs and HDDs in the appropriate locations using the provided screws.
- Connect SATA data and power cables.

Image: Visual representation of SSD and HDD mounting points within the case.
7. Złącza przedniego panelu I/O
Podłącz kable panelu przedniego do płyty głównej:
- 1 x USB 3.2 Type-C (10Gbps)
- 2 x USB 3.0 (5 Gb/s)
- 2x USB 2.0
- 1 x gniazdo słuchawkowe/mikrofonowe
- Power Button / Reset Button / LED indicators

Image: Close-up of the front I/O panel showing USB ports and audio jack.
8. Auxiliary Screen Setup
The 11.3-inch auxiliary screen (1920x480 resolution) displays real-time hardware data.
- Connect the auxiliary screen's USB cable to an available USB 2.0 header on your motherboard.
- Connect the auxiliary screen's power cable to a SATA power connector from your PSU.
- Download and install the necessary monitoring software from the official SHINYSNAKE webstrona.
- Configure the display settings and choose from over 20 customizable themes to show CPU/GPU temperatures, clock speeds, fan RPM, and more.

Image: Features of the 11.3-inch auxiliary screen, including resolution, USB connection, and monitoring themes.
9. Montaż końcowy
- Perform cable management to ensure optimal airflow and a clean aesthetic.
- Reattach the tempered glass side panel and the solid wood front panel.
Installation Video (SHINY SNAKE G350 - General Guidance)
While this video is for the SHINY SNAKE G350 model, it may provide general visual guidance for PC component installation within a compact SHINY SNAKE chassis. Please note that specific steps and component layouts may differ for the G600.
Video: Installation instructions for the SHINY SNAKE G350 PC case. Provides general steps for component installation.
Operating the Auxiliary Screen
Once your system is fully assembled and powered on, the auxiliary screen will activate. Ensure the monitoring software is installed and running in your operating system.
- Konfiguracja oprogramowania: Use the SHINYSNAKE monitoring software to customize the information displayed on the screen. You can select from various metrics such as CPU temperature, GPU temperature, CPU/GPU load, fan speeds, and more.
- Wybór tematu: The software offers over 20 customizable themes. Experiment with different themes to find one that suits your aesthetic and informational needs.
- Troubleshooting Display: If the screen does not power on or display information, verify the USB and power connections, and ensure the monitoring software is correctly installed and configured.
Produkt ponadview Video (SHINY SNAKE G600)
Ten film zapewnia ponadview of the SHINY SNAKE G600 MATX Chassis, highlighting its features including the auxiliary screen.
Wideo: Ponadview of the SHINY SNAKE G600 MATX Chassis with Auxiliary Screen, demonstrating its design and features.
Konserwacja
- Filtry przeciwpyłowe: Regularly clean the dust filters (if present) to maintain optimal airflow and prevent dust buildup inside the case.
- Czyszczenie zewnętrzne: Użyj miękkiego, damp cloth to clean the exterior surfaces. Avoid abrasive cleaners or solvents that could damage the finish or wood panel.
- Czyszczenie wnętrza: Okresowo otwieraj obudowę i usuwaj kurz z podzespołów i powierzchni wewnętrznych za pomocą sprężonego powietrza. Przed czyszczeniem upewnij się, że system jest wyłączony i odłączony od zasilania.
- Szkło hartowane: Clean the tempered glass panel with a microfiber cloth and a glass cleaner designed for electronics to avoid streaks or damage.
Rozwiązywanie problemów
System Does Not Power On
- Check all power connections: PSU to wall, PSU to motherboard (24-pin and CPU 8-pin), and front panel power switch cable to motherboard.
- Upewnij się, że przełącznik zasilacza jest w pozycji „ON”.
- Sprawdź, czy kabel przycisku zasilania jest prawidłowo podłączony do złącza na przednim panelu płyty głównej.
Auxiliary Screen Not Displaying
- Confirm the USB and SATA power cables for the auxiliary screen are securely connected.
- Ensure the monitoring software is installed and running in your operating system.
- Check your motherboard's BIOS/UEFI settings to ensure USB 2.0 headers are enabled.
Poor Airflow / Overheating
- Verify all case fans are spinning and oriented correctly for optimal airflow (front/bottom intake, rear/top exhaust).
- Clean any dust filters or internal components that may be obstructing airflow.
- Ensure proper cable management to avoid blocking airflow paths.
Specyfikacje
| Funkcja | Szczegół |
|---|---|
| Rozmiar produktu (DxSxW) | 427 x 220 x 362 mm / 16.81" x 8.66" x 14.25" |
| Zgodność płyty głównej | Micro-ATX, Mini-ITX |
| Obsługa długości GPU | Up to 400mm (5-slot) |
| Obsługa wysokości chłodnicy procesora | Do 170 mm |
| Typ i długość zasilacza | ATX PSU, up to 160mm (adjustable chamber) |
| Uchwyty do wentylatorów | Top: 3 x 120mm or 2 x 140mm; Rear: 1 x 120mm; Bottom: 3 x 120mm |
| Wsparcie chłodnicy AIO | Top/Bottom: 120/240/280/360mm; Rear: 120mm |
| Zatoki magazynowe | 1 x 2.5" SSD (rear), 1 x 3.5" HDD (bottom, optional), 2 x 2.5" SSD (auxiliary screen bracket, if no screen) |
| Przednie porty we / wy | 1 x USB 3.2 Type-C (10Gbps), 2 x USB 3.0 (5Gbps), 2 x USB 2.0, 1 x Headphone/Mic Combo Jack |
| Ekran pomocniczy | 11.3-inch, 1920x480 resolution, real-time hardware monitoring |
| Przybory | SPCC Steel, Tempered Glass, Wood |
| Waga przedmiotu | 6.5 kilograma |

Image: Detailed specifications table for the SHINYSNAKE G600 case.
Gwarancja i wsparcie
Informacje o gwarancji
The SHINYSNAKE G600 MATX MFF Gaming Case comes with a 2-letnia gwarancja from the date of purchase. This warranty covers manufacturing defects and material faults under normal use. It does not cover damage caused by misuse, accidents, unauthorized modifications, or improper installation.
Proszę zachować dowód zakupu na potrzeby roszczeń gwarancyjnych.
Obsługa klienta
For technical assistance, troubleshooting, or warranty inquiries, please contact SHINYSNAKE customer support through their official website or the retailer where the product was purchased. You may need to provide your product model number (G600-AS-WT) and proof of purchase.
Official SHINYSNAKE Webstrona: Visit the SHINYSNAKE Store on Amazon


