1. Wprowadzenie
The JDIAG HD10 is a versatile diagnostic scan tool designed for comprehensive analysis of both 12V gasoline/diesel vehicles and 24V diesel heavy-duty trucks. This device supports a wide range of diagnostic functions, including reading and clearing Diagnostic Trouble Codes (DTCs), displaying live data, and performing various system checks. Its ergonomic design and user-friendly interface aim to provide efficient vehicle diagnostics.

Figure 1: JDIAG HD10 Diagnostic Scan Tool with included 6-pin and 9-pin adapters.
2. Informacje dotyczące bezpieczeństwa
Always observe the following safety precautions when operating the JDIAG HD10 diagnostic tool:
- Upewnij się, że pojazd znajduje się w bezpiecznym, dobrze wentylowanym miejscu.
- Należy nosić odpowiedni sprzęt ochrony osobistej, taki jak okulary ochronne.
- Unikać kontaktu z gorącymi elementami silnika i ruchomymi częściami.
- Nie należy obsługiwać narzędzia podczas jazdy.
- Keep the tool dry and away from extreme temperatures.
- Refer to the vehicle's service manual for specific diagnostic procedures and warnings.
3. Zawartość opakowania
Sprawdź, czy w opakowaniu znajdują się wszystkie elementy:
- HD10 heavy duty scanner tool
- 6-pin adapter (for trucks)
- 9-pin adapter (for trucks)
- Kabel danych USB
- Instrukcja obsługi
4. Urządzenie ponadview
The JDIAG HD10 features a 2.4-inch color screen and intuitive button layout for easy navigation. Its robust design includes non-slip grips and a durable integrated cable.

Figure 2: Ergonomic design features including silicone buttons, non-slip sides, durable cable, and OBD2 connector.
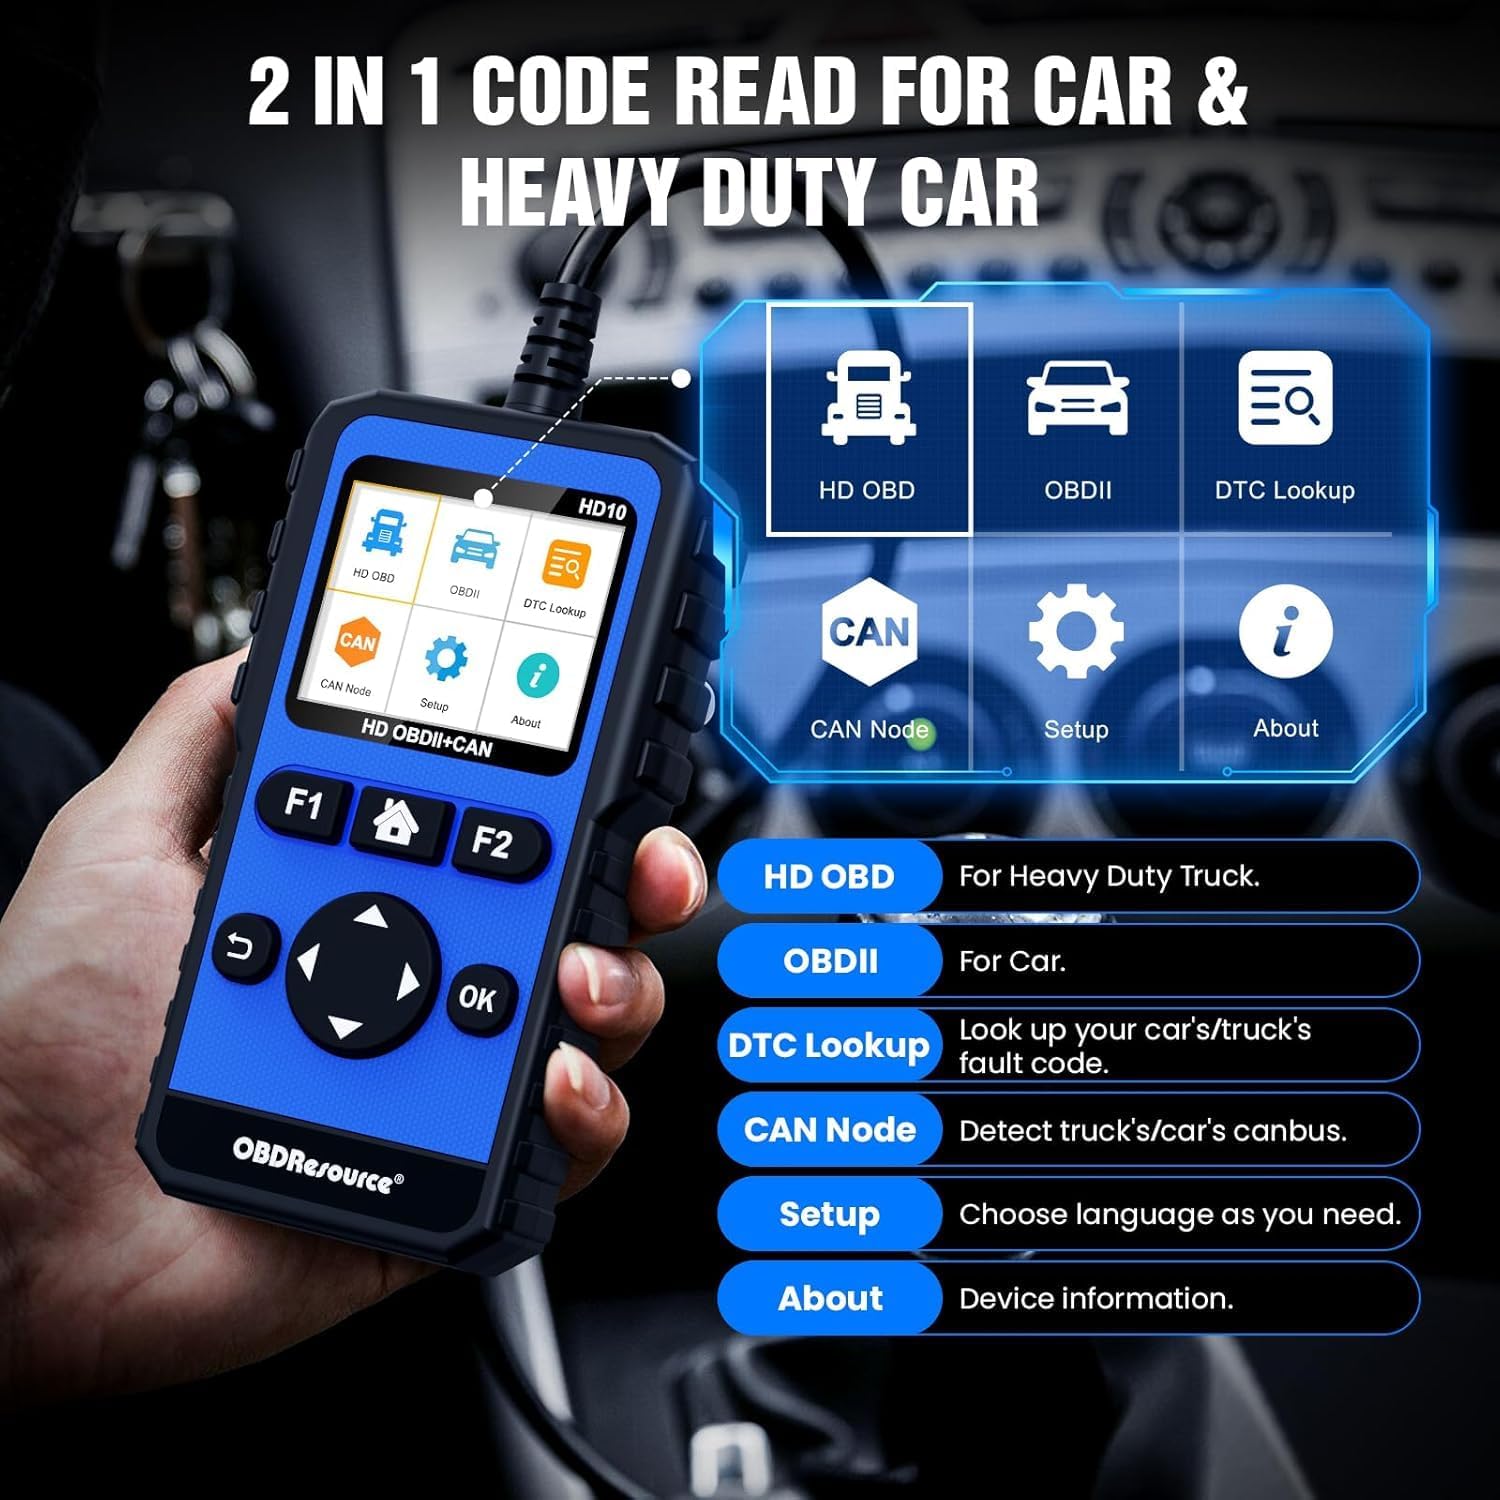
Figure 3: Main menu interface of the HD10 device.
4.1. Cechy fizyczne
- Wyświetlacz: 2.4-inch TFT Color Screen (320 x 240 resolution).
- Pikolak: Clearly arranged silicone physical buttons for high sensitivity and fast response.
- Mieszkania: Anti-slip design on both sides for secure handling.
- Kabel: Integrated, thick, and durable wire (up to 105 cm).
- Złącza: Standard OBD2 connector, with included 6-pin and 9-pin adapters for heavy-duty vehicles.
5. Konfiguracja
5.1. Podłączanie do pojazdu
- Locate the vehicle's Diagnostic Link Connector (DLC). For 12V vehicles, this is typically a 16-pin OBD2 port. For heavy-duty 24V vehicles, it will be a 6-pin or 9-pin connector.
- If diagnosing a heavy-duty vehicle, attach the appropriate 6-pin or 9-pin adapter to the HD10's main cable, then connect to the vehicle's DLC. For 12V vehicles, connect the standard OBD2 connector directly.
- Ensure the connection is secure. The device will power on automatically once connected to the vehicle's power supply.

Figure 4: The HD10 displaying live data, illustrating its 2.4-inch color screen.
5.2. Ustawienia początkowe
Przy pierwszym użyciu lub po zresetowaniu urządzenia może zaistnieć konieczność skonfigurowania podstawowych ustawień:
- Przejdź do Organizować coś menu using the directional buttons and press OK.
- Wybierać Język to choose your preferred language.
- Other settings like unit of measurement (e.g., Metric/Imperial) may also be available in the Setup menu.
6. Instrukcja obsługi
The JDIAG HD10 offers various diagnostic functions accessible through its main menu.
6.1. Nawigacja w menu głównym
Użyj przycisków kierunkowych (Up, W dół, Lewy, Prawidłowy) to highlight menu options and press the OK przycisk, aby potwierdzić wybór. Powrót button (curved arrow) navigates back to the previous screen.
6.2. HD OBD (Heavy Duty On-Board Diagnostics)
This mode is for diagnosing heavy-duty trucks and supports protocols like SAE J1939, SAE J1587/J1708, ISO15765, ISO 14230, and ISO 9141-2.

Figure 5: Full system diagnostic capabilities for heavy-duty vehicles.
- Przeczytaj kody: Retrieves Diagnostic Trouble Codes (DTCs) from various vehicle systems (Engine, Transmission, Drivetrain, Suspension, Braking System, Cab Climate, Body Control, Dashboard, Fuel System, etc.).
- Usuń kody: Clears DTCs from the vehicle's computer after repairs have been made.
- Dane na żywo: Displays real-time operational parameters of the vehicle's systems.
- Pełna diagnostyka systemu: Accesses and diagnoses all supported electronic control units (ECUs) in 24V diesel vehicles.
6.3. OBDII (Standard On-Board Diagnostics)
This mode is for diagnosing 12V gasoline/diesel vehicles and supports standard OBD2 protocols including SAE J1850.

Rysunek 6: Koniecview dostępnych jest wiele pełnych funkcji OBD2.
- Przeczytaj kody: Retrieves current, pending, and permanent DTCs.
- Usuń kody: Czyści kody DTC i wyłącza wskaźnik awarii Lamp (TYSIĄC).
- Gotowość I/M: Sprawdza gotowość monitorów związanych z emisjami.
- Strumień danych: Wyświetla dane z czujników na żywo w formie tekstu lub wykresu.
- Stopklatka: Records a snapshot of vehicle conditions when an emission-related fault occurs.
- Test czujnika O2: Pobiera wyniki testu monitorowania czujnika O2.
- Monitorowanie na pokładzie: Pobiera wyniki testów diagnostycznych pokładowych określonych komponentów/systemów.
- Test układu EVAP: Rozpoczyna test układu kontroli emisji par paliwa.
- Informacje o pojeździe: Displays the vehicle's Vehicle Identification Number (VIN), Calibration ID (CALID), and Calibration Verification Number (CVN).
6.4. Wyszukiwanie kodu DTC
The built-in DTC Lookup function allows you to search for definitions of diagnostic trouble codes directly on the device, helping to understand the nature of a fault without external resources.
6.5. CAN Node Detection
This function helps quickly detect CANBUS nodes and identify faulty modules or lines by checking existing nodes, improving diagnostic efficiency.
6.6. BAT Test (Battery Test)
The BAT Test function allows for basic battery voltage checks, providing quick insights into the vehicle's battery health.
6.7. Aktualizacja oprogramowania
The JDIAG HD10 supports lifetime free software updates. Connect the device to a computer via the USB data cable and follow the instructions on the manufacturer's website to download and install the latest software. This ensures expanded fault coverage and up-to-date functionality.
Wideo 1: Overview of the JDIAG HD10's diagnostic capabilities for cars and trucks, demonstrating its interface and functions.
7. Konserwacja
7.1. Czyszczenie
Przetrzyj urządzenie miękką, damp Ściereczką. Nie używaj środków czyszczących o działaniu ściernym ani rozpuszczalników. Upewnij się, że urządzenie jest suche przed przechowywaniem lub kolejnym użyciem.
7.2. Przechowywanie
Store the JDIAG HD10 in a clean, dry environment, away from direct sunlight and extreme temperatures. Keep it in its original packaging or a protective case when not in use to prevent damage.
8. Rozwiązywanie Problemów
| Problem | Możliwa przyczyna | Rozwiązanie |
|---|---|---|
| Urządzenie nie włącza się. | Loose connection to vehicle DLC; vehicle battery low; faulty cable. | Ensure the cable is securely connected. Check vehicle battery voltage. Try a different vehicle if possible to rule out a device issue. |
| Błąd komunikacji z pojazdem. | Incorrect protocol selected; vehicle ignition off; faulty vehicle DLC; device software outdated. | Verify vehicle ignition is ON. Ensure the correct vehicle type (12V/24V) and protocol are selected. Check the DLC for damage. Update device software. |
| Nie można wyczyścić kodów DTC. | Underlying fault still present; vehicle ignition off; specific vehicle system requirements. | Ensure the underlying issue causing the DTC has been resolved. Verify ignition is ON. Some vehicles require specific conditions for DTC clearing. |
| Ekran jest przyciemniony lub nieczytelny. | Environmental lighting; display settings. | Adjust screen brightness in the Setup menu. Move to an area with less direct sunlight or glare. |
9. Specyfikacje
- Marka: JDIAG
- Model: HD10 (Item model number) / CC0147HD10 (Manufacturer Model)
- System operacyjny: Linux
- Typ dopasowania samochodowego: Uniwersalne dopasowanie
- Supported Protocols (Heavy Duty): SAE J1939, SAE J1587/J1708, ISO15765, ISO 14230, ISO 9141-2
- Supported Protocols (OBD2): SAE J1850 (VPW/PWM), ISO9141, ISO14230 (KWP), ISO15765-4 (CAN)
- Wyświetlacz: 2.4-calowy kolorowy ekran TFT
- Waga przedmiotu: 1.15 funta
- Wymiary opakowania: 7.48 x 6.69 x 1.57 cala

Figure 7: Compatibility table for various heavy-duty truck brands and protocols.
10. Informacje o gwarancji
For detailed warranty information regarding your JDIAG HD10 diagnostic tool, please refer to the documentation included with your purchase or contact JDIAG customer support directly. Protection plans may be available for extended coverage.
11. Wsparcie
If you encounter any issues or have questions regarding the operation of your JDIAG HD10, please contact the JDIAG technical support team. They are available to provide assistance and operational guidance.
- Producent: JDIAG
- Wsparcie techniczne: Refer to the contact information provided in your product packaging or on the official JDIAG webstrona.