
1. Wprowadzenie
Thank you for choosing the MyKaFort Remote Control City Express Train Set. This battery-powered electric train toy is designed for toddlers and is compatible with most wooden railway tracks. It features dual control modes, lights, and sounds for an engaging play experience. Please read this manual carefully before use to ensure proper setup and operation.
2. Informacje dotyczące bezpieczeństwa
OSTRZEŻENIE: NIEBEZPIECZEŃSTWO ZADŁAWIENIA SIĘ - małe części. Not for children under 3 years. Adult supervision is recommended during play. Keep packaging for important information.
3. Zawartość opakowania
Sprawdź, czy w przesyłce znajdują się wszystkie elementy:
- 1x Train Locomotive
- 1x Passenger Carriage
- 1x Pilot zdalnego sterowania
- 1x Posable Figure
4. Koniec produktuview i funkcje
The MyKaFort City Express Train Set offers a rich play experience with the following features:
- Podwójne tryby sterowania: Operate the train using the included remote control or the buttons located on top of the engine.
- Light & Sound Effects: Functional headlights and authentic train sounds enhance the play experience.
- Magnetic Carriage: The detachable passenger carriage connects securely to the locomotive using strong magnetic connectors.
- Ruchoma figurka: An action figure is included and can be placed inside the carriage for imaginative journeys.
- Uniwersalna kompatybilność: Designed to fit major wooden railway brands such as Brio, Thomas, KidKraft, and Chuggington.
- Trwała konstrukcja: Crafted from high-quality ABS plastic with smooth edges, suitable for children aged 3 and up.

Image 1: Dimensions of the train locomotive (7.67in long, 2in high) and remote control (3.93in wide, 3.54in high, 2.36in lever height).
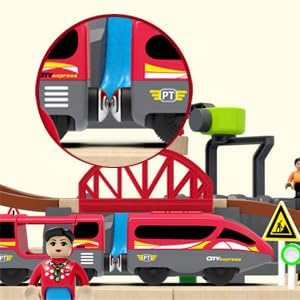
Image 2: Detail showing the magnetic connectors that link the train locomotive and passenger carriage.
5. Konfiguracja
5.1 Battery Installation (Train Locomotive)
- Locate the battery compartment on the underside of the train locomotive.
- Za pomocą małego śrubokręta odkręć pokrywę komory baterii.
- Włóż 2 baterie AA (nie ma ich w zestawie) do komory, zwracając uwagę na prawidłową biegunowość (+/-).
- Załóż pokrywę i zabezpiecz ją śrubą.
5.2 Montaż baterii (pilot zdalnego sterowania)
- Znajdź komorę baterii na spodzie pilota.
- Za pomocą małego śrubokręta odkręć pokrywę komory baterii.
- Włóż 2 baterie AAA (nie ma ich w zestawie) do komory, zwracając uwagę na prawidłową polaryzację (+/-).
- Załóż pokrywę i zabezpiecz ją śrubą.

Image 3: The bottom of the train and remote control, indicating battery compartments and the A/B channel switch for pairing.
5.3 Zdalne parowanie
To pair the remote control with the train:
- Ensure both the train and the remote control are turned off. The switch on the train's underside should be in the middle position.
- Set both the train's channel switch (on the underside) and the remote's channel switch (on the bottom) to the same channel (A or B).
- For first-time pairing, turn the train on FIRST, then turn the remote on.
6. Działanie
6.1 Train Controls (On-board Buttons)
The train locomotive features buttons on its top for direct control:
- Naciśnij przycisk „do przodu”, aby przesunąć pociąg do przodu.
- Press the reverse button to move the train backward.
- Press the stop button to halt the train.
- These buttons also activate lights and train sounds.
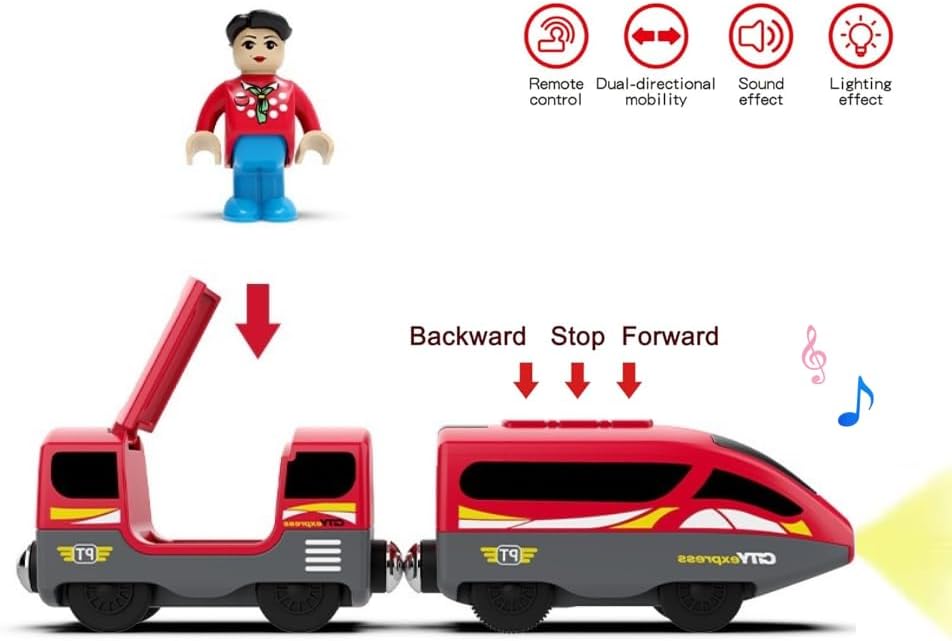
Image 4: The train locomotive highlighting the on-board buttons for controlling movement, lights, and sounds.
6.2 Funkcje zdalnego sterowania
Once paired, use the remote control to operate the train:
- Naprzód: Popchnij dźwignię do przodu.
- Wstecz: Pull the lever backward.
- Zatrzymać: Push the lever then quickly release it.
- Dźwięk: Press the speaker button to activate train sounds.
- Ślepia: Press the light bulb button to activate the headlights.
6.3 Magnetic Coupling
The locomotive and carriage connect via magnetic couplers. Simply bring the ends together, and they will snap into place. To detach, gently pull them apart.

Image 5: The MyKaFort City Express Train Set running on a wooden track, demonstrating its compatibility.
6.4 Track Compatibility
This train set is designed to be compatible with most standard wooden railway tracks, allowing for integration with existing train sets and expansion possibilities.
7. Konserwacja
- Wipe the train and remote control with a dry cloth to remove dust and dirt. Do not immerse in water.
- If the toy will not be used for an extended period, remove the batteries from both the train and the remote control to prevent leakage.
- Store the train set in a cool, dry place away from direct sunlight.
8. Rozwiązywanie Problemów
| Problem | Możliwa przyczyna | Rozwiązanie |
|---|---|---|
| Train does not move or respond to remote. | 1. Baterie są słabe lub nieprawidłowo zainstalowane. 2. Remote and train are not paired. 3. Channel switches (A/B) are mismatched. | 1. Replace batteries in both train and remote. Check polarity. 2. Follow remote pairing instructions (Section 5.3). 3. Ensure both train and remote are set to the same A or B channel. |
| Nie działają światła i dźwięki. | 1. Baterie są rozładowane. 2. Feature not activated. | 1. Wymień baterie. 2. Press the dedicated light/sound buttons on the remote or train. |
| Train moves slowly or struggles on inclines. | Baterie są słabe. | Replace batteries in the train locomotive. |
9. Specyfikacje
| Funkcja | Szczegół |
|---|---|
| Marka | MyKaFort |
| Numer modelu | 90098 |
| Tworzywo | Tworzywo ABS |
| Źródło zasilania | Zasilany bateryjnie |
| Train Batteries | 2x AA (brak w zestawie) |
| Baterie do pilota | 2x AAA (brak w zestawie) |
| Zalecany wiek | 36 months (3 years) and up |
| Metoda kontroli | Zdalny, dotykowy |
| Wymiary przedmiotu | 4.33 x 4.33 x 2.83 inches (packaging dimensions, actual product dimensions are shown in Image 1) |
10. Gwarancja i wsparcie
Specific warranty information and detailed support contacts are not provided in the available product data. For assistance, please refer to the retailer where the product was purchased or visit the official MyKaFort brand store online.
11. Filmy produktowe
No official seller videos are available for embedding in this manual. Please refer to the product page for any available customer-uploaded videos.