1. Wprowadzenie
Thank you for choosing the STRICH 37-Key Kids Mini Digital Piano Keyboard. This manual provides essential information for the safe and effective use of your new musical instrument. Please read it thoroughly before operation and retain it for future reference.

Figure 1.1: STRICH 37-Key Kids Mini Digital Piano Keyboard (Pink)
2. Informacje dotyczące bezpieczeństwa
- Zawsze nadzoruj dzieci podczas użytkowania.
- Keep the piano away from water and moisture.
- Nie wystawiaj na działanie ekstremalnych temperatur ani bezpośredniego światła słonecznego.
- Use only the provided power adapter or recommended batteries.
- Unikaj upuszczania instrumentu i narażania go na silne uderzenia.
- Zapewnij odpowiednią wentylację wokół urządzenia.
3. Zawartość opakowania
Sprawdź, czy w opakowaniu znajdują się wszystkie elementy:
- STRICH 37-Key Mini Digital Piano Keyboard
- Zasilacz (prąd stały 6 V)
- Kid's Piano Course Music Book
- Key Stickers for learning
- Instrukcja obsługi

Figure 3.1: Included accessories with the STRICH piano.
4. Konfiguracja
4.1 Powering the Piano
The piano can be powered by either the included DC 6V power adapter or 4 AA batteries (not included).
4.1.1 Instalacja baterii
- Locate the battery compartment on the underside of the piano.
- Za pomocą śrubokręta otwórz pokrywę komory baterii.
- Włóż 4 baterie AA, zwracając uwagę na prawidłową polaryzację (+/-).
- Załóż pokrywę i zabezpiecz ją śrubą.

Rysunek 4.1: Komora baterii na 4 baterie AA.
4.1.2 Power Adapter Connection
Insert the DC 6V power adapter into the 'DC: 6V' port on the rear panel of the piano, then plug the adapter into a standard wall outlet.
4.2 Applying Key Stickers
The included key stickers are designed to assist with learning. Refer to the 'Kid's Piano Course' music book for guidance on proper placement.

Figure 4.2: Key stickers applied to the piano keys.
4.3 Music Stand Placement
The detachable music stand can be inserted into the slot on the top panel of the piano to hold your music book or tablet.
5. Instrukcja obsługi
5.1 Włączanie/wyłączanie i regulacja głośności
Locate the 'VOL' knob on the rear panel. Turn the knob clockwise to power on the piano and increase the volume. Turn it counter-clockwise to decrease the volume and power off the piano.

Figure 5.1: Volume and power control knob.
5.2 Podłączanie urządzeń zewnętrznych
The rear panel features various ports for enhanced functionality:
- MIDI Port: Connect to MIDI-compatible devices for advanced musical applications.
- Port USB: Connect to a computer or other USB devices.
- Port TELEFON: Plug in headphones for private practice.
- INPUT Port: Connect external audio sources (e.g., MP3 player) to play along.
- SUSTAIN PEDAL Port: Connect an optional sustain pedal for extended note duration.

Rysunek 5.2: Połączenia na panelu tylnym.
5.3 Łączność bezprzewodowa
The piano supports wireless connection, allowing playback of songs and music from compatible mobile phones and tablets. Refer to your device's instructions for pairing with a Bluetooth audio device.
5.4 Learning with the Music Book and Stickers
The included 'Kid's Piano Course' music book provides simple tutorials and songs that correspond to the key stickers. Follow the color and shape codes to play basic melodies.
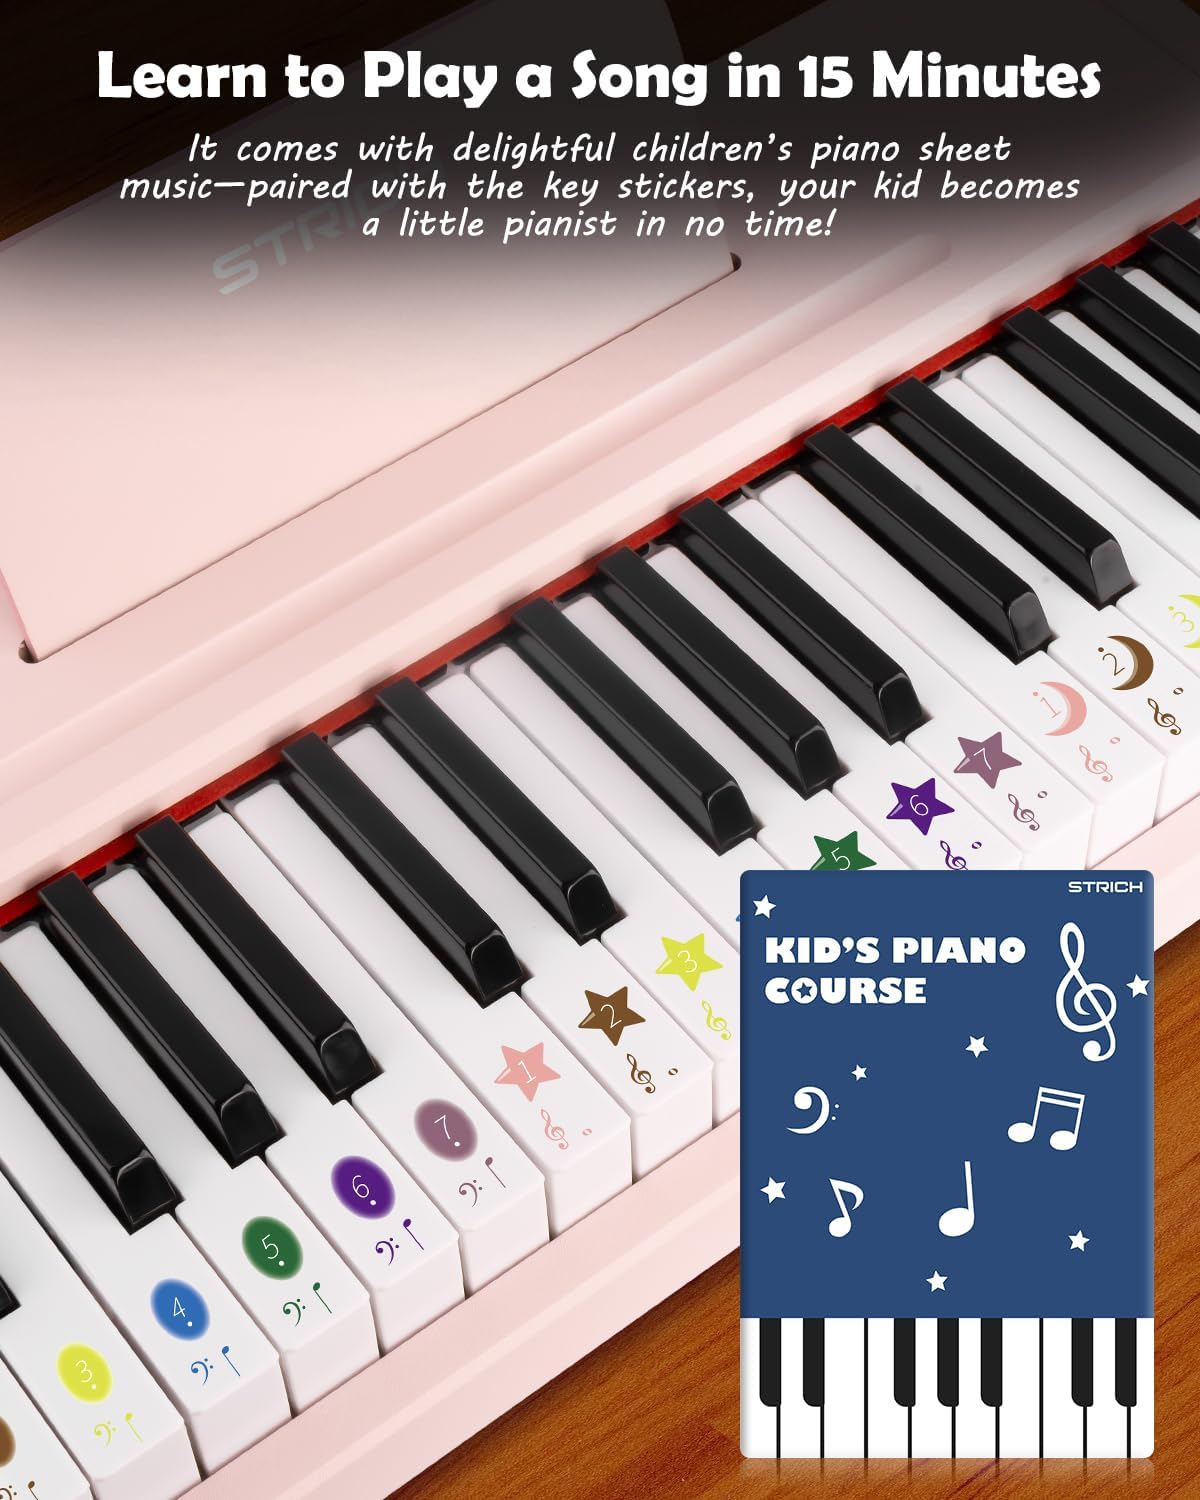
Figure 5.3: Learning to play using the music book and key stickers.
6. Konserwacja
- Clean the piano surface with a soft, dry cloth. Avoid abrasive cleaners or solvents.
- Jeżeli nie używasz urządzenia przez dłuższy czas, wyjmij baterie, aby zapobiec wyciekowi.
- Store the piano in a cool, dry place, away from direct sunlight and extreme temperatures.
7. Rozwiązywanie Problemów
- Brak dźwięku: Ensure the piano is powered on and the volume is turned up. Check battery installation or power adapter connection. Verify external devices (headphones, speakers) are correctly connected and powered.
- Klawisze nie reagują: Ensure the piano is powered on. If using batteries, check battery level.
- Problemy z połączeniem bezprzewodowym: Ensure the piano's wireless function is active and your external device's Bluetooth is enabled. Try re-pairing the devices.
8. Specyfikacje
| Funkcja | Specyfikacja |
|---|---|
| Numer modelu | SEK-37 |
| Wymiary produktu | 21.65 x 11.02 x 3.54 cala |
| Waga przedmiotu | 9.9 funta |
| Klawiatura | 37 |
| Źródło zasilania | DC 6V Adapter or 4 AA Batteries |
| Zalecany wiek | 36 miesięcy - 8 lat |

Rysunek 8.1: Wymiary produktu.
9. Gwarancja i wsparcie
For warranty information or technical support, please refer to the contact details provided with your purchase or visit the official STRICH webZachowaj dowód zakupu na wypadek roszczeń gwarancyjnych.