
1. Wprowadzenie
Thank you for choosing the Osram Ceiling Wing Fan 36W D105. This manual provides essential information for the safe installation, operation, and maintenance of your new ceiling fan. Please read these instructions carefully before installation and retain them for future reference.
This modern ceiling fan features an integrated LED light with adjustable white color and dimming capabilities, controlled conveniently by a remote. It is designed for indoor use in various rooms such as living rooms, bedrooms, kitchens, and dining areas.
2. Instrukcje bezpieczeństwa
- Bezpieczeństwo elektryczne: Always disconnect power at the main circuit breaker before attempting any installation, maintenance, or cleaning. Ensure all wiring is performed by a qualified electrician and complies with local electrical codes.
- Montowanie: The mounting structure must be capable of supporting the weight of the fan (approximately 4.2 kg) and the dynamic load during operation.
- Prześwit ostrza: Aby zapobiec obrażeniom ciała lub uszkodzeniom, należy zachować odpowiedni odstęp między łopatkami wentylatora a przeszkodami, np. ścianami i meblami.
- Narażenie na działanie wody: This product is designed for indoor use only and has a water resistance level of 'Water Resistant'. Do not expose it to direct water spray or high humidity environments like uncovered outdoor areas.
- Dzieci i zwierzęta: Podczas pracy i instalacji wentylatora należy trzymać dzieci i zwierzęta z dala od niego.
- Konserwacja: Do not attempt to repair or modify the fan. Refer all servicing to qualified personnel.
3. Zawartość opakowania
Ostrożnie rozpakuj pudełko i upewnij się, że wszystkie elementy są obecne i nieuszkodzone. Jeśli brakuje którejkolwiek części lub jest ona uszkodzona, natychmiast skontaktuj się ze sprzedawcą.
- Osram Ceiling Wing Fan Unit (with integrated LED light)
- Zdalne sterowanie
- Elementy montażowe (śruby, kotwy itp.)
- Instrukcja obsługi (ten dokument)
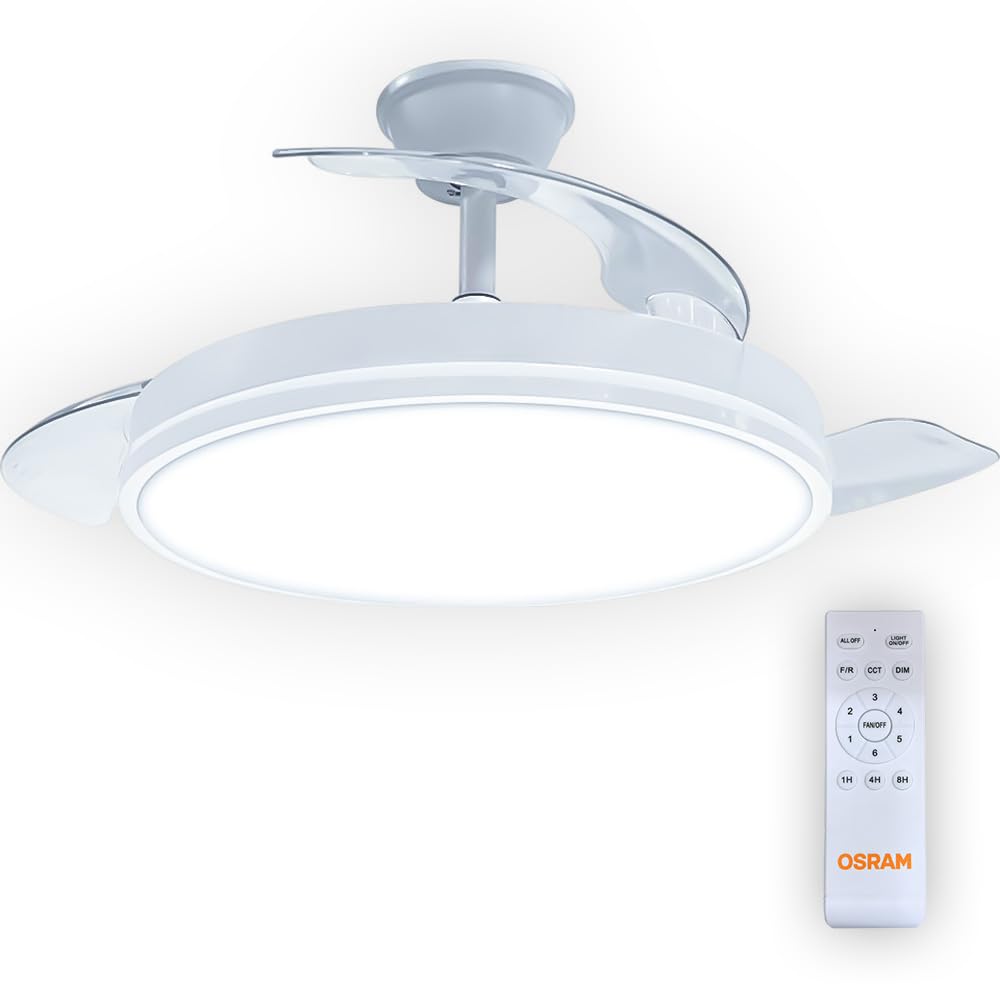
Image 1: Osram Ceiling Wing Fan 36W D105. This image shows the complete ceiling fan unit with its central LED light and transparent wing-like blades.
4. Konfiguracja i instalacja
Assembly is required for this product. Follow these steps carefully. If you are unsure about any part of the installation, consult a qualified electrician.
4.1 Wstępna instalacja
- Wyłącz zasilanie: Locate the circuit breaker for the room where you will install the fan and turn off the power. Verify power is off using a voltagtester.
- Przygotuj miejsce montażu: Upewnij się, że puszka przyłączeniowa sufitowa jest solidnie zamontowana i może utrzymać ciężar wentylatora.
4.2 Montaż wentylatora
- Zamontuj wspornik montażowy: Przymocuj uchwyt montażowy do puszki przyłączeniowej w suficie za pomocą dołączonych śrub i podkładek. Upewnij się, że jest solidnie zamocowany.
- Połączenia elektryczne: Connect the electrical wires from the ceiling to the fan's wiring. Typically, this involves connecting Live (L), Neutral (N), and Ground (GND) wires. Match colors (e.g., Black to Black, White to White, Green/Bare Copper to Green/Bare Copper). Use wire nuts to secure connections.
- Secure Fan Body: Carefully lift the fan body and attach it to the mounting bracket. Follow the specific instructions in the included diagram for your model to ensure proper alignment and secure fastening. This fan uses a Semi-Flush Mount installation type.
- Instalacja ostrzy: If the blades are separate, attach them to the fan motor housing according to the instructions. Ensure all screws are tightened securely.
- Zamontuj osłonę światła: Secure the LED light cover to the fan body.

Obraz 2: Bok view of the Osram Ceiling Wing Fan. This view highlights the fan's profile and the semi-flush mounting point, which is crucial for installation planning.
4.3 Po instalacji
- Przywróć zasilanie: Po zakończeniu instalacji i zabezpieczeniu wszystkich połączeń należy przywrócić zasilanie za pomocą wyłącznika automatycznego.
- Wentylator testowy: Za pomocą pilota sprawdź działanie wentylatora i światła.
5. Instrukcja obsługi
Your Osram Ceiling Wing Fan is controlled by the included remote control. Ensure the remote has working batteries (not included, typically 2x AAA) before use.

Image 3: Osram Ceiling Fan Remote Control. This image displays the layout of the remote control with buttons for fan speed, light control, timer, and direction.
5.1 Funkcje zdalnego sterowania
- WSZYSTKO WYŁĄCZONE: Wyłącza zarówno wentylator, jak i światło.
- ŚWIATŁO WŁ./WYŁ.: Włącza lub wyłącza światło LED.
- F/R (do przodu/do tyłu): Zmienia kierunek obrotów łopatek wentylatora. Obrót do przodu zapewnia chłodzenie latem, a obrót do tyłu zapewnia cyrkulację ciepłego powietrza zimą.
- CCT (skorelowana temperatura barwowa): Adjusts the color temperature of the LED light (e.g., warm white, neutral white, cool white).
- CIEMNY: Dims or brightens the LED light. Press and hold to cycle through brightness levels.
- WENTYLATOR/WYŁ.: Włącza i wyłącza wentylator.
- 1-6: Selects one of the six available fan speeds. '1' is the lowest speed, '6' is the highest.
- 1H / 4H / 8H: Activates the timer function, setting the fan to turn off automatically after 1, 4, or 8 hours, respectively.
6. Konserwacja
Regularna konserwacja zapewnia optymalną wydajność i wydłuża żywotność wentylatora sufitowego.
- Czyszczenie: Always turn off the power before cleaning. Use a soft, damp cloth to wipe down the fan body and blades. Do not use abrasive cleaners or solvents, as they may damage the finish.
- Zasypka: Regularly dust the fan blades and light cover to prevent dust buildup, which can affect performance and light output.
- Dokręcić śruby: Periodically check and tighten all screws on the fan body and mounting bracket to ensure secure operation.
- Nie wymaga smarowania: Silnik wentylatora jest trwale smarowany i nie wymaga dodatkowego oliwienia.
7. Rozwiązywanie Problemów
Jeśli masz problemy z wentylatorem, zapoznaj się z poniższymi typowymi problemami i rozwiązaniami:
| Problem | Możliwa przyczyna | Rozwiązanie |
|---|---|---|
| Wentylator się nie uruchamia | Brak zasilania wentylatora Baterie w pilocie zdalnego sterowania są wyczerpane Nieprawidłowe okablowanie | Sprawdź wyłącznik obwodu i przełącznik ścienny Wymień baterie w pilocie Sprawdź połączenia przewodów (skonsultuj się z elektrykiem) |
| Światło nie działa | Brak zasilania światła Nieprawidłowe okablowanie Awaria modułu LED | Sprawdź wyłącznik obwodu i przełącznik ścienny Sprawdź połączenia przewodów (skonsultuj się z elektrykiem) Contact customer support for LED module replacement |
| Wentylator się chwieje | Luźne śruby mocujące Niewyważone ostrza | Ensure all mounting screws are tight Check if blades are securely attached and balanced (balancing kit may be needed if severe) |
| Pilot nie odpowiada | Rozładowane baterie Przeszkoda pomiędzy pilotem a odbiornikiem Pilot nie jest sparowany (jeśli dotyczy) | Wymień baterie Ensure clear line of sight to the fan Refer to specific pairing instructions if provided (not common for basic fans) |
8. Specyfikacje
| Marka: | Osram |
| Numer modelu: | Ceiling Blade |
| Typ produktu: | Wentylator sufitowy z oświetleniem |
| Elektryczność: | 36 watów |
| Źródło światła: | PROWADZONY |
| Kolor światła: | Regulowany biały |
| Metoda sterowania: | Zdalny |
| Źródło zasilania: | Elektryczny przewodowy |
| Typ montażu: | Ceiling Mount, Semi-Flush Mount |
| Zastosowanie wewnątrz / na zewnątrz: | Wnętrz |
| Wymiary produktu (dł. x szer. x wys.): | 50U x 20G x 50Y centimeters |
| Waga: | 4.2 kilogramów |
| Materiał klosza: | Plastikowy |
| Kolor: | Biały |
| Styl: | Nowoczesny |
| Wymagany montaż: | Tak |
| Zawartość zestawu: | Zdalne sterowanie |
9. Gwarancja i wsparcie
Aby uzyskać informacje o gwarancji lub pomocy technicznej, zapoznaj się z dokumentacją dołączoną do zakupu lub skontaktuj się ze sprzedawcą. Zachowaj dowód zakupu na wypadek roszczeń gwarancyjnych.