
Wstęp
The We Technology Smart Door Lock FH1 offers multiple secure entry methods and integrated smart features for enhanced home security and convenience. This manual provides essential information for proper installation, configuration, and daily use of your smart door lock.
Co jest zawarte
Przed rozpoczęciem instalacji należy sprawdzić, czy wszystkie komponenty są obecne:
- 1 x C-level lock cylinder
- 1 x lock body
- 1 x double sided door lock
- 1 x instrukcja
- Klawisze 2 x
- 2 x IC Cards
- Bateria 1 x 5000mAh

Image: All components included in the We Technology Smart Door Lock FH1 package.

Image: A detailed layout of all parts and accessories for the smart door lock.
Instalacja
Proper installation is crucial for the optimal performance and security of your smart door lock. Please follow these steps carefully.
1. Door Compatibility and Measurement
Ensure your door meets the required dimensions for installation. The lock is designed for doors with a thickness of 45–90mm.

Image: Diagram illustrating the dimensions of the smart door lock and the mortise, indicating it is not suitable for standard doors without proper measurement. It also shows left-handed and right-handed door configurations.

Image: A detailed guide for checking door dimensions and drilling points before ordering or installing the smart lock.
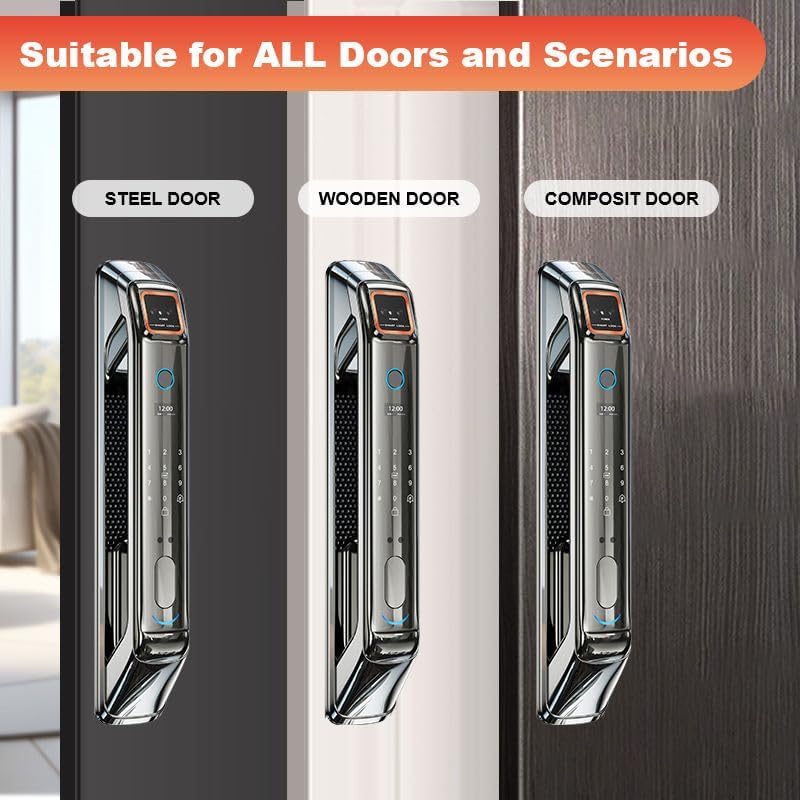
Image: The smart door lock is shown installed on various door types, including steel, wooden, and composite doors, indicating broad compatibility.
2. Adjusting Lock Body Tongue
The direction of the lock body tongue needs to be adjusted based on whether your door pushes inward or pulls outward. Refer to the installation video for a visual guide.
Video: This video demonstrates the installation process for the smart door lock, including how to adjust the lock body tongue for different door opening directions. (Relevant segment: 0:30 - 1:20)
3. Etapy instalacji fizycznej
Follow the detailed steps in the installation video for mounting the lock body, cylinder, and front/rear panels.
Video: This video provides a comprehensive guide to the physical installation of the smart door lock, covering all steps from preparing the door to final assembly. (Relevant segment: 1:20 - 6:45)
Organizować coś
After physical installation, configure your smart door lock for optimal use.
1. Entering Lock Menu
Wake up the screen, press '*' then '#' to enter the lock menu. Input the admin password (initial password: 123456). Please register an admin before use. Note: '*' is for return/exit/delete, '#' is for confirm.
Video: This video guides you through the initial configuration of the smart door lock, starting with how to access the lock menu. (Relevant segment: 0:00 - 0:25)
2. Adding User/Admin
From the lock menu, press '1' to enter local settings, then press '1' to '4' to add user/admin. Options include adding palm/face, fingerprint, password, or IC card. The steps for adding users are the same as adding admins.
- Add palm/face: Put your palm in front of the camera or face the camera and turn your head (up, down, left, right) according to voice instructions.
- Dodaj odcisk palca: Put your finger on the fingerprint zone 5-6 times until it mentions successfully.
- Dodaj hasło: Input 6 digits twice.
- Dodaj kartę: Put the card on the card zone.
Press '*' to exit or continue adding users.
Video: This video demonstrates how to add new users or administrators to the smart door lock using various biometric and passcode methods. (Relevant segment: 0:25 - 1:50)
3. Deleting User/Admin
From the lock menu, press '1' to enter local settings. Press '2' to delete users. Input the user ID or admin ID and press '#' to confirm.
Video: This video segment shows the steps to delete existing users or administrators from the smart door lock's system. (Relevant segment: 1:50 - 2:05)
4. Zablokuj ustawienia
From the lock menu, press '1' to enter local settings. Press '3' to enter lock settings. Please set according to your real need.
- 1: Function settings: Enable dual verification, disable anti-pry alarm, disable motion sensor.
- 2: Volume settings: Dostosuj głośność w górę lub w dół.
- 3: Language settings: Wybierz pomiędzy chińskim i angielskim.
- 4: More settings: Time setting (input date based on format 20_Year_Month_Day_Hour_Minute), record query (inquiry unlock history), initialize system (press '#' to initialize or press '*' to exit).
Video: This video segment details how to access and modify various lock settings, including function, volume, language, and other advanced options. (Relevant segment: 2:05 - 3:45)
5. Install Settings
Enter the lock menu, press '3' to enter install settings. Or press '888#' in initial status. Note: Please check the user manual for explanation for each install setting. Please set install setting carefully.
- 1: Motor direction: Choose forward or reverse according to actual door open direction.
- 2: Slant tongue time: Press 1-9 to set time.
- 3: Lock closing wait time: Press 2-5 to set time.
- 4: Automatic locking: Enable or disable automatic locking.
Video: This video segment explains how to configure installation-specific settings such as motor direction, slant tongue time, lock closing wait time, and automatic locking. (Relevant segment: 3:45 - 4:00)
6. Network Setting (Jlink App)
Enter the lock menu, press '2' to enter 'App setting', then press '1' to add the module. Search 'Jlink' app in Google Play or Apple store. Register an account, open the app, and click 'Add device'.

Image: The Jlink App interface displayed on a smartphone, showing options for controlling the smart door lock remotely.
Video: This video segment demonstrates how to connect the smart door lock to the Jlink App for network configuration and remote control. (Relevant segment: 4:00 - 5:27)
Operacyjny
The We Technology Smart Door Lock FH1 offers multiple convenient and secure ways to unlock your door.
Metody odblokowywania
- Rozpoznawanie twarzy 3D: The lock scans your face for quick and secure entry.
- Żyła palmowa: Hospital-grade infrared scanning reads your unique palm vein pattern.
- Odcisk palca: Umieść zarejestrowany odcisk palca na czujniku.
- Kod dostępu: Wprowadź swój spersonalizowany kod dostępu na klawiaturze.
- Karta elektroniczna: Przyłóż zarejestrowaną kartę IC do wyznaczonego miejsca.
- Klawisz: Use the physical backup key for manual unlocking.
- Jlink App: Remotely unlock the door via the Jlink App on your smartphone.

Image: This diagram visually represents the various unlocking methods available for the smart door lock, including fingerprint, IC card, video intercom, app, face recognition, password, palm vein, and mechanical key.
Video: This video demonstrates the various entry methods for the FH1 Smart Door Lock, including fingerprint, password, face recognition, palm recognition, RFID card, and key unlock.
Konserwacja
To ensure the longevity and optimal performance of your We Technology Smart Door Lock FH1, follow these maintenance guidelines:
- Bateria: The lock is equipped with a massive 5000mAh battery, providing up to 12–18 months of operation on a single charge. When the battery is low, the lock will provide alerts. Use the emergency USB-C or 9V charging ports for backup power.
- Czyszczenie: Regularly wipe the screen and sensors with a soft, dry cloth to prevent dust and smudges from affecting performance. Avoid using abrasive cleaners or solvents.
- Warunki środowiskowe: Ensure the lock is not exposed to extreme temperatures or direct water spray, which could damage electronic components.
Rozwiązywanie problemów
If you encounter any issues with your smart door lock, please refer to the following common troubleshooting tips:
- Zamek nie odpowiada: Check battery level. If low, charge using the emergency ports.
- Biometric unlock failure: Ensure sensors are clean and your registered biometric data is correctly enrolled. Try re-enrolling if issues persist.
- Problemy z łącznością aplikacji: Verify your Wi-Fi connection and ensure the lock is within range. Restart the app and the lock if necessary.
- Incorrect password entry: Ensure you are entering the correct password. If forgotten, use an alternative unlocking method or reset the admin password via the lock menu.
- Door not locking/unlocking properly: Check for any obstructions in the door frame or latch. Ensure the lock body is correctly installed and aligned.
W przypadku powtarzających się problemów prosimy o kontakt z obsługą klienta.
Specyfikacje
| Funkcja | Szczegół |
|---|---|
| Marka | We Technology |
| Nazwa modelu | Smart Door Lock -FH1 |
| Typ zamka | Biometric, Mortise Lock |
| Cechy specjalne | Alarm, Anti-Peeping Password, Auto-Lock, Battery Indicator, Rechargeable |
| Tworzywo | Aluminium |
| Kolor | Srebrny |
| Wymiary przedmiotu Dł. x Szer. x Wys. | 14 x 2.3 x 2.2 cala |
| Waga przedmiotu | 9.35 funta (4.25 kilograma) |
| Typ kontrolera | Android, iOS (Jlink App) |
| Metoda kontroli | Aplikacja, pilot, dotyk |
| Bateria | 5000 mAh (w zestawie) |
| Globalny numer identyfikacyjny handlu | 00850060105470 |
Gwarancja i wsparcie
Your We Technology Smart Door Lock FH1 comes with a manufacturer's warranty. For detailed warranty information, technical support, or service inquiries, please refer to the warranty card included in your package or visit the official We Technology webStrona. Zachowaj dowód zakupu na wypadek roszczeń gwarancyjnych.