Ważne zabezpieczenia
Podczas korzystania z urządzeń elektrycznych należy zawsze przestrzegać podstawowych zasad bezpieczeństwa, w tym:
- Przed użyciem należy przeczytać wszystkie instrukcje.
- Nie dotykaj gorących powierzchni. Używaj uchwytów lub gałek.
- Aby uniknąć porażenia prądem elektrycznym, nie zanurzaj przewodu zasilającego, wtyczek ani elementu grzewczego w wodzie ani innym płynie.
- Należy zachować ścisły nadzór, jeżeli z urządzenia korzystają dzieci lub w ich pobliżu.
- Odłącz od gniazdka, gdy nie jest używany i przed czyszczeniem. Pozostaw do ostygnięcia przed założeniem lub zdjęciem części.
- Nie używaj żadnego urządzenia, jeśli przewód lub wtyczka są uszkodzone, ani po wystąpieniu awarii lub uszkodzeniu urządzenia w jakikolwiek sposób.
- Stosowanie akcesoriów niezalecanych przez producenta urządzenia może spowodować obrażenia.
- Nie stosować na zewnątrz.
- Nie pozwól, aby przewód zwisał z krawędzi stołu lub blatu i dotykał gorących powierzchni.
- Nie umieszczać na gorącym palniku gazowym lub elektrycznym ani w jego pobliżu, a także w nagrzanym piekarniku.
- Należy zachować szczególną ostrożność podczas przenoszenia urządzenia zawierającego gorący olej lub inne gorące płyny.
- Zawsze najpierw podłącz wtyczkę do urządzenia, a następnie podłącz przewód do gniazdka ściennego. Aby odłączyć, ustaw dowolny element sterujący w pozycji „wyłączone”, a następnie wyjmij wtyczkę z gniazdka ściennego.
- Nie używaj urządzenia niezgodnie z jego przeznaczeniem.
Produkt ponadview
The Pioneers Womans Electric Skillet is designed for versatile cooking, featuring a 3.5-liter capacity, 1400-watt heating element, and a durable ceramic non-stick surface. Its adjustable digital temperature control and tempered glass lid with steam vents provide precise cooking and easy monitoring. The detachable handle allows for compact storage and convenient handling.

Rysunek 1: The Electric Skillet fully assembled, showcasing its linen speckle finish, glass lid, and wooden-style handles.
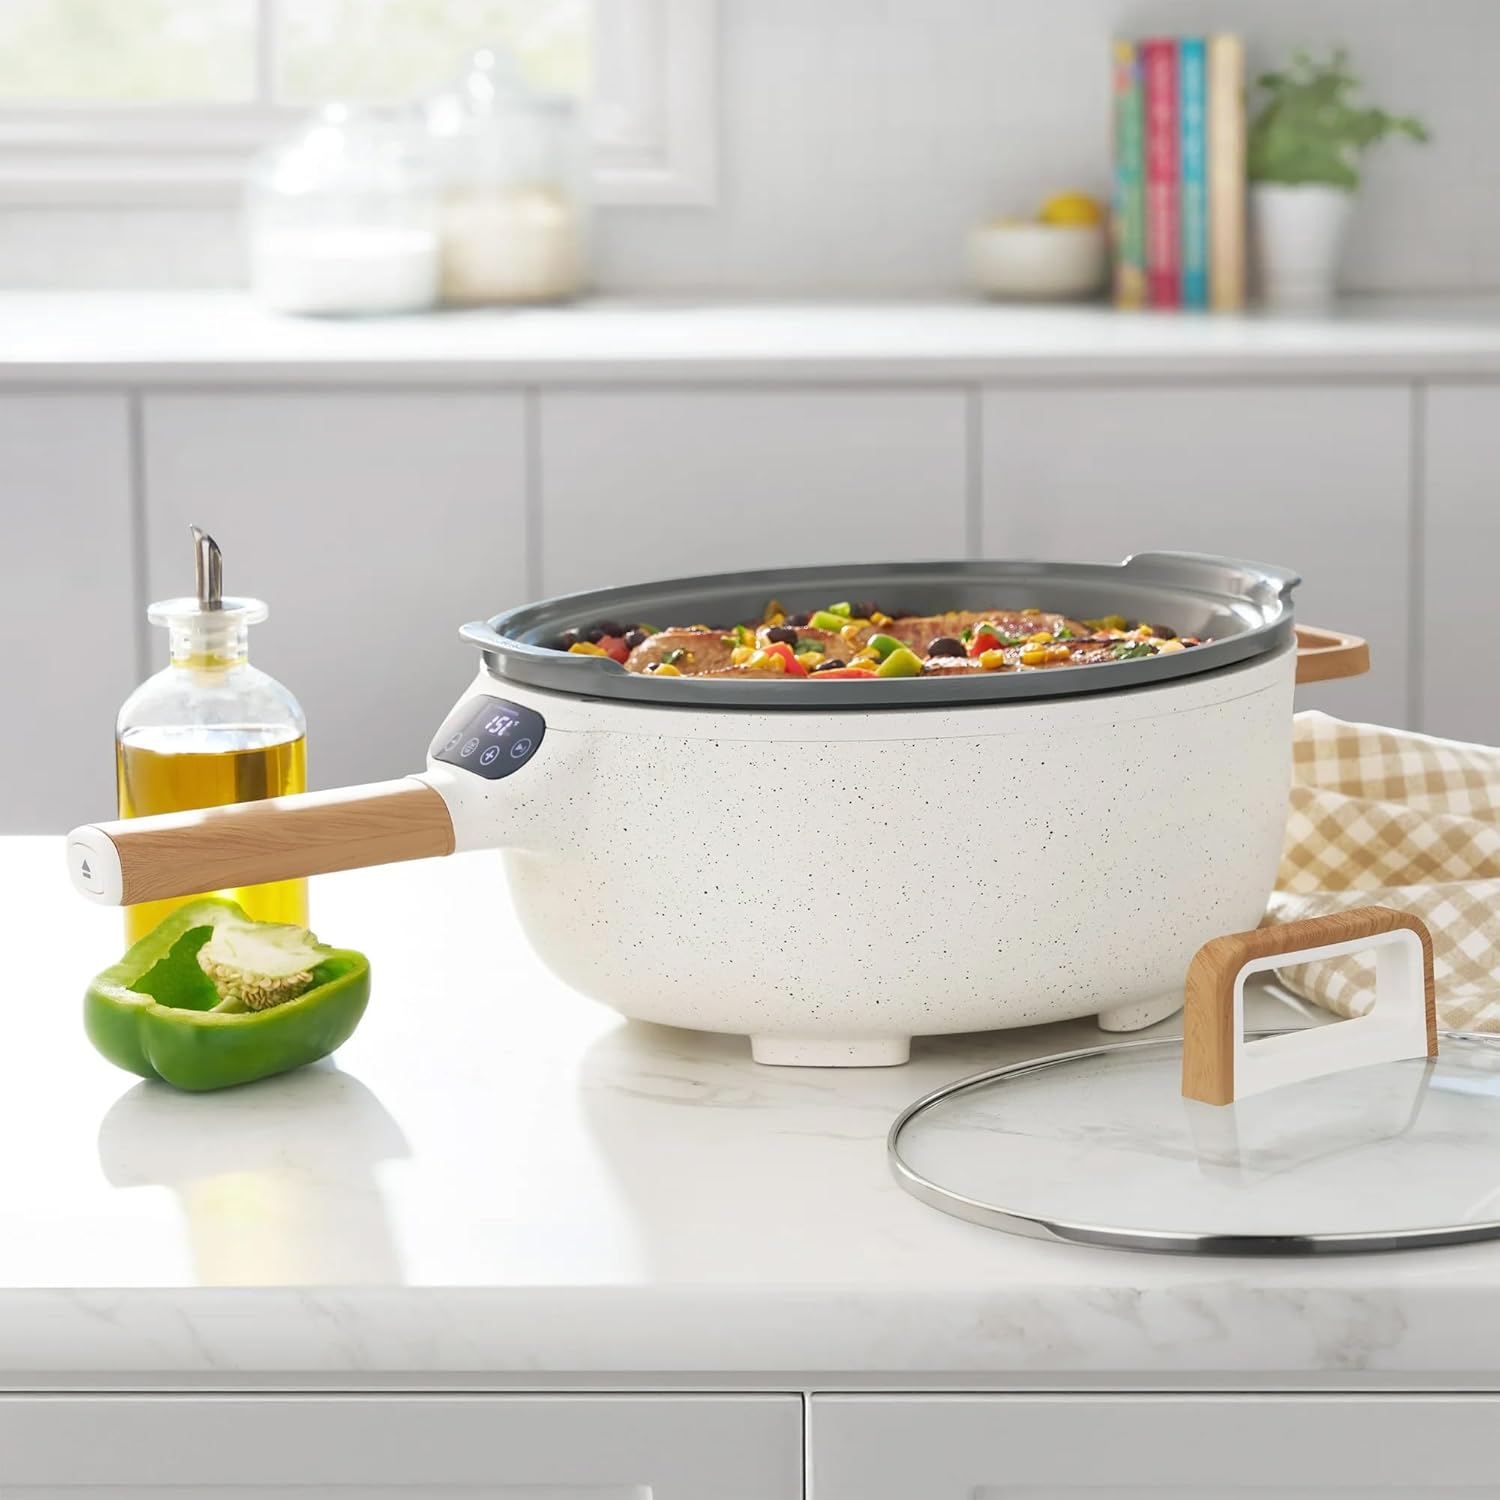
Rysunek 2: The Electric Skillet in use on a kitchen countertop, filled with cooked food, demonstrating its practical application.

Rysunek 3: The removable inner ceramic non-stick pot, highlighting its deep capacity and easy-to-clean surface.

Rysunek 4: The main heating base unit and the detached inner pot, illustrating how the components separate for cleaning and storage.

Rysunek 5: Szczegółowy view of the digital control panel with temperature and timer settings, alongside the detached wooden-style handle.
Organizować coś
- Rozpakowywanie: Ostrożnie wyjmij wszystkie elementy z opakowania. Zachowaj opakowanie do późniejszego przechowywania lub transportu.
- Czyszczenie wstępne: Before first use, wash the removable ceramic pot and glass lid with warm, soapy water. Rinse thoroughly and dry completely. Wipe the main heating unit with a damp cloth. Do not immerse the main heating unit in water.
- Montaż:
- Place the main heating unit on a stable, flat, heat-resistant surface.
- Insert the clean, dry ceramic pot into the main heating unit, ensuring it sits securely.
- Attach the detachable handle by aligning its pins with the slots on the side of the main unit and pushing firmly until it clicks into place.
- Place the glass lid on top of the ceramic pot.
- Podłączenie zasilania: Ensure the appliance is turned off before plugging the power cord into a standard 120V AC electrical outlet.
Instrukcja obsługi
Podstawowa obsługa
- Włączanie: Wciśnij przycisk zasilania (⏻) on the digital control panel to turn on the skillet. The display will illuminate.
- Ustaw temperaturę: Press the "TEMP" button. Use the + I - buttons to adjust the desired cooking temperature. The temperature range is typically from 150°F to 450°F (65°C to 230°C).
- Ustaw timer (opcjonalnie): Press the "TIME" button. Use the + I - buttons to set the cooking duration. The timer can be set for up to 120 minutes.
- Rozpocznij gotowanie: The skillet will begin heating automatically once temperature is set. The display will show the current temperature.
- Wstrzymaj/Wznów: Naciśnij przycisk odtwarzania/pauzy (⏸) to pause or resume cooking.
- Monitorowanie: Use the tempered glass lid to monitor food without releasing heat. The steam vents help prevent condensation buildup.
- Wyłączone: Once cooking is complete, press and hold the power button (⏻) until the display turns off. Unplug the skillet from the wall outlet.
Porady kulinarne
- For best results with the non-stick surface, use wooden, silicone, or nylon utensils. Avoid metal utensils that can scratch the coating.
- Preheat the skillet for 5-10 minutes before adding food to ensure even cooking.
- Adjust temperature as needed based on the type of food and desired doneness.
- The 3.5L capacity is ideal for family-sized meals, stir-fries, stews, and more.
Konserwacja i czyszczenie
Proper maintenance ensures the longevity and performance of your electric skillet.
- Ochłonąć: Always allow the skillet to cool completely before cleaning.
- Demontaż:
- Odłącz przewód zasilający od gniazdka.
- Carefully detach the handle by pressing the release button (if applicable) and pulling it away from the main unit.
- Remove the ceramic pot from the main heating unit.
- Czyszczenie ceramicznego garnka i pokrywki:
- The ceramic pot and glass lid are dishwasher-safe.
- Alternatively, wash by hand with warm, soapy water and a non-abrasive sponge or cloth.
- W przypadku uporczywych resztek jedzenia, przed czyszczeniem namocz garnek w ciepłej wodzie przez kilka minut.
- Rinse thoroughly and dry completely before reassembly or storage.
- Cleaning the Main Heating Unit:
- Wipe the exterior of the main heating unit with a soft, damp płótno.
- Do not immerse the main heating unit, power cord, or plug in water or any other liquid.
- Ensure the electrical contacts on the main unit are clean and dry.
- Składowanie: Store the disassembled skillet in a dry place. The detachable handle allows for more compact storage.
Rozwiązywanie problemów
| Problem | Możliwa przyczyna | Rozwiązanie |
|---|---|---|
| Patelnia się nie włącza. | Not plugged in; power outlet malfunction; power button not pressed correctly. | Ensure the power cord is securely plugged into a working 120V outlet. Press and hold the power button. |
| Jedzenie nie gotuje się równomiernie. | Insufficient preheating; temperature set too low; too much food in the skillet. | Preheat the skillet for 5-10 minutes before adding food. Increase the temperature setting. Cook in smaller batches if necessary. |
| Non-stick coating is losing effectiveness. | Use of metal utensils; abrasive cleaning; excessive high heat. | Use only wooden, silicone, or nylon utensils. Clean with a soft sponge. Avoid prolonged use at maximum temperature. |
| Lid fogs up excessively. | Steam vents are blocked or insufficient. | Ensure steam vents on the lid are clear. Briefly lift the lid to release excess steam if needed. |
Specyfikacje
- Model: PW8500778514-01
- Marka: Ogólny
- Pojemność: 3.5 litrów
- Moc: 1400 watów
- Tomtage: 120 wolty
- Tworzywo: Ceramic (non-stick surface)
- Kolor: Linen Speckle
- Wymiary produktu: 10.79" gł. x 21.06" szer. x 8.46" wys.
- Waga przedmiotu: 5 funtów
- Cechy szczególne: Detachable handle, Digital temperature control, Tempered glass lid with steam vents, Compact storage
- Zawartość zestawu: Electric Skillet, Instruction Manual
- Kraj pochodzenia: Chiny

Rysunek 6: Product dimensions for the Electric Skillet, showing overall length and height.
Gwarancja i wsparcie
For warranty information and customer support, please refer to the contact details provided with your purchase documentation or visit the manufacturer's official webZachowaj paragon jako dowód zakupu na wypadek reklamacji.
For assistance with product operation, troubleshooting, or parts replacement, please contact the customer service department of Generic.
- Producent: Ogólny
- Data pierwszej dostępności: 12 czerwca 2025 r.


