
1. Wprowadzenie
This manual provides detailed instructions for the installation, operation, and maintenance of your Jelkuz MT07 7-Inch Motorcycle CarPlay/Android Auto Navigation System. This device is designed to enhance your riding experience by integrating smartphone functionalities such as navigation, calls, and music directly onto a waterproof, high-definition touchscreen display.
Key features include wireless Apple CarPlay and Android Auto connectivity, a 7-inch IPS touchscreen, dual Bluetooth for audio output to helmets, voice control via Siri or Google Assistant, IP67 waterproof rating, and an anti-theft screen lock function.
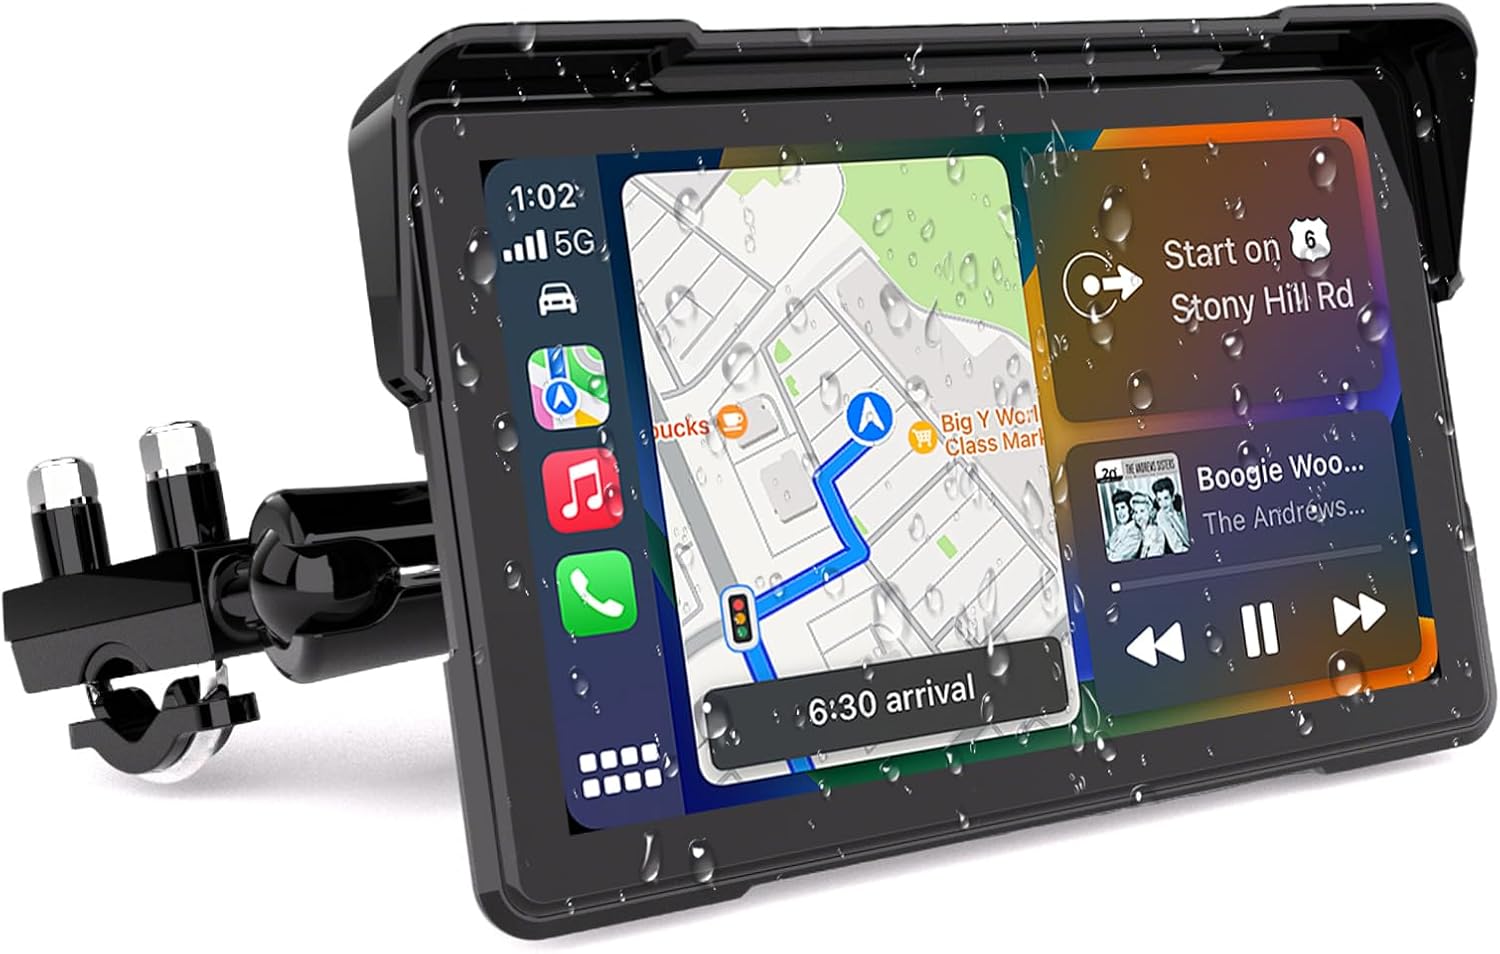
Rysunek 1.1: Jelkuz MT07 Navigation System. This image displays the 7-inch screen with a navigation interface and music player, showing water droplets, indicating its waterproof design.
2. Zawartość opakowania
Sprawdź, czy w przesyłce znajdują się wszystkie elementy wymienione poniżej. Jeśli brakuje któregokolwiek z nich lub jest on uszkodzony, skontaktuj się z obsługą klienta.
- CarPlay Screen (Main Unit)
- Pręt podporowy w kształcie litery U
- Additional Bracket
- Kabel zasilający
- Instrukcja obsługi
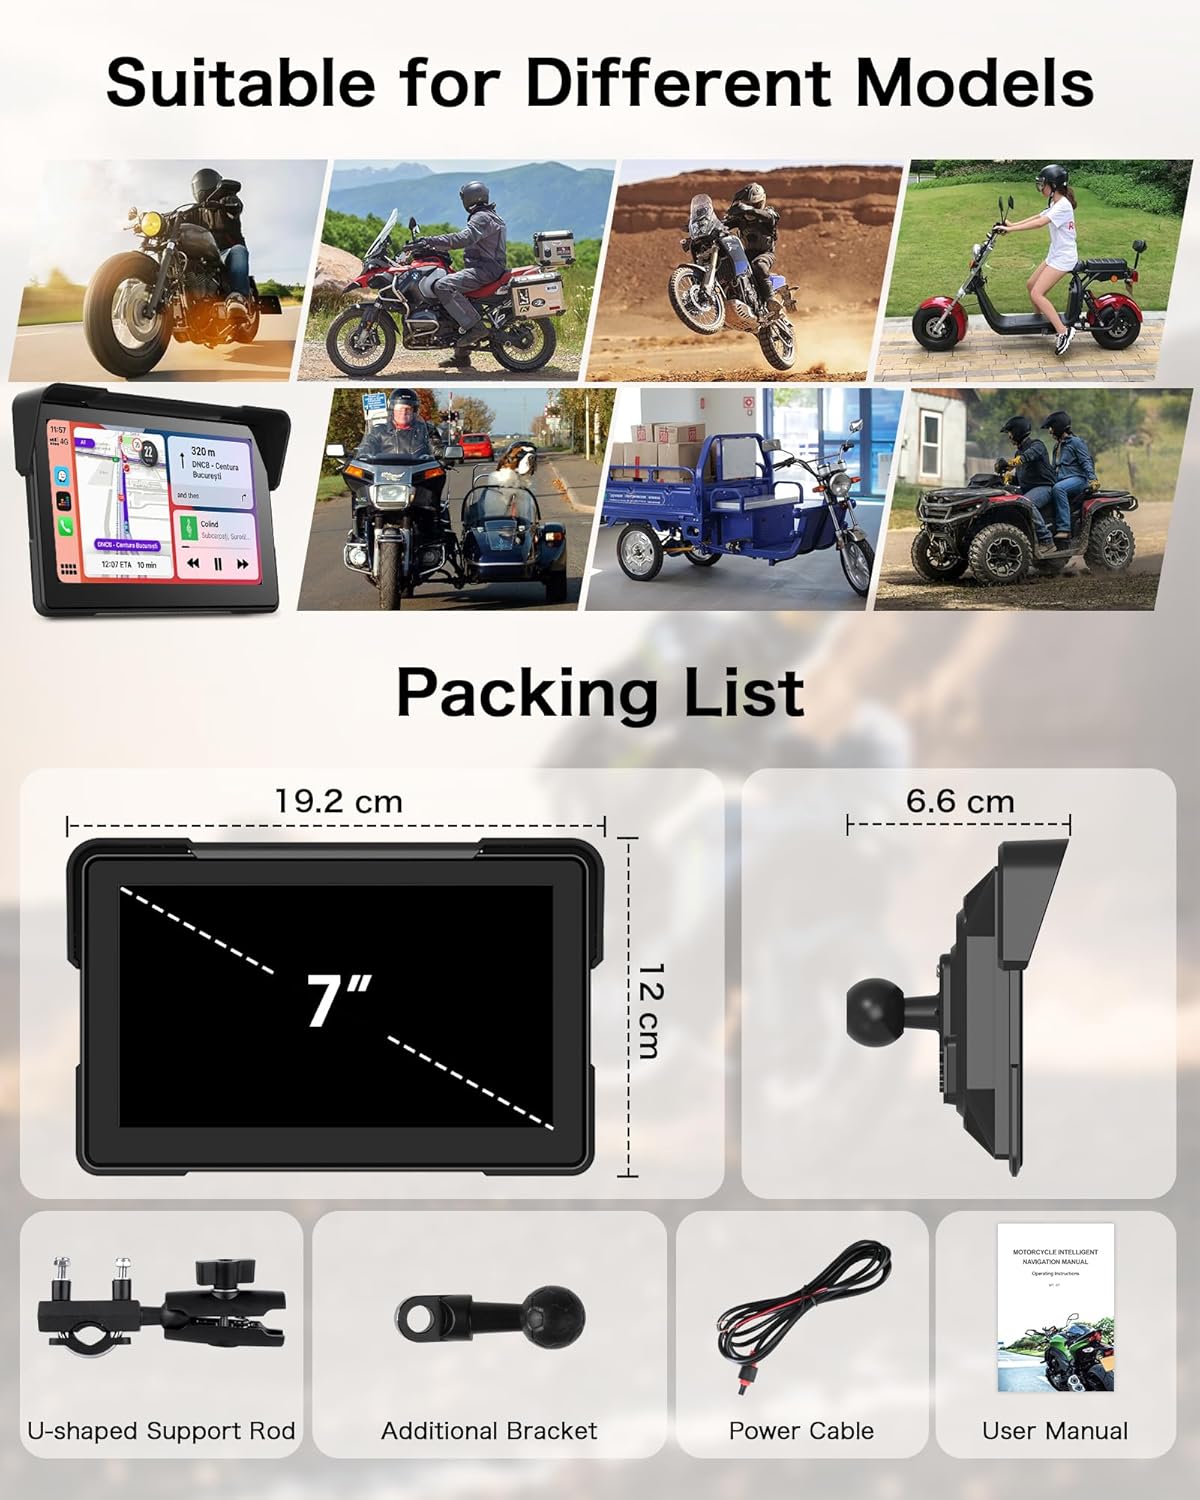
Rysunek 2.1: Package Contents and Dimensions. This image illustrates the main unit, U-shaped support rod, additional bracket, power cable, and user manual, along with the dimensions of the main unit.
3. Konfiguracja i instalacja
3.1 Montaż urządzenia
The Jelkuz MT07 can be mounted on various motorcycle handlebars using the provided U-shaped support rod and additional bracket. Ensure the mount is securely fastened to prevent vibration and movement during operation.
- Attach the U-shaped support rod to your motorcycle's handlebars.
- Connect the additional bracket to the support rod.
- Secure the CarPlay screen to the bracket, ensuring a firm fit.
- Dostosuj viewkąt zapewniający optymalną widoczność.
3.2 Połączenie zasilania
Proper power connection is crucial for automatic power on/off functionality and stable operation.
- Połącz czerwony power cable wire to the motorcycle's ACC control wire (+12V). The ACC control wire typically provides power only when the ignition is on, allowing the device to power on and off with your motorcycle.
- Połącz czarny power cable wire to the motorcycle's zacisk ujemny (grunt).
- Aby zapobiec zwarciom, należy upewnić się, że wszystkie połączenia są solidne i zaizolowane.

Rysunek 3.1: Power Wiring Diagram. This diagram illustrates how to connect the red power wire to the ACC power supply and the black wire to the ground, and then connect these to the Motorcycle CarPlay screen.
Notatka: The exact location of the ACC control wire may vary by motorcycle model. Consult your motorcycle's service manual if you are unsure.
4. Instrukcja obsługi
4.1 Bezprzewodowy CarPlay i Android Auto
Urządzenie obsługuje bezprzewodową technologię Apple CarPlay i Android Auto, co pozwala na bezproblemową integrację ze smartfonem.
- Upewnij się, że Bluetooth i Wi-Fi w Twoim smartfonie są włączone.
- On the Jelkuz MT07 screen, navigate to the CarPlay or Android Auto icon and tap it.
- Postępuj zgodnie z instrukcjami wyświetlanymi na ekranie, aby sparować smartfon przez Bluetooth.
- Once paired, the system will automatically establish a Wi-Fi connection for CarPlay or Android Auto.
- Your phone's compatible apps (navigation, music, calls, messages) will appear on the screen.

Rysunek 4.1: Wireless CarPlay and Android Auto Interfaces. This image shows the distinct user interfaces for both Wireless CarPlay and Wireless Android Auto, displaying various app icons.
4.2 Podwójna łączność Bluetooth
The Jelkuz MT07 features dual Bluetooth, enabling connection to both your smartphone and a Bluetooth helmet or headset simultaneously.
- First, connect your smartphone to the CarPlay screen via Bluetooth as described in Section 4.1.
- Next, connect your smartphone to your Bluetooth helmet or headset.
- Audio from the CarPlay screen (navigation prompts, music, calls) will be routed to your connected helmet or headset.

Rysunek 4.2: Dual Bluetooth Connection. This diagram shows the connection flow: smartphone to CarPlay screen, and smartphone to Bluetooth helmet or headset, enabling hands-free audio.
Ważna uwaga: Volume cannot be adjusted directly on the Motorcycle CarPlay screen when using a Bluetooth helmet or headset. Adjust volume via your helmet/headset controls or your smartphone.
4.3 Sterowanie głosowe (Siri/Asystent Google)
Utilize voice commands for hands-free operation, enhancing safety while riding.
- Activate Siri (for Apple CarPlay) or Google Assistant (for Android Auto) by saying "Hey Siri" or "Hey Google," or by pressing the voice command button on your connected device.
- Następnie możesz wydawać polecenia takie jak:
- „Przejdź do [miejsce docelowe]”
- „Zadzwoń do [nazwa kontaktu]”
- „Odtwórz [piosenkę/artystę]”
- „Wyślij wiadomość do [nazwa kontaktu]”

Rysunek 4.3: Voice Control in Action. This image shows a motorcycle dashboard with the Jelkuz MT07 screen displaying navigation, and visual cues for voice commands like "Hey Siri, Navigate to Home" and "Hi Google, Play Music."
4.4 Screen Features and Settings
- 7-calowy ekran dotykowy IPS: The high-definition screen provides clear visuals and is responsive to touch, even with gloves.
- Regulacja jasności: The screen brightness can be adjusted to ensure optimal visibility in various lighting conditions, from bright sunlight to nighttime.
- Anti-theft Screen Lock: Set a screen saver password (initial password: 0000) in the system settings to protect your device and privacy. This password can be changed.
- Tryb dzień/noc: Switch between day and night display modes for improved visibility and reduced eye strain.
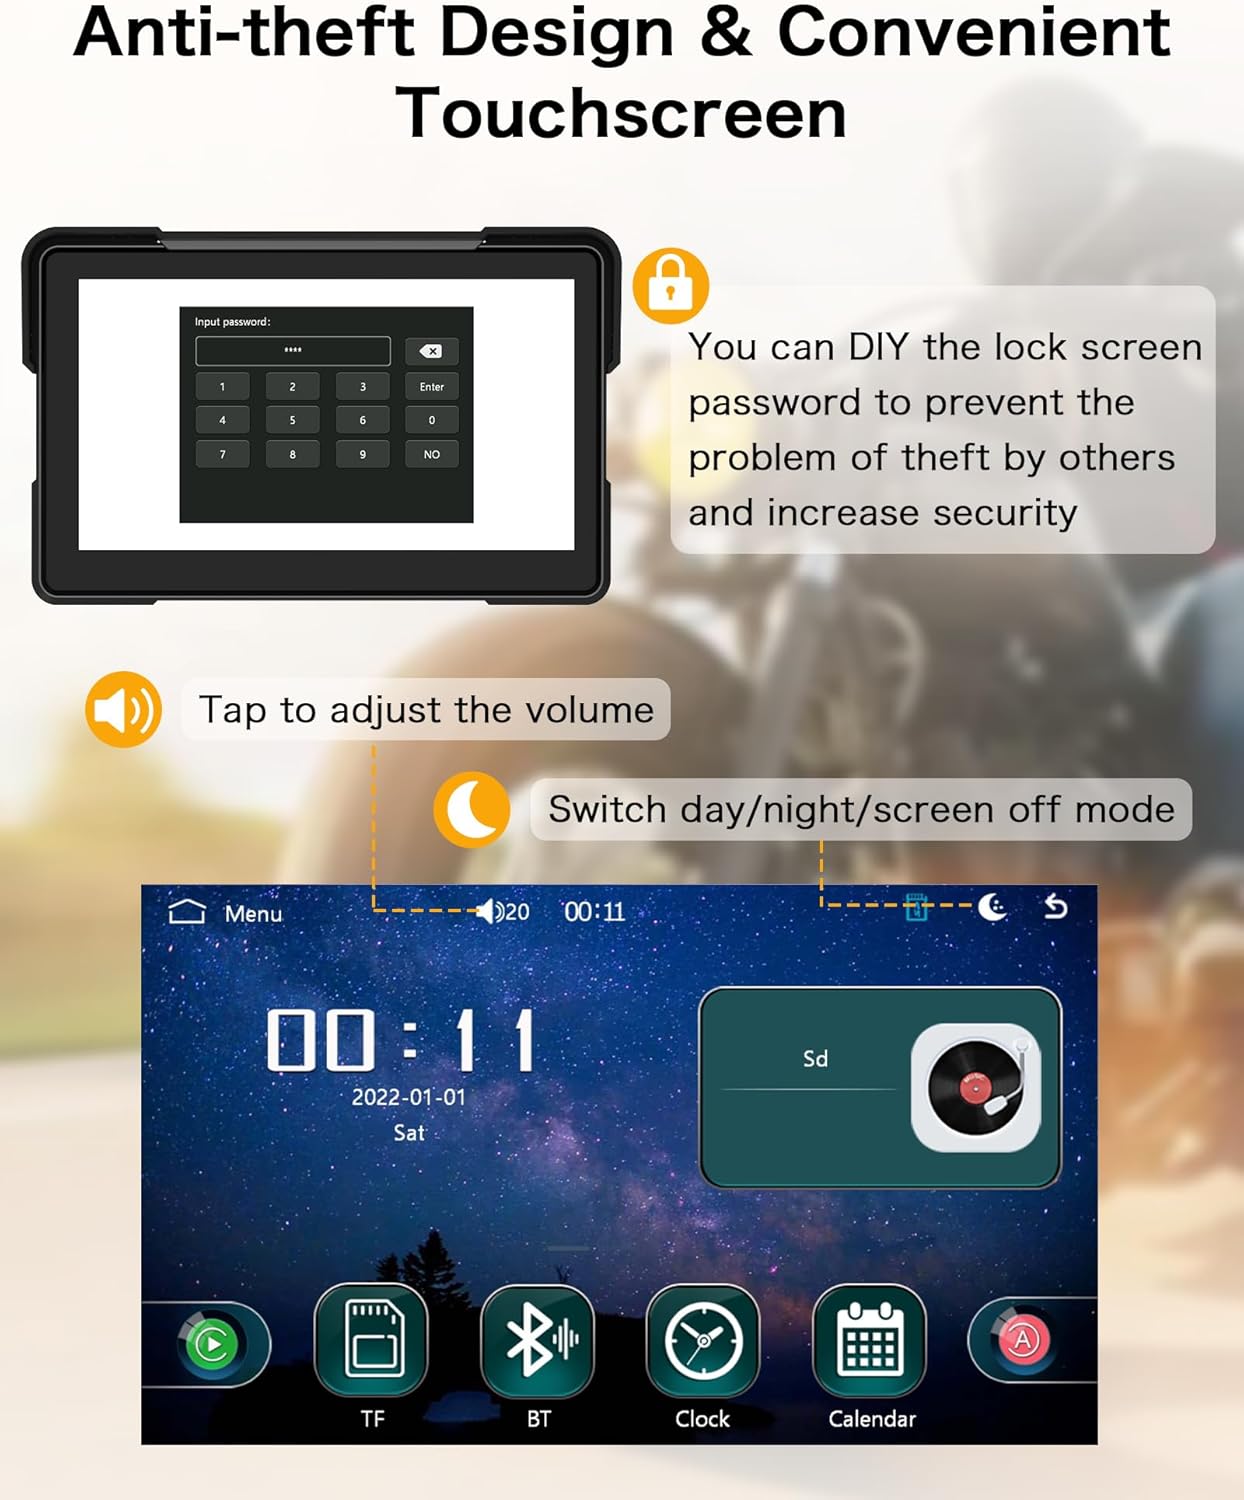
Rysunek 4.4: Anti-theft and Screen Controls. This image displays the anti-theft password input screen and the main menu interface, highlighting options for volume adjustment and day/night mode.
5. Konserwacja
To ensure the longevity and optimal performance of your Jelkuz MT07 system, follow these maintenance guidelines:
- Stopień wodoodporności: The device has an IP67 waterproof rating, meaning it is protected against dust and can withstand immersion in water up to 1 meter for 30 minutes. It is designed to resist rain and splashes.
- Czyszczenie: Użyj miękkiego, damp Do czyszczenia ekranu i obudowy używaj ściereczki. Unikaj środków czyszczących o działaniu ściernym i rozpuszczalników, które mogłyby uszkodzić wyświetlacz lubasing.
- Temperatura: The device is designed to be resistant to both low and high temperatures, suitable for various riding conditions. However, avoid prolonged exposure to extreme temperatures when not in use.
- Składowanie: Jeśli urządzenie nie będzie używane przez dłuższy czas, należy je przechowywać w chłodnym i suchym miejscu, z dala od bezpośredniego światła słonecznego.

Rysunek 5.1: Durability Features. This image illustrates the device's IP67 waterproof and dustproof capabilities, as well as its resistance to low and high temperatures, showcasing its suitability for various environments.
6. Rozwiązywanie Problemów
If you encounter issues with your Jelkuz MT07, refer to the following common problems and solutions:
Q: How to enable automatic power on/off for the device?
A: The positive terminal of the device's power cable (red wire) must be connected to the motorcycle's ACC control wire. The negative terminal (black wire) can be connected to the battery's negative terminal. The ACC control wire is typically located within the wiring harness beneath the motorcycle's handlebars, though its exact position may vary depending on the motorcycle model.
Q: The screen is unresponsive or frozen.
A: Try restarting the device by disconnecting and reconnecting the power. If the issue persists, ensure the screen is clean and free of debris. If the problem continues, contact customer support.
Q: Cannot connect to CarPlay/Android Auto wirelessly.
A:
- Ensure your smartphone's Bluetooth and Wi-Fi are both enabled.
- Usuń urządzenie z ustawień Bluetooth w telefonie i spróbuj sparować je ponownie.
- Restart both your smartphone and the Jelkuz MT07 unit.
- Upewnij się, że system operacyjny Twojego telefonu jest aktualny.
Q: No audio through Bluetooth helmet/headset.
A:
- Ensure your smartphone is connected to both the Jelkuz MT07 and your Bluetooth helmet/headset.
- Verify that the volume on your helmet/headset and smartphone is turned up.
- Disconnect and reconnect both Bluetooth connections.
- Before connecting your smartphone to the CarPlay screen, ensure it is disconnected from any other Bluetooth headset or helmet to avoid interference.
- Ensure your Bluetooth headset or helmet is powered on and in pairing mode when attempting to connect.
7. Specyfikacje
| Funkcja | Szczegół |
|---|---|
| Numer modelu | MT07 |
| Rozmiar wyświetlacza | 7 cali |
| Technologia łączności | Bluetooth |
| Cechy specjalne | Wireless CarPlay & Android Auto, GPS Navigation, Voice Control, IP67 Waterproof |
| System operacyjny | Android (dla systemu wewnętrznego, obsługuje CarPlay/Android Auto) |
| Typ montażu | Handheld (Motorcycle Handlebar Mount) |
| Waga przedmiotu | 2.2 funta (ok. 1 kg) |
| Wymiary opakowania | 8 x 4 x 3.01 cala (ok. 20.3 x 10.2 x 7.6 cm) |
| Producent | Jelkuz |
8. Gwarancja i wsparcie
Jelkuz provides a 12-miesięczny serwis posprzedażowy for this product. If you encounter any problems or have questions regarding your Jelkuz MT07 Navigation System, please contact our customer support team. We aim to provide a satisfactory solution within 24 hours.
Proszę zachować dowód zakupu na potrzeby roszczeń gwarancyjnych.