Elitech DMG-2SE
Instrukcja obsługi zestawu wskaźników cyfrowych Elitech DMG-2SE
Model: DMG-2SE | Brand: Elitech
Wstęp
This manual provides comprehensive instructions for the safe and efficient operation, setup, and maintenance of the Elitech Digital Manifold Gauge Set, model DMG-2SE. This device is designed for precise measurement of pressure and temperature in HVAC, refrigeration, and air conditioning systems. Please read this manual thoroughly before use to ensure proper functionality and safety.
Informacje dotyczące bezpieczeństwa
- Always wear appropriate personal protective equipment (PPE), including safety glasses and gloves, when handling refrigerants.
- Ensure all hose connections are secure and leak-free before applying pressure or vacuum to a system.
- Do not exceed the maximum working pressure of the hoses (500 PSI) or the gauge (800 PSI). Exceeding these limits can cause equipment damage or personal injury.
- Use the device in a well-ventilated area to prevent the accumulation of refrigerant vapors.
- Refer to local and national regulations for proper refrigerant handling, recovery, and disposal procedures.
- Keep the device away from moisture, direct sunlight, and extreme temperatures to prevent damage to electronic components.
- Nie próbuj demontować ani modyfikować urządzenia. Wszelkie prace serwisowe zlecaj wykwalifikowanemu personelowi.
Produkt ponadview i komponenty
The Elitech DMG-2SE is a digital manifold gauge designed for HVAC/R professionals, offering accurate pressure and temperature measurements. It features a high-definition LCD screen, intuitive controls, and robust construction for reliable performance.
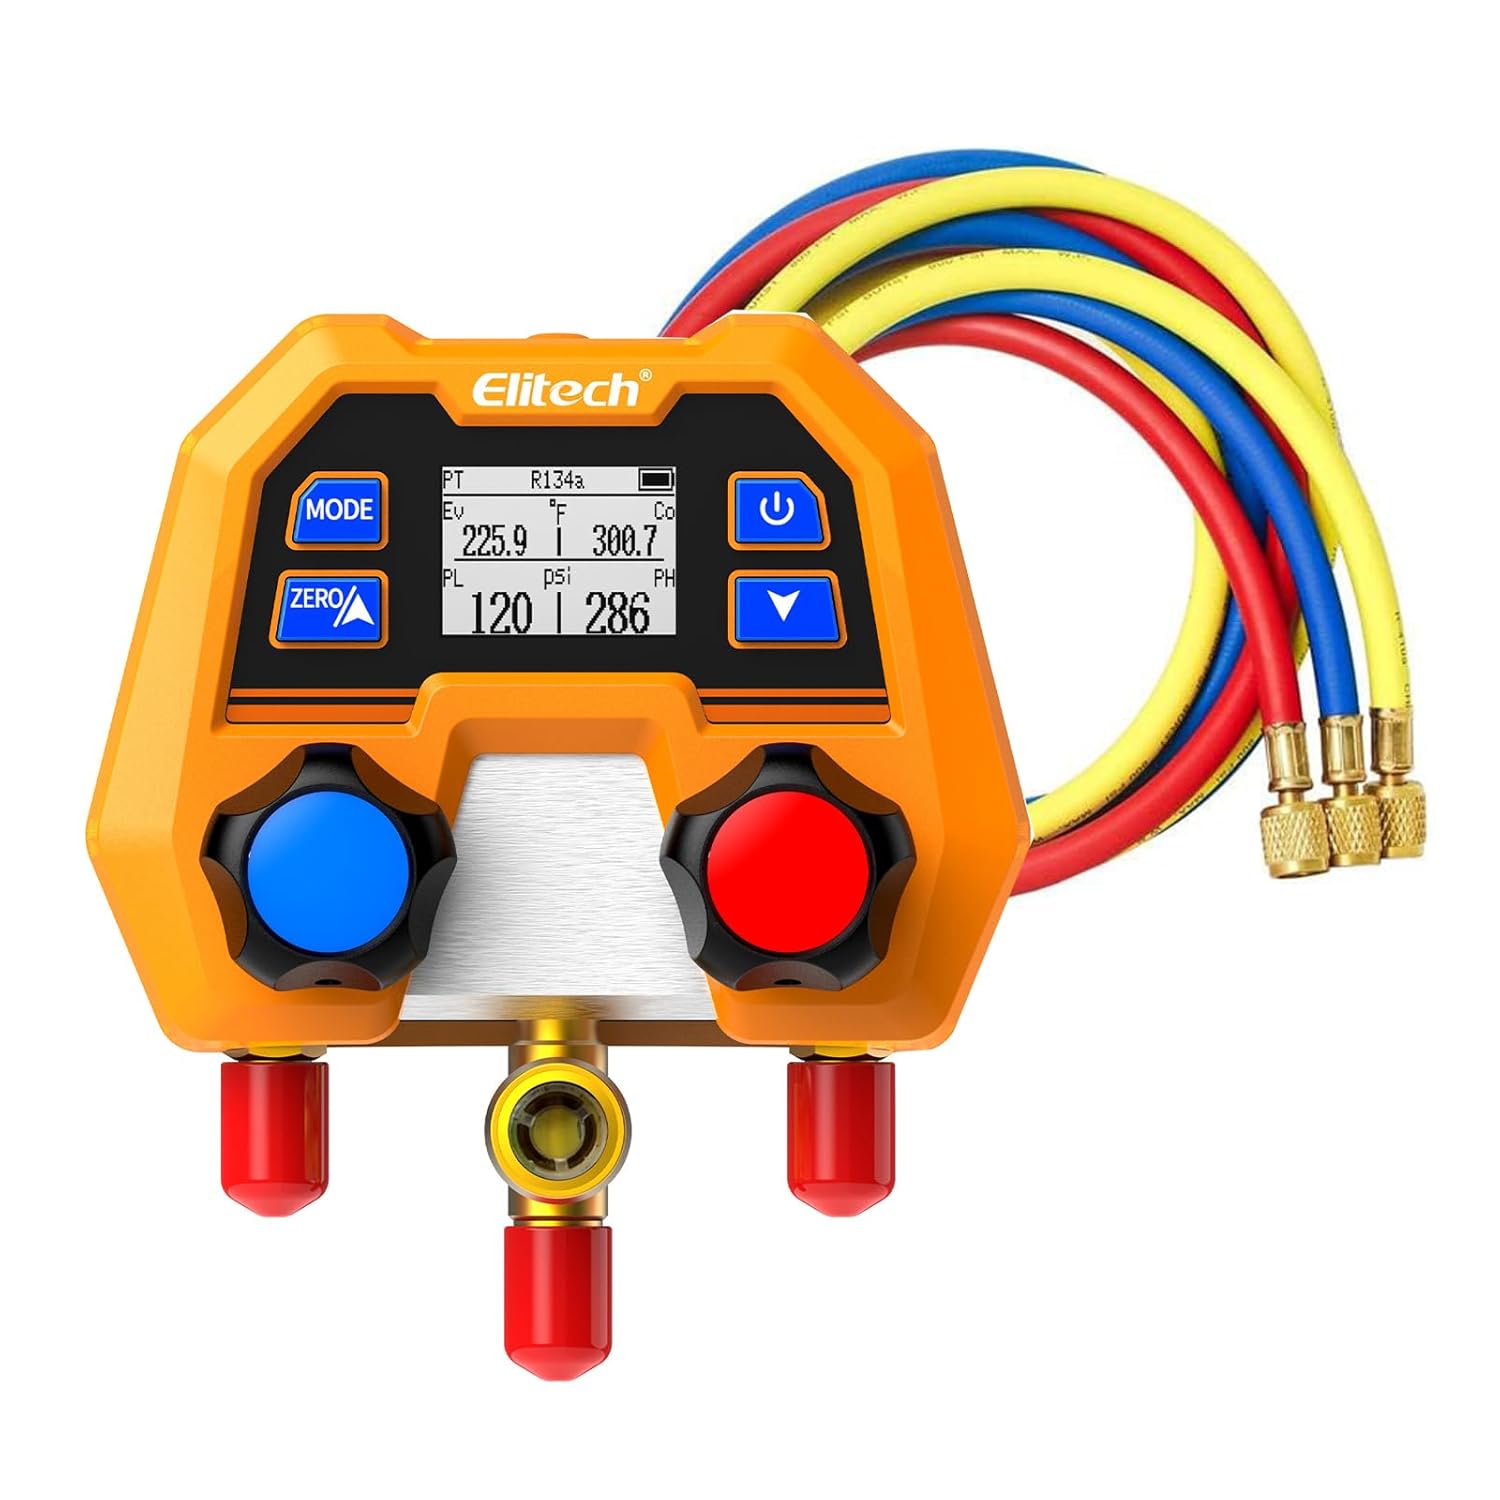


Węże czynnika chłodniczego
The included refrigerant charging hoses are color-coded for easy identification and proper connection.


Specyfikacje
- Zakres ciśnienia: -14 do 800 psi
- Dokładność: ±1% FS (pełna skala)
- Rezolucja: 1 psi
- Jednostki ciśnienia: psi, kg/cm², kPa, MPa, bar, inHg
- Jednostki temperatury: ° C / ° F
- Kompatybilne czynniki chłodnicze: Supports 88 types (e.g., R11, R12, R22, R134a, R410a, R404a, R407c, R507, R32, R290, R600a, R1234yf, etc.). The device defaults to 18 types and can be updated via an app.
- Długość węża: 59 cali (1.5 m)
- Połączenia węży: 1/4" SAE
- Hose Working Pressure: 500 PSI (Yellow, Blue, Red)
- Hose Burst Pressure: 4000 PSI (Yellow, Blue, Red)
- Moc: 2 x AAA batteries (replaceable)
- Czas pracy baterii: Około 200 godzin
- Wymiary: Approximately 4.3 inches (11 cm) width, 5.3 inches (13.5 cm) height, 2.9 inches (7.4 cm) depth.
- Waga: Około 1.5 funta (680 g)
Organizować coś
- Montaż baterii: Open the battery compartment located on the back of the unit. Insert two AAA batteries, ensuring correct polarity (+/-). Close the compartment securely.
- Pierwsze włączenie: Wciśnij przycisk zasilania (U symbol) to turn on the device. The LCD screen will illuminate.
- Wybór jednostki: Use the "MODE" button to cycle through available measurement units (psi, kg/cm², kPa, MPa, bar, inHg for pressure; °C/°F for temperature). Select your preferred units by stopping on the desired option.
- Wybór czynnika chłodniczego: Press the "MODE" button repeatedly until the refrigerant type (e.g., R134a) flashes on the display. Use the up/down arrow buttons to scroll through the list of supported refrigerants. Confirm your selection by pressing "MODE" again or by waiting a few seconds for the selection to auto-confirm.
- Zeroing the Pressure: Before connecting the gauge to any system, ensure it is at atmospheric pressure (not connected to any pressure source). Press the "ZERO" button to calibrate the pressure reading to zero. This ensures accurate measurements.
Instrukcja obsługi
Podłączanie węży
- Połącz niebieski wąż to the low-pressure service port of the HVAC/R system.
- Połącz czerwony wąż to the high-pressure service port of the HVAC/R system.
- Połącz żółty wąż to the service port of your vacuum pump, refrigerant tank, or recovery machine.
- Ensure all connections are hand-tightened, then slightly snugged with a wrench to prevent refrigerant leaks.
Pomiar ciśnienia i temperatury
- With the hoses connected to the system, slowly open the appropriate valve knobs on the manifold gauge to allow system pressure to reach the internal sensors.
- The LCD will display real-time pressure readings for both the high and low sides of the system.
- Simultaneously, the display will show the corresponding saturation temperatures (evaporation and condensation temperatures) for the currently selected refrigerant.
- The "PT" (Pressure-Temperature) mode shows pressure and saturation temperature. "Ev" (Evaporation) and "Co" (Condensation) indicate the saturation temperatures, while "PL" (Low Pressure) and "PH" (High Pressure) indicate the actual system pressures.

Refrigerant Charging/Recovery
The DMG-2SE provides accurate pressure readings essential for refrigerant charging and recovery processes. Always follow industry best practices and local regulations for these operations.
- Do ładowania: Connect the yellow hose to the refrigerant tank. Purge any air from the yellow hose before opening the manifold valve to the system. Monitor the pressure readings on the DMG-2SE to ensure the correct charge is added.
- For Recovery: Connect the yellow hose to a certified refrigerant recovery machine. Follow the recovery unit's instructions and monitor system pressures on the DMG-2SE during the recovery process.
Konserwacja
- Czyszczenie: Przetrzyj urządzenie miękką, damp ściereczką. Nie używaj środków czyszczących o właściwościach ściernych, rozpuszczalników ani nie zanurzaj urządzenia w wodzie.
- Wymiana baterii: Replace batteries when the low battery indicator appears on the display. Ensure the device is powered off before opening the battery compartment and replacing the two AAA batteries.
- Kontrola węża: Regularly inspect all refrigerant hoses for signs of wear, cracks, cuts, or damage. Replace damaged hoses immediately to prevent refrigerant leaks and ensure safety.
- Składowanie: Store the manifold gauge set in a clean, dry place, away from direct sunlight, extreme temperatures, and corrosive environments.
Rozwiązywanie problemów
| Problem | Możliwa przyczyna | Rozwiązanie |
|---|---|---|
| Urządzenie nie włącza się | Wyczerpane lub nieprawidłowo zainstalowane baterie | Wymień baterie, zwracając uwagę na prawidłową biegunowość. |
| Niedokładne odczyty ciśnienia | Gauge not zeroed; Leaking connections; Incorrect refrigerant selected | Zero the gauge before use. Check all hose connections for leaks. Verify the correct refrigerant type is selected. |
| Na wyświetlaczu pojawia się komunikat „Err” | Sensor error or measurement out of range | Power off and restart the device. If the error persists, contact customer support. |
Gwarancja i wsparcie
For detailed warranty information, technical support, or service inquiries regarding your Elitech Digital Manifold Gauge Set DMG-2SE, please contact Elitech customer service. Refer to the product packaging or the official Elitech webstrona zawierająca najnowsze dane kontaktowe i zasoby pomocy.
Elitarny Webstrona: www.elitech.com
Ask a question about this manual
Ask about setup, troubleshooting, compatibility, parts, safety, or missing instructions. Manuals+ will review the question and use this page’s manual context to help answer it.