
1. Wprowadzenie
This manual provides instructions for the safe assembly, operation, maintenance, and troubleshooting of your EYESUN Exercise Bike Model QM-530W. Please read this manual thoroughly before using the product and retain it for future reference.
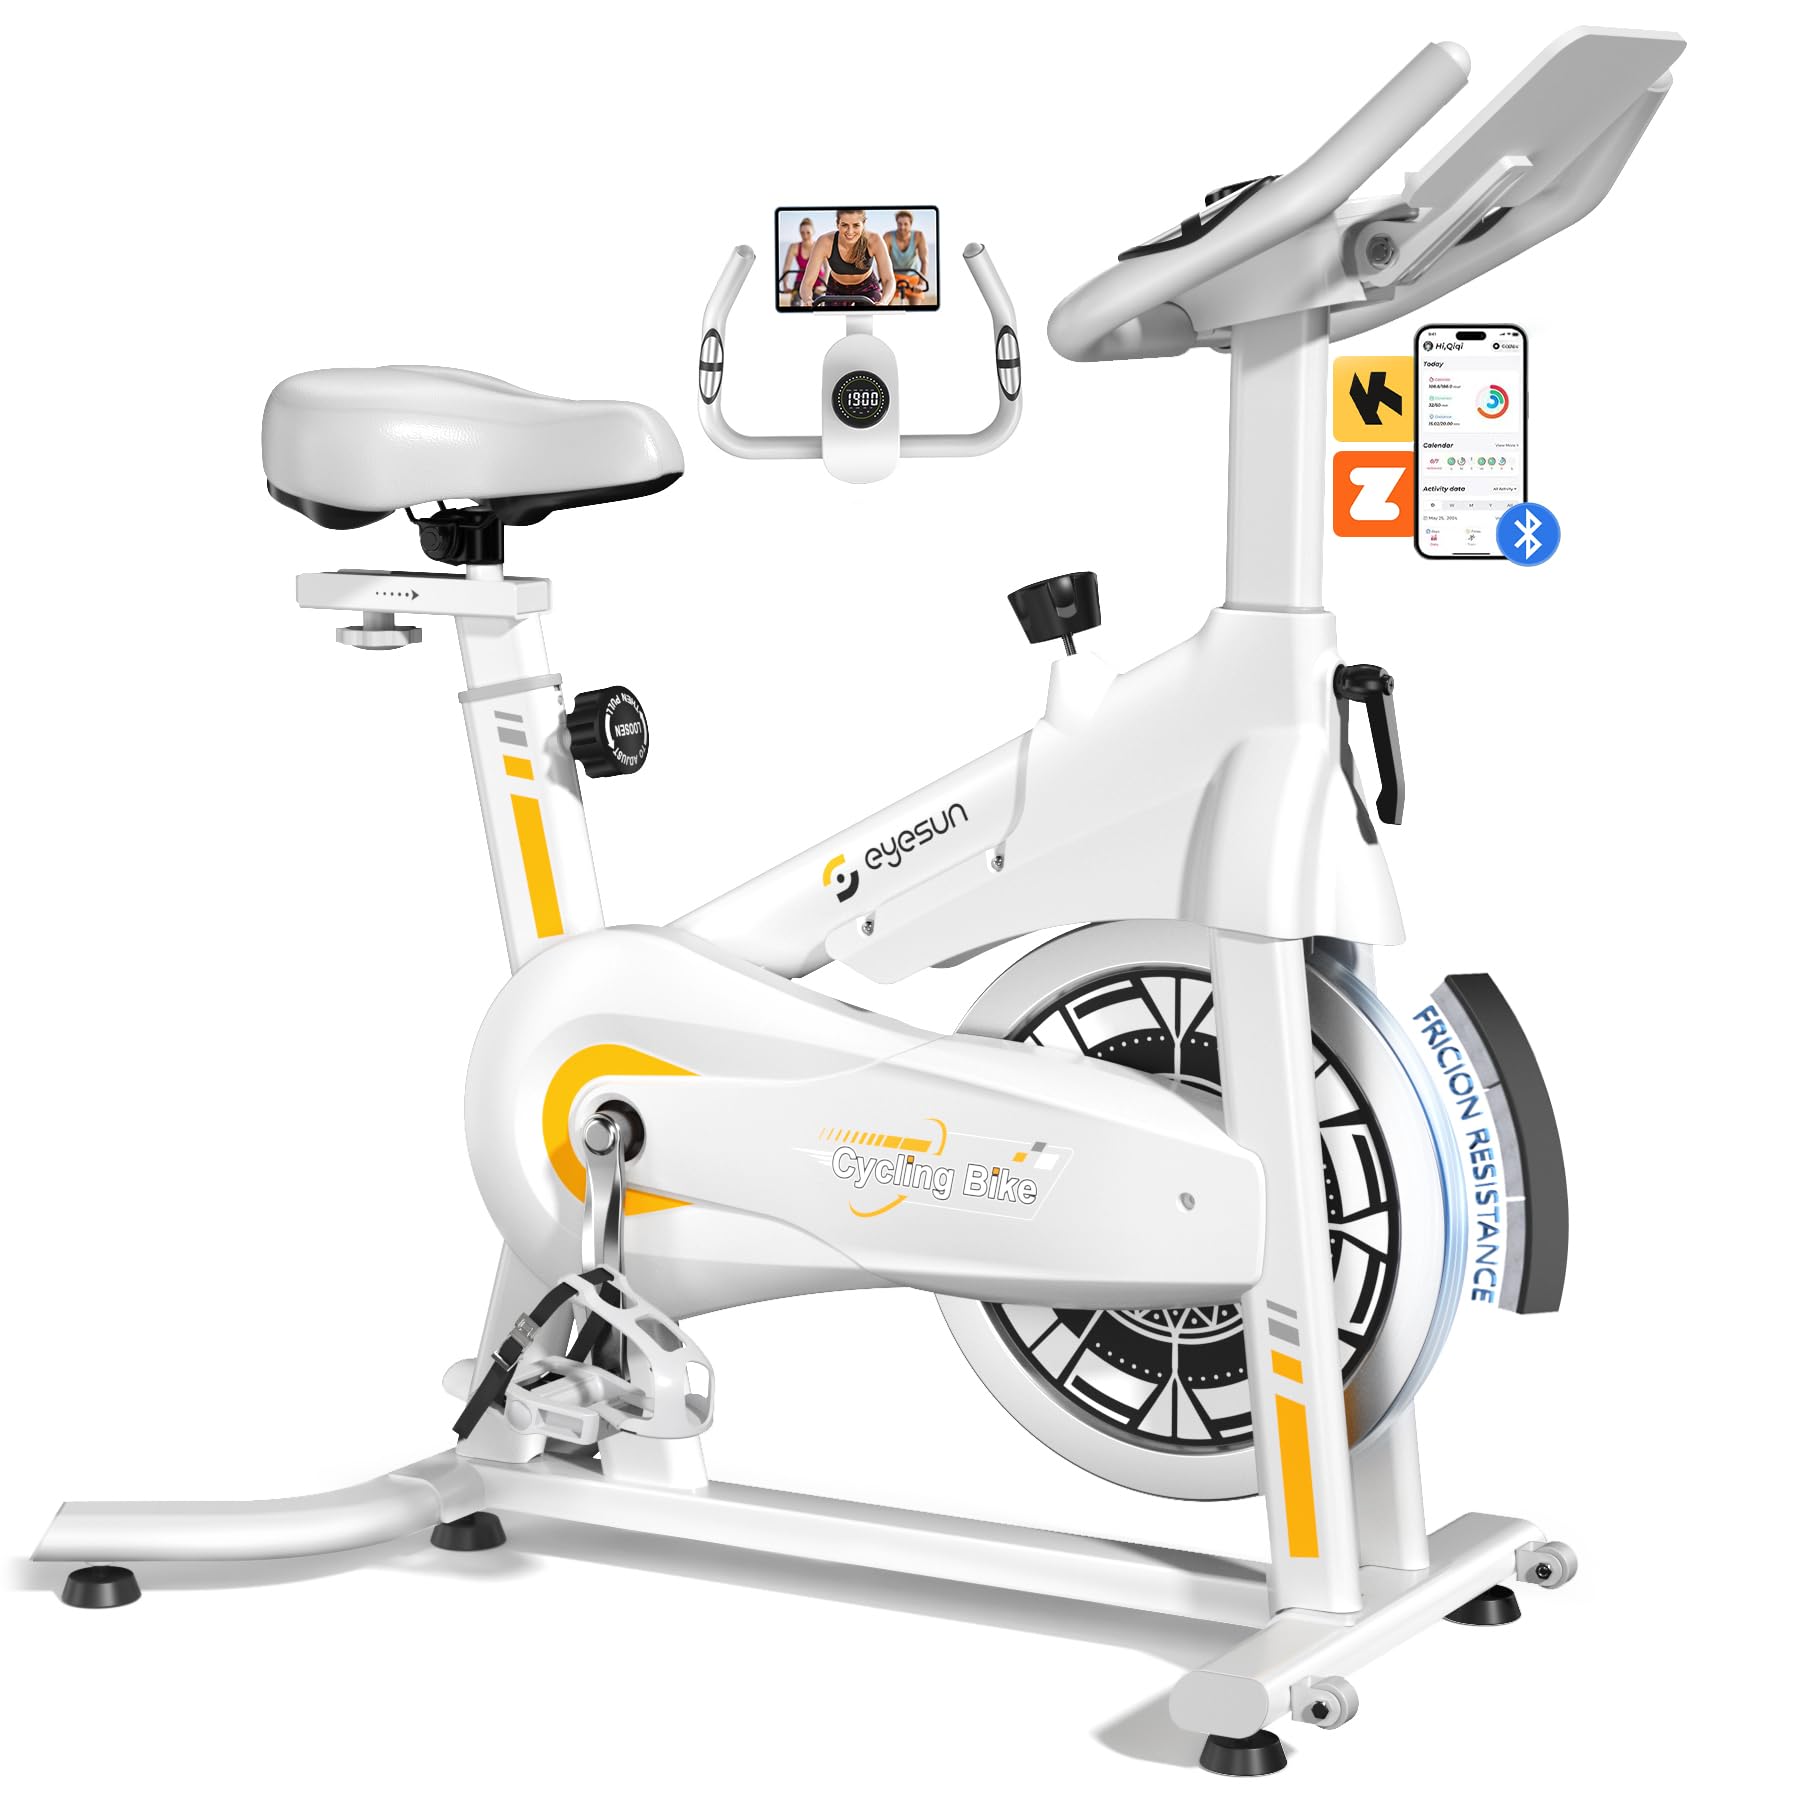
Image 1: EYESUN Exercise Bike QM-530W, White & Yellow model.
2. Informacje dotyczące bezpieczeństwa
Before beginning any exercise program, consult with your physician. It is essential to understand and follow all safety precautions to prevent injury and ensure proper operation of the exercise bike.
- Przed każdym użyciem należy upewnić się, że wszystkie części są solidnie zamocowane.
- Place the exercise bike on a flat, stable surface. Use a mat underneath to protect flooring and reduce noise.
- Podczas pracy dzieci i zwierzęta domowe należy trzymać z dala od urządzenia.
- Noś odpowiednie obuwie i odzież sportową. Unikaj luźnych ubrań, które mogłyby zostać wciągnięte przez ruchome części.
- Maksymalna waga użytkownika tego roweru wynosi 330 funtów (150 kg).
- The resistance bar functions as an emergency stop. Press it down firmly to stop the flywheel immediately.
- Adjustable cage pedals are designed to keep your feet secure during exercise. Ensure your feet are properly secured before starting.
- Do not dismount the bike until the flywheel has completely stopped.

Image 2: Illustration of the exercise bike's sturdy construction and body muscles engaged during use.
3. Zawartość opakowania
Przed rozpoczęciem montażu sprawdź, czy wszystkie elementy są obecne. Jeśli brakuje którejkolwiek części lub jest ona uszkodzona, skontaktuj się z obsługą klienta.
- Rama główna (wstępnie zmontowana)
- Montaż kierownicy
- Sztyca i siodełko
- Przednie i tylne stabilizatory
- Pedały (lewy i prawy)
- Monitor LCD
- Zestaw elementów montażowych (śruby, podkładki, nakrętki, narzędzia)
- Instrukcja obsługi
4. Instrukcja montażu
The EYESUN Exercise Bike is designed for quick assembly, with approximately 80% of the unit pre-assembled. Typical assembly time is around 25 minutes.
- Zamontuj stabilizatory: Przymocuj przednie i tylne stabilizatory do ramy głównej za pomocą dołączonych śrub i podkładek. Upewnij się, że są mocno dokręcone.
- Zainstaluj pedały: Zidentyfikuj lewy (L) i prawy (R) pedał. Lewy pedał należy przykręcić przeciwnie do ruchu wskazówek zegara, a prawy zgodnie z ruchem wskazówek zegara. Wkręć je w ramiona korby i mocno dokręć kluczem.
- Miejsce montażu: Włóż sztycę siodełka do ramy głównej i dostosuj do żądanej wysokości. Zabezpiecz pokrętłem regulacyjnym. Zamontuj siodełko na sztycy.
- Zamontuj kierownicę: Slide the handlebar assembly into the front post. Adjust the height and secure with the adjustment knob.
- Podłącz monitor LCD: Connect the sensor cable from the main frame to the back of the LCD monitor. Ensure the connection is vertical and perpendicular to the flywheel for accurate data tracking. Mount the LCD monitor onto the handlebar post.
Video 1: Detailed assembly guide for the EYESUN Exercise Bike. This video demonstrates step-by-step installation of components.
5. Dostosowania
Proper adjustment of the bike ensures comfort and effectiveness during your workout.
5.1 Regulacja siedzenia
- Wysokość: Loosen the adjustment knob on the vertical seat post. Raise or lower the seat until your leg has a slight bend at the knee when the pedal is at its lowest point. Tighten the knob securely.
- Naprzód wstecz: Loosen the adjustment knob under the seat. Slide the seat forward or backward to achieve a comfortable position relative to the handlebars. Ensure your knees are aligned with the balls of your feet when pedals are horizontal. Tighten the knob securely.
5.2 Regulacja kierownicy
- Loosen the adjustment knob on the handlebar post. Raise or lower the handlebars to a comfortable height that allows for a relaxed upper body posture. Tighten the knob securely.
5.3 Regulacja oporu
- The resistance knob is located on the main frame. Turn the knob clockwise to increase resistance and counter-clockwise to decrease resistance.
- To engage the emergency brake, press the resistance knob down firmly.

Image 3: Visual guide for adjusting handlebar and seat positions for various user heights.
Video 2: Demonstration of adjusting the seat and handlebar for optimal user comfort.
6. Obsługa roweru treningowego
6.1 Funkcje monitora LCD
The upgraded LCD monitor tracks your workout data in real-time.
- Czas: Czas trwania treningu.
- Prędkość: Aktualna prędkość jazdy na rowerze.
- Dystans: Całkowity dystans pokonany podczas treningu.
- Kalorie: Szacunkowa liczba spalonych kalorii.
- Puls: Heart rate (if connected to a compatible sensor, not included).
- Drogomierz: Całkowity skumulowany dystans.
Ensure the APP sensor cable is correctly connected to the flywheel for accurate data tracking.

Image 4: Close-up of the digital LCD display and proper sensor cable connection.
6.2 Integracja aplikacji
The exercise bike supports Bluetooth connectivity for integration with fitness applications.
- Zgodne aplikacje: FantomFite, KINOMAP, and Zwift.
- Synchronizacja danych: Supports syncing with Google Fit and Apple Health for comprehensive fitness tracking.
- Uchwyt do tabletu: Use the built-in tablet holder to enjoy music or videos while riding, or to view your fitness app.

Image 5: Illustration of the exercise bike's compatibility with popular fitness applications.
Wideo 3: Ponadview of the LCD monitor and Bluetooth connectivity features.
7. Konserwacja
Regularna konserwacja gwarantuje długowieczność i bezpieczną pracę roweru treningowego.
- Czyszczenie: Wytrzyj rower reklamąamp Po każdym użyciu przetrzyj ściereczką pot i kurz. Unikaj środków czyszczących o działaniu ściernym.
- Kontrola: Okresowo sprawdzaj wszystkie śruby, nakrętki i części ruchome pod kątem dokręcenia i zużycia. Dokręć wszystkie luźne elementy mocujące.
- Smarowanie: The belt drive system is designed to be low maintenance and quiet. No lubrication is typically required for the belt.
- Składowanie: When not in use, store the bike in a dry, cool place away from direct sunlight and moisture. The built-in transport wheels allow for easy relocation.

Image 6: Features like the smooth belt drive and stable U-shaped bottom contribute to low maintenance and durability.

Image 7: The space-saving design and transport wheels facilitate easy movement and storage.
8. Rozwiązywanie Problemów
If you encounter issues with your EYESUN Exercise Bike, refer to the following common problems and solutions.
| Problem | Możliwa przyczyna | Rozwiązanie |
|---|---|---|
| Pisk lub zgrzytanie podczas pracy | Loose components; debris in flywheel area; worn belt. | Check and tighten all bolts and nuts. Inspect flywheel area for foreign objects. If noise persists, contact support. |
| Inaccurate LCD monitor readings | Sensor cable not connected properly; low battery in monitor. | Ensure the APP sensor cable is securely and vertically connected to the monitor. Replace monitor batteries if necessary. |
| Opór się nie zmienia | Problem z mechanizmem pokrętła oporu. | Check if the resistance knob is fully engaged. If the mechanism feels loose or unresponsive, contact support. |
| Wobbly seat or handlebars | Adjustment knobs not tightened sufficiently. | Ensure all seat and handlebar adjustment knobs are tightened firmly after positioning. |
9. Specyfikacje
| Funkcja | Szczegół |
|---|---|
| Numer modelu | QM-530W |
| Wymiary produktu | 100.08 x 50.55 x 106.93 cm (39.4 x 19.9 x 42.1 cala) |
| Waga przedmiotu | 21.32 kg (47 funta) |
| Maksymalna nośność | 330 funta (150 kg) |
| Układ napędowy | Napęd pasowy |
| Tworzywo | Stal stopowa |
| Mechanizm oporu | Friction (Adjustable Brake Pad) |
| Cechy specjalne | Adjustable Pedal, Adjustable Resistance Level, Adjustable Seat, Flywheel |
| Zalecany wzrost użytkownika | 4'8" do 6'1" (142 cm do 185 cm) |
| Inseam Range | 25"–35" (63.5 cm – 89 cm) |
| Źródło zasilania (monitor) | Zasilany bateryjnie (baterie w zestawie) |
10. Gwarancja i wsparcie
EYESUN provides a 24-miesięczna bezproblemowa gwarancja for your exercise bike. This warranty covers manufacturing defects and ensures product quality.
For any questions, concerns, or warranty claims, please contact EYESUN customer service:
- E-mail: wsparcie@eyesun.net
- Obsługa klienta jest dostępna 24 godziny na dobę, 7 dni w tygodniu.