
1. Wprowadzenie
The Geeetech M1 Mini 3D Printer is designed for ease of use, making it suitable for beginners and educational environments. This compact printer features auto-leveling, a direct drive extruder, and a flexible magnetic build plate to simplify the 3D printing process. Please read this manual thoroughly before operating your printer to ensure safe and optimal performance.

Opis obrazu: A Geeetech M1 Mini 3D Printer, white and light blue, is shown with a spool of blue PLA filament attached to its side. Inside the print area, a colorful 3D printed Santa Claus figure is visible on the print bed. Another separate spool of blue filament is positioned next to the printer.
2. Instrukcje bezpieczeństwa
- Zawsze używaj drukarki w dobrze wentylowanym pomieszczeniu.
- Trzymaj drukarkę z dala od materiałów łatwopalnych, źródeł ciepła i wody.
- Do not touch the nozzle or heated bed during operation or immediately after printing, as they can reach high temperatures.
- Podczas pracy drukarki należy trzymać dzieci i zwierzęta z dala od niej.
- Używaj wyłącznie zasilacza dołączonego do drukarki.
- Do not attempt to modify the printer or use non-approved parts.
- Przed przystąpieniem do czyszczenia lub konserwacji należy odłączyć drukarkę od gniazdka elektrycznego.
3. Zawartość opakowania
Sprawdź, czy w opakowaniu znajdują się wszystkie komponenty:
- Geeetech M1 Mini 3D Printer (fully assembled)
- 0.5kg Blue PLA Filament spool
- Zasilacz
- Karta TF
- Kabel USB
- Tools and Accessories (e.g., spatula, nozzle cleaning needle)
- Instrukcja obsługi (ten dokument)
4. Koniec produktuview i komponenty
Familiarize yourself with the main parts of your Geeetech M1 Mini 3D Printer.

Opis obrazu: This image highlights three key features of the Geeetech M1 Mini 3D Printer. It shows a close-up of the 2.4-inch LCD color screen, emphasizing its larger display for convenient operation. Below that, the PEI print plate is shown, also noted for its larger display size and convenient operation. Finally, a view of the print head area points out the high-brightness lighting provided by three integrated LEDs.
- Kolorowy ekran LCD o przekątnej 2.4 cala: For intuitive operation and monitoring.
- PEI Print Plate: Flexible and removable magnetic build plate for easy model removal and reduced warping.
- High-Brightness Lighting: Integrated LEDs illuminate the print area.
- Ekstruder z napędem bezpośrednim: Provides strong extrusion force for various filaments.
- Auto-Leveling Sensor: For precise and simple bed leveling.
- Uchwyt żarnika: Located on the side for filament spool.

Opis obrazu: eksplodował view or cutaway diagram of the Geeetech M1 Mini 3D Printer reveals internal components and design features. Labels point to 'Premium hardness plastic' for the casing, 'Hotbed three bearings' for the print bed mechanism, 'Thickened filament bracket' for the filament support, and 'Leather pulley reinforcement' for a drive component. The image also mentions a printing speed of 250mm/s.
5. Konfiguracja
5.1 Rozpakowywanie i umieszczanie
- Ostrożnie wyjmij drukarkę z opakowania.
- Place the printer on a stable, level surface in a well-ventilated area.
- Usuń wszelkie folie ochronne i materiały opakowaniowe.
5.2 Połączenie zasilania
- Podłącz zasilacz do portu zasilania drukarki.
- Podłącz zasilacz do odpowiedniego gniazdka elektrycznego.
5.3 Ładowanie filamentu
- Mount the provided 0.5kg PLA filament spool onto the side filament holder.
- Trim the end of the filament to a sharp angle.
- On the LCD screen, navigate to the filament loading option.
- Insert the filament into the extruder's input hole. The printer will automatically pull the filament through once the nozzle reaches the correct temperature.
- Wait for a steady stream of filament to extrude from the nozzle, indicating successful loading.
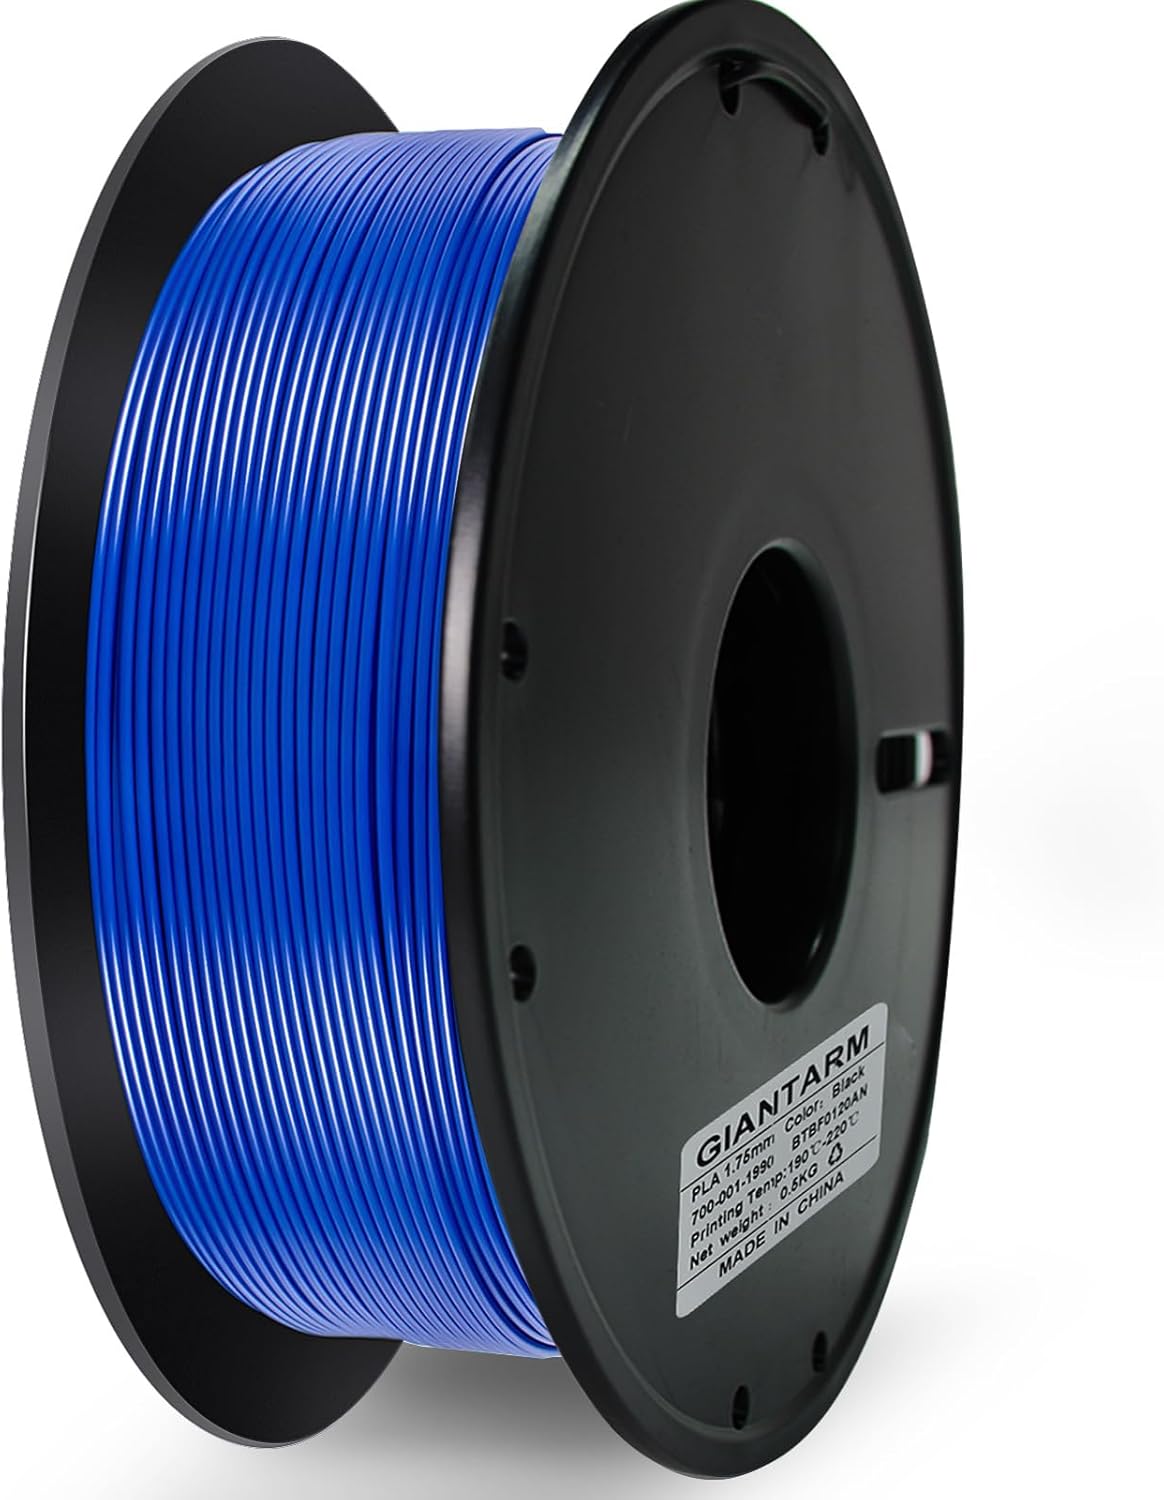
Opis obrazu: A close-up shot of a black spool wound with bright blue PLA filament. The label on the spool indicates 'GIANTARM PLA 1.75mm', 'Color: Black' (though the filament is blue), 'Net Weight: 0.5KG', and 'MADE IN CHINA'.
5.4 Installing the 1KG Filament Holder (Optional)
If you wish to use a 1KG filament spool, you can print and attach a larger filament holder. The necessary model file is typically provided on the included TF card or available for download from the manufacturer's webstrona.

Opis obrazu: This image displays a four-panel guide for installing a 1KG filament holder. The top-left panel shows the 3D printed components of the holder. The top-right panel shows the printer with the printed holder attached. The bottom-left panel shows a 1KG filament spool. The bottom-right panel shows the printer with the 1KG spool mounted on the newly installed holder. Text instructions below the panels read: '1. Print the provided model file using your 3D printer. 2. Attach the printed model to the consumables bracket. 3. Enjoy the convenience of using 1KG consumables with this lightweight holder. For printing instructions, visit A+.'
6. Instrukcja obsługi
6.1 Włączanie/wyłączanie
- Włączanie: Press the power button located on the printer. The LCD screen will light up.
- Aby wyłączyć: Press and hold the power button until the printer shuts down, or use the power switch if available.
6.2 Auto-Leveling
The Geeetech M1 Mini features 16-point full-auto leveling. This process ensures the print bed is correctly calibrated for optimal adhesion and print quality.
- Ensure the print bed is clean and free of debris.
- From the main menu on the LCD screen, select the 'Auto-Level' or 'Leveling' option.
- The printer will automatically move the print head to various points on the bed to measure and adjust.
- Wait for the process to complete. No manual intervention is required.
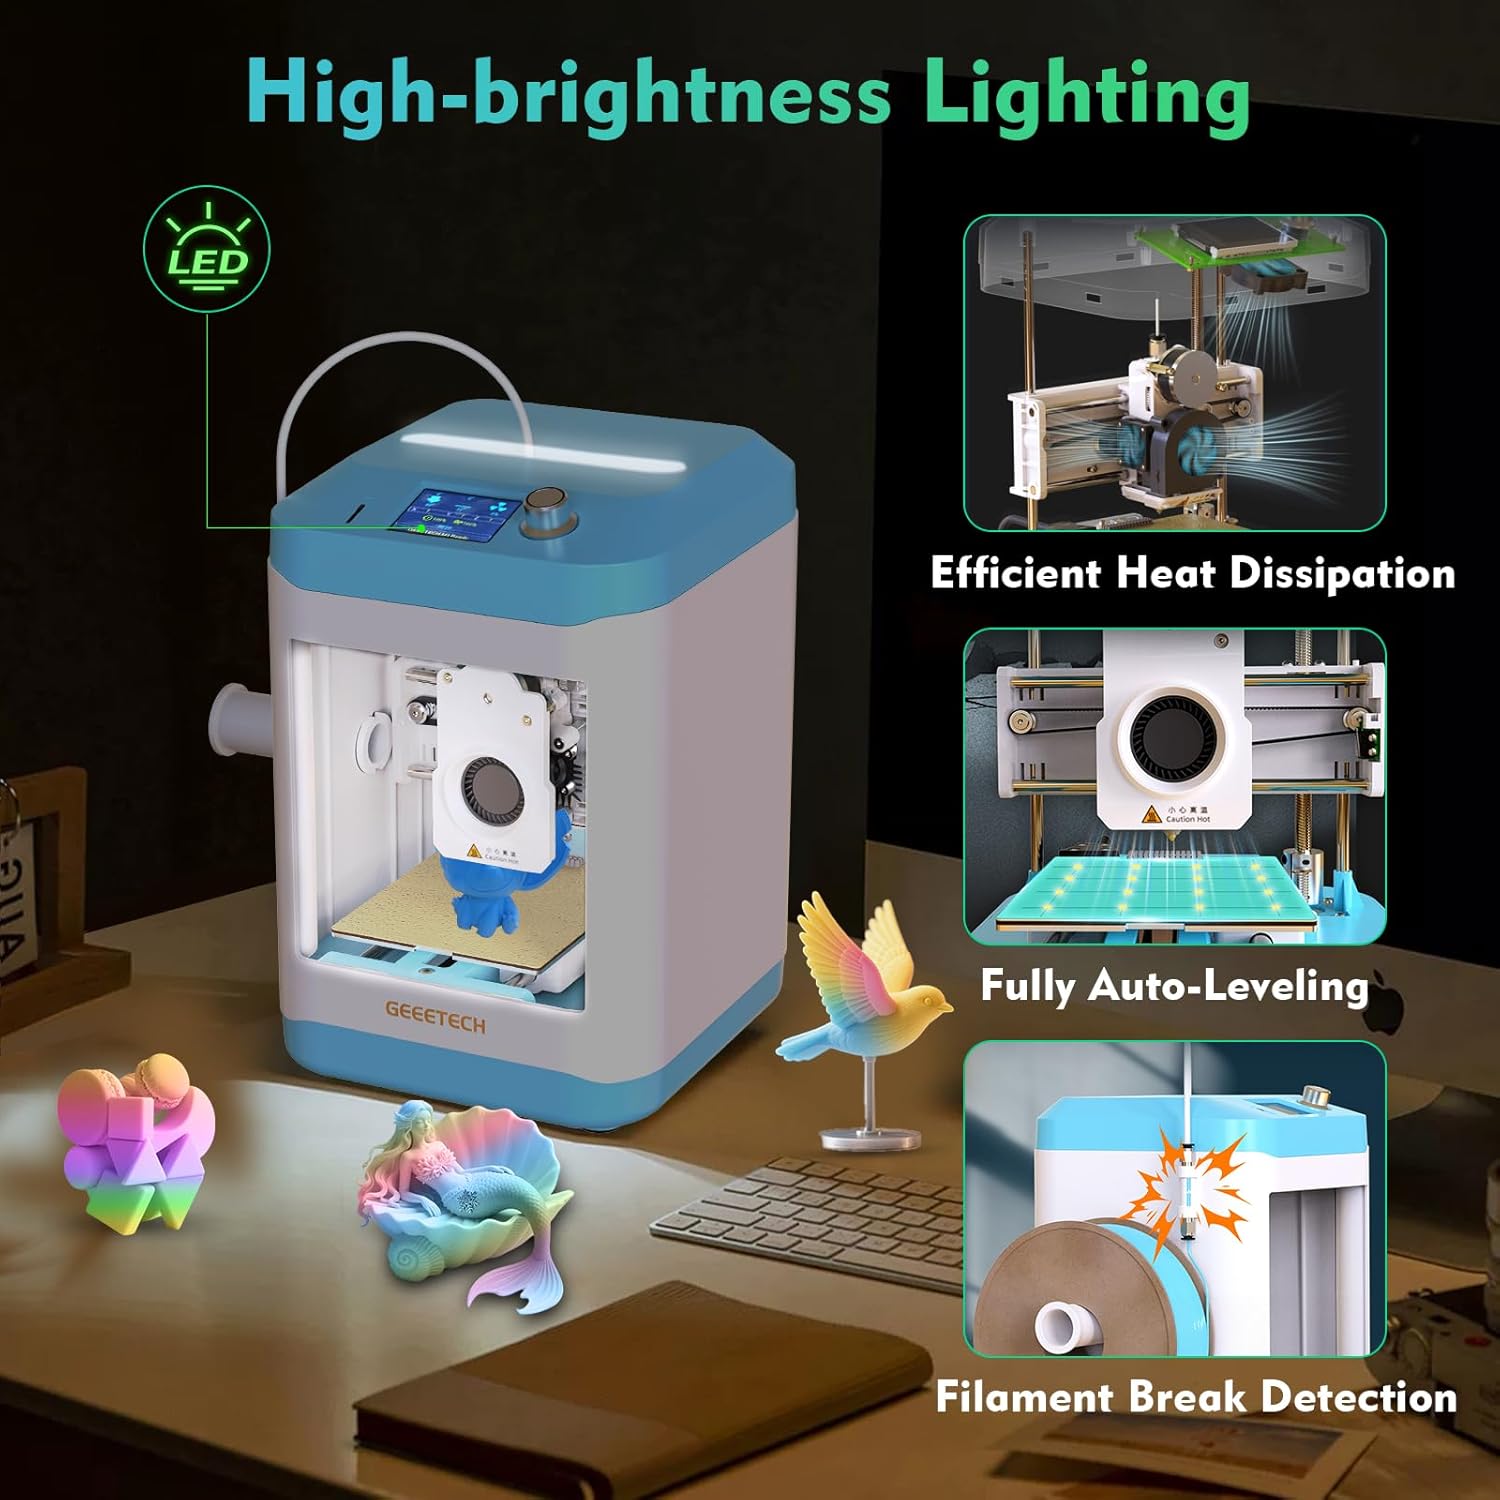
Opis obrazu: This image showcases several features of the Geeetech M1 Mini 3D Printer. The main printer unit is shown with various 3D printed objects around it. Insets highlight 'High-brightness Lighting' with an LED icon, 'Efficient Heat Dissipation' showing internal cooling fans, 'Fully Auto-Leveling' depicting the print head probing the bed, and 'Filament Break Detection' illustrating a sensor detecting a broken filament.
6.3 Rozpoczęcie drukowania
- Prepare your 3D model using slicing software on your computer and save it to the TF card in a compatible format (e.g., .gcode).
- Insert the TF card into the designated slot on the printer.
- On the LCD screen, navigate to 'Print from TF Card' or a similar option.
- Select the desired model file z listy.
- Confirm your selection to begin the printing process. The printer will preheat the nozzle and bed, then start printing.
6.4 Monitoring and Pausing a Print
- The LCD screen will display print progress, temperature, and other relevant information.
- To pause a print, select the 'Pause' option from the menu. To resume, select 'Resume'.
- In case of filament run-out or breakage, the printer features filament break detection and will pause automatically. Load new filament and resume the print.
6.5 Usuwanie wydruku
- Once the print is complete, allow the print bed and nozzle to cool down.
- Carefully remove the flexible magnetic PEI print plate from the printer.
- Gently flex the print plate to detach the printed model. Use a spatula if necessary, but avoid excessive force to prevent damage to the plate or model.
- Reattach the print plate to the printer.
7. Konserwacja
7.1 Cleaning the Print Bed
- After each print, ensure the print bed is clean. Use a soft cloth and isopropyl alcohol to wipe away any residue.
- Avoid using abrasive materials that could scratch the PEI surface.
7.2 Konserwacja dyszy
- If you notice clogs or poor extrusion, use the provided nozzle cleaning needle to clear the nozzle while it is heated.
- Periodically inspect the nozzle for wear. A worn nozzle can affect print quality and may need replacement.
7.3 Ogólne czyszczenie
- Utrzymuj drukarkę w czystości, usuwając kurz i resztki filamentu. Używaj miękkiej szczotki lub sprężonego powietrza.
- Ensure the linear rails and lead screws are clean and lightly lubricated if necessary (refer to manufacturer guidelines for lubricant type).
8. Rozwiązywanie Problemów
- Słaba przyczepność pierwszej warstwy:
- Ensure the print bed is clean.
- Verify auto-leveling has been performed correctly.
- Adjust print bed temperature in slicing software if necessary.
- Filament nie wytłacza się:
- Sprawdź, czy filament jest prawidłowo załadowany i nie jest splątany.
- Clean the nozzle for clogs.
- Ensure the nozzle is at the correct temperature for the filament type.
- Problemy z jakością druku (np. nitki, przesunięcia warstw):
- Check filament quality and ensure it is dry.
- Review slicing software settings (retraction, print speed, cooling).
- Aby zapobiec drganiom, należy ustawić drukarkę na stabilnej powierzchni.
- Drukarka nie włącza się:
- Verify the power adapter is securely connected to both the printer and the power outlet.
- Sprawdź gniazdko elektryczne za pomocą innego urządzenia.
9. Specyfikacje
| Funkcja | Specyfikacja |
|---|---|
| Model | Geeetech M1 Mini |
| Obszar wydruku | 3.94 × 4.33 × 3.94 cala (100 × 110 × 100 mm) |
| Typ wytłaczarki | Napęd bezpośredni |
| Zgodność filamentów | PLA, TPU (0.5kg spools recommended, 1kg with optional holder) |
| Niwelacja | 16-Point Full-Auto Leveling |
| Prędkość drukowania | Do 250 mm/s |
| Wyświetlacz | 2.4-calowy kolorowy ekran LCD |
| Płyta budowlana | Flexible and Removable Magnetic PEI |
| Cechy specjalne | High-brightness lighting, Efficient heat dissipation, Filament break detection |
10. Gwarancja i wsparcie
Geeetech offers a friendly warranty and dedicated customer support for your M1 Mini 3D Printer:
- Zwrot/Wymiana: 30 days worry-free return/replacement.
- Naprawa: 12-month free repair service.
- Wsparcie techniczne: Dożywotnie profesjonalne wsparcie techniczne.
If you have any questions or require assistance, please contact our customer support team. We aim to reply within 24 hours.